Citroen C5 RHD 2015 (RD/TD) / 2.G Owner's Manual
Manufacturer: CITROEN, Model Year: 2015, Model line: C5 RHD, Model: Citroen C5 RHD 2015 (RD/TD) / 2.GPages: 362, PDF Size: 32.4 MB
Page 181 of 362

179
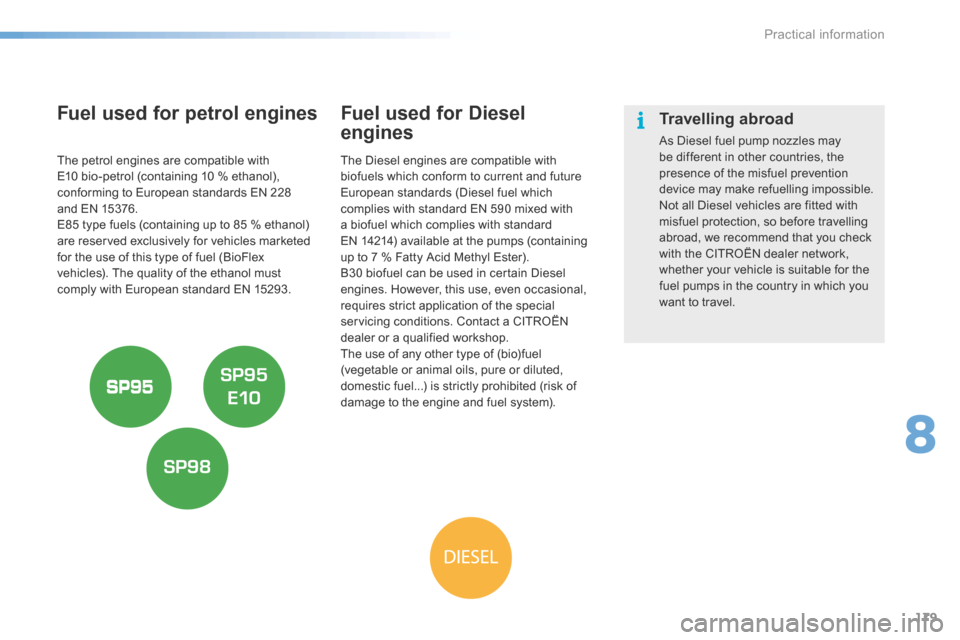
Fuel used for petrol engines
The petrol engines are compatible with
E10 bio-petrol (containing 10 % ethanol),
conforming to European standards EN 228
and EN 15376.
E85 type fuels (containing up to 85 % ethanol)
are reserved exclusively for vehicles marketed
for the use of this type of fuel (BioFlex
vehicles). The quality of the ethanol must
comply with European standard EN 15293.
Fuel used for Diesel
engines
The Diesel engines are compatible with
biofuels which conform to current and future
European standards (Diesel fuel which
complies with standard EN 590 mixed with
a biofuel which complies with standard
EN 14214) available at the pumps (containing
up to 7 % Fatty Acid Methyl Ester).
B30 biofuel can be used in certain Diesel
engines. However, this use, even occasional,
requires strict application of the special
servicing conditions. Contact a CITROËN
dealer or a qualified workshop.
The use of any other type of (bio)fuel
(vegetable or animal oils, pure or diluted,
domestic fuel...) is strictly prohibited (risk of
damage to the engine and fuel system).
Travelling abroad
As Diesel fuel pump nozzles may
be different in other countries, the
presence of the misfuel prevention
device may make refuelling impossible.
Not all Diesel vehicles are fitted with
misfuel protection, so before travelling
abroad, we recommend that you check
with the CITROËN dealer network,
whether your vehicle is suitable for the
fuel pumps in the country in which you
want to travel.
8
Practical information
Page 182 of 362

180
HDi engines make use of advanced
technology.
For any work on your vehicle, contact
a qualified workshop that has the
skills and equipment required, which a
CITROËN dealer is able to provide.
BlueHDi engines
Running out of fuel (Diesel)
Priming the fuel system
HDi 160 engine
If you run out of fuel:
F after filling (minimum 5 litres) and removing
the protective cover to gain access to the
priming pump,
F operate the manual priming pump, until
some resistance is felt,
F operate the starter motor while depressing
the accelerator pedal slightly until the
engine starts. If the engine fails to start at the first attempt,
wait fifteen seconds before trying again.
If the engine fails to start after a few attempts,
operate the priming pump again and then try to
start the engine.
When the engine is idling, accelerate slightly to
complete the bleeding of the circuit.
F
Fill the fuel tank with at least five litres of
Diesel.
F Switch on the ignition (without starting the
engine).
F Wait around 6 seconds and switch off the
ignition.
F Repeat the operation 10 times.
F Operate the starter to run the engine.
Practical information
Page 183 of 362

181
Temporary puncture repair kit
The kit is located in the boot under the floor.
Complete system consisting of a compressor
and a sealant cartridge which permits the
temporary repair of the tyre so that you can
drive to the nearest garage. This repair kit is available from
CITROËN dealers or a qualified
workshop.
It is designed to repair holes of a
maximum diameter of 6 mm, located
exclusively on the tyre tread or
shoulder. Avoid removing any foreign
bodies which have penetrated the tyre.
The vehicle's electric system allows the
connection of a compressor for long
enough to inflate a tyre after a puncture
repair or for inflating a small inflatable
accessory.
All versions*, except BlueHDi
Diesel
BlueHDi Diesel versions
* Depending on the country of sale.
8
Practical information
Page 184 of 362

182
Using the kit
F Switch off the ignition.
F Affix the speed limitation sticker to the
vehicle's steering wheel to remind you that
a wheel is in temporary use. F
Check that the switch A is in position "0" .
F Connect the pipe of the cartridge 1 to the
valve of the tyre to be repaired. F
Connect the compressor's electric plug to
the vehicle's 12 V socket.
F Start the vehicle and leave the engine
running.
Practical information
Page 185 of 362

183
F Remove the compressor and unclip and
store the cartridge in a sealed bag to avoid
staining your vehicle with traces of fluid.
F Drive immediately for approximately
two miles (three kilometres), at reduced
speed (between 15 and 35 mph [20 and
60 km/h]), to plug the puncture.
F Stop to check the repair and the pressure. F
Connect the compressor pipe directly to
the valve of the repaired wheel.
F
Switch on the compressor by moving
the switch A to position "1" until the tyre
pressure reaches 2.0 bars.
If this pressure has not been reached
after approximately five to ten minutes,
the tyre cannot be repaired; contact a
CITROËN dealer to have your vehicle
repaired.
8
Practical information
Page 186 of 362

184
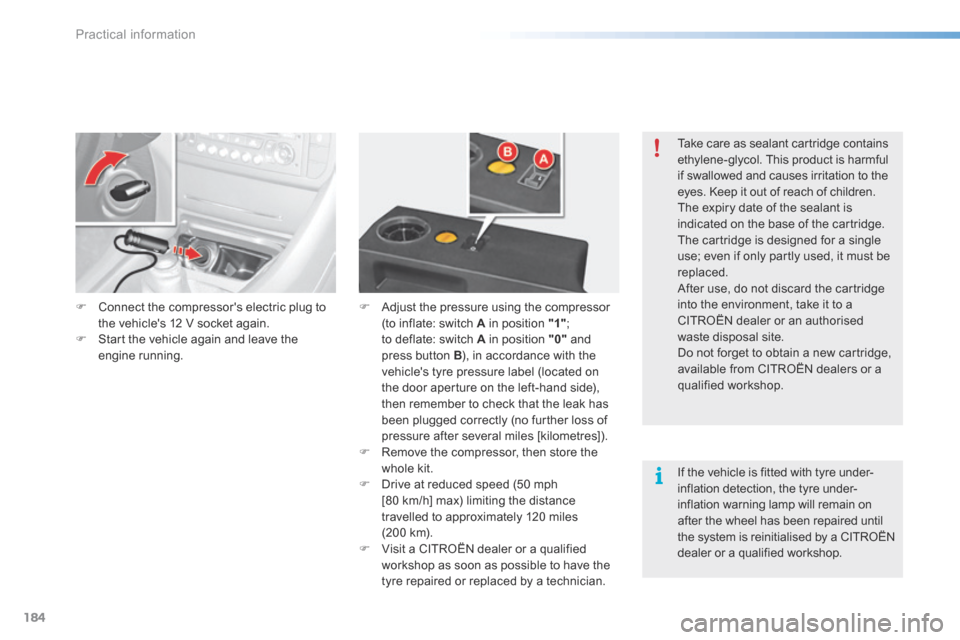
F Connect the compressor's electric plug to
the vehicle's 12 V socket again.
F Start the vehicle again and leave the
engine running. F
Adjust the pressure using the compressor
(to inflate: switch A in position "1" ;
to deflate: switch A in position "0" and
press button B ), in accordance with the
vehicle's tyre pressure label (located on
the door aperture on the left-hand side),
then remember to check that the leak has
been plugged correctly (no further loss of
pressure after several miles [kilometres]).
F Remove the compressor, then store the
whole kit.
F Drive at reduced speed (50 mph
[80 km/h] max) limiting the distance
travelled to approximately 120 miles
(200 km).
F Visit a CITROËN dealer or a qualified
workshop as soon as possible to have the
tyre repaired or replaced by a technician. Take care as sealant cartridge contains
ethylene-glycol. This product is harmful
if swallowed and causes irritation to the
eyes. Keep it out of reach of children.
The expiry date of the sealant is
indicated on the base of the cartridge.
The cartridge is designed for a single
use; even if only partly used, it must be
replaced.
After use, do not discard the cartridge
into the environment, take it to a
CITROËN dealer or an authorised
waste disposal site.
Do not forget to obtain a new cartridge,
available from CITROËN dealers or a
qualified workshop.
If the vehicle is fitted with tyre under-
inflation detection, the tyre under-
inflation warning lamp will remain on
after the wheel has been repaired until
the system is reinitialised by a CITROËN
dealer or a qualified workshop.
Practical information
Page 187 of 362

185
Changing a wheel
Access to the tools
For vehicles supplied with a standard spare
wheel (same size as the four wheels), the tools
are stowed in a carrier, located in the spare
wheel.
F Release the retaining strap for access to it.
List of tools
all of these tools are specific to your vehicle
and may vary according to equipment. Do not
use them for any other purpose. 1.
Wheelbrace.
Used for removing the wheel trim and the
wheel fixing bolts.
2. Jack with integral handle.
Used to raise the vehicle.
3. Bolt head finisher tool.
Used to remove the wheel bolt protectors
(finishers) on wheel bolts with alloy wheels.
4. Wheel chock*.
5. Towing eye.
Do not use:
-
the jack for any purpose other than
lifting the vehicle,
- a different jack from the one
supplied with the vehicle.
If the vehicle does not have its original
jack, contact a CITROËN dealer or a
qualified workshop to obtain the one
listed by the manufacturer. For more information, refer to the
"Towing the vehicle" section.
* Depending on country of sale.
For vehicles supplied with a "space-saver"
type spare wheel
, the tools are stowed in a
storage well, located below the spare wheel.
F Unscrew the central yellow screw and
remove the wheel for access to it.
8
Practical information
Page 188 of 362

186
Access to the spare wheel
Removing the boot floor
F Saloon: raise the boot floor and fold in two.
F Tourer : raise the boot floor and hook it
using the retractable handle. Secure the
hook to the top part of the boot.
Removing the standard spare
wheel
F d etach the strap then push the wheel
for wards so as to be able to lift it.
Repositioning the standard spare
wheel
F Position the spare wheel flat in the boot,
then pull it towards you.
F Next place the toolbox inside the wheel,
then secure the assembly using the strap.
Removing the "space-saver"
spare wheel
F Unscrew the central yellow screw.
F Take the spare wheel from the rear and lift
it towards you.
F Remove the wheel from the boot.
Practical information
Page 189 of 362

187
The tyre pressures are indicated on the
label located on the left hand centre
door pillar.
Tyre pressures are given on this label
for different vehicle loading conditions.Repositioning the "space-saver"
spare wheel
F Return the spare wheel to its housing
above the toolbox.
F Unscrew the central yellow screw by a few
turns, then put it in place in the middle of
the wheel.
F Tighten the central yellow screw until it
clicks so that it is secured in its housing.
Repositioning the boot floor
F Release the boot floor to return it to its
initial position.
8
Practical information
Page 190 of 362

188
Removing a wheel
F Park the vehicle on stable, firm ground that
is not slippery. apply the parking brake.
F If your vehicle is equipped with
"Hydractive III+" suspension, with the
engine running at idle, adjust the ground
clearance to its maximum height.
F Switch off the ignition and engage first gear
(position P for an automatic gearbox).
F If your vehicle is fitted with "Hydractive III+"
suspension, position the chock, whichever
direction the gradient may be in, in front of
the front wheel diametrically opposite to
the one to be replaced.
List of operations
F Remove the protector from each bolt using
tool 3 .
F Fit the security bolt socket to the
wheelbrace to slacken the security bolt
(depending on equipment).
F Slacken the other bolts using just the
wheelbrace 1 .
Before positioning the jack:
F
Always adjust the vehicle’s ground
clearance to the "maximum height"
position and retain this adjustment
for as long as the jack is under the
vehicle (do not use the hydraulic
adjustments),
F Ensure that any passengers have
left the vehicle and are in a safe
place.
Never go underneath the vehicle if it is
supported only by the jack.
The jack and all of the tools are specific
to your vehicle. Do not use them for any
other purposes.
Have the original wheel repaired and
refitted as soon as possible.
Practical information