Citroen C6 2008 1.G Owner's Manual
Manufacturer: CITROEN, Model Year: 2008, Model line: C6, Model: Citroen C6 2008 1.GPages: 216, PDF Size: 5.3 MB
Page 101 of 216
104
III
G R O U N D C L E A R A N C E A D J U S T M E N T
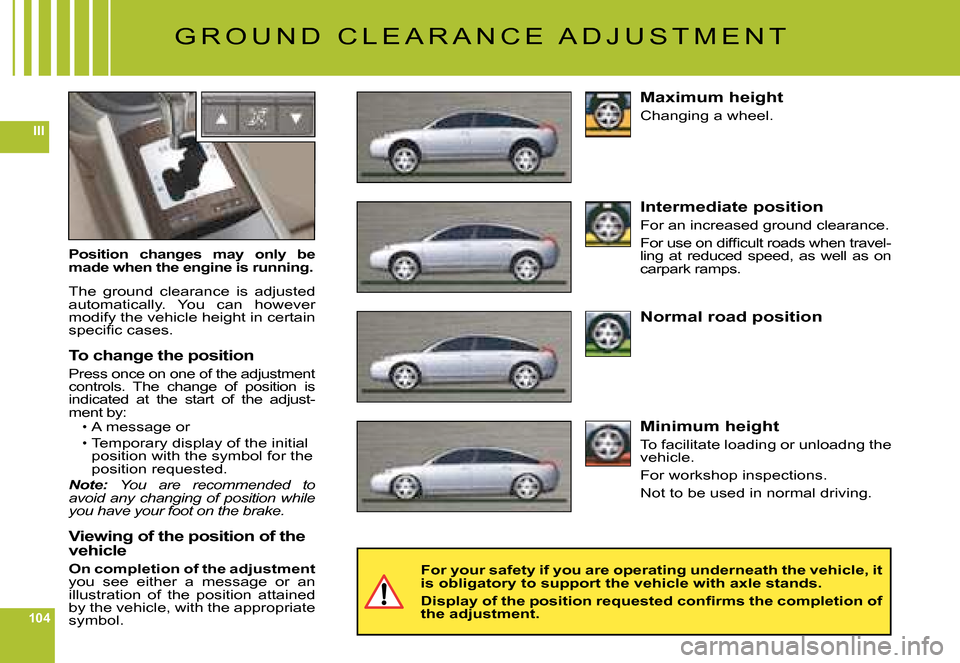
Position changes may only be made when the engine is running.
The ground clearance is adjusted automatically. You can however modify the vehicle height in certain �s�p�e�c�i�fi� �c� �c�a�s�e�s�.
To change the position
Press once on one of the adjustment controls. The change of position is indicated at the start of the adjust-ment by:A message or
Temporary display of the initial position with the symbol for the position requested.Note: You are recommended to avoid any changing of position while you have your foot on the brake.
Viewing of the position of the vehicle
On completion of the adjustmentyou see either a message or an illustration of the position attained by the vehicle, with the appropriate symbol.
Page 102 of 216
105
III
G R O U N D C L E A R A N C E A D J U S T M E N T
AUTOMATIC CORRECTION OF GROUND CLEARANCE
Your vehicle has active suspension with variable damping which is electronically controlled. This automatically regu-lates the ground clearance according to the vehicle speed and the road surface conditions.
Limits on access to the positions
Maximum height:
Impossible if speed > 10 km/h (6 mph).
Intermediate position:
Impossible if speed > 40 km/h (24 mph).
Normal road position: Always permitted.
Minimum height:
Impossible if speed > 10 km/h (6 mph).Note: If the speed authorised for a particular position is exceeded, the vehicle reverts automatically to the normal road position.
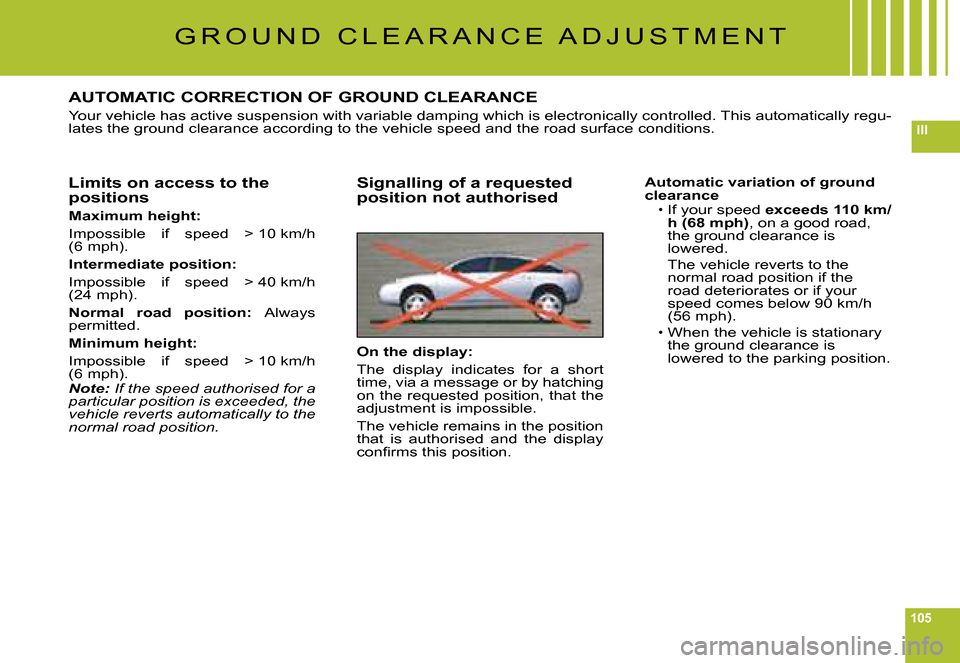
Signalling of a requested position not authorised
On the display:
The display indicates for a short time, via a message or by hatching on the requested position, that the adjustment is impossible.
The vehicle remains in the position that is authorised and the display �c�o�n�fi� �r�m�s� �t�h�i�s� �p�o�s�i�t�i�o�n�.
Automatic variation of ground clearanceIf your speed exceeds110 km/h (68 mph), on a good road, the ground clearance is lowered.The vehicle reverts to the normal road position if the road deteriorates or if your speed comes below 90 km/h (56 mph).
When the vehicle is stationary the ground clearance is lowered to the parking position.
Page 103 of 216
106
III221
2
2
I N T E R I O R L I G H T I N G
Front
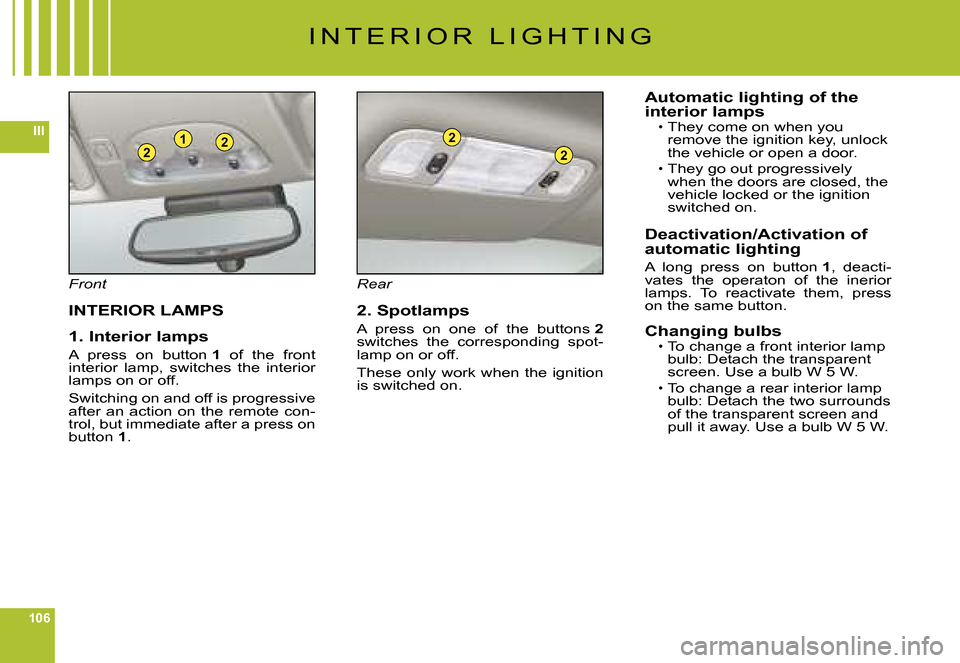
INTERIOR LAMPS
1. Interior lamps
A press on button 1 of the front interior lamp, switches the interior lamps on or off.
Switching on and off is progressive after an action on the remote con-trol, but immediate after a press on button 1.
Rear
2. Spotlamps
A press on one of the buttons 2switches the corresponding spot-lamp on or off.
These only work when the ignition is switched on.
Automatic lighting of the interior lampsThey come on when you remove the ignition key, unlock the vehicle or open a door.
They go out progressively when the doors are closed, the vehicle locked or the ignition switched on.
Deactivation/Activation of automatic lighting
A long press on button 1, deacti-vates the operaton of the inerior lamps. To reactivate them, press on the same button.
Changing bulbsTo change a front interior lamp bulb: Detach the transparent screen. Use a bulb W 5 W.
To change a rear interior lamp bulb: Detach the two surrounds of the transparent screen and pull it away. Use a bulb W 5 W.
Page 104 of 216
107
III
C
D
I N T E R I O R L I G H T I N G
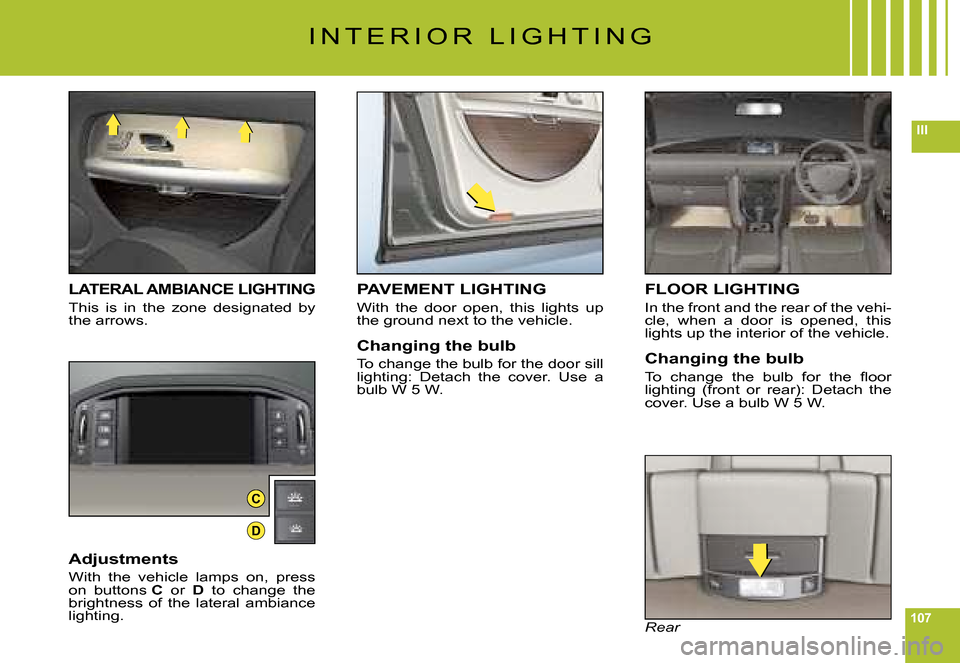
LATERAL AMBIANCE LIGHTING
This is in the zone designated by the arrows.
Adjustments
With the vehicle lamps on, press on buttons C or D to change the brightness of the lateral ambiance lighting.
FLOOR LIGHTING
In the front and the rear of the vehi-cle, when a door is opened, this lights up the interior of the vehicle.
Changing the bulb
�T�o� �c�h�a�n�g�e� �t�h�e� �b�u�l�b� �f�o�r� �t�h�e� �fl� �o�o�r� lighting (front or rear): Detach the cover. Use a bulb W 5 W.
Rear
PAVEMENT LIGHTING
With the door open, this lights up the ground next to the vehicle.
Changing the bulb
To change the bulb for the door sill lighting: Detach the cover. Use a bulb W 5 W.
Page 105 of 216
108
IIIAB
I N T E R I O R C O M F O R T
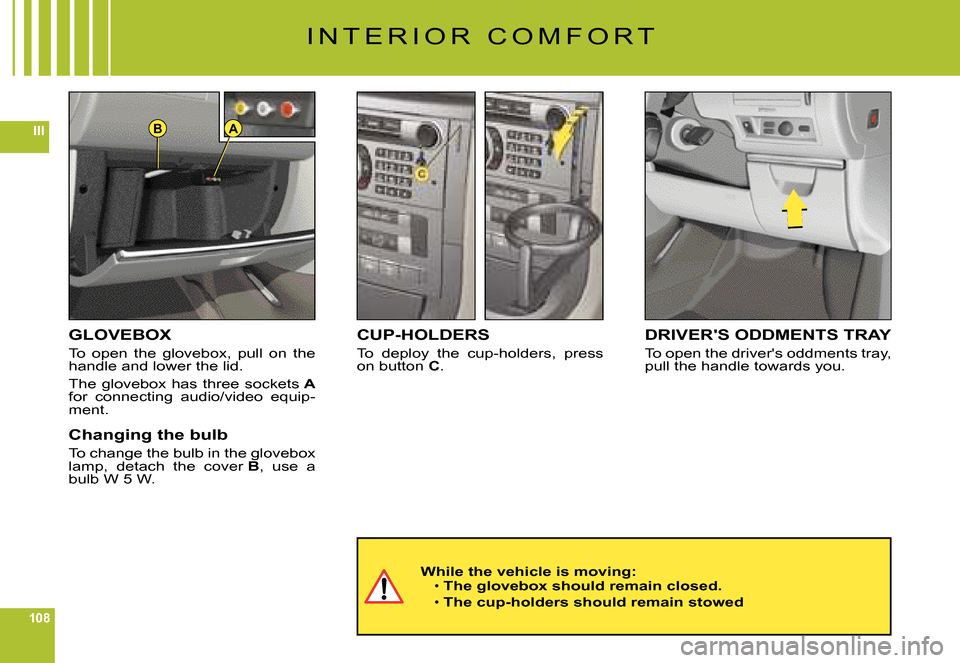
GLOVEBOX
To open the glovebox, pull on the handle and lower the lid.
The glovebox has three sockets Afor connecting audio/video equip-ment.
Changing the bulb
To change the bulb in the glovebox lamp, detach the cover B, use a bulb W 5 W.
CUP-HOLDERS
To deploy the cup-holders, press on button C.
DRIVER'S ODDMENTS TRAY
To open the driver's oddments tray, pull the handle towards you.
While the vehicle is moving:The glovebox should remain closed.
The cup-holders should remain stowed
Page 106 of 216

109
III
I N T E R I O R C O M F O R T
FRONT CENTRAL ODDMENTS TRAY
To open, press on the chrome of the central oddments tray.
REAR STORAGE
To open the storage tray, pull at the centre of the drawer.
SEAT POCKETS
There are pockets on the rear of the front seat backrests.
Page 107 of 216
110
III
I N T E R I O R C O M F O R T
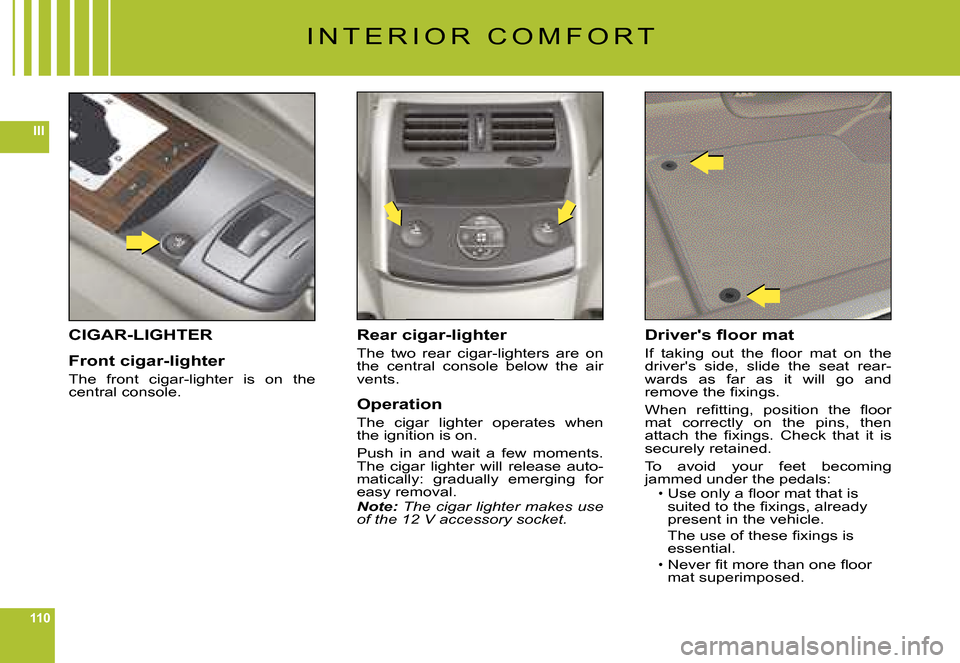
CIGAR-LIGHTER
Front cigar-lighter
The front cigar-lighter is on the central console.
Rear cigar-lighter
The two rear cigar-lighters are on the central console below the air vents.
Operation
The cigar lighter operates when the ignition is on.
Push in and wait a few moments. The cigar lighter will release auto-matically: gradually emerging for easy removal.Note: The cigar lighter makes use of the 12 V accessory socket.
�D�r�i�v�e�r�'�s� �fl� �o�o�r� �m�a�t
�I�f� �t�a�k�i�n�g� �o�u�t� �t�h�e� �fl� �o�o�r� �m�a�t� �o�n� �t�h�e� driver's side, slide the seat rear-wards as far as it will go and �r�e�m�o�v�e� �t�h�e� �fi� �x�i�n�g�s�.
�W�h�e�n� �r�e�fi� �t�t�i�n�g�,� �p�o�s�i�t�i�o�n� �t�h�e� �fl� �o�o�r� mat correctly on the pins, then �a�t�t�a�c�h� �t�h�e� �fi� �x�i�n�g�s�.� �C�h�e�c�k� �t�h�a�t� �i�t� �i�s� securely retained.
To avoid your feet becoming jammed under the pedals:�U�s�e� �o�n�l�y� �a� �fl� �o�o�r� �m�a�t� �t�h�a�t� �i�s� �s�u�i�t�e�d� �t�o� �t�h�e� �fi� �x�i�n�g�s�,� �a�l�r�e�a�d�y� present in the vehicle.
�T�h�e� �u�s�e� �o�f� �t�h�e�s�e� �fi� �x�i�n�g�s� �i�s� essential.
�N�e�v�e�r� �fi� �t� �m�o�r�e� �t�h�a�n� �o�n�e� �fl� �o�o�r� mat superimposed.
Page 108 of 216
111
III
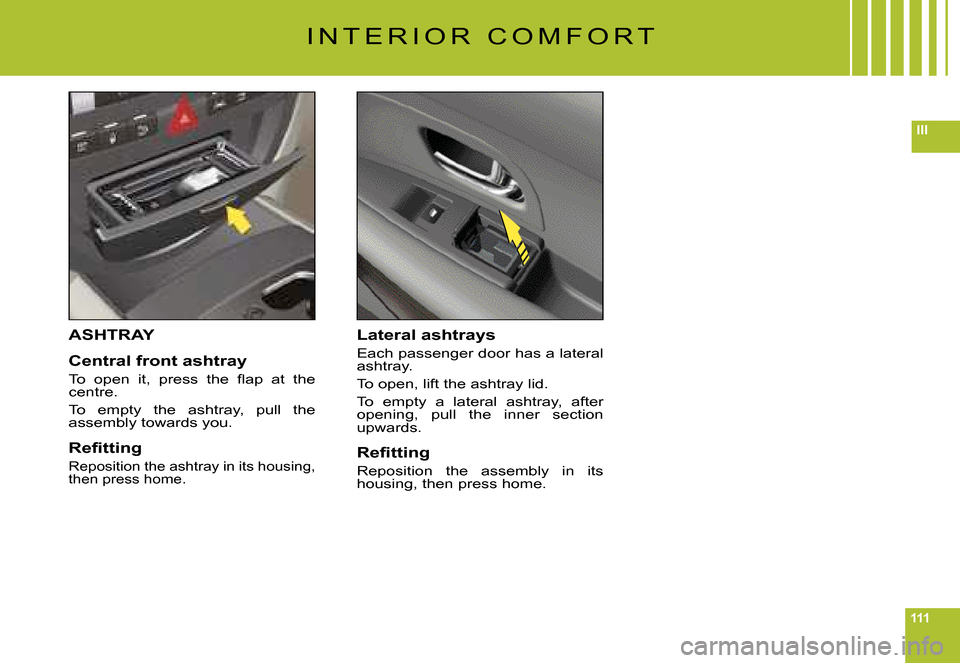
ASHTRAY
Central front ashtray
�T�o� �o�p�e�n� �i�t�,� �p�r�e�s�s� �t�h�e� �fl� �a�p� �a�t� �t�h�e� centre.
To empty the ashtray, pull the assembly towards you.
�R�e�fi� �t�t�i�n�g
Reposition the ashtray in its housing, then press home.
Lateral ashtrays
Each passenger door has a lateral ashtray.
To open, lift the ashtray lid.
To empty a lateral ashtray, after opening, pull the inner section upwards.
�R�e�fi� �t�t�i�n�g
Reposition the assembly in its housing, then press home.
I N T E R I O R C O M F O R T
Page 109 of 216

112
IIIABC
D
FRONT ARMREST
The armrest gives you extra com-fort in your driving position.
To optimise your driving position, lift the control B and push the arm-rest forwards.
The armrest returns to its initial position when you push it rear-wards.
Storage areas
Two formats of storage are avail-able:To have big storage in the armrest, lift the control C.
For small storage in the armrest, lift the control A.
Page 110 of 216
113
III
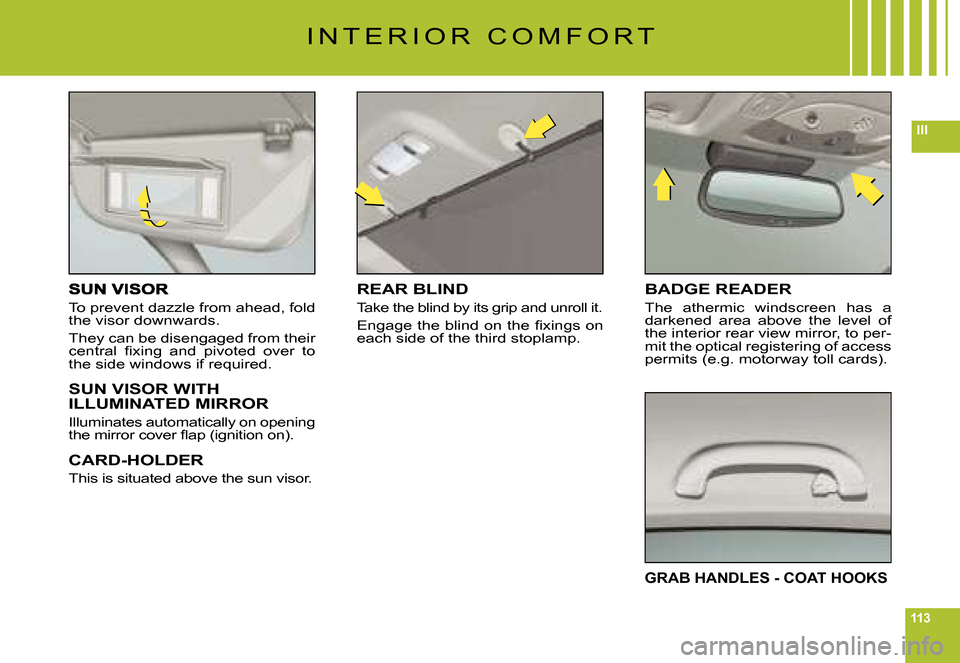
To prevent dazzle from ahead, fold the visor downwards.
They can be disengaged from their �c�e�n�t�r�a�l� �fi� �x�i�n�g� �a�n�d� �p�i�v�o�t�e�d� �o�v�e�r� �t�o� the side windows if required.
SUN VISOR WITH ILLUMINATED MIRROR
Illuminates automatically on opening �t�h�e� �m�i�r�r�o�r� �c�o�v�e�r� �fl� �a�p� �(�i�g�n�i�t�i�o�n� �o�n�)�.
CARD-HOLDER
This is situated above the sun visor.
REAR BLIND
Take the blind by its grip and unroll it.
�E�n�g�a�g�e� �t�h�e� �b�l�i�n�d� �o�n� �t�h�e� �fi� �x�i�n�g�s� �o�n� each side of the third stoplamp.
BADGE READER
The athermic windscreen has a darkened area above the level of the interior rear view mirror, to per-mit the optical registering of access permits (e.g. motorway toll cards).
GRAB HANDLES - COAT HOOKS
I N T E R I O R C O M F O R T