stop start CITROEN CX 1988 Service Manual
[x] Cancel search | Manufacturer: CITROEN, Model Year: 1988, Model line: CX, Model: CITROEN CX 1988Pages: 648, PDF Size: 95.8 MB
Page 156 of 648
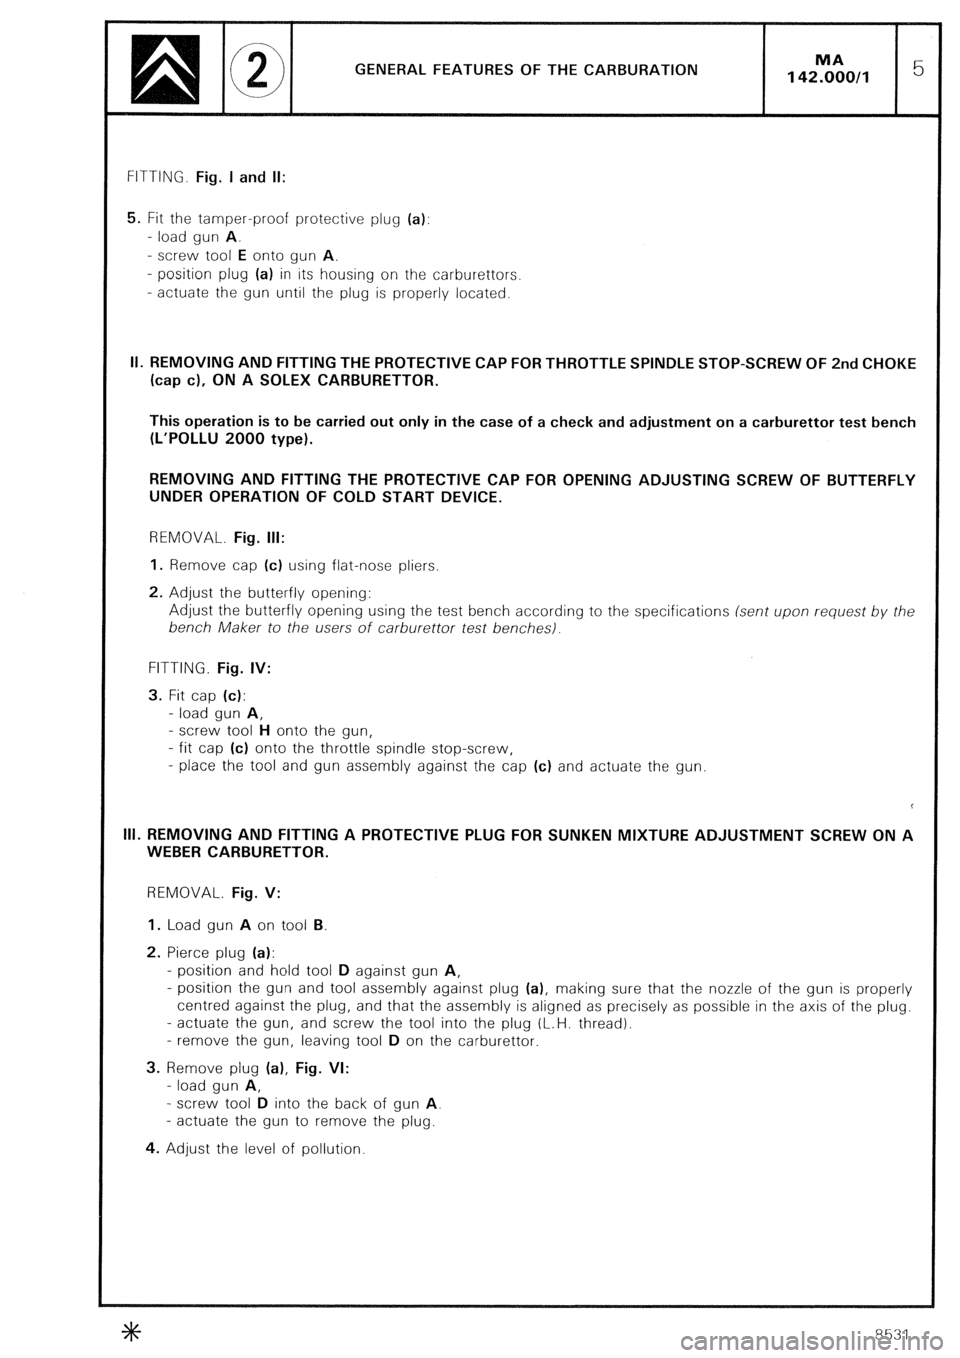
GENERAL FEATURES OF THE CARBURATION
FITTING. Fig. I and II:
5. Fit the tamper-proof protective plug (a):
- load gun A.
- screw tool E onto gun A.
- position plug (a) in its housing on the carburettors
- actuate the gun until the plug is properly located. II. REMOVING AND FITTING THE PROTECTIVE CAP FOR THROTTLE SPINDLE STOP-SCREW OF 2nd CHOKE
(cap c), ON A SOLEX CARBURETTOR.
This operation is to be carried out only in the case of a check and adjustment on a carburettor test bench
(L’POLLU 2000 type).
REMOVING AND FITTING THE PROTECTIVE CAP FOR OPENING ADJUSTING SCREW OF BUTTERFLY
UNDER OPERATION OF COLD START DEVICE.
REMOVAL. Fig. Ill:
1.
Remove cap (c) using flat-nose pliers
2. Adjust the butterfly opening:
Adjust the butterfly opening using the test bench according to the specifications (sent upon request by the
bench Maker to the users of carburettor test benches).
FITTING. Fig. IV:
3. Fit cap (c):
- load gun A,
- screw tool H onto the gun,
- fit cap (c) onto the throttle spindle stop-screw,
- place the tool and gun assembly against the cap (c) and actuate the gun. Ill. REMOVING AND FITTING A PROTECTIVE PLUG FOR SUNKEN MIXTURE ADJUSTMENT SCREW ON A
WEBER CARBURETTOR.
REMOVAL. Fig. V:
1. Load gun A on tool B.
2. Pierce plug (a):
- position and hold tool D against gun A,
- position the gun and tool assembly against plug (a), making sure that the nozzle of the gun is properly
centred against the plug, and that the assembly is aligned as precisely as possible in the axis of the plug.
- actuate the gun, and screw the tool into the plug (L.H. thread).
- remove the gun, leaving tool D
on the carburettor.
3. Remove plug (a), Fig. VI:
- load gun A,
- screw tool D into the back of gun A
- actuate the gun to remove the plug.
4. Adjust the level of pollution
Page 212 of 648
CHECKING AND ADJUSTING
THE INJECTION SYSTEM
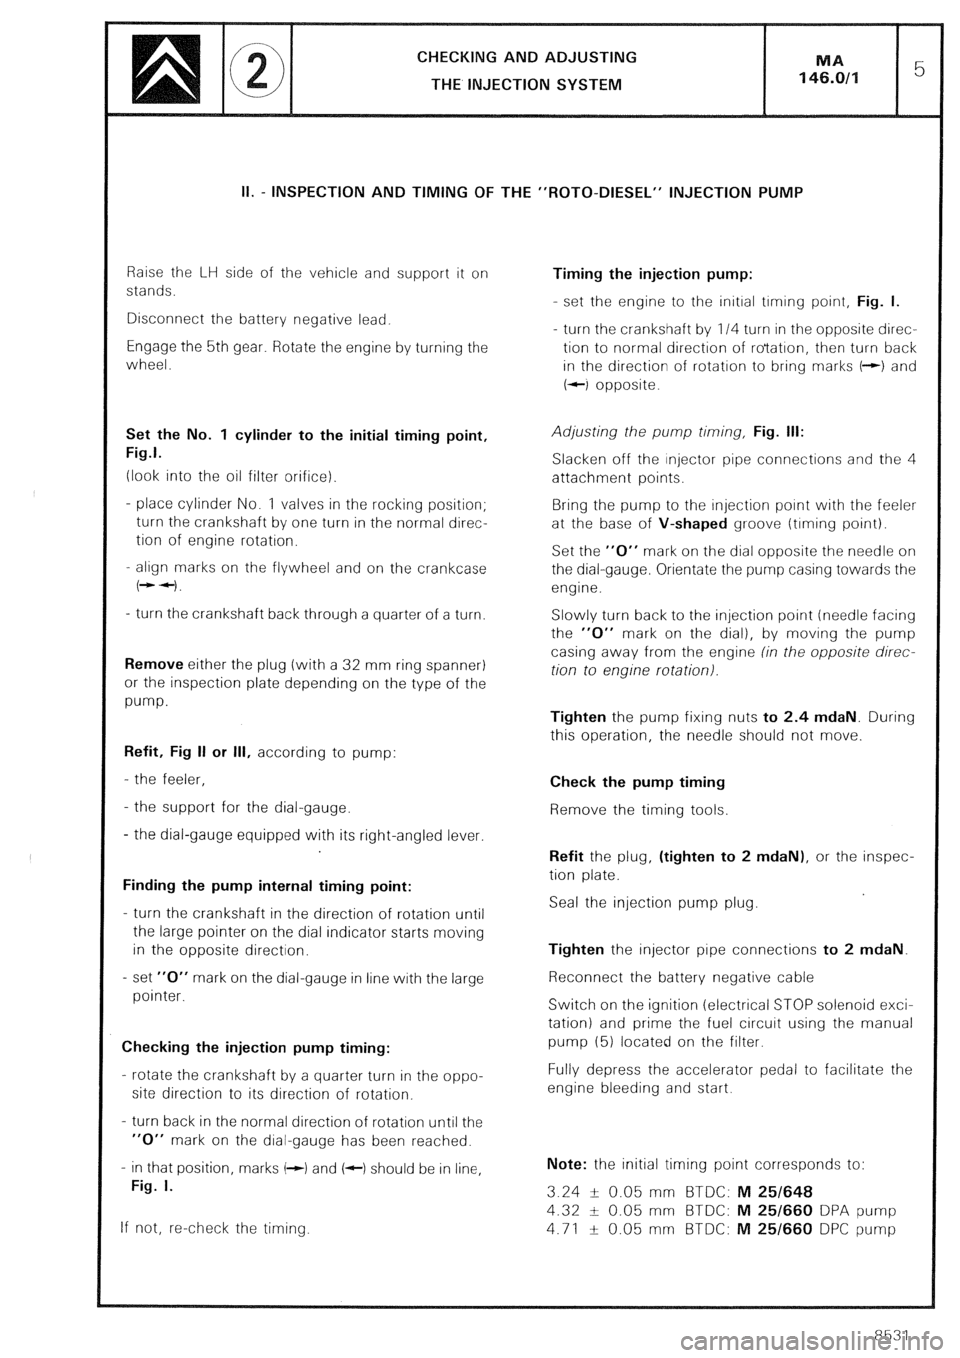
II. - INSPECTION AND TIMING OF THE “ROT0-DIESEL” INJECTION PUMP
Raise the LH side of the vehicle and support it on
stands.
Disconnect the battery negative lead.
Engage the 5th gear. Rotate the engine by turning the
wheel.
Set the No. 1 cylinder to the initial timing point,
Fig.1.
(look into the oil filter orifice).
- place cylinder No. 1 valves in the rocking position;
turn the crankshaft by one turn in the normal direc-
tion of engine rotation.
- align marks on the flywheel and on the crankcase
(++I.
- turn the crankshaft back through a quarter of a turn.
Remove either the plug (with a 32 mm ring spanner)
or the inspection plate depending on the type of the
pump.
Refit, Fig II or Ill, according to pump:
- the feeler,
- the support for the dial-gauge.
- the dial-gauge equipped with its right-angled lever.
Finding the pump internal timing point:
- turn the crankshaft in the direction of rotation until
the large pointer on the dial indicator starts moving
in the opposite direction.
- set “0” mark on the dial-gauge in line with the large
pointer.
Checking the injection pump timing:
- rotate the crankshaft by a quarter turn in the oppo-
site direction to its direction of rotation.
- turn back in the normal direction of rotation until the
“0” mark on the dial-gauge has been reached.
- in that position, marks (-1 and (c) should be in line,
Fig. I.
If not, re-check the timing. Timing the injection pump:
- set the engine to the initial trming point, Fig. I.
- turn the crankshaft by 114 turn in the opposite direc-
tion to normal direction of ro’tatron, then turn back
in the direction of rotation to bring marks t-+) and
+-I opposite.
Adjusting the pump timing, Fig. Ill:
Slacken off the injector pipe connections and the 4
attachment points.
Bring the pump to the injection point with the feeler
at the base of V-shaped groove (timing point).
Set the “0” mark on the dial opposite the needle on
the dial-gauge. Orientate the pump casing towards the
engine.
Slowly turn back to the injection point (needle facing
the “0” mark on the dial), by moving the pump
casing away from the engine (in the opposite direc-
tion to engine rotation).
Tighten the pump fixing nuts to 2.4 mdaN. During
this operation, the needle should not move.
Check the pump timing
Remove the timing tools.
Refit the plug, (tighten to 2 mdaN), or the inspec-
tion plate.
Seal the injection pump plug.
Tighten the injector pipe connections to 2 mdaN.
Reconnect the battery negative cable
Switch on the ignition (electrical STOP solenoid exci-
tation) and prime the fuel circuit using the manual
pump (5) located on the filter.
Fully depress the accelerator pedal to facilitate the
engine bleeding and start.
Note: the initial timing point corresponds to:
3.24 -L- 0.05 mm BTDC: M 25/648
4.32 + 0.05 mm BTDC: M 25/660 DPA pump
4.71 f 0.05 mm BTDC: M 25/660 DPC pump
8531
Page 216 of 648
Raise the R.H side of the vehicle and support it on
stands.
Disconnect the negative lead from the battery
Engage the highest gear. Using the road wheel, turn
the engine.
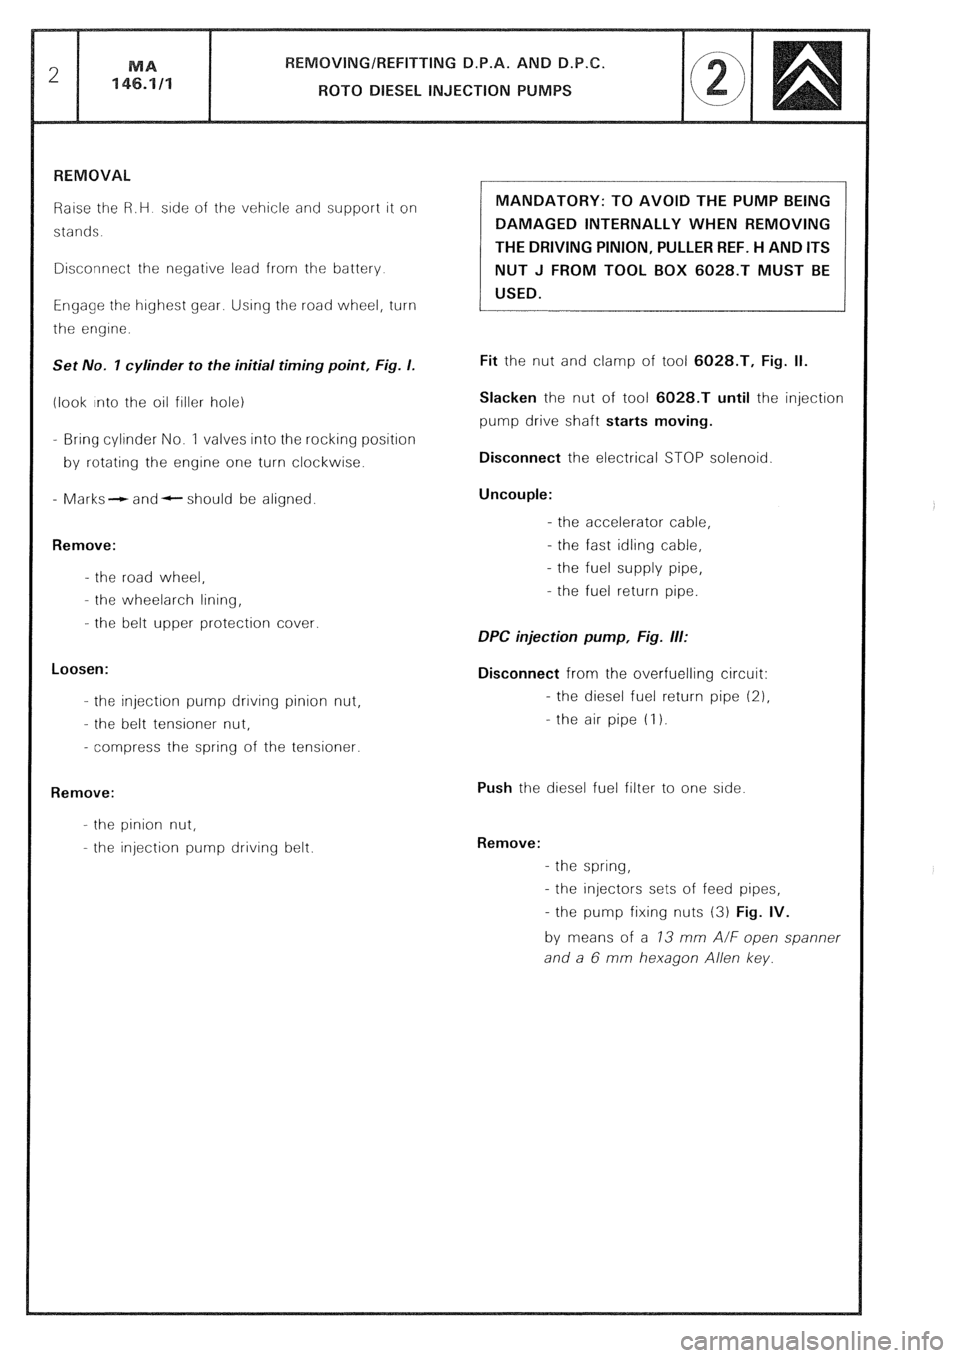
Set No. I cylinder to the initial timing point, Fig. I.
(look into the oil filler hole)
- Bring cylinder No. 1 valves into the rocking position
by rotating the engine one turn clockwise.
- Marks- and- should be aligned.
Remove:
- the road wheel,
- the wheelarch lining,
- the belt upper protection cover.
Loosen:
- the injection pump drrvrng pinion nut,
- the belt tensioner nut,
- compress the spring of the tensioner.
Remove:
- the pinion nut,
- the injection pump driving belt. MANDATORY: TO AVOID THE PUMP BEING
DAMAGED INTERNALLY WHEN REMOVING
THE DRIVING PINION, PULLER REF. H AND ITS
NUT J FROM TOOL BOX 6028.T MUST BE
USED.
Fit the nut and clamp of tool 6028.T, Fig. II.
Slacken the nut of tool 6028.T until the injection
pump drive shaft starts moving.
Disconnect the electrical STOP solenoid
Uncouple:
- the accelerator cable,
- the fast idling cable,
- the fuel supply pipe,
- the fuel return pipe.
DPC injection pump, Fig. ill:
Disconnect from the overfuelling circuit:
- the diesel fuel return pipe (21,
- the air pipe (I 1.
Push the diesel fuel filter to one side
Remove:
- the spring,
- the injectors sets of feed pipes,
- the pump fixing nuts (3) Fig. IV.
by means of a 73 mm A/F open spanner
and a 6 mm hexagon Allen key.
Page 224 of 648
CHECKING THE PETROL SUPPLY
829.A5-J6T.A500
Pump AC DELCO TYPE: PB3
CHECKING THE PETROL PRESSURE WITH APPARATUS 4005-T:
- Position apparatus 4005-T.
- Disconnect the carburettor fuel return pipe; fit plug (2)
- Unscrew tap @ by one turn approx.
- Start the engine.
a) Check the petrol pressure at zero delivery:
- Fully screw up the tap; the pressure should not show a reading of more than 325 m.bar for the stabilised
pressure.
b) Check the tightness of the pump delivery valve:
- Stop the engine: there should not be a sudden drop in pressure.
c) Check the tightness of the carburettor needle valve:
- Unscrew tap @ ; start the engine, leave it running for a few minutes.
- Stop the engine: there should not be a sudden drop in pressure.
- Remove apparatus 4005-T and fit the fuel supply pipe and the fuel return pipe to the carburettor
(after plug (2) has been removed).
CHECKING THE PUMP FOR LEAKS:
Close the pump delivery tube. Blow compressed air under 800 m.bar pressure into the suction pipe. Immerse the
pump in a container filled with clean White Spirit: no leak should be detected.
Page 233 of 648

GENERAL FEATURES
OF THE TRANSISTORISED IGNITION SYSTEM
TRANSISTORISED IGNITION
PRINCIPLE OF OPERATION
The plug spark is triggered by distributor (1) which comprises a coil located inside the field of a magnetic circuit
permanent magnet. The magnetic circuit has four fixed branches and four movable branches driven by the distribu-
tor shaft.
When the movable branches, in their rotation, come opposite the fixed ones, a variation of the magnetic field is
brought and current is induced into the sensor winding.
This current, in turn, triggers electronic module (2)
which builds up the current in ignition coil (3) primary winding
and then cuts it off, thus creating a high tension current in the coil secondary winding and triggering a spark from
the plug selected by the distributor rotor arm. IGNITION DISTRIBUTOR (I!
The advance curves are specific for each engine type
N: Distributor rpm
D = Vacuum Dl, in m.bars A:
Distributor degrees 02, in mm.hg
Pick-up coil resistance: 1100 Q sr 10% (990 to 1210 02)
Setting the distributor static timing on the engine is impossible owing to design.
A revolution of the distributor is required to create a variation of the magnetic field which will send a signal to the
module. Consequently, when fitting a distributor, place it in mid-slot; start the engine and adjust the distributor
by means of a timing light or a diagnosis console.
The duration and amplitude of the signal depend on the speed, therefore the DWELL ratio
is not significant.
The air gap between the branches is non-adjustable and it cannot be measured ELECTRONIC MODULE (2)
Intended to operate with the magnetically-triggered distributor.
Do not carry out a check with an ohmmeter since the results would not be significant.
Do not operate the module without cooling (aluminium plate heat sink and heat conductor grease).
The operation of the ignition system is possible with the engine stopped: - connect an earthed sparking plug to
the coil HT lead; short ” + 12 volts” pulses on module red lead (path 5) (with all leads connected, cap lifted) will
generate a spark from the plug: simulation of a signal from the distributor pick up).
Do not operate the module and coil without a plug and HT lead, (It could result in the module being destroyed). IGNITION COIL (3)
The coil must not be kept alive under 12 volts without its module (overheating).
The coil current flow is generated by the module which then reduces it, prior to cutting it off when the engine
ignition timing occurs.
Only use a rev. counter with a UT induction clip.
Page 320 of 648
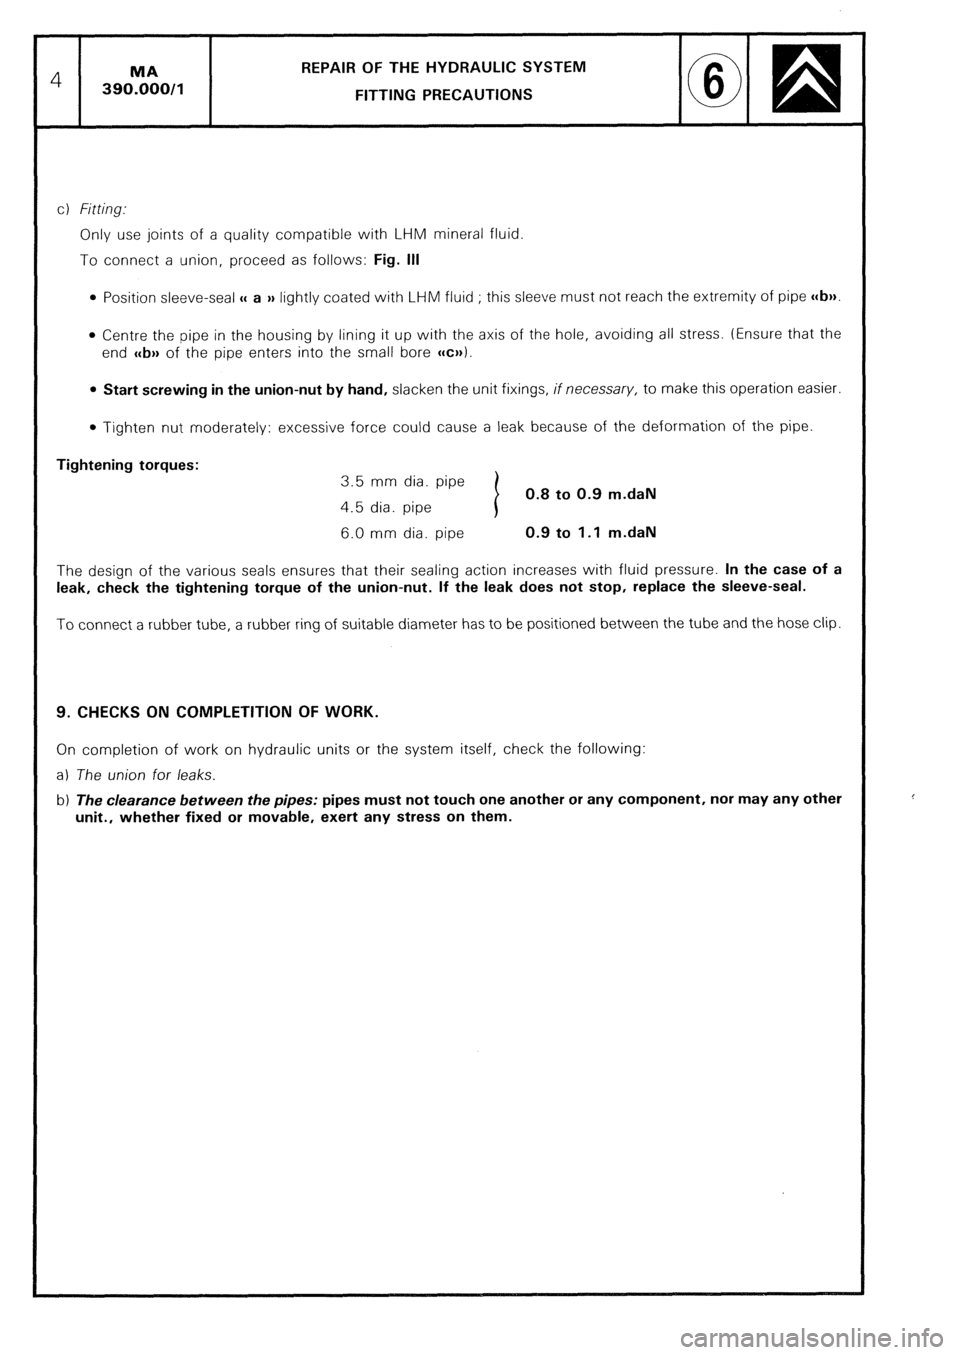
REPAIR OF THE HYDRAULIC SYSTEM
FITTING PRECAUTIONS
c) Fitting..
Only use joints of a quality compatible with LHM mineral fluid.
To connect a union, proceed as follows: Fig. Ill
0 Position sleeve-seal u a )) lightly coated with LHM fluid ; this sleeve must not reach the extremity of pipe c(b)).
l Centre the pipe in the housing by lining it up with the axis of the hole, avoiding all stress. (Ensure that the
end c
l Tighten nut moderately: excessive force could cause a leak because of the deformation of the pipe.
Tightening torques:
3.5 mm dia. pipe
0.8 to 0.9 m.daN
4.5 dia. pipe
6.0 mm dia. pipe 0.9 to 1.1 m.daN
The design of the various seals ensures that their sealing action increases with fluid pressure. In the case of a
leak, check the tightening torque of the union-nut. If the leak does not stop, replace the sleeve-seal.
To connect a rubber tube, a rubber ring of suitable diameter has to be positioned between the tube and the hose clip.
9. CHECKS ON COMPLETITION OF WORK.
On completion of work on hydraulic units or the system itself, check the following:
a) The union for leaks.
b) The clearance between the pipes: pipes must not touch one another or any component, nor may any other
unit., whether fixed or movable, exert any stress on them.
Page 382 of 648
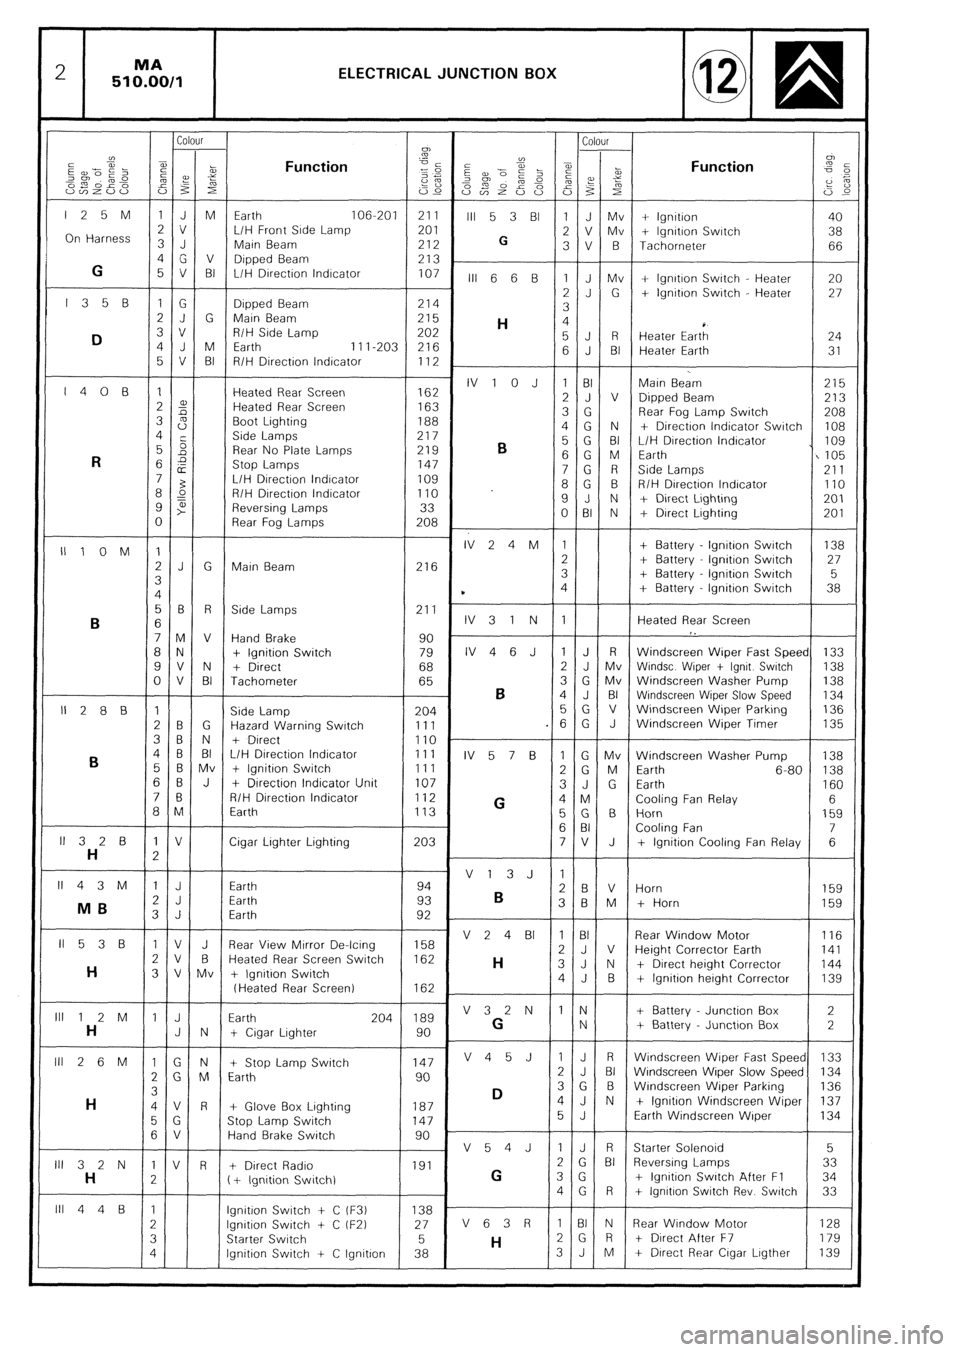
2 MA
510.00/1 ELECTRICAL JUNCTION BOX
Colour Colour
CJ)
”
2
a,
E --Pi- Function ”
i
-1
5 z 2 iz az?i”; cg Function
,%“~o” -0
2% z 2:
om 02’ 2%
Es p 2 f
“v)Z”” i53 s 22
S2r”~S 0% zi ‘i’ F
G,c
125M 1JM Earth 106-201 211
III 5 3 Bl 1 J Mv + lgnttron 40
On Harness 3 J 2 v L/H Front Srde Lamp 201
2 V Mv
G + lgnrtion Swatch 38
Main Beam 212 3V B Tachometer 66
4G V Dipped Beam
G 213
5 V BI L/H Drrectron lndrcator 107
III 6 6 B 1 J Mv + lgnrtron Swatch - Heater 20
l35B 1G 2J G + lgnrtron Switch - Heater 27
Drpped Beam 214
3
2J G Marn Beam 215
H 4
D 3 v R/H Side Lamp 202
4 J M 5J R
Earth Heater Eart; 24
11 I-203 216
5 V BI 6 J BI Heater Earth 31
R/H Direction lndrcator 112
I408 1 Heated Rear Screen IV 1 0 J 1 BI
162 Main Beam 215
2 2 Heated Rear Screen 2 J V
163 Dipped Beam 213
3 s Boot Lighting 3 G
188 Rear Fog Lamp Swatch
208
4 Side Lamps 4G N
217 + Directron Indicator Swatch 108
5 5
Rear No Plate Lamps 219
B 5 G BI L/H Drrection lndrcator I 109
R 6 2
Stop Lamps 6 G M Earth
147 I105
E 7G R Side Lamps
7 3 L/H DIrectron lndrcator 109 211
8 L? R/H Drrectron Indicator 8G B
110 R/H Directron lndrcator 110
9 t” Reversing Lamps 33 9 J N + Direct Lrghtrng 201
0 Rear Fog Lamps 208 0 BI N + Drrect Lrghting 201
IllOM 1 IV24M 1 + Battery lgnttron Switch 138
2J G Marn Beam 216 2 + Battery lgnrtron Swatch 27
3 3 + Battery lgnttion Switch 5
4 * 4 + Battery - lgnitron Swatch 38
56 R Side Lamps 211 .
B 6 IV31N 1 Heated Rear Screen
7M V Hand Brake 90 I.
8 N + Ignition Switch 79 IV46J 1 J R Windscreen Wiper Fast Speed 133
9V N + Direct 68 2 J Mv Wrndsc Wtper t lgnrt Swatch 138
0 V BI Tachometer 65 3 G Mv Windscreen Washer Pump
B 138
4 J BI Wrndscreen Wiper Slow Speed 134
II288 1 Side Lamp 204 5G v Windscreen Wiper Parkrng 136
2 B G Hazard Warning Switch 111 .6 G J Windscreen Wiper Timer 135
3B N + Drrect 110 .
B 4 B BI L/H Direction Indicator 111
IV 5 7 B 1 G Mv Windscreen Washer Pump 138
5 6 Mv + lgnitron Switch 111
2 G M Earth 6-80 138
6B J + Drrection Indicator Unit 107
3J G Earth
7 0 160
R/H Direction Indicator 112
G 4 M Cooling Fan Relay 6 a M Earth 113
5G B Horn 159
6 BI Cooling Fan 7
ll32B 1 V Cigar Lrghter Lighting 203 7V J
H 2 + lgnitron Cooling Fan Relay 6
II43M 1 J V13J 1
Earth 94
2 J 2 B V Horn
Earth 93
B 159
MB 3 B M
3 J Earth + Horn
92 159
II538 1 V J Rear View Mtrror De-lcrng V 2 4 BI 1 BI
158 Rear Window Motor
116
2v B Heated Rear Screen Switch 2J V
162 Height Corrector Earth 141
H H 3 V Mv + Ignition Switch 3J N + Drrect height Corrector 144
4J B + lgnrtron herght Corrector 139
(Heated Rear Screen) 162
lll12M 1 J Earth 204 189 V32N IN + Battery Junction Box 2
H J N + Crgar Lighter 90 G N + Battery Junctron Box 2
Ill 2 6 M 1 G N + Stop Lamp Switch 147 V45J 1 J R Wrndscreen Wrper Fast Speed 133
2 G M Earth 90 2 J BI Windscreen Wiper Slow Speed 134
3
D 3 G B Windscreen Wrper Parking 136
H 4V R + Glove Box Lrghting 187 4J N + lgnitron Windscreen Wiper 137
5 G Stop Lamp Switch 147 5 J Earth Windscreen Wiper 134
6 V Hand Brake Swatch 90
V54J IJ R Starter Solenord 5
III 3 2 N 1 V R + Direct Radro 191 2 G Bi Reversrng Lamps 33
H 2 ( + lgnrtion Swrtchl G 3 G + lgnrtron Swatch After Fl 34
4G R + lgnrtron Swatch Rev Switch 33
lll44B 1 lgnttron Swatch + C iF3) 138 -
2 lgnrtron Switch + C tF2) 27 V 6 3 R 1 BI N Rear Wrndow Motor 128
3 Starter Swatch 5
H 2G R t Direct After F7 179
4 lgnrtion Switch -t C lgnrtron 38 3J M + Dtrect Rear Crgar Lrgther 139
Page 392 of 648
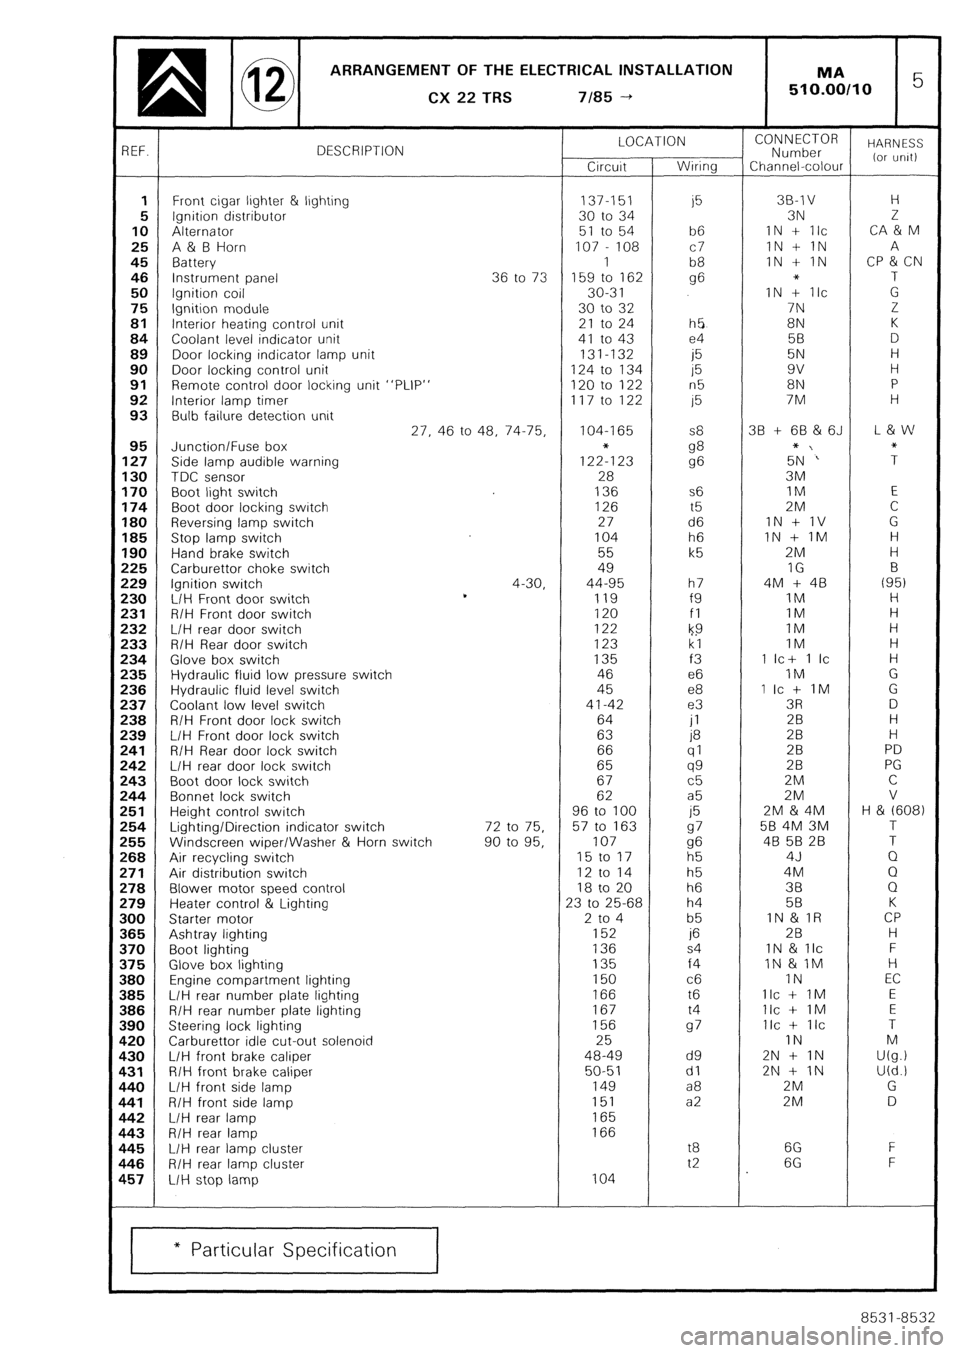
ARRANGEMENT OF THE ELECTRICAL INSTALLATION
q @ CX22TRS 7/85-t 1 MA 5 510.00110
3EF. DESCRIPTION LOCATION
Circuit Wiring CONNECTOR
Number HARNESS
Channel-colour (or urilt)
1 Front cigar ljghter & lighting 137-151
i5 38-l v H
5 Ignition distributor 30 to 34 3N 2
10 Alternator 51 to 54 b6 IN + Ilc CA & M
25 A & B Horn 107 - 108 c7 1N + 1N A
45 Battery 1
b8 IN + IN CP & CN
46 Instrument panel 36 to 73 159 to 162 g6 * T
50 Ignition coil 30-3 1 IN + Ilc G
75 Ignition module 30 to 32 7N Z
81 Interior heating control unit 21 to 24 h5 8N K
84 Coolant level indicator unit 41 to 43 e4 5B D
89 Door locking indicator lamp unit 131-132
i5 5N H
90 Door locking control unit 124 to 134 15 9v H
91 Remote control door locking unit “PLIP” 120 to 122 n5 8N P
92 Interior lamp timer 117 to 122 15 7M H
93 Bulb failure detection unit
27, 46 to 48, 74-75, 104-I 65 S8 38 + 68 & 6J L & w
95 Junction/Fuse box
127 Side lamp audible warning 1222123 g8
g6 5+N‘” ;
130 TDC sensor 28 3M
170 Boot light switch 136 s6 IM E
174 Boot door locking switch 126 t5 2M C
180 Reversing lamp switch 27 d6 1N + 1V G
185 Stop lamp switch 104 h6 IN + IM H
190 Hand brake switch 55 k5 2M H
!25 Carburettor choke switch 49 IG B
!29 Ignition switch 4-30, 44-95 h7 4M + 48 (95)
!30 L/H Front door switch *
119 f9 IM H
!31 R/H Front door switch 120 fl 1M H
!32 L/H rear door switch 122
k9 IM H
!33 R/H Rear door switch 123 kl IM H
!34 Glove box switch 135 f3 1 Ic+ 1 Ic H
!35 Hydraulic fluid low pressure switch 46 e6 IM G
!36 Hydraulic fluid level switch 45 e8 1 Ic + IM G
!37 Coolant low level switch 41-42 e3 3R D
!38 R/H Front door lock switch 64
jl 28 H
!39 L/H Front door lock switch 63 P
28 H
!41 R/H Rear door lock switch 66 (71 28 PD !42 L/H rear door lock switch 65 qg 28 PG
!43 Boot door lock switch 67 c5 2M C
!44 Bonnet lock switch 62 a5 2M V
!51 Height control switch 96 to 100
j5 2M & 4M H & (608) !54 Lighting/Direction indicator switch 72 to 75. 57 to 163 97 58 4M 3M T
!55 Windscreen wiper/Washer & Horn switch 90 to 95, 107 g6 48 5B 28 T
!68 Air recycling switch 15 to 17
h5 4J Q
!71 Air distribution switch 12 to 14 h5 4M Q !78 Blower motor speed control 18 to 20 h6 38 Q
!79 Heater control & Lighting 23 to 25-68 h4 58 K
100 Starter motor 2 to 4 b5 IN & IR CP 165 Ashtray lighting 152 if5 2B H
I70 Boot lighting 136 s4 1N & llc F
I75 Glove box lighting 135 f4 IN & 1M H I80 Engine compartment lighting 150 c6 IN EC
I85 L/H rear number plate lighting 166 t6 Ilc + IM E 186 R/H rear number plate lighting 167 t4 Ilc + IM E
190 Steering lock lighting 156 97 Ilc + IIC T
L20 Carburettor idle cut-out solenoid 25 IN M L30 L/H front brake caliper 48-49 d9 2N + IN U(g.) I31 R/H front brake caliper 50-51 dl 2N + IN U(d.!
L40 L/H front side lamp 149 a8 2M G
141 R/H front side lamp 151 a2 2M D 142 L/H rear lamp 165 L43 R/H rear lamp 166 I45 L/H rear lamp cluster t8 6G F
146 R/H rear lamp cluster t2 6G F
157 L/H stop lamp 104
* Particular Specification
8531-8532
Page 393 of 648
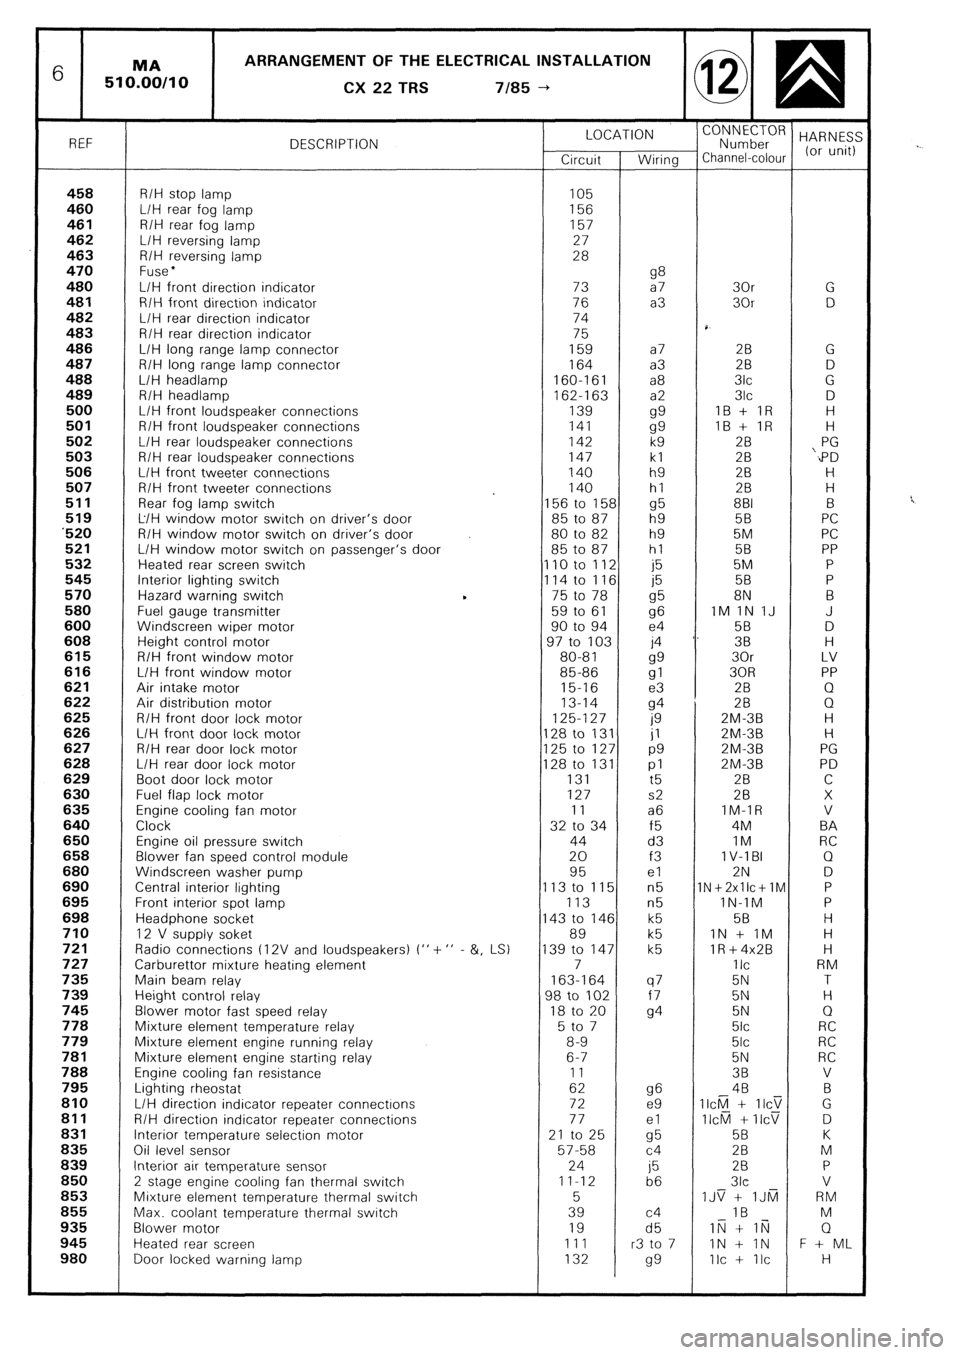
6 ARRANGEMENT OF THE ELECTRICAL INSTALLATION
CX
22 TRS 7185 --)
REF DESCRIPTION LOCATION
“;;;;;roR HARNES:
Circuit Wiring Channel-colour (or unit)
458 R/H stop lamp 105 460 L/H rear fog lamp 156 461 R/H rear fog lamp 157
462 L/H reversing lamp 27
463 R/H reversing lamp 28
470 Fuse l 480 g8 L/H front direction indicator 73 a7 30r G 481 R/H front direction indicator 76 a3 30r D 482 L/H rear direction indicator 74
483 R/H rear direction indicator 75
486 L/H long range lamp connector 159 a7 28 G 487 R/H long range lamp connector 164 a3 2B D 488 L/H headlamp 160-161 a8 3lc G
489 R/H headlamp
162-l 63 a2 3lc D 500 L/H front loudspeaker connections 139
gg IB + IR H 501 R/H front loudspeaker connections 141
gg IB + IR H 502 L/H rear loudspeaker connections 142 k9 28 PG 503 R/H rear loudspeaker connections 147 kl 28 ‘,PD 506 L/H front tweeter connections 140 h9 2B H 507 R/H front tweeter connections 140 hl 28 H
511 Rear fog lamp switch 156 to 158 g5 881 B 519 L/H window motor switch on driver’s door 85 to 87 h9 5B PC ‘520 R/H window motor switch on driver’s door 80 to 82 h9 5M PC 521 L/H window motor switch on passenger’s door 85 to 87 hl 58 PP 532 Heated rear screen switch 110 to 112 j5 5M P 545 Interior lighting switch
114 to 116 j5 58 P 570 Hazard warning switch 75 to 78
g5 8N B 580 Fuel gauge transmitter 59 to 61
96 IM 1N IJ J 600 Windscreen wiper motor 90 to 94 e4 58 D 608 Height control motor 97 to 103 j4 ‘. 38 H 615 R/H front window motor 80-81
gg 30r LV 616 L/H front window motor 85-86
gl 30R PP 621 Air intake motor 15-16 e3 2B Q 622 Air distribution motor 13-14
94 28 0 625 R/H front door lock motor 125-127
0 ZM-3B H 626 L/H front door lock motor 128 to 131 jl ZM-3B H 627 R/H rear door lock motor 125 to 127 p9 2M-3B PG 628 L/H rear door lock motor 128 to 131 pl 2M-3B PD 629 Boot door lock motor 131
t5 2B C 630 Fuel flap lock motor 127 s2 28 X 635 Engine cooling fan motor 11 a6 IM-IR V 640 Clock 32 to 34 f5 4M BA 650 Engine oil pressure switch 44 d3 IM RC 658 Blower fan speed control module 20 f3 1 V-l BI Q 680 Windscreen washer pump 95 el 2N D 690 Central interior lighting 113 to 115 n5 1N+2xllc+lM P 695 Front interior spot lamp 113 n5 lN-1M P 698 Headphone socket 143 to 146 k5 58 H 710 12 V supply soket 89 k5 IN + IM H 721 Radio connections t 12V and loudspeakers) I” + ” - &, LS) 139 to 147 k5 lR+4x2B H 727 Carburettor mixture heating element 7 IIC RM 735 Main beam relay 163-164 q7 5N T 739 Height control relay 98 to 102 f7 5N H 745 Blower motor fast speed relay 18 to 20
94 5N Q 778 Mixture element temperature relay 5 to 7 5lc RC 779 Mixture element engine running relay 8-9 5lc RC 781 Mixture element engine starting relay 6-7 5N RC 788 Engine cooling fan resistance 11 38 V 795 Lighting rheostat 62 g6 4B B 810 L/H direction indicator repeater connectrons 72 e9 II&l + IICT G 811 R/H direction indicator repeater connections 77 el II&l + IICV D 831 Interior temperature selection motor 21 to 25
cl5 5B K 836 Oil level sensor 57-58 c4 28 M 839 Interior air temperature sensor 24
j5 28 P 850
2 stage engine cooling fan thermal switch 11-12
b6 3lc V 853 Mixture element temperature thermal switch 5 IJS + IJti RM 855 Max. coolant temperature thermal switch 39 c4 IB M 935 Blower motor 19 d5 IN + li;j Q 945 Heated rear screen 111 r3 to 7 IN + IN F + ML 980 Door locked warning lamp 132
99 Ilc + Ilc H
Page 400 of 648
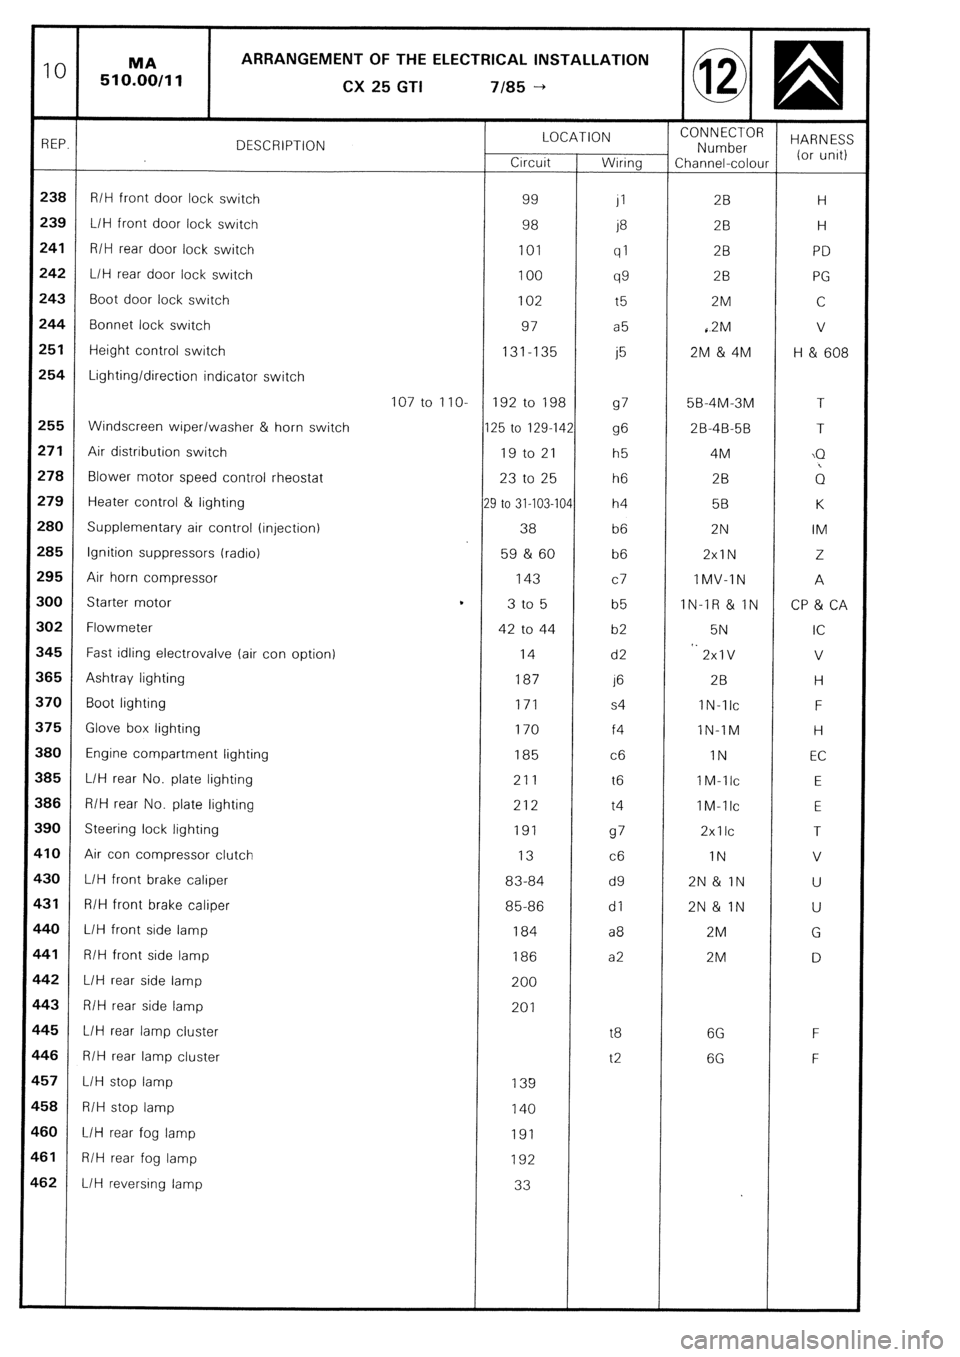
10 MA ARRANGEMENT OF THE ELECTRICAL INSTALLATION
510.00/11
CX
25 GTI 7185 -+
REP. DESCRIPTION LOCATION CONNECTOR
Number HARNESS
Crrcuit Wiring Channel-colour (or unrt)
238 R/H front door lock switch 99
JI 2B H
239
L/H front door lock switch 98
j8 2B H
241 R/H rear door lock switch 101
ql 28 PD
242 L/H rear door lock switch 100
99 28 PG
243 Boot door lock switch 102 t5 2M C
244 Bonnet lock switch 97 a5 ,2M v
251 Height control switch 131-135
j5 2M & 4M H & 608
254 Lighting/direction indicator switch
107 to IIO- 192 to 198
97 5B-4M-3M T
255 Windscreen wiper/washer & horn switch 125 to 129-142
96 2B-4B-5B T
271 Air distribution switch 19 to 21 h5 4M \Q
278 Blower motor speed control rheostat 23 to 25 h6 2B ;1
279 Heater control & lighting
29 to 31-103-104 h4 58 K
280 Supplementary air control (injection) 38 b6 2N IM
285 Ignition suppressors (radio) 59 & 60 b6 2xlN 2
295
Air horn compressor 143
c7 IMV-IN A
300
Starter motor t
3 to 5 b5 IN-IR & IN CP & CA
302 Flowmeter 42 to 44 b2 5N IC
545 Fast idling electrovalve (air con option) 14 d2 *. 2xlV V
$65 Ashtray lighting 187 1’3 2B H
$70 Boot lighting 171 s4 IN-TIC F
i75 Glove box lighting 170 f4 lN-IM H
I80 Engine compartment lighting 185 c6 IN EC
385 L/H rear No. plate lighting 211 t6 IM-llc E
386 R/H rear No. plate lighting 212 t4 IM-llc
E
390 Steering lock lighting 191
97 2xllc T
$10 Air con compressor clutch 13
c6 IN V
$30 L/H front brake caliper 83-84 d9 2N& IN U
$31 R/H front brake caliper 85-86 dl 2N& IN U
140 L/H front side lamp 184 a8 2M G
F41 R/H front side lamp 186 a2 2M D
L42 L/H rear side lamp 200
c43
R/H rear side lamp 201
145
L/H rear lamp cluster t8 6G F
C46 R/H rear lamp cluster t2 6G F
L57 L/H stop lamp 139
158 R/H stop lamp 140
160
L/H rear fog lamp 191
1-61 R/H rear fog lamp 192
.62 L/H reversing lamp 33