audio CITROEN DISPATCH SPACETOURER 2017 Handbook (in English)
[x] Cancel search | Manufacturer: CITROEN, Model Year: 2017, Model line: DISPATCH SPACETOURER, Model: CITROEN DISPATCH SPACETOURER 2017Pages: 774, PDF Size: 48.25 MB
Page 477 of 774
475
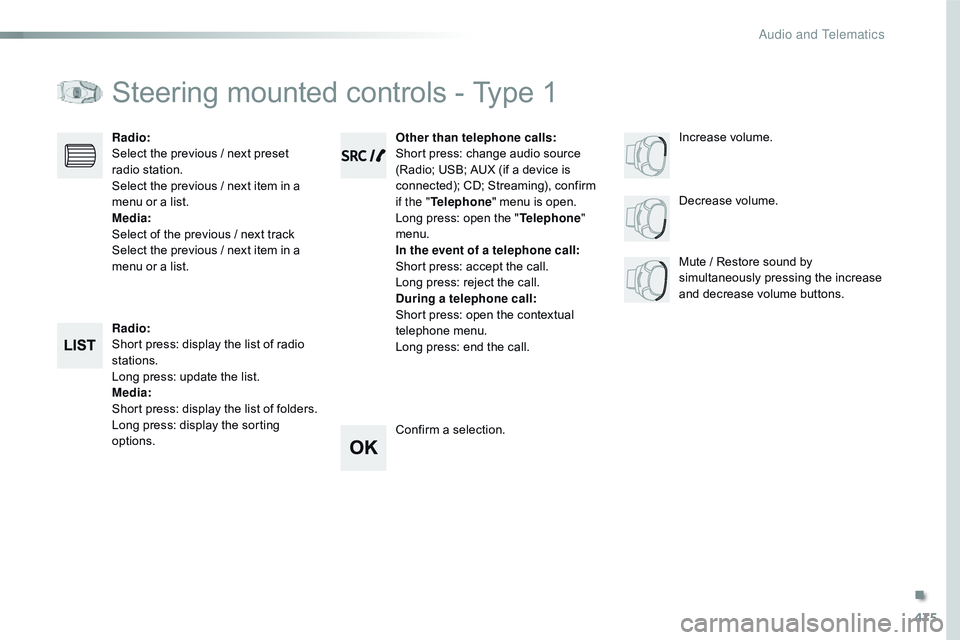
Steering mounted controls - Type 1
Radio:
Short press: display the list of radio
stations.
Long press: update the list.
Media:
Short press: display the list of folders.
Long press: display the sorting
options. Decrease volume.
Radio
:
Select the previous / next preset
radio station.
Select the previous / next item in a
menu or a list.
Media :
Select of the previous / next track
Select the previous / next item in a
menu or a list. Mute / Restore sound by
simultaneously pressing the increase
and decrease volume buttons.
Other than telephone calls
:
Short press: change audio source
(Radio; USB; AUX (if a device is
connected); CD; Streaming), confirm
if the " Telephone " menu is open.
Long press: open the " Telephone"
menu.
In the event of a telephone call:
Short press: accept the call.
Long press: reject the call.
During a telephone call :
Short press: open the contextual
telephone menu.
Long press: end the call.
Confirm a selection. Increase volume.
.
Audio and Telematics
Page 478 of 774
476
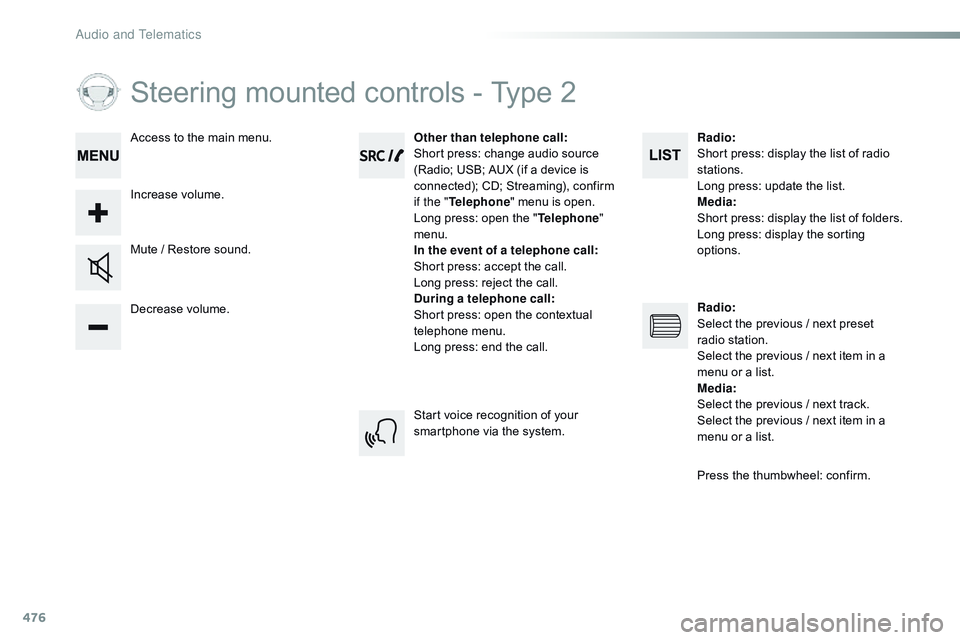
Steering mounted controls - Type 2
Decrease volume. Mute / Restore sound.Other than telephone call
:
Short press: change audio source
(Radio; USB; AUX (if a device is
connected); CD; Streaming), confirm
if the " Telephone " menu is open.
Long press: open the " Telephone"
menu.
In the event of a telephone call:
Short press: accept the call.
Long press: reject the call.
During a telephone call :
Short press: open the contextual
telephone menu.
Long press: end the call.
Increase volume. Access to the main menu.
Start voice recognition of your
smartphone via the system.Radio
:
Short press: display the list of radio
stations.
Long press: update the list.
Media :
Short press: display the list of folders.
Long press: display the sorting
options.
Radio :
Select the previous / next preset
radio station.
Select the previous / next item in a
menu or a list.
Media :
Select the previous / next track.
Select the previous / next item in a
menu or a list.
Press the thumbwheel: confirm.
Audio and Telematics
Page 479 of 774
477
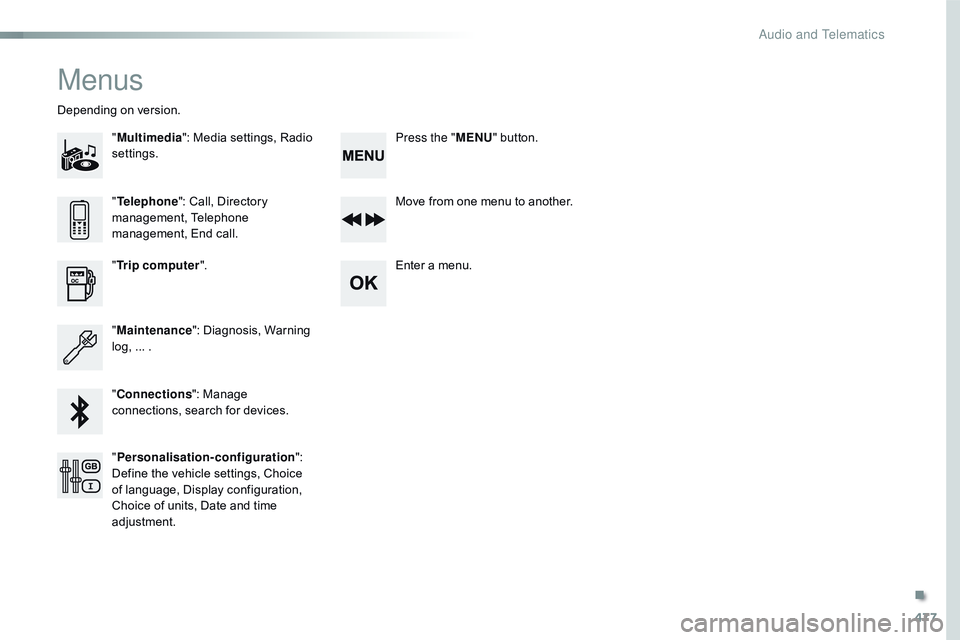
Menus
"Multimedia ": Media settings, Radio
settings.
Depending on version.
Move from one menu to another.
Enter a menu.
" Trip computer ".
" Maintenance ": Diagnosis, Warning
log, ... .
" Connections ": Manage
connections, search for devices. "
Telephone ": Call, Directory
management, Telephone
management, End call.
" Personalisation-configuration ":
Define the vehicle settings, Choice
of language, Display configuration,
Choice of units, Date and time
adjustment. Press the "
MENU" button.
.
Audio and Telematics
Page 480 of 774
478
RDS
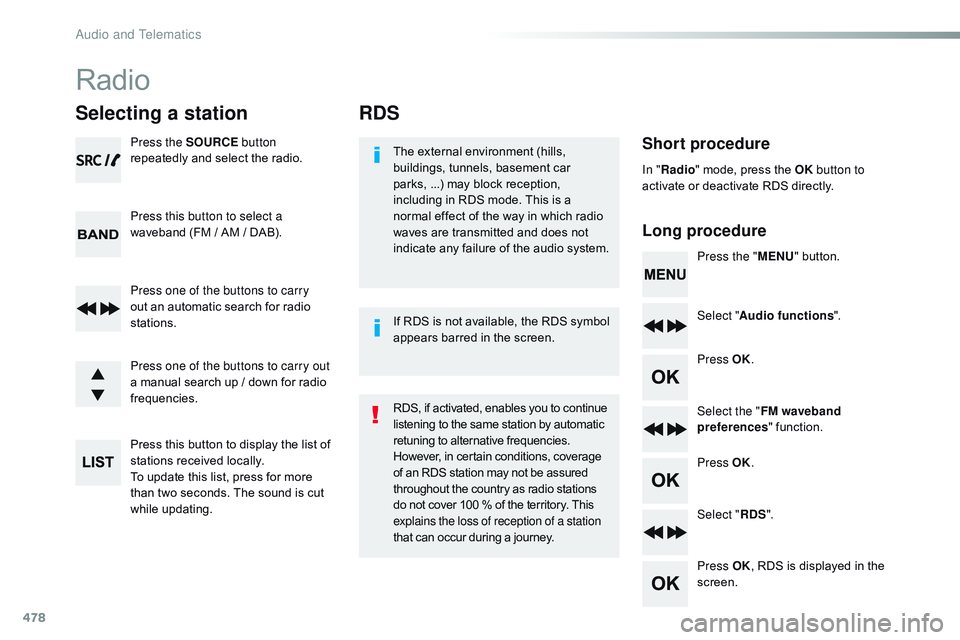
Short procedure
Long procedureThe external environment (hills,
buildings, tunnels, basement car
parks, ...) may block reception,
including in RDS mode. This is a
normal effect of the way in which radio
waves are transmitted and does not
indicate any failure of the audio system. Press the "MENU" button.
Select " Audio functions ".
Press OK.
Select the " FM waveband
preferences " function.
Press OK.
Select " RDS".
Press OK , RDS is displayed in the
screen.
In "
Radio " mode, press the OK button to
activate or deactivate RDS directly.
RDS, if activated, enables you to continue
listening to the same station by automatic
retuning to alternative frequencies.
However, in certain conditions, coverage
of an RDS station may not be assured
throughout the country as radio stations
do not cover 100 % of the territory. This
explains the loss of reception of a station
that can occur during a journey. If RDS is not available, the RDS symbol
appears barred in the screen.
Radio
Selecting a station
Press the SOURCE button
repeatedly and select the radio.
Press this button to select a
waveband (FM / AM / DAB).
Press one of the buttons to carry
out an automatic search for radio
stations.
Press one of the buttons to carry out
a manual search up / down for radio
frequencies.
Press this button to display the list of
stations received locally.
To update this list, press for more
than two seconds. The sound is cut
while updating.
Audio and Telematics
Page 481 of 774
479
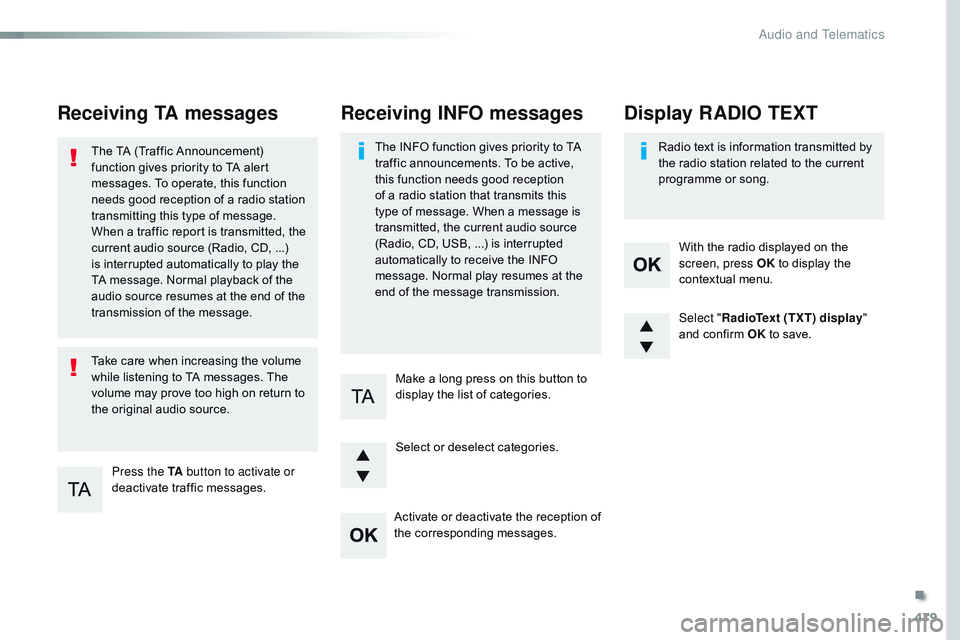
Receiving TA messages
Press the TA button to activate or
deactivate traffic messages.
The TA (Traffic Announcement)
function gives priority to TA alert
messages. To operate, this function
needs good reception of a radio station
transmitting this type of message.
When a traffic report is transmitted, the
current audio source (Radio, CD, ...)
is interrupted automatically to play the
TA message. Normal playback of the
audio source resumes at the end of the
transmission of the message.
Take care when increasing the volume
while listening to TA messages. The
volume may prove too high on return to
the original audio source.
Select "
RadioText (TXT) display "
and confirm OK to save.
Select or deselect categories. With the radio displayed on the
screen, press OK
to display the
contextual menu.
Make a long press on this button to
display the list of categories.
Receiving INFO messages
The INFO function gives priority to TA
traffic announcements. To be active,
this function needs good reception
of a radio station that transmits this
type of message. When a message is
transmitted, the current audio source
(Radio, CD, USB, ...) is interrupted
automatically to receive the INFO
message. Normal play resumes at the
end of the message transmission. Radio text is information transmitted by
the radio station related to the current
programme or song.
Display RADIO TEXT
Activate or deactivate the reception of
the corresponding messages.
.
Audio and Telematics
Page 482 of 774
480
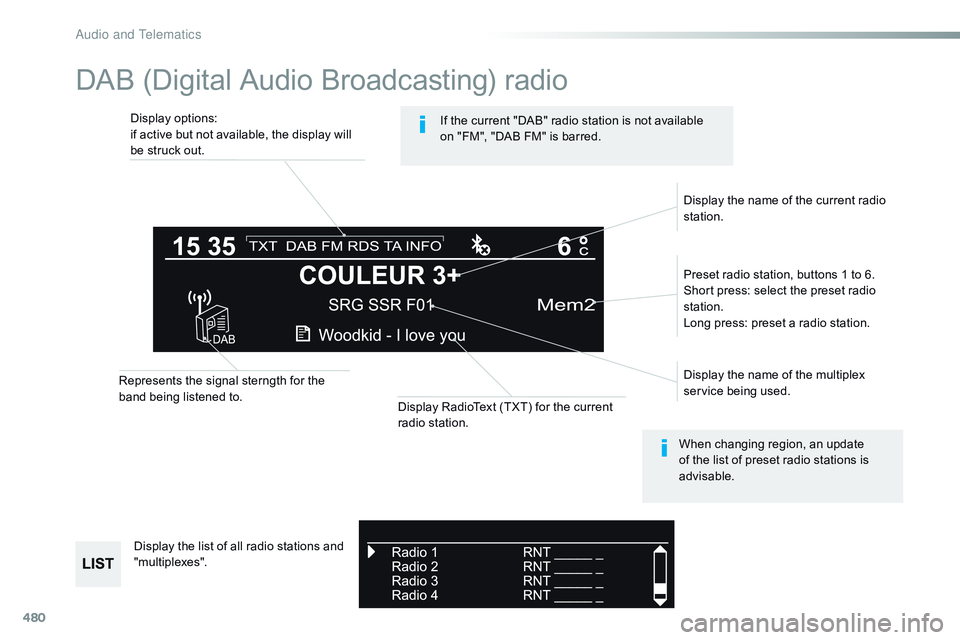
DAB (Digital Audio Broadcasting) radio
Display options:
if active but not available, the display will
be struck out.Preset radio station, buttons 1 to 6.
Short press: select the preset radio
station.
Long press: preset a radio station.
Display the name of the multiplex
service being used.
Display the list of all radio stations and
"multiplexes".
Represents the signal sterngth for the
band being listened to.
Display RadioText (TXT) for the current
radio station. Display the name of the current radio
station.
If the current "DAB" radio station is not available
on "FM", "DAB FM" is barred.
When changing region, an update
of the list of preset radio stations is
advisable.
A
Page 483 of 774
481
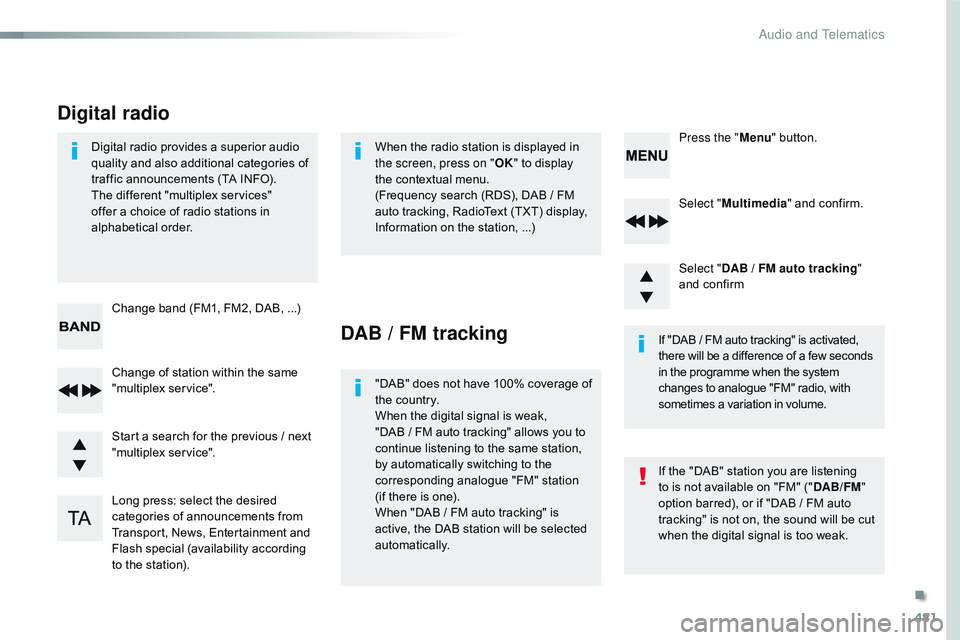
Select "Multimedia " and confirm.
Select " DAB / FM auto tracking "
and confirm
Long press: select the desired
categories of announcements from
Transport, News, Entertainment and
Flash special (availability according
to the station). Change of station within the same
"multiplex service". Press the "
Menu" button.
Start a search for the previous / next
"multiplex service". Change band (FM1, FM2, DAB,
...)
Digital radio provides a superior audio
quality and also additional categories of
traffic announcements (TA INFO).
The different "multiplex services"
offer a choice of radio stations in
alphabetical order.
Digital radio
When the radio station is displayed in
the screen, press on "
OK" to display
the contextual menu.
(Frequency search (RDS), DAB
/ FM
auto tracking, RadioText (TXT) display,
Information on the station,
...)
DAB / FM tracking
"DAB" does not have 100% coverage of
the country.
When the digital signal is weak,
"DAB / FM auto tracking" allows you to
continue listening to the same station,
by automatically switching to the
corresponding analogue "FM" station
(if there is one).
When "DAB
/ FM auto tracking" is
active, the DAB station will be selected
automatically. If "DAB
/ FM auto tracking" is activated,
there will be a difference of a few seconds
in the programme when the system
changes to analogue "FM" radio, with
sometimes a variation in volume.
If the "DAB" station you are listening
to is not available on "FM" (" DAB/FM"
option barred), or if "DAB
/ FM auto
tracking" is not on, the sound will be cut
when the digital signal is too weak.
.
Audio and Telematics
Page 484 of 774
482
Media
USB player
This unit consists of a USB port and an
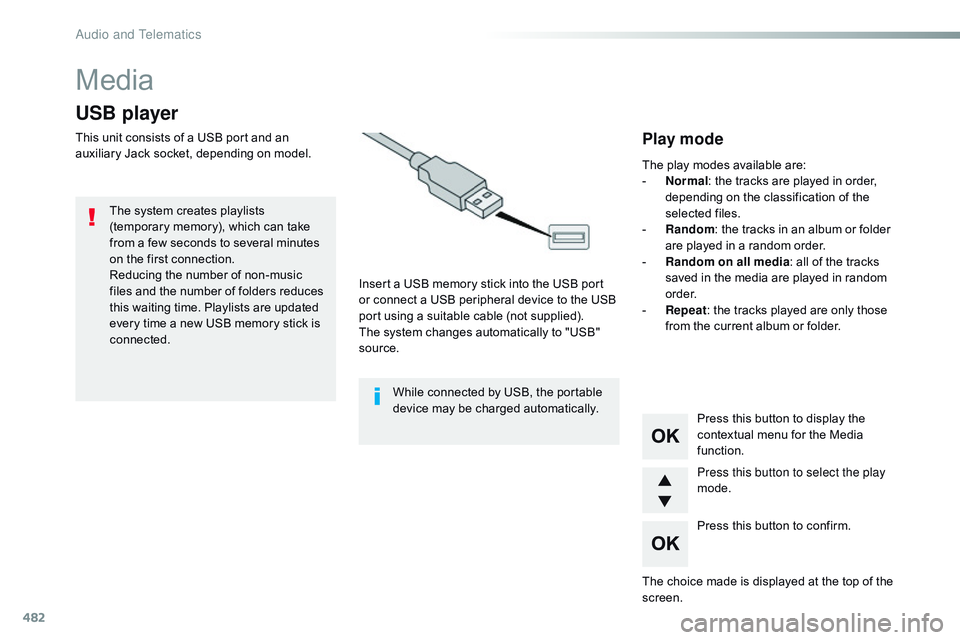
auxiliary Jack socket, depending on model.Insert a USB memory stick into the USB port
or connect a USB peripheral device to the USB
port using a suitable cable (not supplied).
The system changes automatically to "USB"
source.
The system creates playlists
(temporary memory), which can take
from a few seconds to several minutes
on the first connection.
Reducing the number of non-music
files and the number of folders reduces
this waiting time. Playlists are updated
every time a new USB memory stick is
connected.
Press this button to display the
contextual menu for the Media
function.
Press this button to select the play
mode.
Press this button to confirm.Play mode
The play modes available are:
- No rmal: the tracks are played in order,
depending on the classification of the
selected files.
-
R
andom : the tracks in an album or folder
are played in a random order.
-
R
andom on all media : all of the tracks
saved in the media are played in random
o r d e r.
-
R
epeat : the tracks played are only those
from the current album or folder.
The choice made is displayed at the top of the
screen.
While connected by USB, the portable
device may be charged automatically.
Audio and Telematics
Page 485 of 774
483
Choosing a track to playFile classificationPlaying files
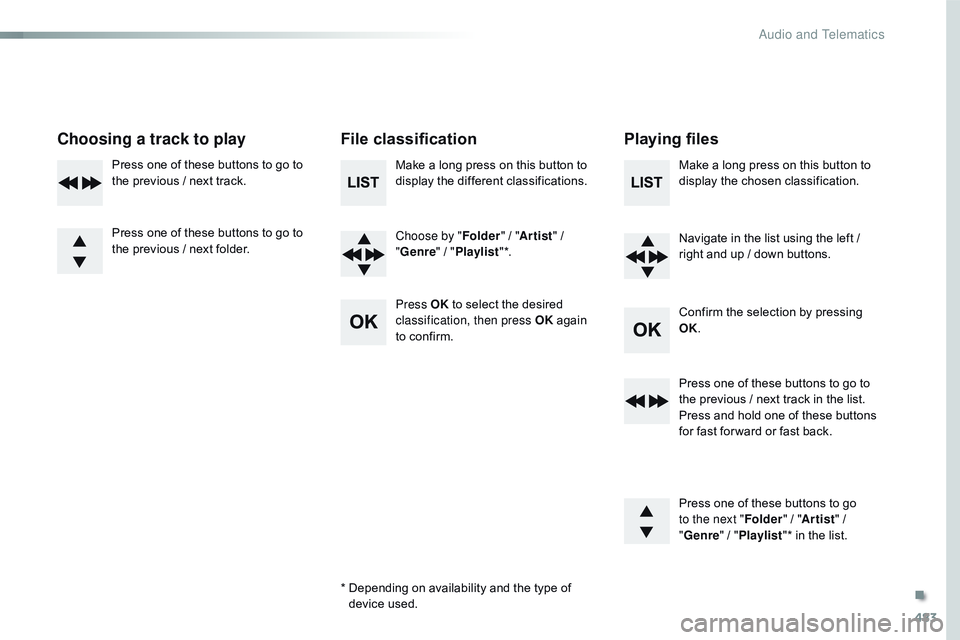
Make a long press on this button to
display the different classifications.
Choose by "Folder" / "Artist " /
" Genre " / "Playlist " *.
Press OK to select the desired
classification, then press OK again
to confirm. Make a long press on this button to
display the chosen classification.
Navigate in the list using the left /
right and up / down buttons.
Confirm the selection by pressing
OK.
Press one of these buttons to go to
the previous / next track in the list.
Press and hold one of these buttons
for fast for ward or fast back.
Press one of these buttons to go
to the next "
Folder" / "Artist " /
" Genre "
/ "Playlist "* in the list.
*
D
epending on availability and the type of
device used.
Press one of these buttons to go to
the previous / next track.
Press one of these buttons to go to
the previous / next folder.
.
Audio and Telematics
Page 486 of 774
484
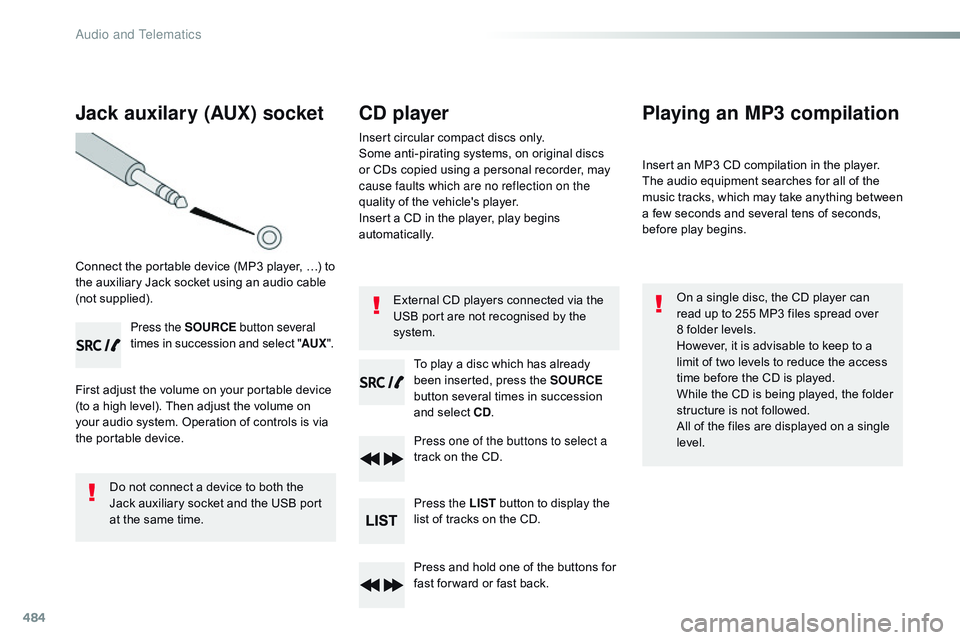
Jack auxilary (AUX) socket
Connect the portable device (MP3 player, …) to
the auxiliary Jack socket using an audio cable
(not supplied).Press the SOURCE button several
times in succession and select " AUX".
First adjust the volume on your portable device
(to a high level). Then adjust the volume on
your audio system. Operation of controls is via
the portable device.
Do not connect a device to both the
Jack auxiliary socket and the USB port
at the same time.
CD player
Insert circular compact discs only.
Some anti-pirating systems, on original discs
or CDs copied using a personal recorder, may
cause faults which are no reflection on the
quality of the vehicle's player.
Insert a CD in the player, play begins
automatically.
To play a disc which has already
been inserted, press the SOURCE
button several times in succession
and select CD .
Press one of the buttons to select a
track on the CD.
Press the LIST button to display the
list of tracks on the CD.
Press and hold one of the buttons for
fast for ward or fast back.
Playing an MP3 compilation
Insert an MP3 CD compilation in the player.
The audio equipment searches for all of the
music tracks, which may take anything between
a few seconds and several tens of seconds,
before play begins.
On a single disc, the CD player can
read up to 255 MP3 files spread over
8 folder levels.
However, it is advisable to keep to a
limit of two levels to reduce the access
time before the CD is played.
While the CD is being played, the folder
structure is not followed.
All of the files are displayed on a single
level.
External CD players connected via the
USB port are not recognised by the
system.
Audio and Telematics