change time CITROEN DISPATCH SPACETOURER 2018 Handbook (in English)
[x] Cancel search | Manufacturer: CITROEN, Model Year: 2018, Model line: DISPATCH SPACETOURER, Model: CITROEN DISPATCH SPACETOURER 2018Pages: 400, PDF Size: 16.99 MB
Page 223 of 400

221
Programming the alert
thresholds
The thresholds for triggering an alert determine
how you wish to be warned of the presence of a
vehicle moving or stationary ahead of you, or a
pedestrian in your traffic lane.
You can select one of three thresholds:
- "Distant ", to be warned early (cautious
driving).
-
"Normal ".
-
"Close ", to be warned later.
With audio system
In the " Personalisation-
configuration " menu, activate/
deactivate " Auto. emergency
braking ".
Then change the alert threshold.
With the touch screen
In the " Driving/Vehicle " menu,
activate/deactivate " Collision risk
alert and automatic braking ".
Then change the alert threshold.
Press " Confirm " to save the change.
Active Safety Brake
If the radar and the camera have
confirmed the presence of a vehicle
or a pedestrian, this warning
lamp flashes when the system is
operating. Important
: if operation of the
automatic emergency braking is
triggered, you should take back
control of your vehicle and brake
with the pedal to add to or finish the
automatic braking.
The driver can take back control of the vehicle
at any time by sharply turning the steering
wheel and/or pressing the accelerator pedal.
The point at which braking is triggered
may be adjusted depending on the driving
actions of the driver, such as movement
of the steering wheel or actions on the
accelerator pedal.
Operation of the system may be felt by
slight vibration in the brake pedal.
If the vehicle comes to a complete stop,
the automatic braking is maintained for
1 to 2 seconds.
With a manual gearbox, in the event of
automatic emergency braking until the
vehicle comes to a complete stop, the
vehicle may stall.
With an automatic gearbox, in the event
of automatic emergency braking until the
vehicle comes to a complete stop, keep
the brake pedal pressed down to prevent
the vehicle from starting off again.
This function, also called automatic emergency
braking, aims to reduce the speed of impact or
avoid a frontal collision by your vehicle where
the driver fails to react.
Using a radar and a camera, this system acts
on the vehicle's braking system.
6
Driving
Page 226 of 400

224
Fatigue detection system
It is recommended that you take a break as
soon as you feel tired or at least every two
hours.The system cannot in any circumstances
replace the need for vigilance on the part
of the driver.
Do not take the wheel if you are tired.
Driving time warning
The system triggers an alert once it
detects that the driver has not taken
a break after two hours of driving at
a speed above 40
mph (65 km/h).If the driver does not follow this advice, the
alert is repeated hourly until the vehicle is
stopped.
The system resets itself if one of the following
conditions is met:
-
e
ngine running, the vehicle has been
stationary for more than 15
minutes,
-
t
he ignition has been switched off for a few
minutes,
-
t
he driver's seat belt is unfastened and their
door is open.
As soon as the speed of the vehicle drops
below 40 mph (65 km/h), the system goes
into standby.
The driving time is counted again once the
speed is above 40
mph (65 km/h).
Activation/Deactivation
The system is activated or deactivated via the
vehicle configuration menu.
With audio system
In the "Personalisation-
configuration " menu, activate/
deactivate " Fatigue Detection
System ".
With the touch screen
In the "Driving/Vehicle " menu,
activate/deactivate " Fatigue
Detection System ".
This alert is issued via the display of a
message encouraging you to take a break,
accompanied by an audible signal.
Driver attention alert
Depending on version, the "Driving time
warning" may be combined with the "Driver
attention alert". The system assesses the driver's
level of alertness by identifying
trajectory changes in relation to the
lane markings.
This system is particularly suited to fast roads
(speed higher than 40
mph (65 km/h)).
Driving
Page 248 of 400

246
Checking levels
Check all of these levels regularly, in line with
the manufacturer's service schedule. Top them
up if necessary, unless other wise indicated.
If a level drops significantly, have the
corresponding system checked by a CITROËN
dealer or a qualified workshop.The fluid must comply with the
manufacturer's recommendations and with
the vehicle's engine.
Take care when working under the bonnet,
as certain areas of the engine may be
extremely hot (risk of burns) and the
cooling fan could start at any time (even
with the ignition off).
Used products
Avoid prolonged contact of used oil or
fluids with the skin.
Most of these fluids are harmful to health
or indeed very corrosive. Do not discard used oil or fluids into
sewers or onto the ground.
Take used oil to a CITROËN dealer or
a qualified workshop and dispose of
it in the containers reser ved for this
purpose.
Engine oil level
The check is carried out either when
the ignition is switched on using the
oil level indicator in the instrument
panel for vehicles equipped with an
electric gauge, or using the dipstick.
To ensure that the reading is correct, your
vehicle must be parked on a level sur face
with the engine stopped for more than
30
minutes.
It is normal to top up the oil level between
two ser vices (or oil changes). CITROËN
recommends that you check the level, and top
up if necessary, every 3,000
miles (5,000 km).
Checking using the dipstick
The location of the dipstick is shown in the
corresponding underbonnet layout view.
F
T
ake the dipstick by its coloured grip and
pull it out completely.
F
W
ipe the end of the dipstick using a clean
non-fluffy cloth.
F
R
efit the dipstick and push fully down, then
pull it out again to make the visual check:
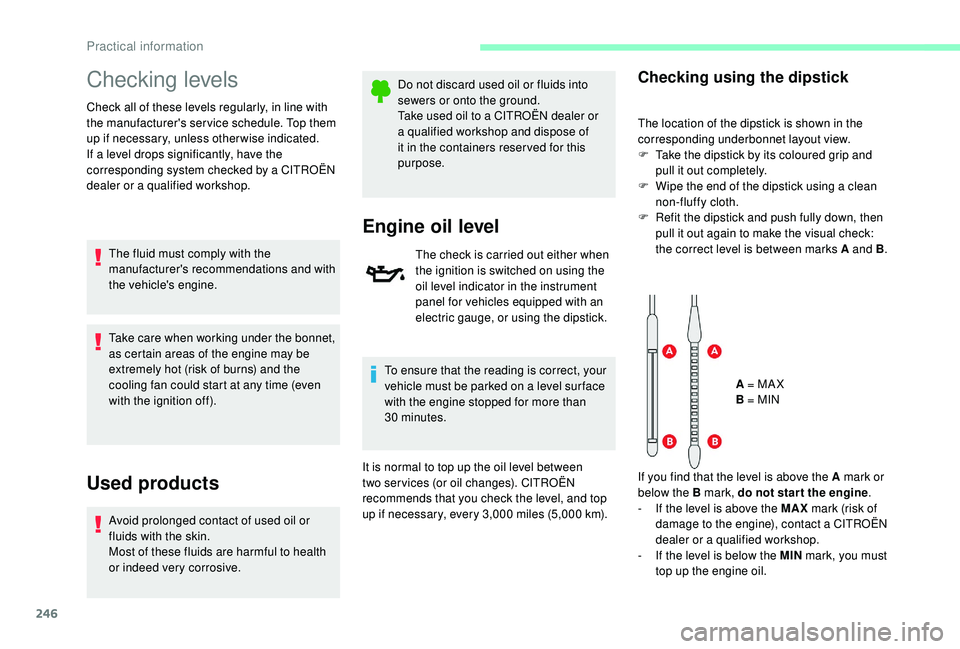
the correct level is between marks A and B .
A = MA X
B = MIN
If you find that the level is above the A mark or
below the B mark, do not star t the engine .
-
I
f the level is above the MAX mark (risk of
damage to the engine), contact a CITROËN
dealer or a qualified workshop.
-
I
f the level is below the MIN mark, you must
top up the engine oil.
Practical information
Page 251 of 400

249
Passenger compartment filter
Refer to the manufacturer's
ser vice schedule for details of
the replacement inter val for this
component.
Depending on the environment (e.g. dusty
atmosphere) and the use of the vehicle
(e.g. city driving), replace it twice as often if
necessary .
A clogged passenger compartment
filter may have an adverse effect on
the per formance of the air conditioning
system and generate undesirable odours.
Oil filter
Change the oil filter each time the
engine oil is changed.
Refer to the manufacturer’s
ser vice schedule for details of
the replacement inter val for this
component.
Particle filter (Diesel)
The start of saturation of the particle
filter is indicated by the temporary
illumination of this warning lamp
accompanied by a message about
the risk of the filter clogging up. As soon as the traffic conditions permit,
regenerate the filter by driving at a speed
of at least 37
mph (60 km/h) until the
warning lamp goes off.
If the warning lamp stays on, this indicates
a low Diesel additive level.
For more information on Checking levels ,
refer to the corresponding section.
On a new vehicle, the first particle
filter regeneration operations may be
accompanied by a "burning" smell, which
is per fectly normal.
Following prolonged operation of the
vehicle at very low speed or at idle,
you may, in exceptional circumstances,
notice the emission of water vapour at the
exhaust on acceleration. This does not
affect the behaviour of the vehicle or the
environment.
Manual gearbox
The gearbox does not require any
maintenance (no oil change).
Automatic gearbox
The gearbox does not require any
maintenance (no oil change).
Electronic gearbox
The gearbox does not require any
maintenance (no oil change).
Parking brakeIf excessive travel or a loss of
effectiveness of this system is
noticed, the parking brake must
be checked, even between two
services.
Checking this system must be done by a
CITROËN dealer or a qualified workshop.
Brake padsBrake wear depends on the style
of driving, particularly in the case
of vehicles used in town, over short
distances. It may be necessary to
have the condition of the brakes
checked, even between vehicle
services.
Unless there is a leak in the circuit, a drop in
the brake fluid level indicates that the brake
pads are worn.
7
Practical information
Page 272 of 400

270
Ty p e E
When each operation has been completed,
check the operation of the lighting.
Front lamps
Halogen headlamps
Xenon bulb: xenon bulbs must be changed by
a CITROËN dealer or a qualified workshop as
there is a risk of electrocution.For more information on Changing a bulb
and in particular the types of bulb, refer to the
corresponding section.
For H7 type bulbs with lugs, take care to
obser ve their correct installation so as to
ensure the best lighting performance.
1.
Sidelamps.
Ty p e A , W5W-5W
2. Main beam headlamps.
Ty p e C , H1- 55W
3. Dipped beam headlamps.
Ty p e C , H7- 5 5 W
4. Daytime running lamps.
Ty p e A , W21W LL-21W
5. Direction indicators.
Ty p e B , PY21W-21W (amber)
Xenon headlamps
For more information on Changing a bulb
and in particular the types of bulb, refer to the
corresponding section.
1. Main beam headlamps.
Ty p e C , H1- 55W
2. Dipped beam headlamps.
Ty p e E , D8S 25W
3. Direction indicators.
Ty p e B , PY21W-21W (amber)
In the event of a breakdown
Page 273 of 400

271
Foglamps
Ty p e D, H11 - 5 5 W
Daytime running lamps/sidelamps
If fitted to your vehicle, contact a CITROËN
dealer or a qualified workshop for the
replacement of this type of LED lamp and light
guide.
A replacement kit for the LEDs is available from
CITROËN dealers.
Direction indicator side repeater
Ty p e A , W Y5W-5W (amber)
-
P
ush the repeater towards the rear and
disengage it.
-
W
hen refitting, engage the repeater towards
the front and then bring it towards the rear.
Amber coloured bulbs (direction indicators and
side repeaters) must be replaced with bulbs of
identical specification and colour.
Dipped beam headlamps
(halogen headlamps)
Ty p e C , H7- 5 5 W
When refitting the connector and bulb
in the lamp, push the assembly into its
housing until it clicks into place.
F
P
ress the upper clip on the cover then tip it
rear wards to remove it.
F
P
ress the lower clip on the electrical
connector and remove the assembly of
connector and bulb.
F
P
ull the bulb out and change it.
To refit, proceed in reverse order.
8
In the event of a breakdown
Page 274 of 400

272
Daytime running lamps (halogen headlamps)
Ty p e A, W21W LL-21W
Sidelamps (halogen headlamps)
Ty p e A, W5W
Main beam headlamps (halogen headlamps)
Ty p e C, H1- 55W
F
P
ress the upper clip on the cover then tip it
rear wards to remove it.
F
P
ress the two side clips on the electrical
connector and remove the assembly of
connector and bulb.
F
P
ull the bulb out and change it.
To refit, proceed in reverse order. F
P
ress the upper clip on the cover then tip it
rear wards to remove it.
F
P
ress the two side clips on the electrical
connector and remove the assembly of
connector and bulb.
F
P
ull the bulb out and change it.
To refit, proceed in reverse order. F
P
ress the upper clip on the cover then tip it
rear wards to remove it.
F
P
ress the lower clip on the electrical
connector and remove the assembly of
connector and bulb.
F
P
ull the bulb out and change it.
To refit, proceed in reverse order.
Be aware that the area behind the right-
hand headlamp (facing forwards) may
be hot, with the risk of burns (degassing
p i p e s).
In the event of a breakdown
Page 275 of 400

273
Direction indicators (halogen
headlamps)
Ty p e B, PY21W-21W (amber)
Faster flashing of the direction indicator
lamp (left or right) indicates a failed bulb
on that side.
Dipped beam headlamps (xenon
headlamps)
Ty p e E , D8S 25W
Replacement of D8S xenon bulbs must
be done by a CITROËN dealer or a
qualified workshop as there is a risk of
electrocution.
It is recommended that both D8S bulbs be
replaced at the same time, in the event of
the failure of one of them.
Main beam headlamps (xenon headlamps)
Ty p e C , H1- 55W
When refitting the connector and bulb
in the lamp, push the assembly into its
housing until it clicks into place.
F
P
ress the upper clip on the cover then tip it
rear wards to remove it.
F
T
urn the bulb holder a quarter turn anti-
clockwise.
F
R
emove the bulb holder.
F
C
hange the faulty bulb.
To refit, proceed in reverse order. F
P
ress the upper clip on the cover then tip it
rear wards to remove it.
F
P
ress the lower clip on the electrical
connector and remove the assembly of
connector and bulb.
F
P
ull the bulb out and change it.
To refit, proceed in reverse order.
8
In the event of a breakdown
Page 296 of 400

1
CITROËN Connect Nav
GPS satellite navigation –
Applications – Multimedia
audio system – Bluetooth
®
telephone
Contents
First steps
2
S
teering mounted controls
3
M
enus
4
V
oice commands
5
N
avigation
1
1
Connected navigation
1
5
Applications
1
8
Radio
2
3
DAB radio (Digital Audio Broadcasting)
2
5
Media
26
T
elephone
2
8
Configuration
3
3
Frequently asked questions
3
7The different functions and settings
described vary according to the version
and configuration of your vehicle.
As a safety measure and because it
requires sustained attention by the
driver, the pairing of a Bluetooth mobile
telephone with the Bluetooth hands-free
system of your audio system must be
done with the vehicle stationary
and the
ignition on.
The system is protected in such a way that
it will only operate in your vehicle.
The display of the Energy Economy
Mode message signals that a change to
standby is imminent.
The link below gives access to OSS
(Open Source Software) codes for the
system.
https://www.groupe-psa.com/fr/oss/
https://www.groupe-psa.com/en/oss/
.
CITROËN Connect Nav
Page 298 of 400

3
In the "Settings" menu you can create
a profile for just one person or a group
of people with common points, with the
possibility of entering a multitude of
settings (radio presets, audio settings,
navigation history, contact favourites,
etc.); these settings are taken into account
automatically.
In very hot conditions, the volume may
be limited to protect the system. It may go
into standby (screen and sound off) for at
least 5
minutes.
The return to normal takes place when
the temperature in the passenger
compartment has dropped.Steering mounted controls
Depending on model.
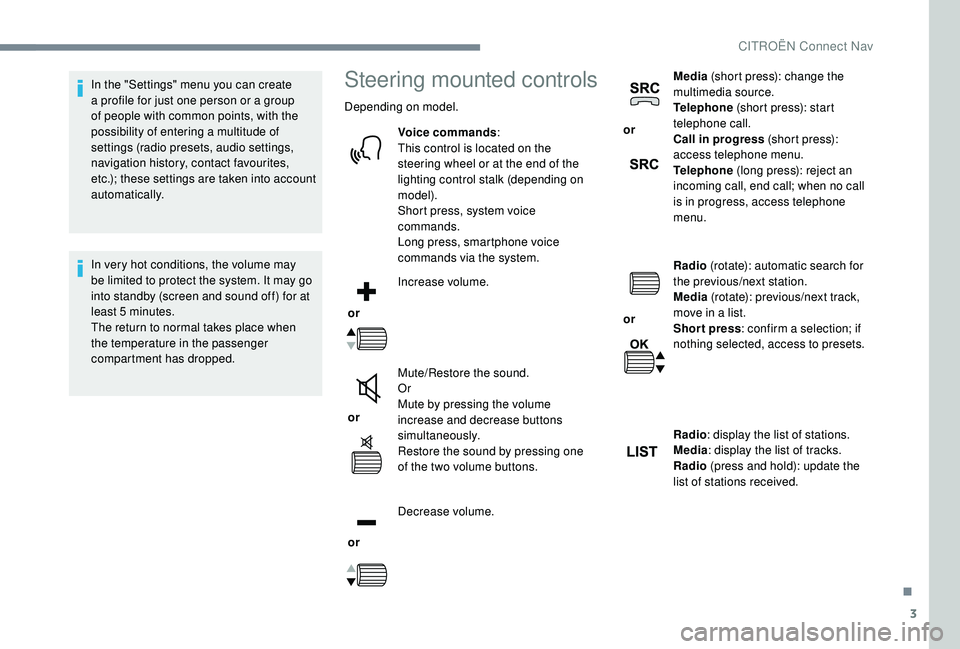
Voice commands :
This control is located on the
steering wheel or at the end of the
lighting control stalk (depending on
model).
Short press, system voice
commands.
Long press, smartphone voice
commands via the system.
or Increase volume.
or Mute/Restore the sound.
Or
Mute by pressing the volume
increase and decrease buttons
simultaneously.
Restore the sound by pressing one
of the two volume buttons.
or Decrease volume. or
Media
(short press): change the
multimedia source.
Telephone (short press): start
telephone call.
Call in progress (short press):
access telephone menu.
Telephone (long press): reject an
incoming call, end call; when no call
is in progress, access telephone
menu.
or Radio
(rotate): automatic search for
the previous/next station.
Media (rotate): previous/next track,
move in a list.
Short press : confirm a selection; if
nothing selected, access to presets.
Radio : display the list of stations.
Media : display the list of tracks.
Radio (press and hold): update the
list of stations received.
.
CITROËN Connect Nav