belt CITROEN DISPATCH SPACETOURER 2020 Handbook (in English)
[x] Cancel search | Manufacturer: CITROEN, Model Year: 2020, Model line: DISPATCH SPACETOURER, Model: CITROEN DISPATCH SPACETOURER 2020Pages: 324, PDF Size: 10.89 MB
Page 121 of 324

119
Deployment
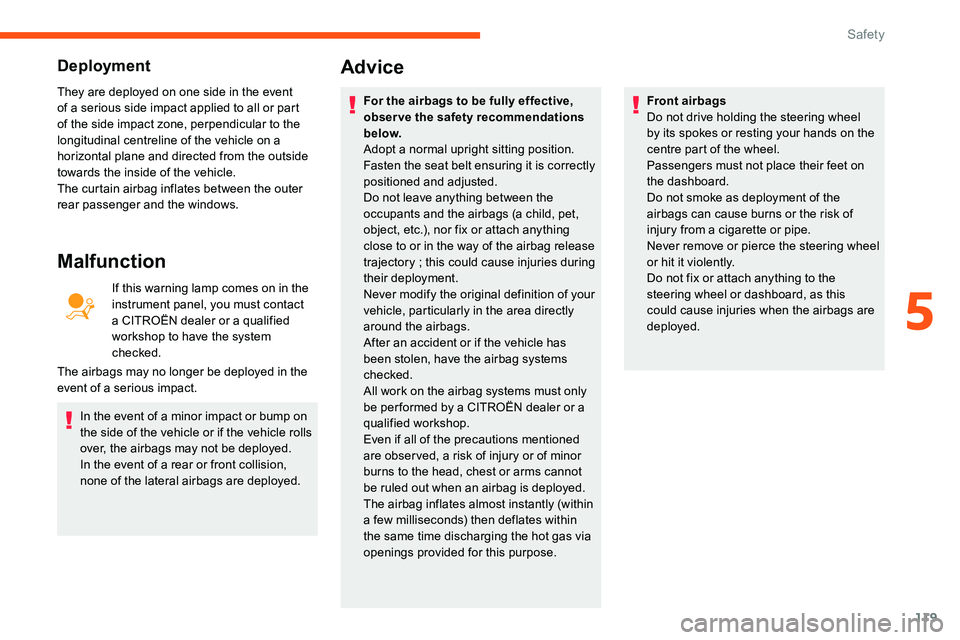
They are deployed on one side in the event
of a serious side impact applied to all or part
of the side impact zone, perpendicular to the
longitudinal centreline of the vehicle on a
horizontal plane and directed from the outside
towards the inside of the vehicle.
The curtain airbag inflates between the outer
rear passenger and the windows.
Malfunction
If this warning lamp comes on in the
instrument panel, you must contact
a CITROËN dealer or a qualified
workshop to have the system
checked.
The airbags may no longer be deployed in the
event of a serious impact.
In the event of a minor impact or bump on
the side of the vehicle or if the vehicle rolls
over, the airbags may not be deployed.
In the event of a rear or front collision,
none of the lateral airbags are deployed.
Advice
For the airbags to be fully effective,
observe the safety recommendations
below.
Adopt a normal upright sitting position.
Fasten the seat belt ensuring it is correctly
positioned and adjusted.
Do not leave anything between the
occupants and the airbags (a child, pet,
object, etc.), nor fix or attach anything
close to or in the way of the airbag release
trajectory
; this could cause injuries during
their deployment.
Never modify the original definition of your
vehicle, particularly in the area directly
around the airbags.
After an accident or if the vehicle has
been stolen, have the airbag systems
checked.
All work on the airbag systems must only
be per formed by a CITROËN dealer or a
qualified workshop.
Even if all of the precautions mentioned
are obser ved, a risk of injury or of minor
burns to the head, chest or arms cannot
be ruled out when an airbag is deployed.
The airbag inflates almost instantly (within
a few milliseconds) then deflates within
the same time discharging the hot gas via
openings provided for this purpose. Front airbags
Do not drive holding the steering wheel
by its spokes or resting your hands on the
centre part of the wheel.
Passengers must not place their feet on
the dashboard.
Do not smoke as deployment of the
airbags can cause burns or the risk of
injury from a cigarette or pipe.
Never remove or pierce the steering wheel
or hit it violently.
Do not fix or attach anything to the
steering wheel or dashboard, as this
could cause injuries when the airbags are
deployed.
5
Safety
Page 122 of 324

120
Curtain airbags
Lateral airbags
Use only approved covers on the seats,
compatible with the deployment of the
lateral airbags. For information on the
range of seat covers suitable for your
vehicle, contact a CITROËN dealer.
Do not fix or attach anything to the seat
backrests (clothes, etc.), as this could
cause injuries to the thorax or arm when
the lateral airbag is deployed.
Do not sit with the upper part of the body
any nearer to the door than necessary.
The vehicle's front door panels include
side impact sensors.
A damaged door or any unauthorised or
incorrectly executed work (modification or
repair) on the front doors or their interior
trim could compromise the operation of
these sensors - risk of malfunction of the
lateral airbags!
Such work must only be done by a
CITROËN dealer or a qualified workshop.
General points relating to
child seats
The legislation on carrying children is
specific to each country. Refer to the
legislation in force in your country. -
S
tatistically, the safest seats in your
vehicle for carr ying children are the rear
seats.
-
A c
hild weighing less than 9 kg must
travel in the "rear ward facing" position
both in the front and in the rear.
It is recommended that children travel on
the rear seats of your vehicle:
- "
rearward facing " up to the age of 3,
- "
forward facing " over the age of 3.
Ensure that the seat belt is positioned and
tightened correctly.
For child seats with a support leg, ensure
that the support leg is in firm and steady
contact with the floor.
At the front: if necessary, adjust the
passenger seat.
At the rear: if necessary, adjust the
relevant front seat.
Remove and stow the head restraint
before installing a child seat with backrest
on a passenger seat. Refit the head
restraint once the child seat has been
removed.
Feel
, Shine , Business
Lounge
Do not fix or attach anything to the roof,
as this could cause head injuries when the
curtain airbag is deployed.
Do not remove the grab handles installed
on the roof, as they play a part in securing
the curtain airbags.
For maximum safety, please obser ve the
following recommendations:
-
I
n accordance with European regulations,
all children under the age of 12 or less
than one and a half metres tall must
travel in approved child seats suited to
their weight , on seats fitted with a seat belt
or ISOFIX mountings.
Safety
Page 123 of 324

121
Advice
An incorrectly installed child seat
compromises the child's safety in the
event of an accident.
Ensure that there is no seat belt or seat
belt buckle under the child seat, as this
could destabilise it.
Remember to fasten the seat belts or the
harness of child seats, keeping the slack
relative to the child's body to a minimum,
even for short journeys.
When installing a child seat using the seat
belt, ensure that the seat belt is tightened
correctly on the child seat and that it
secures the child seat firmly on the seat
of the vehicle. If the passenger seat is
adjustable, move it forwards if necessary.
Remove the head restraint before
installing a child seat with a backrest
on a passenger seat.
Ensure that the head restraint is stored or
attached securely to prevent it from being
thrown around the vehicle in the event
of sharp braking. Refit the head restraint
once the child seat has been removed.Installing a booster seat
The chest part of the seat belt must be
positioned on the child's shoulder without
touching the neck.
Ensure that the lap part of the seat belt
passes correctly over the child's thighs.
Use a booster seat with backrest,
equipped with a belt guide at shoulder
level.
Additional protections
To prevent accidental opening of the doors
and rear windows, use the "Child lock".
Take care not to open the rear windows by
more than one third.
To protect young children from the rays
of the sun, fit side blinds on the rear
windows.
As a safety precaution, do not leave:
-
a c
hild alone and unattended in a
vehicle,
-
a c
hild or an animal in a vehicle
which is exposed to the sun, with the
windows closed,
-
t
he keys within reach of children inside
the vehicle.
Child seat at the front
F Adjust the passenger seat to the highest
and fully back longitudinal position , with
the backrest straightened .
"Forward facing"
You must leave the front passenger airbag
active.
"Rearward facing"
5
Safety
Page 125 of 324

123
F Move the vehicle's front seat for ward and straighten the backrest so that the legs of
the child in the "for ward facing" child seat or
the "rear ward facing" child seat itself do not
touch the vehicle's front seat.
F
V
erify that the backrest of the "for ward
facing" child seat is as close as possible to
the backrest of the vehicle's rear seat, and
is ideally in contact with it.
F
A
djust the rear seat to the fully back
longitudinal position, with the backrest
straightened.
Make sure that the seat belt is correctly
tightened.
For child seats with a support leg, make
sure that the support leg is in firm and
steady contact with the floor. If necessary,
adjust the front seat of the vehicle.
Row 3
If the vehicle is so equipped, when a child seat
is installed on a passenger seat in the 3rd row,
m
ove the seats in the 2nd row for ward and
straighten the backrests so that the child seat
or the legs of the child do not touch the seats in
the 2
nd row.
Recommended child seats
Range of recommended child seats which are secured using a three-point seat belt .
Group 0+: from bir th to 13 kg
L1
"RÖMER Baby-Safe Plus"
Installed in the rearward facing position.
Groups 2 and 3: from 15 to 36
kg
L5
"RÖMER KIDFIX XP"
Can be fitted to the vehicle's ISOFIX mountings.
The child is restrained by the seat belt.
Is only installed on the outer rear seats.
The head restraint on the vehicle seat must be removed. Groups 2 and 3: from 15 to 36
kg
L6
"GRACO Booster"
The child is restrained by the seat belt.
Is only installed on the front passenger seat or on the outer rear seats.
5
Safety
Page 126 of 324

124
Locations for child seats secured using the seat belt
Pursuant to European legislation, the table indicates the options for installing child seats secured using a seat belt and universally approved (a) for the
weight of the child and the seat in the vehicle.Weight of the child and indicative age
Seat positions Under 13
kg
(groups 0 (b) and 0+)Up to about 1 year old From 9 to 18
kg
(g r o u p 1)
From about 1 to 3 years oldFrom 15 to 25
kg
(group 2)
From about 3 to 6 years oldFrom 22 to 36
kg
(group 3)
From about 6 to 10 years old
Cab/Row 1 (c) (f )
Individual seat, passenger seat U
Bench seat, outer seat U
Bench seat, centre seat X
Row 2 (d) (Fixed bench seat)* Rear seats U
*
T
he folding bench seat is in the process of being approved.
Safety
Page 130 of 324

128
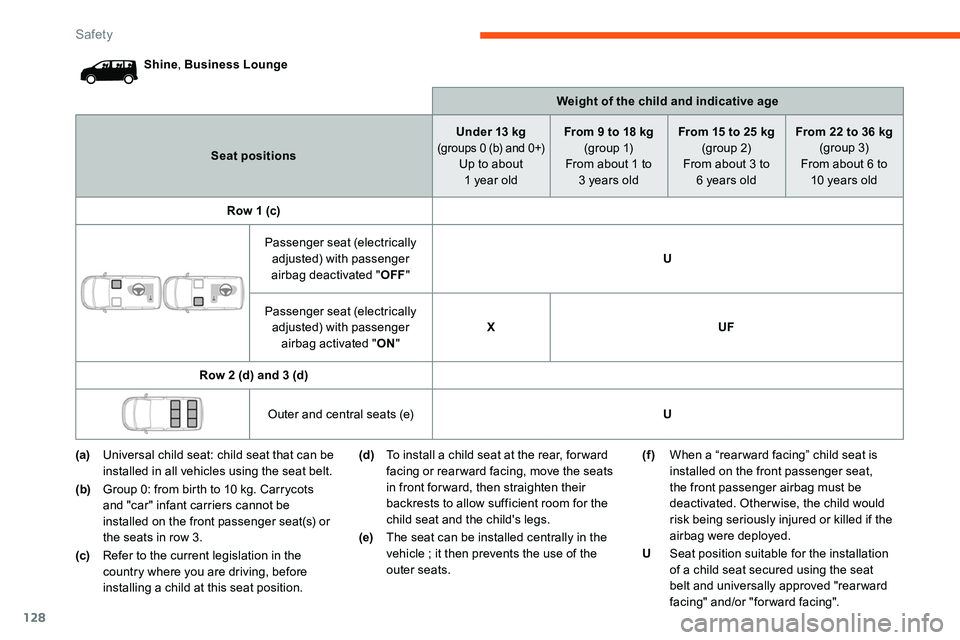
Shine, Business Lounge
Weight of the child and indicative age
Seat positions Under 13
kg
(groups 0 (b) and 0+)Up to about 1 year old From 9 to 18
kg
(g r o u p 1)
From about 1 to 3 years old From 15 to 25
kg
(group 2)
From about 3 to 6 years old From 22 to 36
kg
(group 3)
From about 6 to 10 years old
Row 1 (c)
Passenger seat (electrically adjusted) with passenger
airbag deactivated " OFF" U
Passenger seat (electrically adjusted) with passenger airbag activated " ON" X
UF
Row 2 (d) and 3 (d) Outer and central seats (e) U
(a) Universal child seat: child seat that can be
installed in all vehicles using the seat belt.
(b) Group 0: from birth to 10
kg. Carrycots
and "car" infant carriers cannot be
installed on the front passenger seat(s) or
the seats in row 3.
(c) Refer to the current legislation in the
country where you are driving, before
installing a child at this seat position. (d)
To install a child seat at the rear, for ward
facing or rear ward facing, move the seats
in front for ward, then straighten their
backrests to allow sufficient room for the
child seat and the child's legs.
(e) The seat can be installed centrally in the
vehicle
; it then prevents the use of the
outer seats. (f )
When a “rear ward facing” child seat is
installed on the front passenger seat,
the front passenger airbag must be
deactivated. Otherwise, the child would
risk being seriously injured or killed if the
airbag were deployed.
U Seat position suitable for the installation
of a child seat secured using the seat
belt and universally approved "rear ward
facing" and/or "forward facing".
Safety
Page 131 of 324

129
UFSeat position suitable for the installation
of a child seat secured using the seat belt
and universally approved "forward facing".
X Seat position not suitable for the
installation of a child seat of the weight
class indicated.
"ISOFIX" mountingsThe vehicle has been approved in accordance
with the latest ISOFIX regulation.
If fitted to the vehicle, the ISOFIX regulation
mountings are identified by labels.
The mountings comprise three rings for each
seat:
-
T
wo front rings A , located between the
vehicle seat backrest and cushion, indicated
by an "ISOFIX" marking,
-
I
f fitted to your vehicle, a rear ring B called
the Top Tether and located behind the
vehicle's seat, for securing the upper strap,
as indicated by a "Top Tether" marking.
The Top Tether is used to secure the upper
strap of child seats that have one. This system
prevents the child seat from tipping for ward in
the event of a front impact.
This ISOFIX mounting system provides fast,
reliable and safe fitting of the child seat in your
vehicle. For information on the possibilities for
installing ISOFIX child seats in your
vehicle, refer to the summary table.
The ISOFIX child seats are fitted with two
latches which are secured on the two front
rings A
.
Some child seats also have an upper strap
which is attached to rear ring B .
To secure the child seat to the Top Tether:
-
r
emove and stow the head restraint before
installing a child seat on this seat (refit it
once the child seat has been removed),
-
r
un the strap of the child seat behind the top
of the seat backrest, centring it between the
holes for the head restraint rods,
-
a
ttach the hook of the upper strap to rear
ring B ,
-
t
ighten the upper strap.
The incorrect installation of a child seat in
a vehicle compromises the protection of
the child in the event of an accident.
Strictly follow the fitting instructions
provided in the installation guide supplied
with the child seat.
5
Safety
Page 132 of 324

130
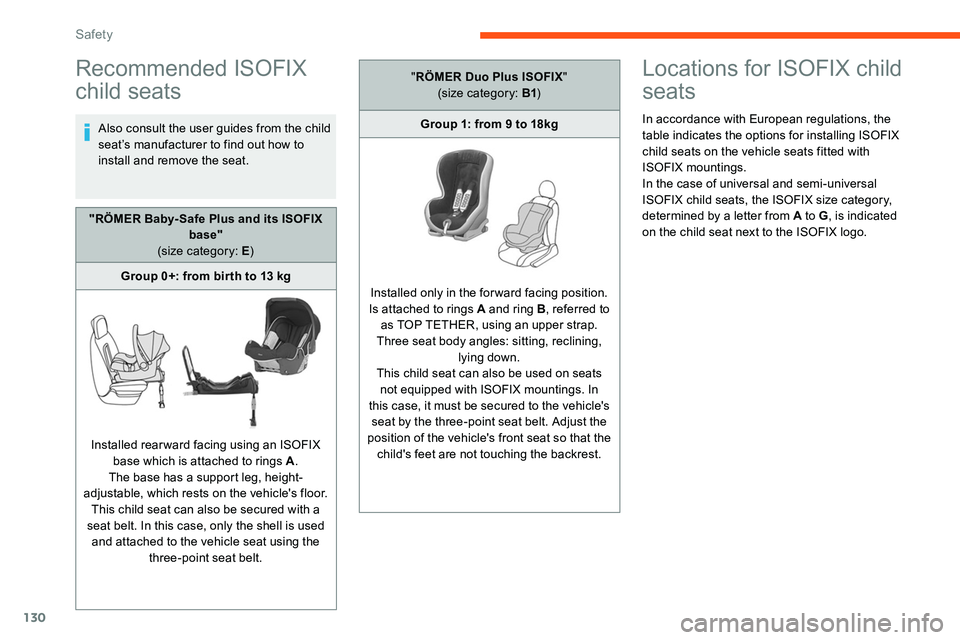
Recommended ISOFIX
child seats
Also consult the user guides from the child
seat’s manufacturer to find out how to
install and remove the seat.
Locations for ISOFIX child
seats
In accordance with European regulations, the
table indicates the options for installing ISOFIX
child seats on the vehicle seats fitted with
ISOFIX mountings.
In the case of universal and semi-universal
ISOFIX child seats, the ISOFIX size category,
determined by a letter from A to G, is indicated
on the child seat next to the ISOFIX logo.
"RÖMER Baby- Safe Plus and its ISOFIX
base"
(size category: E )
Group 0+: from bir th to 13
kg
Installed rearward facing using an ISOFIX base which is attached to rings A .
The base has a support leg, height-
adjustable, which rests on the vehicle's floor. This child seat can also be secured with a
seat belt. In this case, only the shell is used and attached to the vehicle seat using the three-point seat belt. "
RÖMER Duo Plus ISOFIX "
(size category: B1 )
Group 1: from 9 to 18kg
Installed only in the forward facing position.
Is attached to rings A and ring B , referred to
as TOP TETHER, using an upper strap.
Three seat body angles: sitting, reclining, lying down.
This child seat can also be used on seats not equipped with ISOFIX mountings. In
this case, it must be secured to the vehicle's seat by the three-point seat belt. Adjust the
position of the vehicle's front seat so that the child's feet are not touching the backrest.
Safety
Page 155 of 324

153
Deactivation/Activation
With / Without audio system
If the system has been deactivated
in STOP mode, the engine restarts
immediately.
Operation
Main conditions for operation
- T he driver’s door must be closed.
-
T
he sliding side door must be closed.
-
T
he driver's seat belt must be fastened.
-
T
he state of charge of the battery must be
sufficient.
-
T
he temperature of the engine must be
within its nominal operating range.
-
T
he outside temperature must be between
0°C and 35
°C.
Putting the engine into standby
(STOP mode)
The engine automatically goes into standby
as soon as the driver indicates the intention of
stopping.
With a manual gearbox : at a speed below
12 mph (20
km/h) or the vehicle stopped
(depending on engine), with the gear lever in
neutral and clutch pedal released.
With an automatic gearbox : with the brake
pedal depressed or the gear selector in
position
N, with the vehicle stopped.
With an electronic gearbox : at a speed
below 12 mph (20
km/h), with the brake pedal
depressed or the gear selector in position N ,
with the vehicle stopped.
Time counter
A time counter adds up the time spent in
standby during a journey. It resets to zero every
time the ignition is switched on.
Special cases:
The engine does not go into standby if one of
the operating conditions is not met and in the
following cases.
-
S
teep slope (rising or falling).
-
V
ehicle speed has not exceeded 6 mph
(10
km/h) since the last engine start (with
the key or the " START/STOP" b u t to n).
-
N
eeded to maintain a comfortable
temperature in the passenger compartment.
-
D
emisting active. In these cases, this indicator lamp
flashes for a few seconds, then goes
of f.
After the engine has restarted, STOP
mode is not available as long as the
vehicle has not reached a speed of 5 mph
(8
km/h).
During parking manoeuvres, STOP mode
is not available for a few seconds after
coming out of reverse gear or turning the
steering wheel.
F
T
o deactivate or reactivate the system,
press this button.
The indicator lamp is lit when the system is
deactivated .
With touch screen
Activation or deactivation is done via
the vehicle configuration menu.
The system reactivates automatically
every time the engine is started by the
driver.
6
Driving
Page 174 of 324

172
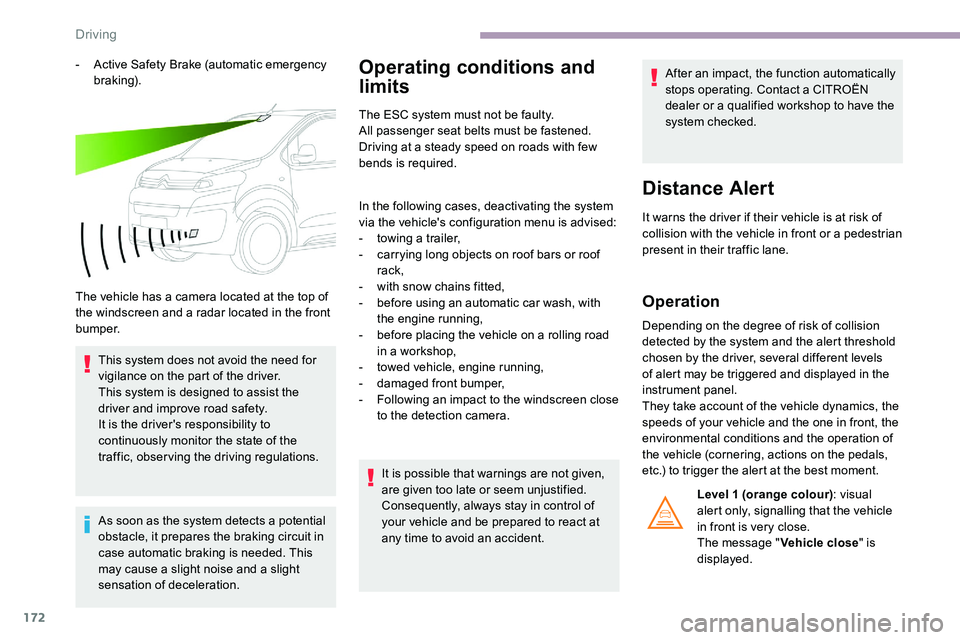
- Active Safety Brake (automatic emergency b r ak ing).
The vehicle has a camera located at the top of
the windscreen and a radar located in the front
b u m p e r. This system does not avoid the need for
vigilance on the part of the driver.
This system is designed to assist the
driver and improve road safety.
It is the driver's responsibility to
continuously monitor the state of the
traffic, observing the driving regulations.
As soon as the system detects a potential
obstacle, it prepares the braking circuit in
case automatic braking is needed. This
may cause a slight noise and a slight
sensation of deceleration.Operating conditions and
limits
The ESC system must not be faulty.
All passenger seat belts must be fastened.
Driving at a steady speed on roads with few
bends is required.
In the following cases, deactivating the system
via the vehicle's configuration menu is advised:
-
t
owing a trailer,
-
c
arrying long objects on roof bars or roof
rack,
-
w
ith snow chains fitted,
-
b
efore using an automatic car wash, with
the engine running,
-
b
efore placing the vehicle on a rolling road
in a workshop,
-
t
owed vehicle, engine running,
-
d
amaged front bumper,
-
F
ollowing an impact to the windscreen close
to the detection camera.
It is possible that warnings are not given,
are given too late or seem unjustified.
Consequently, always stay in control of
your vehicle and be prepared to react at
any time to avoid an accident. After an impact, the function automatically
stops operating. Contact a CITROËN
dealer or a qualified workshop to have the
system checked.
Distance Alert
It warns the driver if their vehicle is at risk of
collision with the vehicle in front or a pedestrian
present in their traffic lane.
Operation
Depending on the degree of risk of collision
detected by the system and the alert threshold
chosen by the driver, several different levels
of alert may be triggered and displayed in the
instrument panel.
They take account of the vehicle dynamics, the
speeds of your vehicle and the one in front, the
environmental conditions and the operation of
the vehicle (cornering, actions on the pedals,
etc.) to trigger the alert at the best moment.
Level
1 (orange colour) : visual
alert only, signalling that the vehicle
in front is very close.
The message " Vehicle close" is
displayed.
Driving