headlamp CITROEN DISPATCH SPACETOURER DAG 2018 Handbook (in English)
[x] Cancel search | Manufacturer: CITROEN, Model Year: 2018, Model line: DISPATCH SPACETOURER DAG, Model: CITROEN DISPATCH SPACETOURER DAG 2018Pages: 400, PDF Size: 16.99 MB
Page 4 of 400
2
.
.
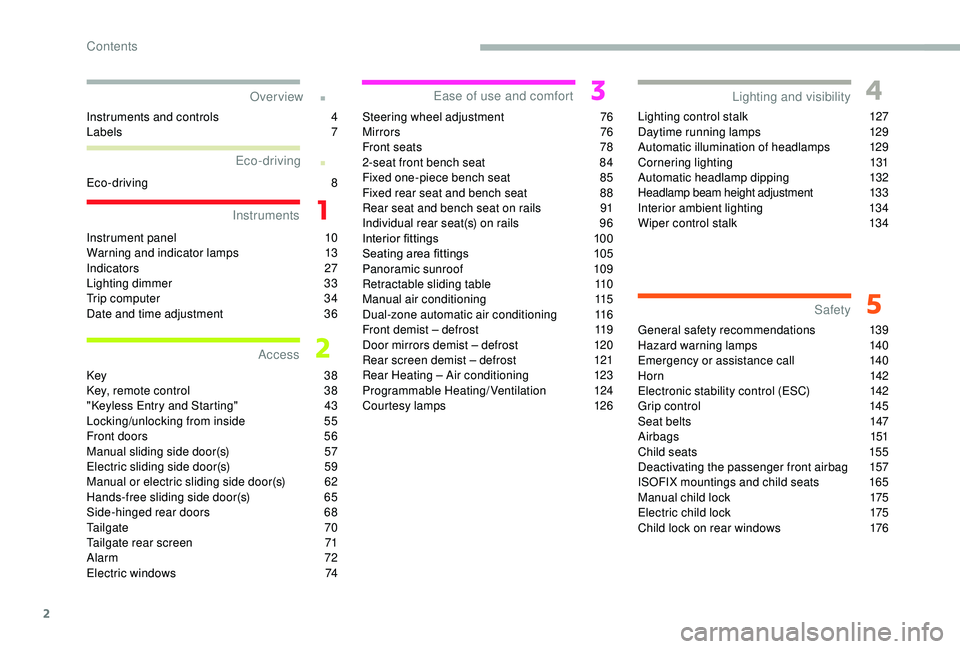
Instrument panel 10
Warning and indicator lamps 1 3
Indicators
2
7
Lighting dimmer
3
3
Trip computer
3
4
Date and time adjustment
3
6
Key
38
Key, remote control
3
8
"
K
eyless Entry and Starting"
4
3
Locking/unlocking from inside
5
5
Front doors
5
6
Manual sliding side door(s)
5
7
Electric sliding side door(s)
5
9
Manual or electric sliding side door(s)
6
2
Hands-free sliding side door(s)
6
5
Side-hinged rear doors
6
8
Tailgate
7
0
Tailgate rear screen
7
1
Alarm
72
Electric windows
7
4Steering wheel adjustment
7
6
Mirrors
76
F
ront seats
7
8
2-seat front bench seat
8
4
Fixed one-piece bench seat
8
5
Fixed rear seat and bench seat
8
8
Rear seat and bench seat on rails
9
1
Individual rear seat(s) on rails 9 6
Interior fittings 1 00
Seating area fittings
1
05
Panoramic sunroof
1
09
Retractable sliding table
1
10
Manual air conditioning
1
15
Dual-zone automatic air conditioning
1
16
Front demist – defrost
1
19
Door mirrors demist – defrost
1
20
Rear screen demist – defrost
1
21
Rear Heating – Air conditioning
1
23
Programmable Heating/Ventilation
1
24
Courtesy lamps
1
26Lighting control stalk
1
27
Daytime running lamps
1
29
Automatic illumination of headlamps
1
29
Cornering lighting
1
31
Automatic headlamp dipping
1
32
Headlamp beam height adjustment
1
33
Interior ambient lighting
1
34
Wiper control stalk 1 34
General safety recommendations
1
39
Hazard warning lamps
1
40
Emergency or assistance call
1
40
Hor n
142
Electronic stability control (ESC)
1
42
Grip control
1
45
Seat belts
1
47
Airbags
1
51
Child seats
1
55
Deactivating the passenger front airbag
1
57
ISOFIX mountings and child seats
1
65
Manual child lock
1
75
Electric child lock
1
75
Child lock on rear windows
1
76
Over view
Instruments
Access Ease of use and comfort
Safety
Lighting and visibility
Eco-driving
Instruments and controls 4
L abels 7
Eco-driving
8
Contents
Page 8 of 400
6
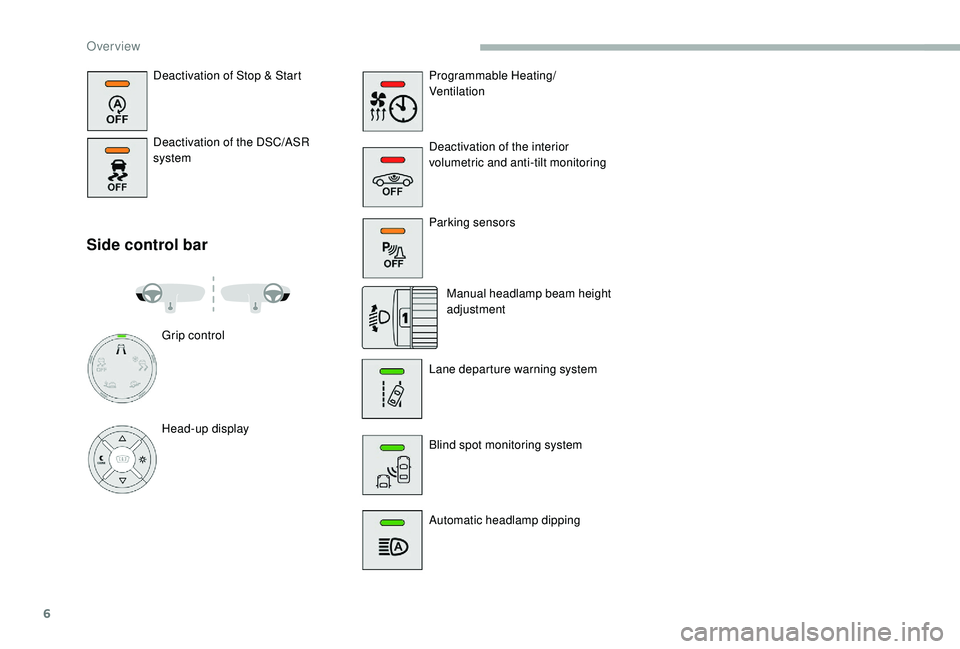
Deactivation of Stop & Start
Deactivation of the DSC/ASR
system
Side control bar
Programmable Heating/
Ventilation
Deactivation of the interior
volumetric and anti-tilt monitoring
Parking sensorsManual headlamp beam height
adjustment
Lane departure warning system
Blind spot monitoring system
Automatic headlamp dipping
Grip control
Head-up display
Over view
Page 10 of 400
8
As a passenger, if you avoid connecting your
multimedia devices (film, music, video game
etc.), you will contribute towards limiting the
consumption of electrical energy, and so of
fuel.
Disconnect your portable devices before
leaving the vehicle.
Eco- driving
Eco-driving is a range of everyday practices that allow the motorist to optimise their fuel consumption and CO2 emissions.
Optimise the use of your
gearbox
With a manual gearbox, move off gently
and change up without waiting. During
acceleration, change up early.
With an automatic gearbox, favour automatic
mode and avoid pressing the accelerator
pedal heavily or suddenly.
The gear efficiency indicator invites you to
engage the most suitable gear: as soon as the
indication is displayed in the instrument panel,
follow it straight away.
For vehicles fitted with an automatic gearbox,
this indicator appears only in manual mode.
Drive smoothly
Maintain a safe distance between vehicles,
use engine braking rather than the
brake pedal, and press the accelerator
progressively. These practices contribute
towards a reduction in fuel consumption and
CO
2 emissions and also help reduce the
background traffic noise.
If your vehicle has cruise control, make use of
the system at speeds above 25
mph (40 km/h)
when the traffic is flowing well.
Control the use of your electrical
equipment
Before moving off, if the passenger
compartment is too warm, ventilate it by
opening the windows and air vents before
using the air conditioning.
Above around 30
mph (50 km/h), close the
windows and leave the air vents open.
Consider using equipment that can help
keep the temperature in the passenger
compartment down (sunroof blind and window
blinds, etc.). Switch off the headlamps and front foglamps
when the ambient light level does not require
their use.
Avoid running the engine before moving off,
particularly in winter; your vehicle will warm up
much faster while driving. Unless it has automatic regulation, switch off
the air conditioning as soon as the desired
temperature has been reached.
Switch off the demisting and defrosting
controls, if these are not automatically
managed.
Switch off the heated seat as soon as
possible.
Eco-driving
Page 27 of 400
25
Warning/indicator lampStateCause Action/Observations
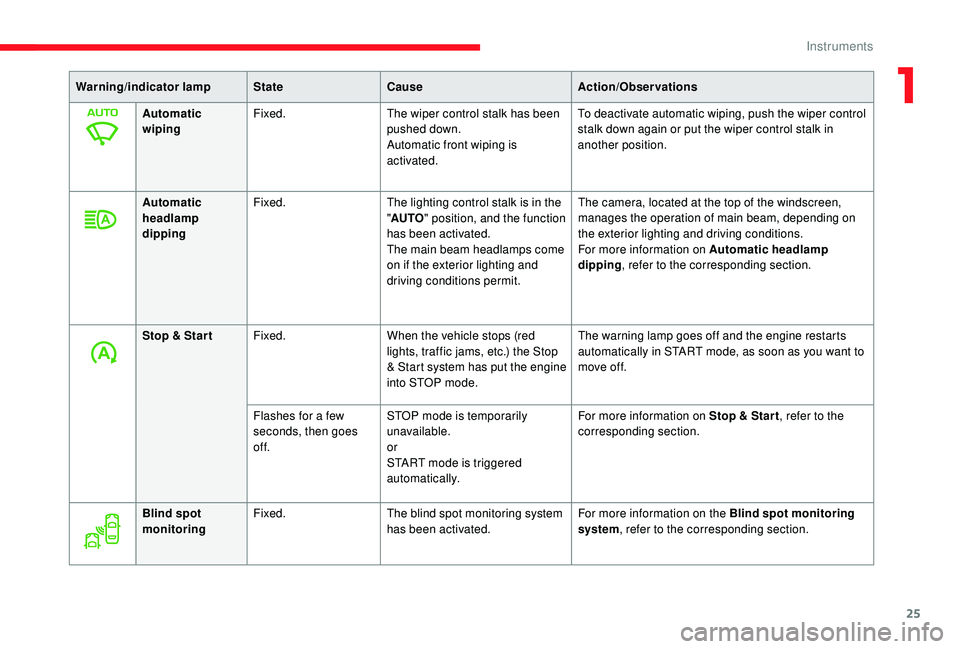
Automatic
wiping Fixed.
The wiper control stalk has been
pushed down.
Automatic front wiping is
activated. To deactivate automatic wiping, push the wiper control
stalk down again or put the wiper control stalk in
another position.
Automatic
headlamp
dipping Fixed.
The lighting control stalk is in the
"AUTO " position, and the function
has been activated.
The main beam headlamps come
on if the exterior lighting and
driving conditions permit. The camera, located at the top of the windscreen,
manages the operation of main beam, depending on
the exterior lighting and driving conditions.
For more information on Automatic headlamp
dipping
, refer to the corresponding section.
Stop & Star t Fixed. When the vehicle stops (red
lights, traffic jams, etc.) the Stop
& Start system has put the engine
into STOP mode. The warning lamp goes off and the engine restarts
automatically in START mode, as soon as you want to
move off.
Flashes for a few
seconds, then goes
of f. STOP mode is temporarily
unavailable.
or
START mode is triggered
automatically. For more information on Stop & Star t
, refer to the
corresponding section.
Blind spot
monitoring Fixed.
The blind spot monitoring system
has been activated. For more information on the Blind spot monitoring
system, refer to the corresponding section.
1
Instruments
Page 28 of 400
26
Warning/indicator lampStateCause Action/Observations
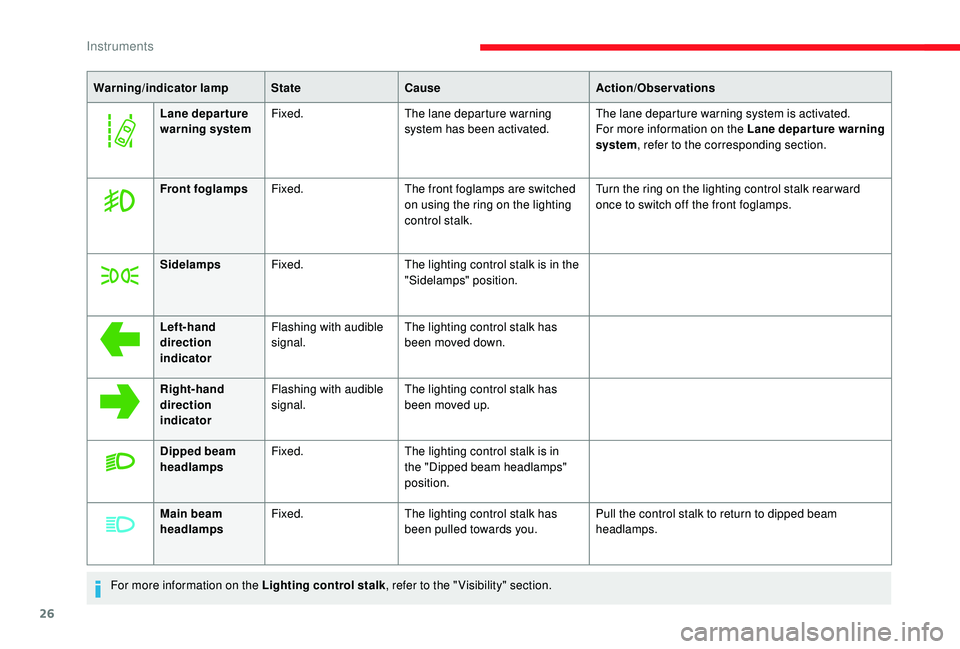
Lane depar ture
warning system Fixed.
The lane departure warning
system has been activated. The lane departure warning system is activated.
For more information on the Lane depar ture warning
system, refer to the corresponding section.
Front foglamps Fixed. The front foglamps are switched
on using the ring on the lighting
control stalk. Turn the ring on the lighting control stalk rear ward
once to switch off the front foglamps.
Sidelamps Fixed. The lighting control stalk is in the
"Sidelamps" position.
Left-hand
direction
indicator Flashing with audible
signal.
The lighting control stalk has
been moved down.
Right-hand
direction
indicator Flashing with audible
signal.
The lighting control stalk has
been moved up.
Dipped beam
headlamps Fixed.
The lighting control stalk is in
the "Dipped beam headlamps"
position.
Main beam
headlamps Fixed.
The lighting control stalk has
been pulled towards you. Pull the control stalk to return to dipped beam
headlamps.
For more information on the Lighting control stalk , refer to the " Visibility" section.
Instruments
Page 42 of 400
40
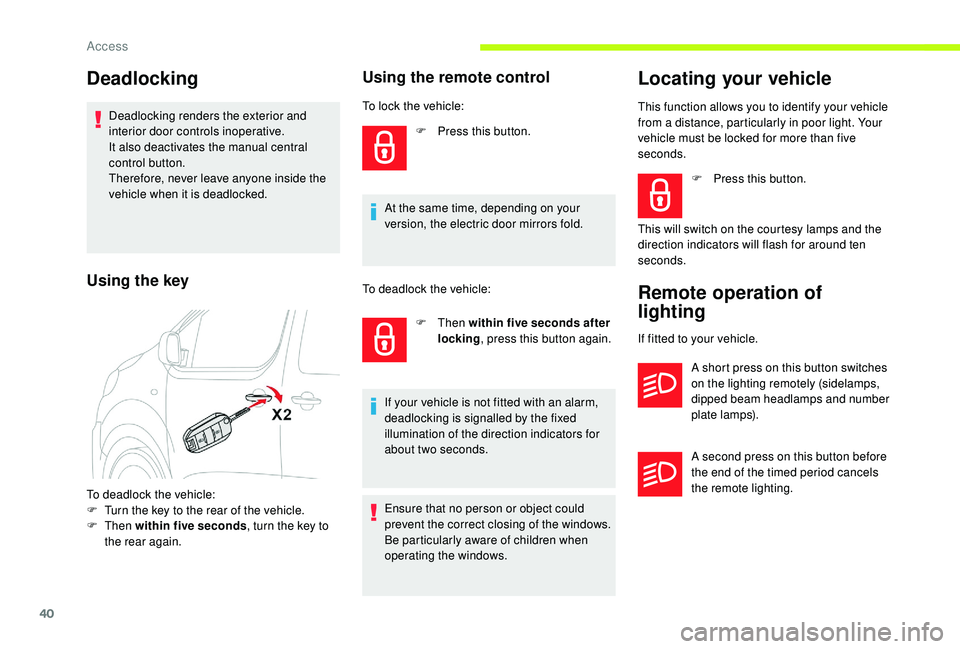
Deadlocking
Deadlocking renders the exterior and
interior door controls inoperative.
It also deactivates the manual central
control button.
Therefore, never leave anyone inside the
vehicle when it is deadlocked.
Using the remote control
F Press this button.
At the same time, depending on your
version, the electric door mirrors fold.
F
Then within five seconds after
locking , press this button again.
If your vehicle is not fitted with an alarm,
deadlocking is signalled by the fixed
illumination of the direction indicators for
about two seconds.
Ensure that no person or object could
prevent the correct closing of the windows.
Be particularly aware of children when
operating the windows.
Locating your vehicle
This function allows you to identify your vehicle
from a distance, particularly in poor light. Your
vehicle must be locked for more than five
seconds.
Remote operation of
lighting
If fitted to your vehicle. A short press on this button switches
on the lighting remotely (sidelamps,
dipped beam headlamps and number
plate lamps).
A second press on this button before
the end of the timed period cancels
the remote lighting.
Using the key
To deadlock the vehicle:
F T urn the key to the rear of the vehicle.
F
Then within five seconds , turn the key to
the rear again. To lock the vehicle:
To deadlock the vehicle:
F
P
ress this button.
This will switch on the courtesy lamps and the
direction indicators will flash for around ten
seconds.
Access
Page 53 of 400

51
Locating your vehicle
This function allows you to identify your vehicle
from a distance, particularly in poor light. Your
vehicle must have been locked for more than
five seconds.
Remote operation of
lighting
If fitted to your vehicle.A short press on this button switches
on the lighting remotely (sidelamps,
dipped beam headlamps and number
plate lamps).
A second press on this button before
the end of the timed period cancels
the remote lighting.
Anti-theft protection
Electronic engine immobiliser
The remote control contains an electronic chip
which has a secret code. When the ignition is
switched on, this code must be recognised in
order for starting to be possible.
A few seconds after switching off the ignition,
this system locks the engine control system,
therefore preventing the engine from being
started in the event of a break-in.
In the event of a fault, you are
informed by illumination of this
warning lamp, an audible signal and
a message in the screen.
The vehicle will not start; contact a CITROËN
dealer as soon as possible.
F
P
ress this button.
This will switch on the courtesy lamps and the
direction indicators will flash for around ten
seconds.
B a c k- u p c o nt r o l (s)
Integral key
If the alarm is activated, the audible signal
triggered on opening a door with the key
(integral with the remote control) will stop
when the ignition is switched on.
It is used to lock and unlock the vehicle when
the remote control cannot operate:
-
c
ell battery flat, vehicle battery discharged
or disconnected, etc.
-
v
ehicle located in an area with strong
electromagnetic signals.
F
H
old button 1 pulled to extract the integral
key 2 .
2
Access
Page 79 of 400

77
Heated mirrors
If your vehicle has heated door mirrors:
orF
P
ress the heated mirror button.
For more information on Rear screen
demist - defrost , refer to the associated
section. As a safety measure, the mirrors should
be adjusted to reduce the blind spots.
The objects obser ved are, in reality, closer
than they appear.
Take this into account in order to
correctly judge the distance of vehicles
approaching from behind.Rear view mirror
Equipped with an anti-dazzle system, which
darkens the mirror glass and reduces the
nuisance to the driver caused by the sun,
headlamps from other vehicles, etc.
Manual model
Adjustment
F
A djust the mirror so that the glass is
directed correctly in the "day" position. Day/night position
F
P
ull the lever to change to the "night" anti-
dazzle position.
F
P
ush the lever to change to the normal
"day" position.
Automatic "electrochrome"
model
F Press the heated rear window button.
In order to ensure optimum visibility during
your manoeuvres, the mirror lightens
automatically when reverse gear is
engaged.
This system automatically and progressively
changes between day and night use by means
of a sensor measuring the light coming from the
rear of the vehicle.
3
Ease of use and comfort
Page 129 of 400

127
Lighting control stalk
Main lighting
Selection of main lighting mode
Turn the ring to align the desired symbol with
the marking.Automatic illumination of headlamps.
Sidelamps only.
Dipped or main beam headlamps.
Switching the headlamps (dipped
beam/main beam)
In the lighting off and sidelamps modes, the
driver can switch on the main beam headlamps
temporarily ("headlamp flash"), for as long as
the stalk is kept pulled.Operation of the selected lighting is
confirmed by the illumination of the
corresponding indicator lamp.
Without AUTO lighting
With AUTO lighting
In some weather conditions (e.g. low
temperature or humidity), the presence
of misting on the internal sur face of the
glass of the headlamps and rear lamps is
normal; it disappears after the lamps have
been on for a few minutes.
Foglamps
With rear foglamp only
Lighting off (ignition off) /
Daytime running lamps (engine
running).
Pull the stalk to switch between dipped and
main beam headlamps. It operates with the sidelamps on.
F
T
o switch it on, turn the ring for wards.
When the lighting is switched off automatically
(version with AUTO lighting), the foglamp and
the dipped beam headlamps will remain on.
F
T
o switch it off, turn the ring rear wards.
4
Lighting and visibility
Page 130 of 400

128
With front and rear foglamps
They operate with dipped beam
headlamps on, in manual or auto
mode.
Rotate and release the ring:
F
o
nce for wards to switch on the front
foglamps,
F
f
or wards a second time to switch on the rear
foglamps.
F
o
nce backwards to switch off the rear
foglamps,
F
b
ackwards a second time to switch off the
front foglamps.
If the lamps are switched off automatically
(version with AUTO lighting) or the dipped
beams are switched off manually, the foglamps
and sidelamps remain on.
F
T
urn the ring backwards to switch off the
foglamps, the sidelamps will then switch off. When lighting is left on
An audible signal when a front door is
opened warns the driver that the vehicle's
exterior lighting is on, with the ignition off
and in manual lighting mode.
In this case, switching off the lighting
stops the audible signal.
The lighting goes off when you switch off
the ignition, but you can always switch it
on again using the lighting control stalk.
Travelling abroad
If using your vehicle in a country that
drives on the other side of the road, the
headlamps must be adjusted to avoid
dazzling on-coming drivers.
Contact a CITROËN dealer or a qualified
workshop. In good or rainy weather, by both day and
night, use of the front foglamps and the
rear foglamps are prohibited. In these
situations, the power of their beams may
dazzle other drivers. They should only be
used in fog or falling snow.
In these weather conditions, it is your
responsibility to switch on the foglamps
and dipped headlamps manually as the
sunshine sensor may detect sufficient
light.
Switch off the front and rear foglamps
when they are no longer necessary.
Lighting and visibility