ignition Citroen DS3 2014 1.G Repair Manual
[x] Cancel search | Manufacturer: CITROEN, Model Year: 2014, Model line: DS3, Model: Citroen DS3 2014 1.GPages: 376, PDF Size: 12.55 MB
Page 237 of 376
235
DS3_en_Chap10_info-pratiques_ed01-2014
Changing a front or rear wiper bladeProcedure for replacing a worn wiper blade with a new one without the use of tools.
Before removing a front
wiper blade
F Within one minute after switching off the i
gnition, operate the wiper stalk to position
t
he wiper blades in the vertical position.
This
position must be used in order to avoid
d
amaging the wiper blade and the bonnet.
Removal
F Raise the corresponding wiper arm.
F U nclip the wiper blade and remove it.
Fitting
F At the front, check the size of the wiper b
lade as the shorter blade is fitted to the
passenger
side of the vehicle.
F
P
ut the corresponding new wiper blade in
p
lace and clip it.
F
F
old down the wiper arm carefully.
After fitting a front wiper
blade
F Switch on the ignition.
F O perate the wiper stalk again to park the
w
iper blades.
Load reduction modeSystem which manages the use of certain functions according to the level of charge
r
emaining in the battery.
When
the vehicle is being driven, the load
r
eduction function temporarily deactivates
c
ertain functions, such as the air conditioning,
t
he heated rear screen...
The deactivated functions are reactivated
automatically
as soon as conditions permit.
Practical information
Page 239 of 376
237
DS3_en_Chap10_info-pratiques_ed01-2014
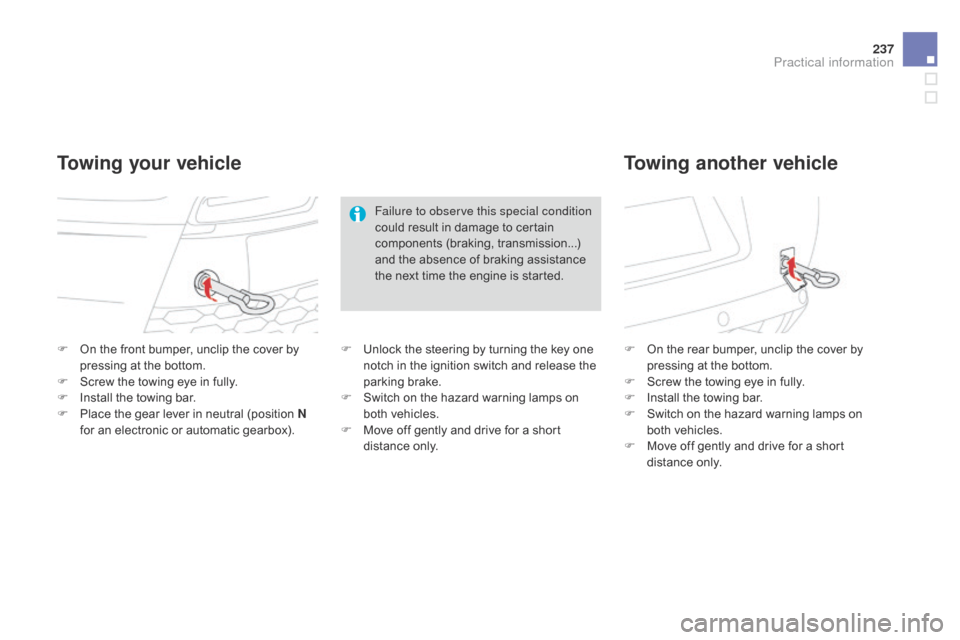
F On the front bumper, unclip the cover by p
ressing at the bottom.
F
S
crew the towing eye in fully.
F
I
nstall the towing bar.
F
P
lace the gear lever in neutral (position N
for
an electronic or automatic gearbox). F
O n the rear bumper, unclip the cover by p
ressing at the bottom.
F
S
crew the towing eye in fully.
F
I
nstall the towing bar.
F
S
witch on the hazard warning lamps on
b
oth vehicles.
F
M
ove off gently and drive for a short
d
istance
o
nly.
Towing your vehicleTowing another vehicle
Failure to observe this special condition
could
result in damage to certain
c
omponents (braking, transmission...)
a
nd the absence of braking assistance
t
he next time the engine is started.
F
U
nlock the steering by turning the key one
n
otch in the ignition switch and release the
par
king
b
rake.
F
S
witch on the hazard warning lamps on
b
oth vehicles.
F
M
ove off gently and drive for a short
d
istance
o
nly.
Practical information
Page 253 of 376
251
DS3_en_Chap11_verifications_ed01-2014
Checking levels
Check all of these levels regularly, in line with the maintenance and warranty guide. Top them up if necessary, unless other wise indicated.
I f a level drops significantly, have the corresponding system checked by a CITROËN dealer or a qualified workshop.
Engine oil level
It is normal to top up the oil level between two services (or oil changes). CITROËN
r
ecommends that you check the level, and top
u
p if necessary, every 3 000 miles (5 000 kms).
The
check is carried out either when
t
he ignition is switched on using the
o
il level indicator in the instrument
p
anel for vehicles with an electric oil
level gauge, or using the dipstick.
To ensure that the reading is correct,
y
our vehicle must be parked on a level
s
ur face with the engine having been off
f
or more than 30 minutes.
Take care when working under the
b
onnet, as certain areas of the engine
m
ay be extremely hot (risk of burns)
a
nd the cooling fan could start at any
t
ime (even with the ignition off).
checking using the dipstick
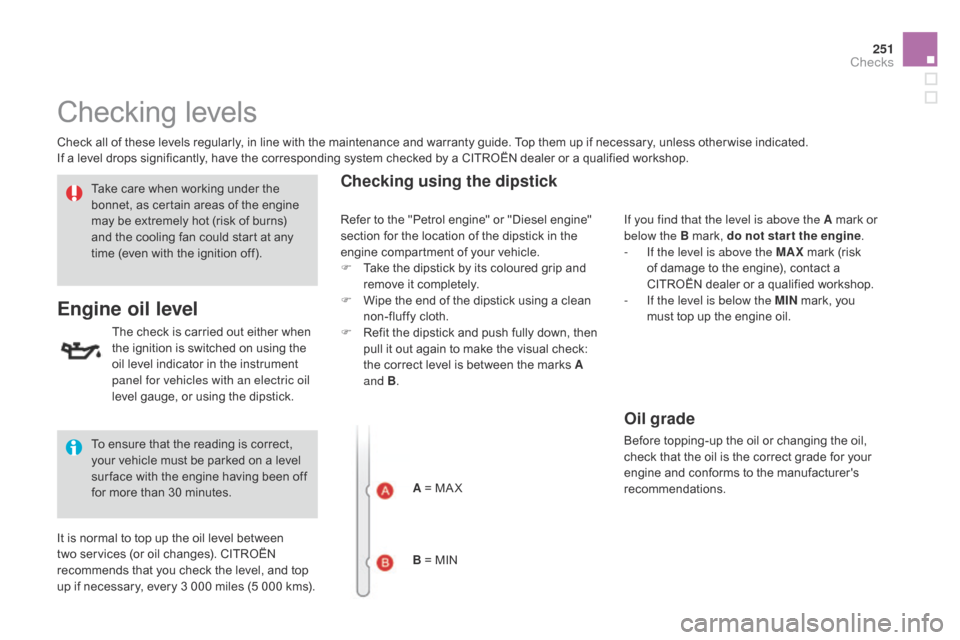
A = MA X
B = MIN If you find that the level is above the A
mark or
belo
w the B mark, do not star t the engine
.
-
I
f the level is above the MAX
mark (risk
o
f damage to the engine), contact a
C
ITROËN dealer or a qualified workshop.
-
I
f the level is below the MIN
mark, you
m
ust top up the engine oil.
Refer
to
the
"Petrol engine" or "Diesel engine"
s
ection
for
the location of the dipstick in the
e
ngine
compartment of your vehicle.
F
T
ake
the
dipstick by its coloured grip and
r
emove
it completely.
F
W
ipe
the
end of the dipstick using a clean
n
on-fluffy cloth.
F
R
efit
the
dipstick and push fully down, then
p
ull
it
out again to make the visual check:
t
he
correct level is between the marks A
and B .
Oil grade
Before topping-up the oil or changing the oil, c
heck that the oil is the correct grade for your
e
ngine and conforms to the manufacturer's
r
ecommendations.
checks
Page 254 of 376
DS3_en_Chap11_verifications_ed01-2014
Brake fluid level
Changing the fluid
Refer to the maintenance and warranty guide for details of the interval for this operation.
Fluid specification
The brake fluid must conform to the manufacturer's r ecommendations.
The
brake fluid level should be close
t
o the "MA X" mark. If it is not, check
t
he brake pad wear.
After
topping
up
the
oil,
the
check
when
s
witching
on
the
ignition
with
the
oil
level
i
ndicator
in
the
instrument
panel
is
not
valid
d
uring
the
30
minutes
after
topping
up.
Topping up the engine oil level
Refer to the "Petrol engine" or "Diesel engine" s ection for the location of the oil filler cap in the
engine
compartment of your vehicle.
F
U
nscrew the oil filler cap to reveal the filler
aperture.
F
A
dd oil in small quantities, avoiding any
s
pills on engine components (risk of fire).
F
W
ait a few minutes before checking the
l
evel again using the dipstick.
F
A
dd more oil if necessary.
F
A
fter checking the level, carefully refit the
o
il filler cap and the dipstick in its tube.
Engine oil change
Refer to the maintenance and warranty guide for details of the interval for this operation.
In
order to maintain the reliability of the engine
a
nd emission control system, never use
a
dditives in the engine oil.
Page 282 of 376
DS3_en_Chap13a_bTa_ed01-2014
EMERGENcY OR ASSIST AN c E c ALL
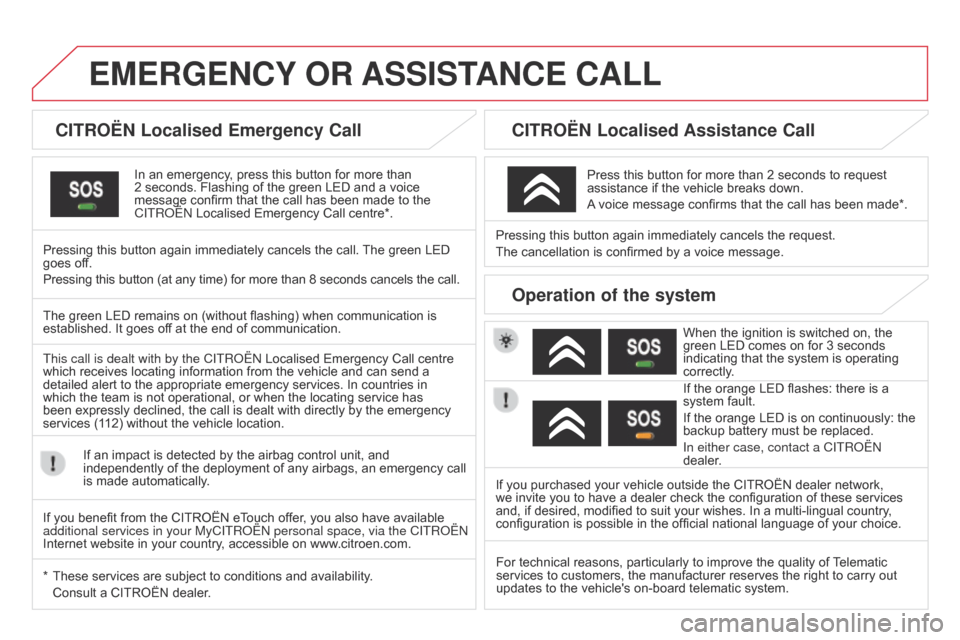
cITROËN Localised Emergency call
In an emergency, press this button for more than 2
seconds. Flashing of the green LED and a voice
message
confirm that the call has been made to the
C
ITR o ËN Localised Emergency Call centre*.
Pressing
this
button again immediately cancels the call.
The
green LED
goes
off.
Pressing
this
button (at any time) for more than 8 seconds cancels the call.
cITROËN Localised Assistance call
When the ignition is switched on, the green LED comes on for 3 seconds
indicating
that the system is operating
correctly
.
If
the orange LED flashes: there is a
system
fault.
If
the orange LED is on continuously: the
backup
battery must be replaced.
In either case, contact a CITR
o ËN
dealer.
Pressing
this
button
again
immediately cancels the request.
The
cancellation
is
confirmed
by
a voice message.
Press
this
button for more than 2 seconds to request
assistance
if
the
vehicle breaks down.
A
voice
message confirms that the call has been made*.
Operation of the system
The green LED remains on (without flashing) when communication is established.
It goes off at the end of communication.
This call is dealt with by the C
ITR o ËN Localised Emergency Call centre
which
receives locating information from the vehicle and can send a
detailed
alert to the appropriate emergency services. In countries in
which
the team is not operational, or when the locating service has
been
expressly declined, the call is dealt with directly by the emergency
services
(112) without the vehicle location.
If
an impact is detected by the airbag control unit, and
independently
of the deployment of any airbags, an emergency call
is
made automatically.
*
These
services are subject to conditions and availability.
Consult
a CITROËN dealer. If
you purchased your vehicle outside the CITROËN dealer network,
we
invite you to have a dealer check the configuration of these services
and,
if desired, modified to suit your wishes. In a multi-lingual country,
configuration
is possible in the official national language of your choice.
For
technical reasons, particularly to improve the quality of
T
elematic
services
to customers, the manufacturer reserves the right to carry out
updates
to the vehicle's on-board telematic system.
If
you benefit from the CITROËN eTouch offer, you also have available
additional
services in your MyCITR o ËN personal space, via the CITR o ËN
Internet
website in your country, accessible on www.citroen.com.
Page 307 of 376
06
305
DS3_en_Chap13b_RT6-2-8_ed01-2014
USING THE TELEPHONE
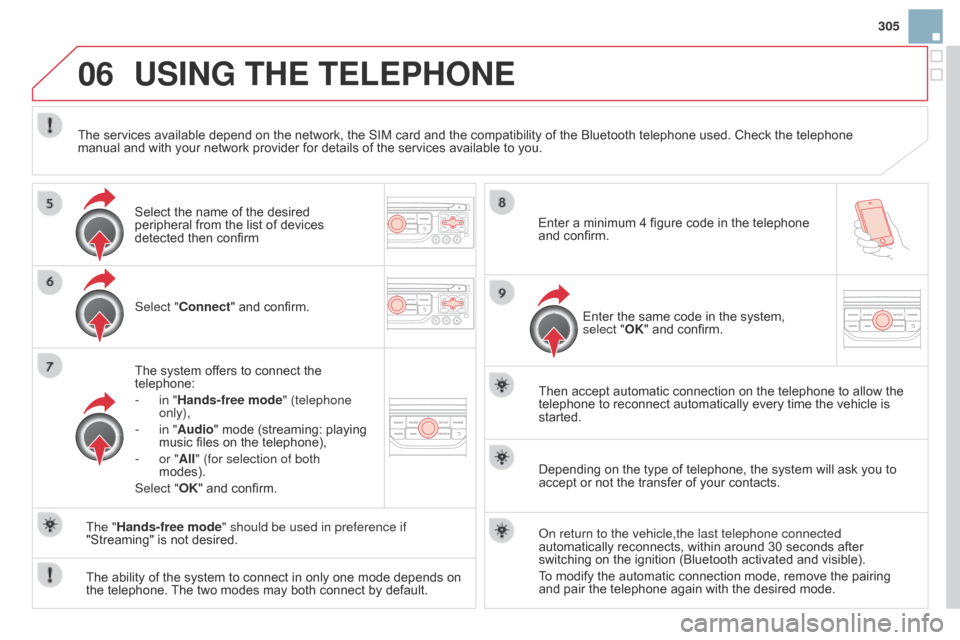
Select "connect" and confirm.
The system offers to connect the
telephone:
-
in "
Hands-free mode" (telephone
only),
-
in "
Audio" mode (streaming: playing
music
files on the telephone),
-
or "
All" (for selection of both
modes).
Select "OK"
and confirm. Then
accept automatic connection on the telephone to allow the
telephone
to reconnect automatically every time the vehicle is
started.
The
ability of the system to connect in only one mode depends on
the
telephone.
The
two modes may both connect by default.
The "Hands-free mode" should be used in preference if
"Streaming"
is not desired.
The
services available depend on the network, the SIM card and the compatibility of the Bluetooth telephone used. Check the telephone
manual
and with your network provider for details of the services available to you.
Depending on the type of telephone, the system will ask you to
accept
or not the transfer of your contacts.
o
n return to the vehicle,the last telephone connected
automatically
reconnects, within around 30 seconds after
switching
on the ignition (Bluetooth activated and visible).
To
modify the automatic connection mode, remove the pairing
and
pair the telephone again with the desired mode.
Enter
a minimum 4 figure code in the telephone
and
confirm.
Enter the same code in the system,
select "
OK" and confirm.
Select
the name of the desired
peripheral
from the list of devices
detected
then confirm
Page 320 of 376
08
DS3_en_Chap13b_RT6-2-8_ed01-2014
Insert the CD in the player, insert the USb
memory stick in the USB player or connect the
USB
peripheral to the USB port using a suitable
cable
(not supplied).
The
system builds playlists (in temporary
memory),
an operation which can take from
a
few seconds to several minutes at the first
connection.
Reduce
the number of non-music files and the
number
of folders to reduce the waiting time.
The
playlists are updated every time the ignition
is
switched off or connection of a USB memory
stick.
However, the system memorises these
lists
and if they are not modified, the loading
time
will be shorter.
Play
starts automatically after a period which
depends
on the capacity of the USB memory
stick. Selection of source
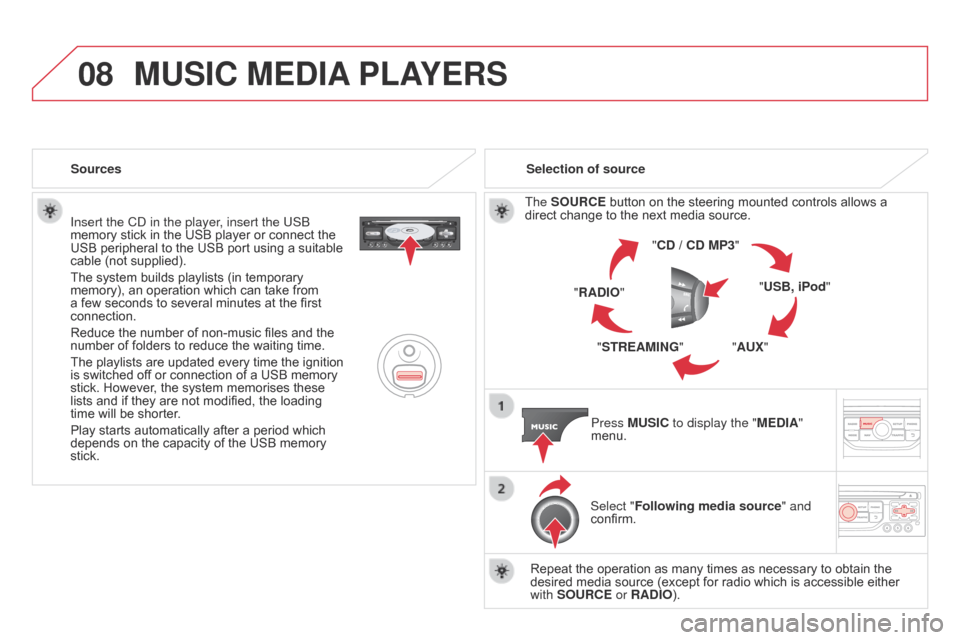
The
SOUR c E button on the steering mounted controls allows a direct
change to the next media source.
" cd / cd MP3"
"USB, iPod "
"AUX"
"STREAMING"
"RA
d IO"
Press MUSI
c to display the "ME d IA"
menu.
Select "Following media source " and
confirm.
Repeat
the operation as many times as necessary to obtain the
desired
media source (except for radio which is accessible either
with
SOUR c E or RA d IO).
Sources
MUSIc MEdIA
PLAYERS
Page 344 of 376
05
DS3_en_Chap13c_RD45_ed01-2014
USB PLAYER
The system puts together playlists (temporary memory) created over a period which depends on the capacity of the USB device.
The
other sources are available during this time.
The
playlists are updated each time the ignition is switched off or
each
time a USB memory stick is connected.
When
connecting for the first time, the classification suggested
is
by folder. When you reconnect, the classification selected
previously
is retained.Connect
the memory stick to the port, directly or
using
a lead. If the audio equipment is switched
on, the US
b source is detected as soon as it
is connected. Play begins automatically after a
delay which depends on the capacity of the US
b
memory stick.
The file formats supported are .mp3 (mpeg1
layer
3 only) and .wma (standard 9 only,
128 kbits/sec
compression).
Certain playlist formats are supported (.m3u, ...)
On reconnection of the previous memory stick
used,
play is resumed automatically with the last
track
played.
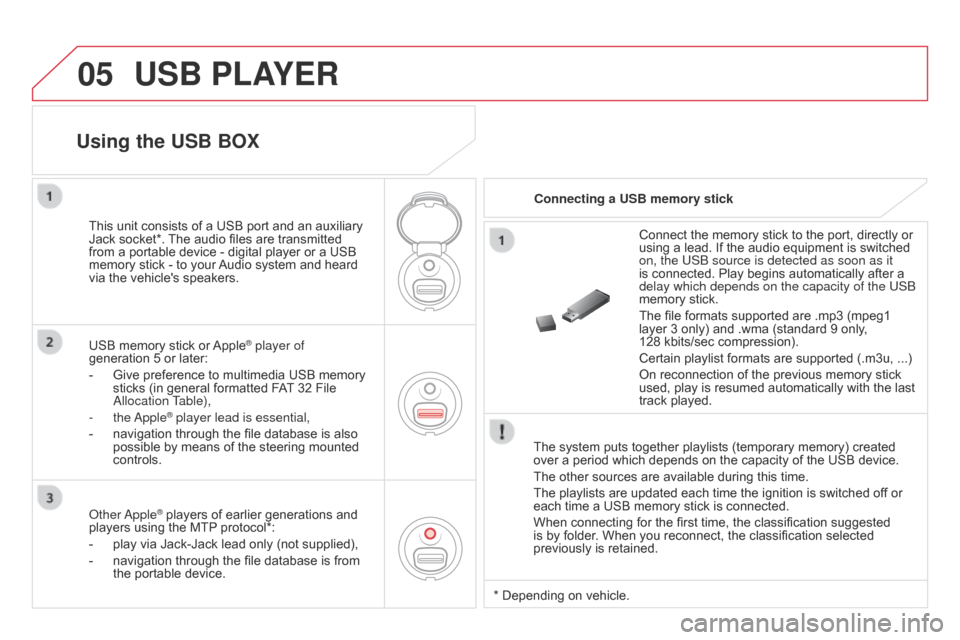
This
unit
consists
of
a
USB
port
and
an
auxiliary
Jack
socket*.
The
audio
files
are
transmitted
from
a
portable
device
-
digital
player
or
a
USB
memory
stick
-
to
your
Audio
system
and
heard
via
the
vehicle's
speakers.
USB
memory
stick
or
Apple® player of
generation
5
or
later:
-
Give
preference
to
multimedia USB memory
sticks
(in
general
formatted FAT
32 File
a
llocation Table),
-
the
a
pple
® player lead is essential,
-
navigation
through the file database is also
possible
by means of the steering mounted
controls.
Using the USB BOX
connecting a USB memory stick
o
ther
a
pple
® players of earlier generations and players
using the MTP protocol*:
-
play
via
Jack-Jack lead only (not supplied),
-
navigation
through the file database is from
the
portable device. * Depending
on vehicle.
Page 347 of 376
06
345
DS3_en_Chap13c_RD45_ed01-2014
BLUETOOTH FUNcTIONS
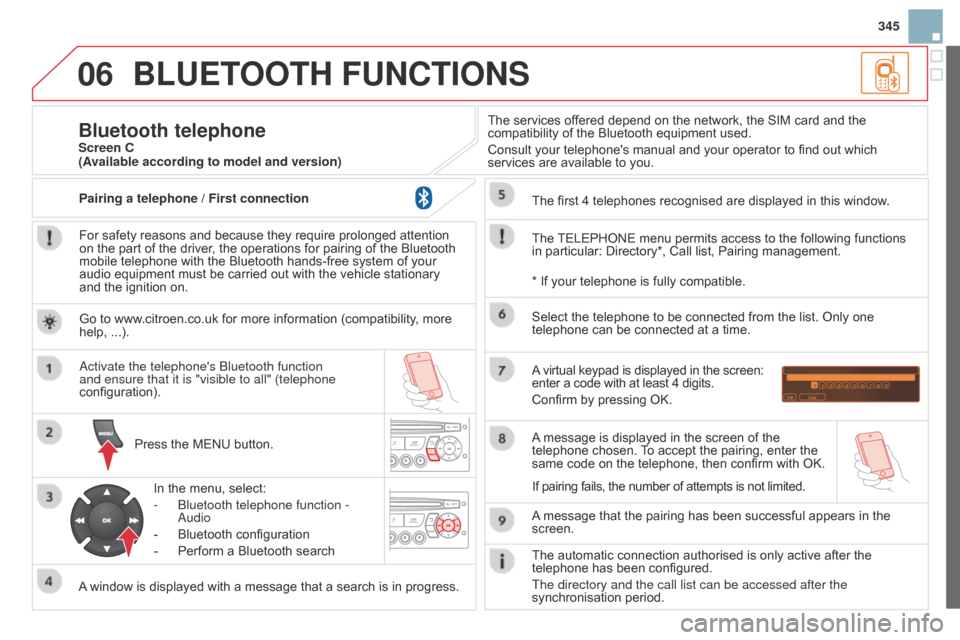
For safety reasons and because they require prolonged attention on the part of the driver, the operations for pairing of the Bluetooth
mobile
telephone with the Bluetooth hands-free system of your
audio
equipment must be carried out with the vehicle stationary
and
the ignition on.
Press
the MENU button.
A
window is displayed with a message that a search is in progress.
a
ctivate the telephone's b luetooth function
and ensure that it is "visible to all" (telephone
configuration).
In
the menu, select:
-
b luetooth telephone function -
a
udio
-
Bluetooth
configuration
-
Perform
a Bluetooth searchThe
services offered depend on the network, the SIM card and the
compatibility
of the Bluetooth equipment used.
Consult your telephone's manual and your operator to find out which
services
are available to you.
Bluetooth telephoneScreen c
The
TELEPHONE
menu permits access to the following functions
in
particular: Directory*, Call list, Pairing management.
The
first 4 telephones recognised are displayed in this window.
A
virtual keypad is displayed in the screen:
enter
a code with at least 4 digits.
Confirm
by pressing OK.
A
message that the pairing has been successful appears in the
screen. Select
the telephone to be connected from the list. Only one
telephone
can be connected at a time.
A
message is displayed in the screen of the
telephone
chosen.
T
o accept the pairing, enter the
same
code on the telephone, then confirm with OK.
The
automatic connection authorised is only active after the
telephone
has been configured.
The directory and the call list can be accessed after the
synchronisation
period.
(Available according to model and version)
*
If your telephone is fully compatible.
If
pairing fails, the number of attempts is not limited.
Go
to www.citroen.co.uk for more information (compatibility, more
help,
...).
Pairing a telephone / First connection
Page 349 of 376
06
347
DS3_en_Chap13c_RD45_ed01-2014
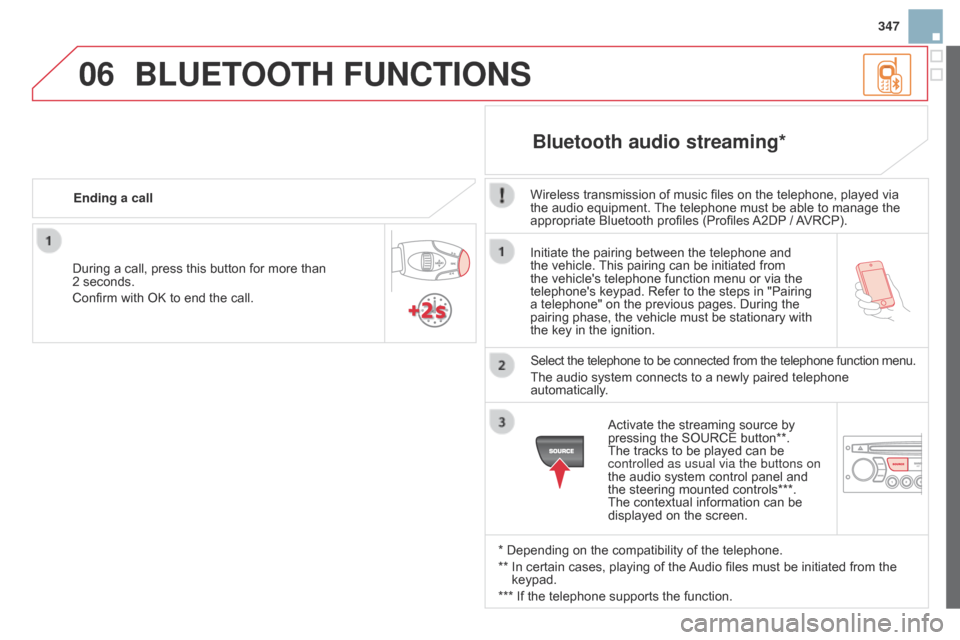
Initiate the pairing between the telephone and the vehicle. This pairing can be initiated from
the
vehicle's telephone function menu or via the
telephone's
keypad. Refer to the steps in "Pairing
a
telephone" on the previous pages. During the
pairing
phase, the vehicle must be stationary with
the
key in the ignition.
Select
the telephone to be connected from the telephone function menu.
The
audio system connects to a newly paired telephone
automatically
.
Bluetooth audio streaming*
Wireless transmission of music files on the telephone, played via the audio equipment. The telephone must be able to manage the
appropriate
Bluetooth profiles (Profiles
A2DP
/
A
VRCP).
*
Depending on the compatibility of the telephone.
**
In
certain cases, playing of the
Audio
files must be initiated from the
keypad.
***
If
the telephone supports the function.
Activate
the streaming source by
pressing
the SOURCE button**.
The
tracks to be played can be
controlled as usual via the buttons on
the
audio system control panel and
the
steering mounted controls***.
The
contextual information can be
displayed
on the screen.
During
a
call,
press
this
button
for
more
than
2
seconds.
Confirm
with
OK
to
end
the
call.
Ending a call
BLUETOOTH FUNcTIONS