ignition Citroen DS3 2014 1.G Workshop Manual
[x] Cancel search | Manufacturer: CITROEN, Model Year: 2014, Model line: DS3, Model: Citroen DS3 2014 1.GPages: 376, PDF Size: 12.55 MB
Page 200 of 376
DS3_en_Chap10_info-pratiques_ed01-2014
Freezing of the AdBlue®
additive
The adblue® additive freezes at
temperatures below around -11°C.
The
SCR
system includes a heater for
t
he
a
d
blu
e
® tank.
I
n
exceptional circumstances (vehicle
k
ept
for
a
long period at temperatures
t
hat
are
constantly below -15°C), an
e
missions
control system fault alert
m
ay
be
related to freezing of the
a
d
blu
e
® in your vehicle.
P
ark
your vehicle in a warmer area for
a
few
hours until the additive becomes
li
quid
a
gain.
The
emissions alert does not go off
i
mmediately, it will occur after several
m
ile
of
running.
You
have
exceeded
the
authorised
d
riving
limit:
the
starting
prevention
s
ystem
inhibits
engine
starting.
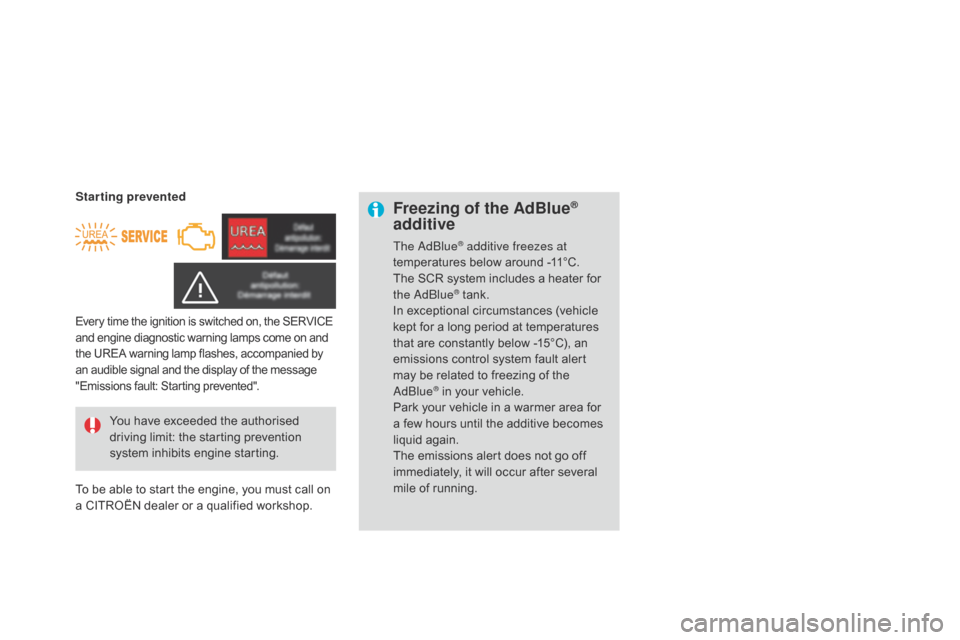
Every time the ignition is switched on, the SERVICE a nd engine diagnostic warning lamps come on and t
he UREA warning lamp flashes, accompanied by
a
n audible signal and the display of the message
"
Emissions fault: Starting prevented".
Starting prevented
To
be able to start the engine, you must call on
a
CITROËN dealer or a qualified workshop.
Page 202 of 376
DS3_en_Chap10_info-pratiques_ed01-2014
Never store bottles of adblue® in
your vehicle.
a
d
blu
e
® freezes at about -11°C and d
eteriorates above 25°C. It is recommended
t
hat bottles be stored in a cool area and
protected
from direct sunlight.
Under these conditions, the additive can be
kept
for
at least a year.
If the additive has frozen, can be used once it
has
completely thawed out.
Recommendations on storage
Before topping-up, ensure that the vehicle is parked on a flat and level sur face.
In wintry conditions, ensure that the
temperature
of the vehicle is above -11°C.
O
ther wise, by freezing, the AdBlue
® cannot
be
poured
into
its
tank.
Park
your
vehicle in a
w
armer
area
for
a
few
hours
to
allow the top-up
t
o
be
carried
out.
Procedure
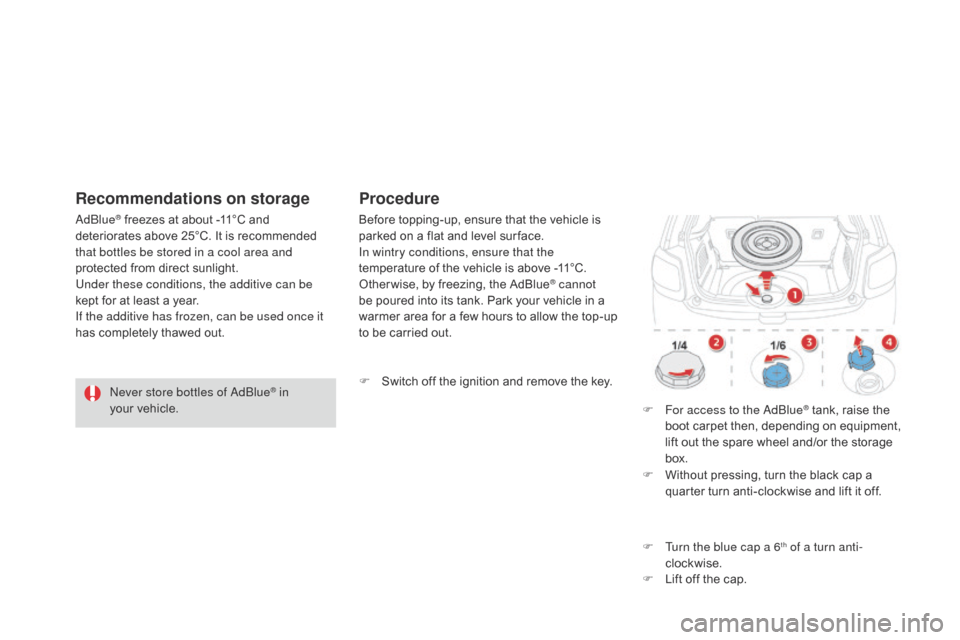
F Switch off the ignition and remove the key.
F
F
or access to the a
dbl
ue
® tank, raise the b
oot
carpet
then,
depending on equipment,
l
ift
out
the
spare
wheel
and/or the storage
b
ox.
F
W
ithout
pressing,
turn
the
black cap a
q
uarter
turn
anti-clockwise and lift it off.
F
T
urn the blue cap a 6
th of a turn anti-
clockwise.
F
L
ift
off
the
cap.
Page 203 of 376
201
DS3_en_Chap10_info-pratiques_ed01-2014
Important: if your vehicle's a
dblu e® tank is completely empty - w
hich
is
confirmed by the alert
m
essages and the impossibility of
s
tarting
the engine, you must add at
l
east
3.8 litres (so two 1.89 litre bottles).If any additive is split or splashed, wash
immediately
with cold water or wipe
w
ith a damp cloth.
If the additive has crystallised, clean it
off using a sponge and hot water.Important:
i
n the event of a top-up after
a breakdown because of a lack of
additive , signalled by the message "Top
u
p emissions additive: Starting prevented",
y
ou must wait around 5 minutes before
s
witching
o
n
t
he
i
gnition,
w
ithout opening
the driver's door, locking the vehicle
or introducing the key into the ignition
switch .
Switch on the ignition, then, after
1
0 seconds, start the engine.
F
o
b
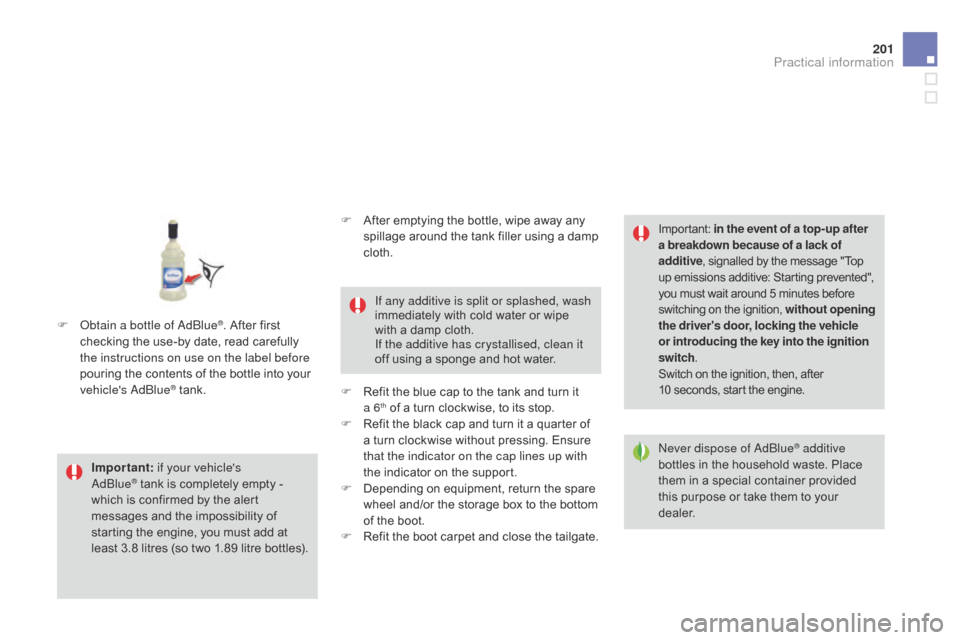
tain a bottle of a
dbl
ue
®. After first c
hecking
the
use-by
date,
read carefully
t
he instructions on use on the label before
pouring
the
contents
of
the bottle into your
v
ehicle's
a
d
blu
e
® tank. N ever dispose of a
dbl
ue
® additive
bottles
in
the
household
waste. Place
t
hem
in
a
special
container provided
t
his
purpose
or
take
them
to your
d
ealer.
F
A
fter
emptying
the
bottle,
wipe
away
any
s
pillage
around
the
tank
filler
using
a
damp
c
loth.
F
R
efit
the
blue
cap
to
the
tank
and
turn
it
a
6
th of a turn clockwise, to its stop.
F
R
efit the black cap and turn it a quarter of
a
turn clockwise without pressing. Ensure
t
hat the indicator on the cap lines up with
the
indicator on the support.
F
D
epending on equipment, return the spare
w
heel and/or the storage box to the bottom
o
f
the boot.
F
R
efit the boot carpet and close the tailgate.
Practical information
Page 205 of 376
203
DS3_en_Chap10_info-pratiques_ed01-2014
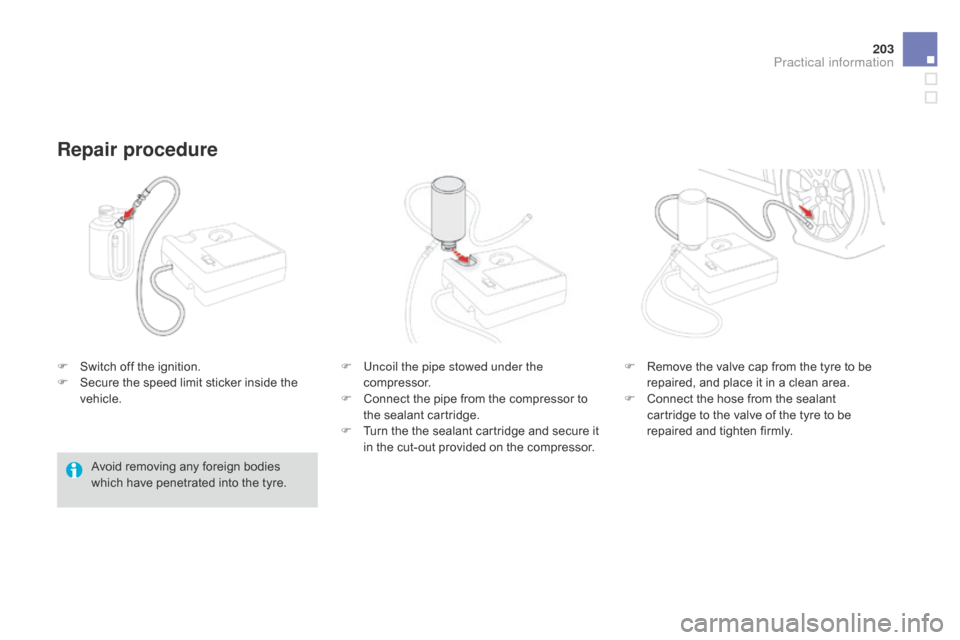
F Switch off the ignition.
F S ecure the speed limit sticker inside the
v
ehicle.
Repair procedure
Avoid removing any foreign bodies which have penetrated into the tyre.F
U
ncoil the pipe stowed under the
compressor.
F
C
onnect the pipe from the compressor to
t
he sealant cartridge.
F
T
urn the the sealant cartridge and secure it
i
n the cut-out provided on the compressor.F
R
emove the valve cap from the tyre to be
r
epaired, and place it in a clean area.
F
C
onnect the hose from the sealant
c
artridge to the valve of the tyre to be
r
epaired and tighten firmly.
Practical information
Page 206 of 376
DS3_en_Chap10_info-pratiques_ed01-2014
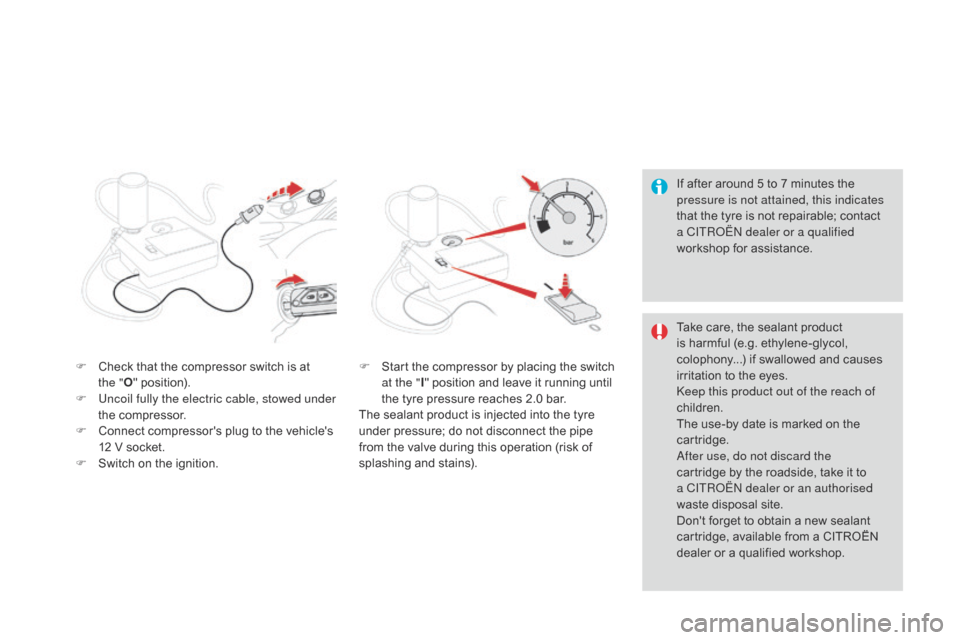
If after around 5 to 7 minutes the pressure is not attained, this indicates
that
the tyre is not repairable; contact
a C
ITR
oË
N dealer or a qualified
workshop
for assistance.
F
C
heck
that
the
compressor
switch
is
at
t
he
" O "
position).
F
U
ncoil fully the electric cable, stowed under
the
compressor.
F
C
onnect
compressor's
plug
to
the
vehicle's
1
2
V
socket.
F
S
witch
on
the
ignition. F
S
tart
the
compressor
by
placing
the
switch
a
t the " I"
position
and
leave
it
running
until
t
he
tyre
pressure
reaches
2.0
bar.
The
sealant
product
is
injected
into
the
tyre
u
nder
pressure;
do
not
disconnect
the
pipe
f
rom
the
valve
during
this
operation
(risk
of
sp
lashing
an
d
s
tains). Take
care, the sealant product
i
s harmful (e.g. ethylene-glycol,
c
olophony...) if swallowed and causes
i
rritation to the eyes.
ke
ep this product out of the reach of
children.
The
use-by date is marked on the
c
artridge.
af
ter use, do not discard the
cartridge
by the roadside, take it to
a C
ITR
oË
N dealer or an authorised
waste
disposal site.
Don't
forget to obtain a new sealant
c
artridge, available from a CITROËN
d
ealer or a qualified workshop.
Page 207 of 376
205
DS3_en_Chap10_info-pratiques_ed01-2014
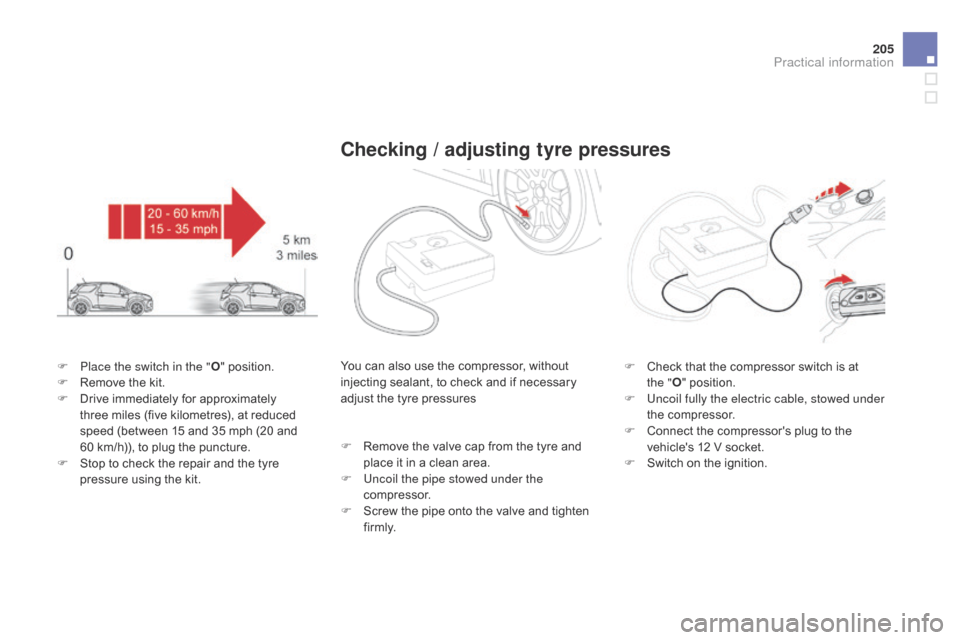
F Place the switch in the "O" position.
F R emove the kit.
F
D
rive immediately for approximately
t
hree miles (five kilometres), at reduced
s
peed (between 15 and 35 mph (20 and
6
0 km/h)), to plug the puncture.
F
S
top to check the repair and the tyre
p
ressure using the kit.
checking / adjusting tyre pressures
You can also use the compressor, without injecting sealant, to check and if necessary
a
djust the tyre pressures
F
R
emove the valve cap from the tyre and
p
lace it in a clean area.
F
U
ncoil the pipe stowed under the
compressor.
F
S
crew the pipe onto the valve and tighten
f
i r m l y. F
C heck that the compressor switch is at
t
he "O "
position.
F
U
ncoil fully the electric cable, stowed under
the
compressor.
F
C
onnect the compressor's plug to the
v
ehicle's 12 V socket.
F
S
witch on the ignition.
Practical information
Page 228 of 376
DS3_en_Chap10_info-pratiques_ed01-2014
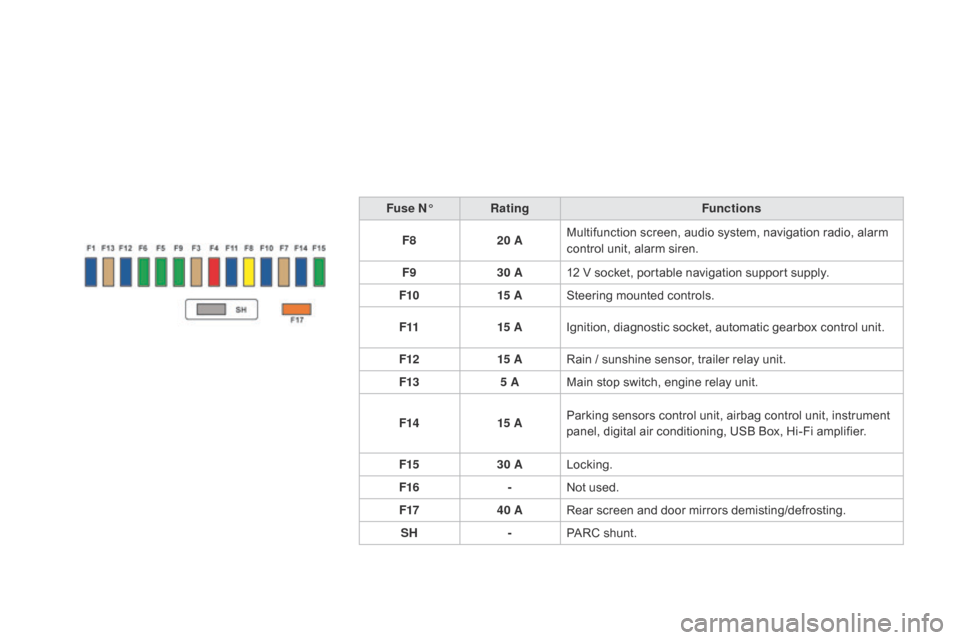
Fuse N°Rating Functions
F8 20 AMultifunction
screen, audio system, navigation radio, alarm
c
ontrol unit, alarm siren.
F9 30 A12
V socket, portable navigation support supply.
F10 15 ASteering
mounted controls.
F11 15 AIgnition,
diagnostic socket, automatic gearbox control unit.
F12 15 ARain
/ sunshine sensor, trailer relay unit.
F13 5 AMain
stop switch, engine relay unit.
F14 15 AParking
sensors control unit, airbag control unit, instrument
p
anel, digital air conditioning, USB Box, Hi-Fi amplifier.
F15 30 ALocking.
F16 -Not
used.
F17 40 ARear
screen and door mirrors demisting/defrosting.
SH -PARC
shunt.
Page 230 of 376
DS3_en_Chap10_info-pratiques_ed01-2014
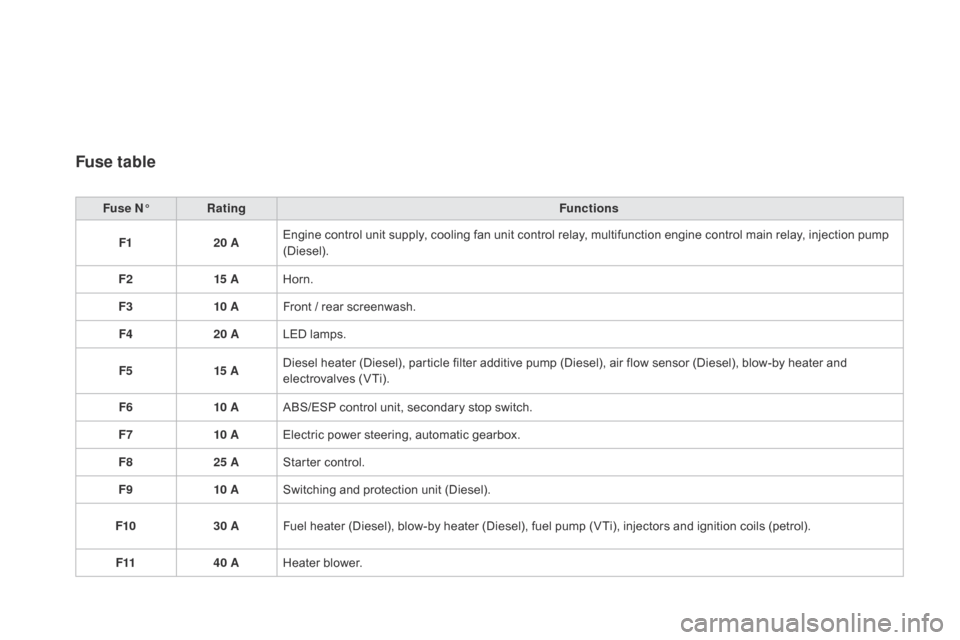
Fuse table
Fuse N°Rating Functions
F1 20 AEngine
control unit supply, cooling fan unit control relay, multifunction engine control main relay, injection pump
(
Diesel).
F2 15 AHorn.
F3 10 AFront
/ rear screenwash.
F4 20 ALED
lamps.
F5 15 ADiesel
heater (Diesel), particle filter additive pump (Diesel), air flow sensor (Diesel), blow-by heater and
e
lectrovalves (VTi).
F6 10 AABS/ESP
control unit, secondary stop switch.
F7 10 AElectric
power steering, automatic gearbox.
F8 25 AStarter
control.
F9 10 ASwitching
and protection unit (Diesel).
F10 30 AFuel
heater (Diesel), blow-by heater (Diesel), fuel pump (VTi), injectors and ignition coils (petrol).
F11 40 AHeater
b
lower.
Page 231 of 376
229
DS3_en_Chap10_info-pratiques_ed01-2014
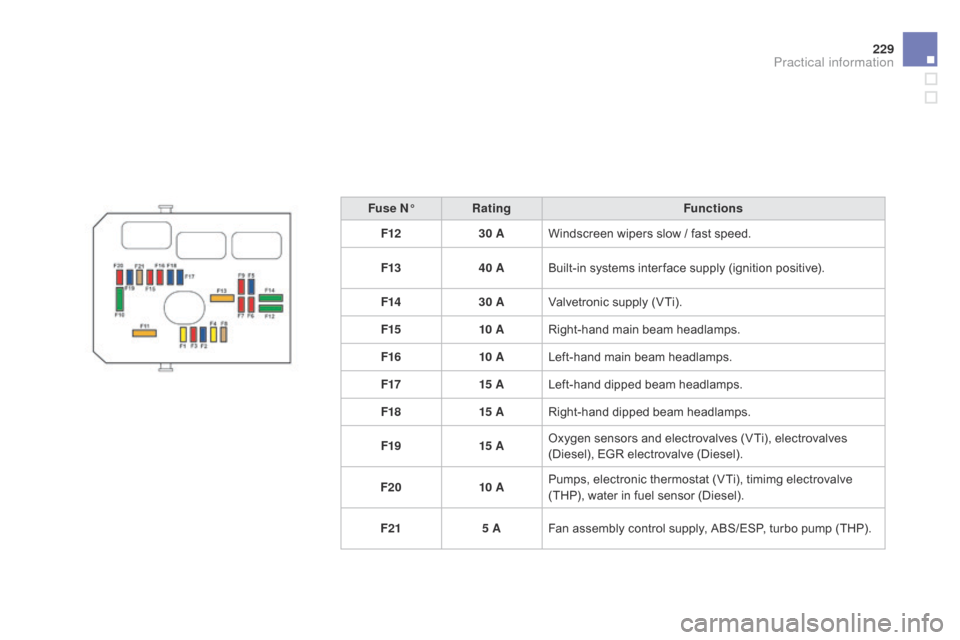
Fuse N°Rating Functions
F12 30 AWindscreen
wipers slow / fast speed.
F13 40 ABuilt-in
systems inter face supply (ignition positive).
F14 30 AValvetronic
supply (VTi).
F15 10 ARight-hand
main beam headlamps.
F16 10 ALeft-hand
main beam headlamps.
F17 15 ALeft-hand
dipped beam headlamps.
F18 15 ARight-hand
dipped beam headlamps.
F19 15 AOxygen
sensors and electrovalves (VTi), electrovalves
(
Diesel), EGR electrovalve (Diesel).
F20 10 APumps,
electronic thermostat (VTi), timimg electrovalve
(
THP), water in fuel sensor (Diesel).
F21 5 AFan
assembly control supply, ABS/ESP, turbo pump (THP).
Practical information
Page 234 of 376
DS3_en_Chap10_info-pratiques_ed01-2014
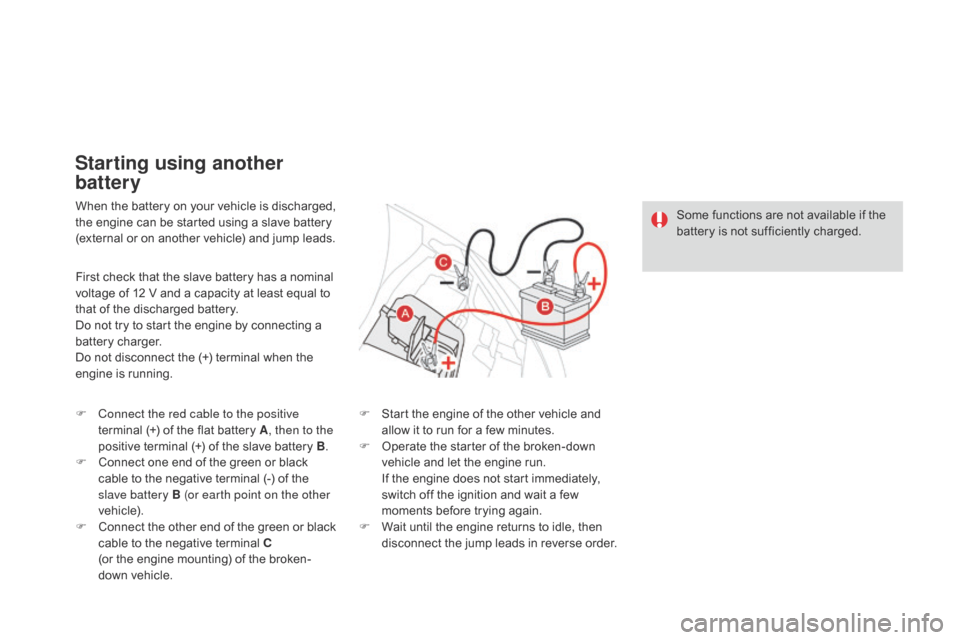
When the battery on your vehicle is discharged, the engine can be started using a slave battery
(
external or on another vehicle) and jump leads.
Starting using another
battery
First check that the slave battery has a nominal voltage of 12 V and a capacity at least equal to
t
hat of the discharged battery.
Do
not try to start the engine by connecting a
b
attery charger.
Do
not disconnect the (+) terminal when the
e
ngine is running.
F
C
onnect the red cable to the positive
terminal
(+) of the flat battery A, then to the
positive
terminal (+) of the slave battery B.
F
C
onnect one end of the green or black
c
able to the negative terminal (-) of the
s
lave battery B (or earth point on the other
vehicle).
F
C
onnect
t
he
o
ther
e
nd
o
f
t
he
g
reen
o
r
b
lack
c
able to the negative terminal c
(or
the engine mounting) of the broken-
down
vehicle. F
S
tart the engine of the other vehicle and
a
llow it to run for a few minutes.
F
O
perate the starter of the broken-down
v
ehicle and let the engine run.
I
f the engine does not start immediately,
s
witch off the ignition and wait a few
m
oments before trying again.
F
W
ait until the engine returns to idle, then
d
isconnect the jump leads in reverse order.Some
functions are not available if the
b
attery is not sufficiently charged.