key CITROEN DS3 CABRIO 2016 Handbook (in English)
[x] Cancel search | Manufacturer: CITROEN, Model Year: 2016, Model line: DS3 CABRIO, Model: CITROEN DS3 CABRIO 2016Pages: 450, PDF Size: 17.47 MB
Page 168 of 450

deactivation
Only the passenger's front airbag can be deactivated:
F
w
ith the ignition off ,
insert the key in the
p
assenger's airbag deactivation switch,
F
t
urn it to the "OFF" position,
F
t
hen, remove the key keeping the switch in
t
he new position.
This
warning lamp comes on in the
i
nstrument panel when the ignition is
o
n and until the airbag is re-activated.To
assure the safety of your child,
t
he passenger's front airbag must be
d
eactivated when you install a rear ward
f
acing child seat on the front passenger
sea
t.
Other wise, the child would risk being
s
eriously injured or killed if the airbag
w
ere deployed.
Reactivation
When you remove a child seat that has been f
itted rear ward facing, turn switch to the "On"
p
osition to re-activate the airbag and so assure
t
he safety of your front passenger in the event
o
f an impact.
Operating fault
If this warning lamp comes on in the instrument panel, you must contact
a
CITROËN dealer or qualified
w
orkshop to have the system
c
hecked. The airbags may no longer
b
e deployed in the event of a serious
im
pact.
Page 190 of 450

Fuel tankFuel tank capacity: approximately 50 litres (petrol) or 46 litres (diesel) or 33 litres (LPg) ;
(dep ending on version: approximately 30 litres (petrol or di esel)).
Low fuel level
Filling
A label affixed to the inside of the flap reminds you of the type of fuel to be used depending on
y
our
eng
ine.
Additions
of fuel must be of at least 7 litres, in
o
rder to be registered by the fuel gauge.The
key cannot be removed from the
l
ock until the cap is refitted.
Opening
the filler cap may create a
n
oise caused by an inrush of air. This
v
acuum is entirely normal, resulting
f
rom the sealing of the fuel system.
To
fill the tank safely:
F
t
he engine must be switched off,
F
o
pen the fuel filler flap,
F
i
nsert the key in the cap, then turn it to the
l
eft,F
r emove the cap and hook it onto the clip
l
ocated on the inside of the flap,
F
f
ill the tank, but do not continue after the
3rd cut- off of the pump ;
this could cause
m
alfunctions.
When
you have filled the tank:
F
p
ut the cap back in place,
F
t
urn the key to the right, then remove it
f
rom the cap,
F
c
lose the flap.
When the fuel tank minimum level is reached this warning lamp comes on o
n the instrument panel. When it first
c
omes on there remains approximately
5 litres
of fuel in the tank.
With Stop & Start, never refuel with the
system in STOP mode; you must switch
o
ff the ignition with the key.
You
must refuel as soon as possible to avoid
r
unning out of fuel.
If
you
run out of fuel (Diesel), refer also to the
"
Checks"
s
ection.
Page 199 of 450

197
Never store bottles of AdBlue® in
your vehicle.
AdBlue
® freezes at about -11°C and d
eteriorates above 25°C. It is recommended
t
hat
bottles be stored in a cool area and
p
rotected from direct sunlight.
Under
these conditions, the additive can be
k
ept
for
at least a year.
If
the
additive has frozen, it can be used once it
h
as
completely thawed out.
Recommendations on storage
Before topping-up, ensure that the vehicle is parked on a flat and level sur face.
In
wintry conditions, ensure that the
t
emperature of the vehicle is above -11°C.
O
ther wise, by freezing, the AdBlue
® cannot
be
poured
into
its
tank.
Park
your
vehicle in a
w
armer
area
for
a
few
hours
to
allow the top-up
t
o
be
carried
out.
Procedure
F Switch off the ignition and remove the key.
F
F
or access to the AdBlue
® tank, raise the b
oot
carpet
then,
depending on equipment,
l
ift
out
the
spare
wheel
and/or the storage
b
ox.
F
W
ithout
pressing,
turn
the
black cap a
q
uarter
turn
anti-clockwise and lift it off.
F
T
urn the blue cap a 6
th of a turn anti-
c
lockwise.
F
L
ift
off
the
cap.
Practical information
Page 200 of 450

Important: if your vehicle's Ad
Blue® tank is completely empty - w
hich
is
confirmed by the alert
m
essages and the impossibility of
s
tarting
the engine, you must add at
l
east
3.8 litres (so two 1.89 litre bottles).If
any additive is split or splashed, wash
i
mmediately with cold water or wipe
w
ith a damp cloth.
If the additive has crystallised, clean it
o
ff using a sponge and hot water.Important:
i
n the event of a top-up after
a breakdown because of a lack of
additive , signalled by the message "Top
u
p emissions additive: Starting prevented",
y
ou must wait around 5 minutes before
s
witching
o
n
t
he
i
gnition,
w
ithout opening
the driver's door, locking the vehicle
or introducing the key into the ignition
switch .
Switch on the ignition, then, after
1
0 seconds, start the engine.
F
O
btain
a
bottle of AdBlue
®. After first c
hecking
the
use-by
date,
read carefully
t
he instructions on use on the label before
pouring
the
contents
of
the bottle into your
v
ehicle's
Ad
Blue
® tank. N ever dispose of AdBlue
® additive b
ottles
in
the
household
waste. Place
t
hem
in
a
special
container provided
t
his
purpose
or
take
them
to your
d
ealer.
F
A
fter
emptying
the
bottle,
wipe
away
any
s
pillage
around
the
tank
filler
using
a
damp
c
loth.
F
R
efit
the
blue
cap
to
the
tank
and
turn
it
a
6
th of a turn clockwise, to its stop.
F
R
efit the black cap and turn it a quarter of
a
turn clockwise without pressing. Ensure
t
hat
the indicator on the cap lines up with
t
he
indicator on the support.
F
D
epending on equipment, return the spare
w
heel and/or the storage box to the bottom
o
f
the boot.
F
R
efit the boot carpet and close the tailgate.
Page 235 of 450
233
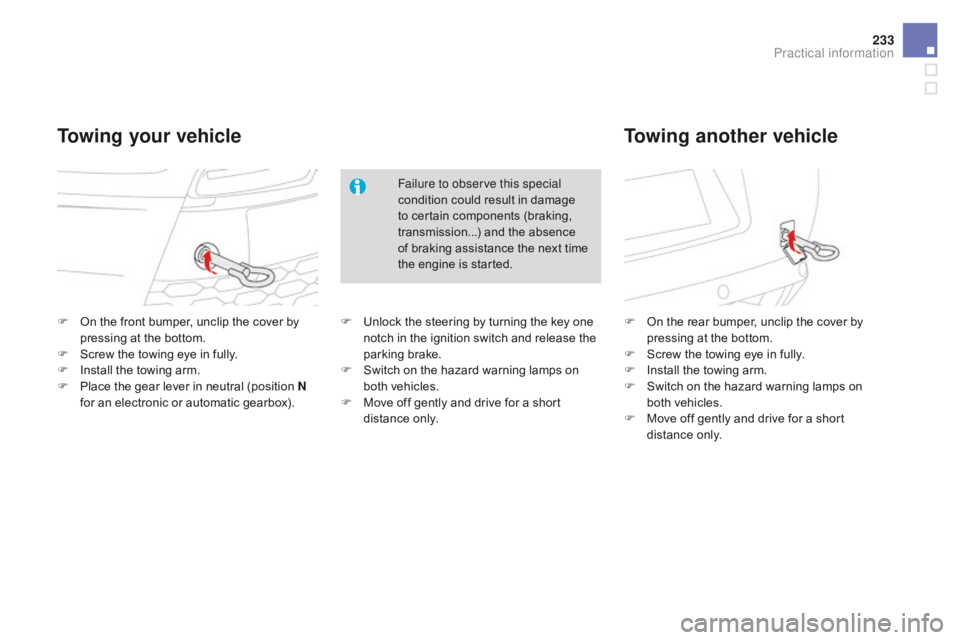
F On the front bumper, unclip the cover by p
ressing at the bottom.
F
S
crew the towing eye in fully.
F
I
nstall the towing arm.
F
P
lace the gear lever in neutral (position n
for
an electronic or automatic gearbox). F
O n the rear bumper, unclip the cover by p
ressing at the bottom.
F
S
crew the towing eye in fully.
F
I
nstall the towing arm.
F
S
witch on the hazard warning lamps on
b
oth vehicles.
F
M
ove off gently and drive for a short
d
istance
o
nly.
Towing your vehicleTowing another vehicle
Failure to observe this special
condition could result in damage
t
o certain components (braking,
t
ransmission...) and the absence
o
f braking assistance the next time
t
he engine is started.
F
U
nlock the steering by turning the key one
n
otch in the ignition switch and release the
par
king
b
rake.
F
S
witch on the hazard warning lamps on
b
oth vehicles.
F
M
ove off gently and drive for a short
d
istance
o
nly.
Practical information
Page 301 of 450
1
1
20
5
4
2
7
299
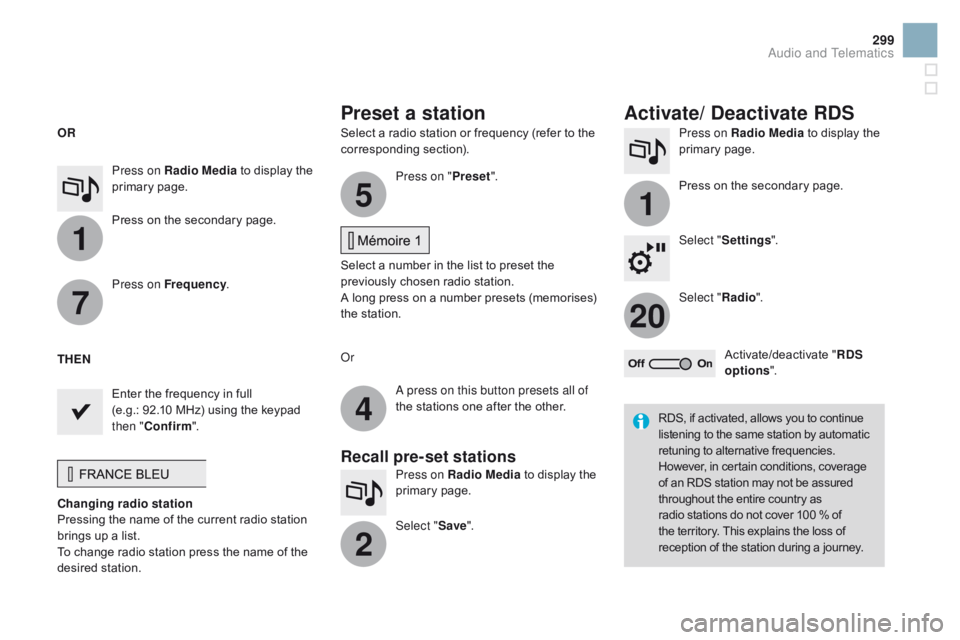
Select a radio station or frequency (refer to the corresponding s ection). Press on Radio Media
to display the p
rimary pag e.
Press
on the secondary page.
Select " Settings ".
Select " Radio".
Activate/deactivate
" RdS
opt
ions".
Press on Radio Media
to
display
the
p
rimary
pag
e.
Press
on
the
secondary
page. Press on "
Preset".
Select
a number in the list to preset the
p
reviously chosen radio station.
A
long press on a number presets (memorises)
t
he station.
Press on Frequency
.
Enter
the
frequency
in
full
(e.g.:
92.10
MHz)
using
the
keypad
t
hen " Confirm ".
Changing radio station
Pressing
the
name
of
the
current
radio
station
b
rings
up
a
list.
To
change
radio
station
press
the
name
of
the
de
sired
s
tation. Or
Press on Radio Media
to display the
p
rimary
pag
e.
Select " Save".
Preset a station Activate/ de activate RdS
OR
THE
n
A p
ress on this button presets all of
the
stations one after the other.
Recall pre-set stations
RDS, if activated, allows you to continue listening to the same station by automatic r
etuning to alternative frequencies.
H
owever, in certain conditions, coverage
o
f an RDS station may not be assured
t
hroughout the entire country as
r
adio stations do not cover 100 % of
t
he territory. This explains the loss of
r
eception of the station during a journey.
Audio and Telematics
Page 345 of 450
343
Use only USB memory sticks formatted FAT32 (File Allocation Table).
It
is recommended that you use
g
enuine
A
pple
® USB cables for correct
operation.
*
I
n certain cases, play of the audio files must
b
e initiated from the keypad.
**
If the telephone supports the function.
Bluetooth® audio streaming
Streaming allows music files on the telephone to be played via the audio system.
Connect
the telephone: see the "Telephone "
section.
Select in the " Bluetooth : Telephone - Audio"
menu
the telephone to be connected.
The
audio system connects to a newly paired
t
elephone
a
utomatically.
Control
of tracks to be played is via the buttons
o
n the audio system control panel and the
s
teering mounted controls**. The contextual
i
nformation can be displayed in the screen.
Activate
the streaming source by
p
ressing the SOURCE
b
ut to n*.
Connecting Apple® players
Connect the Apple® player to the USB port
using
a
suitable
cable (not supplied).
Play
starts
automatically.
Control
is
via
the
audio system.
The classifications available are those of the
portable
device
connected (artists / albums /
g
enres
/
playlists
/
audiobooks / podcasts).
The
version
of
software in the audio system
m
ay
not
be
compatible with the generation of
y
our Apple
® player.
Audio and Telematics
Page 346 of 450
Telephone
Pairing a Bluetooth® telephone
Screen C
(Available according to model and version)
As a safety measure and because they require prolonged attention on the part
o
f the driver, the operations for pairing
o
f the Bluetooth mobile telephone with
t
he Bluetooth hands-free system of
y
our audio equipment must be carried
o
ut with the vehicle stationary and the
ig
nition
o
n.
Go
to
www.citroen.co.uk for more information
(
compatibility, more help, ...).
Activate
the telephone's Bluetooth function
a
nd
ensure that it is "visible to all" (telephone
c
onfiguration). Press the ME
n
U
button. In
the menu, select:
- "Bl
uetooth: Telephone - Audio "
-
"B
luetooth configuration"
-
"P
erform a Bluetooth search"
A
window is displayed with a message that a
s
earch is in progress.
The
services available depend on
t
he network, the SIM card and the
c
ompatibility of the Bluetooth device
u
sed.
Consult
your telephone's manual and
y
our operator to find out which services
a
re available to you.
*
If
your telephone is fully compatible. The
first 4 telephones recognised are displayed
i
n this window.
The " Telephone "
menu permits access to the
f
ollowing functions in particular: "
dir
ectory" *,
" Calls list ", "Consult the paired equipment ".Select
the telephone to be connected from the l
ist. Only one telephone can be connected at
a
time.
A
virtual keypad is displayed in the screen:
e
nter a code with at least 4 digits.
Confirm
by pressing OK.
A
message
in
the
screen
indicates
the
telephone
c
hosen. To accept the pairing, enter the same
c
ode on the telephone, then confirm with OK.
If
pairing fails, the number of attempts is not
l
imited.
A
message that the pairing has been
s
uccessful appears in the screen.
The
automatic connection authorised is only
a
ctive after the telephone has been configured.
The
directory and the call list can be accessed
a
fter the necessary synchronisation period.
Page 347 of 450
345
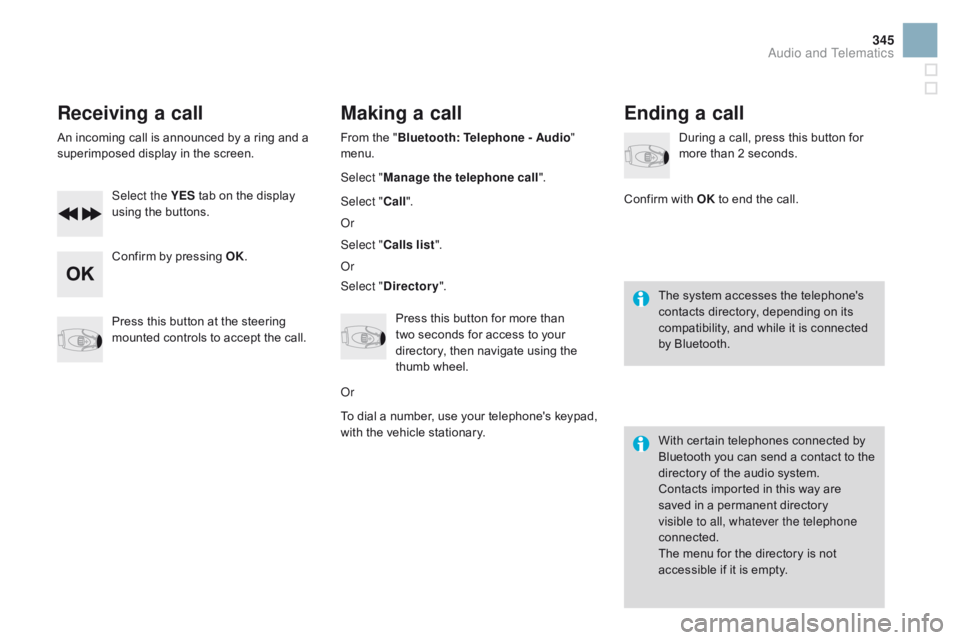
Receiving a call
An incoming call is announced by a ring and a superimposed display in the screen.
Select the YES
tab on the display
u
sing the buttons.
Confirm
by pressing OK.
Press
this button at the steering
m
ounted controls to accept the call.
Making a call
From the "Bl uetooth: Telephone - Audio "
menu.
Select " Manage the telephone call".
Select " Call".
Or
Select " Calls list ".
Or
Select "
dir
ectory".
Press
this button for more than
t
wo seconds for access to your
d
irectory, then navigate using the
t
humb wheel.
Or
To
dial a number, use your telephone's keypad,
w
ith the vehicle stationary.
Ending a call
During a call, press this button for more than 2 seconds.
Confirm
with OK
to end the call.
The
system accesses the telephone's
c
ontacts directory, depending on its
c
ompatibility, and while it is connected
b
y
Bluetooth.
With
certain telephones connected by
B
luetooth you can send a contact to the
d
irectory of the audio system.
Contacts
imported in this way are
s
aved in a permanent directory
v
isible to all, whatever the telephone
connected.
The
menu for the directory is not
a
ccessible if it is empty.
Audio and Telematics
Page 358 of 450
Exterior
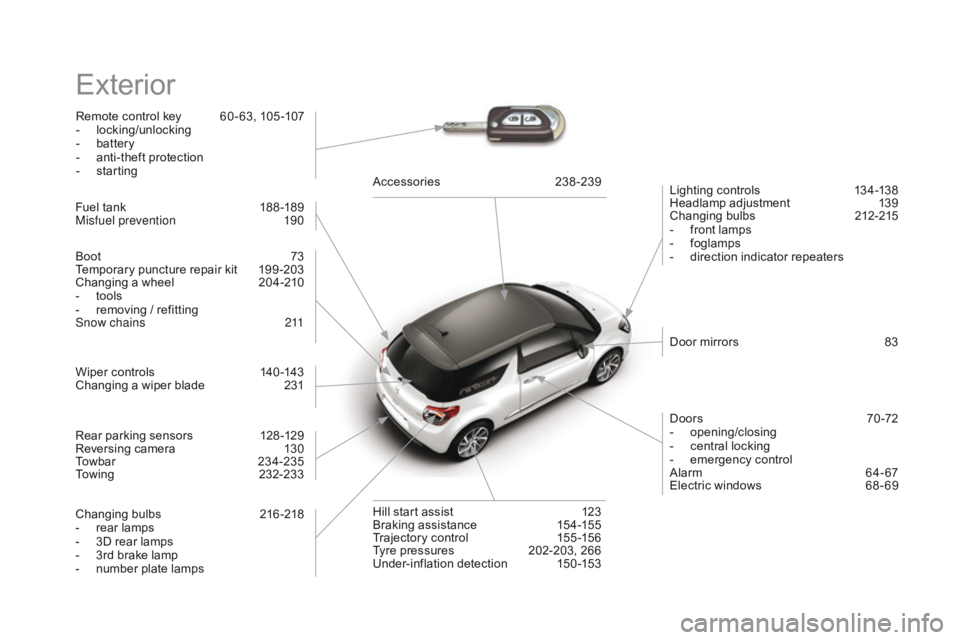
Remote control key 60 - 63, 105 -107
- l ocking/unlocking
-
b
attery
-
a
nti-theft protection
-
s
tarting Lighting
controls
1
34-138
Headlamp
adj
ustment
1
39
Changing
bu
lbs
2
12-215
-
f
ront lamps
-
fo
glamps
-
d
irection indicator repeaters
Wiper
controls
1
40 -143
Changing
a wiper blade
2
31 Door
mirrors
8
3
Doors
7
0 -72
-
ope
ning/closing
-
c
entral locking
-
em
ergency
c
ontrol
Alarm
6
4-67
Electric
windows
6
8 - 69
Fuel
tank
1
88 -189
Misfuel prevention
1
90Accessories
23
8-239
Hill
start assist
1
23
Braking
assistance
1
54-155
Trajectory
control
1
55 -156
Tyre
pressures
2
02-203, 266
Under-inflation
d
etection
1
50-153
Boot
7
3
Temporary
puncture repair kit
1
99 -203
Changing
a wheel
2
04-210
-
t
ools
-
r
emoving / refitting
Snow chains
2
11
Changing
bu
lbs
2
16-218
-
r
ear lamps
-
3
D rear lamps
-
3
rd brake lamp
-
n
umber plate lamps
Rear
parking sensors
1
28 -129
Reversing
camera
1
30
Towbar
23
4-235
Towing
23
2-233