sensor CITROEN DS3 CROSSBACK 2019 Owners Manual
[x] Cancel search | Manufacturer: CITROEN, Model Year: 2019, Model line: DS3 CROSSBACK, Model: CITROEN DS3 CROSSBACK 2019Pages: 244, PDF Size: 7.7 MB
Page 5 of 244
3
Contents
bit.ly/helpPSA
115 Active Safety Brake with Collision Risk Alert and
Intelligent emergency braking assistance
117
Parking sensors
118 Reversing camera
121 Park Assist
124 DS PARK PILOT
07 Practical information
129 Compatibility of fuels
129 Refuelling
130 Misfuel prevention (Diesel)
130 Charging system (Electric)
134 Charging the traction battery (Electric)
137 Towing device
137 Roof bars
138 Snow chains
138 Energy economy mode
139 Bonnet
140 Engine compartment
140 Checking levels
142 Checks
144 AdBlue® (BlueHDi)
146 Free-wheeling
146 Advice on care and maintenance
08 In the event of a breakdown
148 Warning triangle
148 Running out of fuel (Diesel)
148 Tool kit
150 Temporary puncture repair kit
152 Spare wheel
155 Changing a bulb
159 Changing a fuse
161 12 V battery / Accessory battery
165 Towing the vehicle
09 Technical data
168 Engine technical data and towed loads
169 Petrol engines
170 Diesel engines
171 Electric motor
172 Identification markings
172 Dimensions
10 Touch screen BLUETOOTH audio system
173 First steps
173 Steering mounted controls
174 Menus
175 Radio
176 DAB (Digital Audio Broadcasting) radio
177 Media
178 Telephone
179 Settings
180 Frequently asked questions
11 DS CONNECT RADIO
182 First steps
183 Steering mounted controls
184 Menus
185 Applications
185 Radio
187 DAB (Digital Audio Broadcasting) radio
187 Media
188 Telephone
192 Settings
193 Frequently asked questions
12 DS CONNECT NAV
195 First steps
196 Steering mounted controls
196 Menus
198 Voice commands
201 Navigation
204 Connected navigation
206 Applications
209 Radio
210 DAB (Digital Audio Broadcasting) radio
210 Media
212 Telephone
214 Settings
216 Frequently asked questions
Alphabetical index
Access to additional videos
Page 16 of 244
14
Instruments01
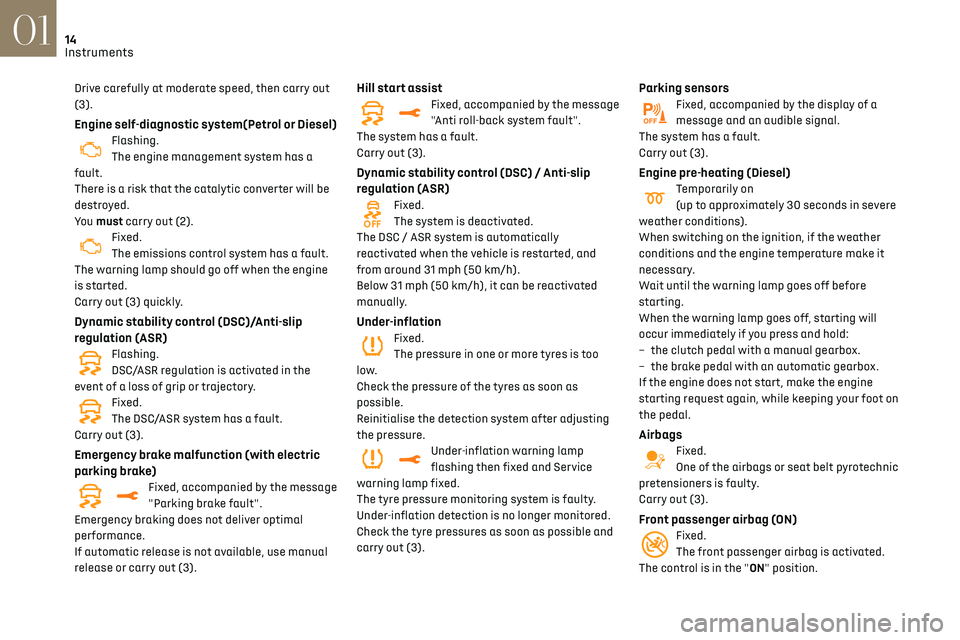
Drive carefully at moderate speed, then carry out
(3).
Engine self-diagnostic system(Petrol or Diesel)Flashing.
The engine management system has a
fault.
There is a risk that the catalytic converter will be
destroyed.
You must carry out (2).
Fixed.
The emissions control system has a fault.
The warning lamp should go off when the engine
is started.
Carry out (3) quickly.
Dynamic stability control (DSC)/Anti-slip
regulation (ASR)
Flashing.
DSC/ASR regulation is activated in the
event of a loss of grip or trajectory.
Fixed.
The DSC/ASR system has a fault.
Carry out (3).
Emergency brake malfunction (with electric
parking brake)
Fixed, accompanied by the message
"Parking brake fault".
Emergency braking does not deliver optimal
performance.
If automatic release is not available, use manual
release or carry out (3).
Hill start assistFixed, accompanied by the message
"Anti roll-back system fault".
The system has a fault.
Carry out (3).
Dynamic stability control (DSC) / Anti-slip
regulation (ASR)
Fixed.
The system is deactivated.
The DSC / ASR system is automatically
reactivated when the vehicle is restarted, and
from around 31 mph (50 km/h).
Below 31 mph (50 km/h), it can be reactivated
manually.
Under-inflationFixed.
The pressure in one or more tyres is too
low.
Check the pressure of the tyres as soon as
possible.
Reinitialise the detection system after adjusting
the pressure.
Under-inflation warning lamp
flashing then fixed and Service
warning lamp fixed.
The tyre pressure monitoring system is faulty.
Under-inflation detection is no longer monitored.
Check the tyre pressures as soon as possible and
carry out (3).
Parking sensorsFixed, accompanied by the display of a
message and an audible signal.
The system has a fault.
Carry out (3).
Engine pre-heating (Diesel)Temporarily on
(up to approximately 30 seconds in severe
weather conditions).
When switching on the ignition, if the weather
conditions and the engine temperature make it
necessary.
Wait until the warning lamp goes off before
starting.
When the warning lamp goes off, starting will
occur immediately if you press and hold:
–
the clut
ch pedal with a manual gearbox.
–
the brak
e pedal with an automatic gearbox.
If the engine does not start, make the engine
starting request again, while keeping your foot on
the pedal.
AirbagsFixed.
One of the airbags or seat belt pyrotechnic
pretensioners is faulty.
Carry out (3).
Front passenger airbag (ON)Fixed.
The front passenger airbag is activated.
The control is in the "ON" position.
Page 25 of 244
23
Instruments01
– Audio system and telephone controls and
display of related information.
–
V
ehicle function and equipment setting menus.
–
Air c
onditioning system controls (depending on
version).
For safety reasons, always stop the
vehicle before performing operations that
require sustained attention.
Some functions are not accessible while
driving.
Recommendations
Do not use pointed objects on the touch screen.
Do not touch the touch screen with wet hands.
Use a soft, clean cloth to clean the touch screen.
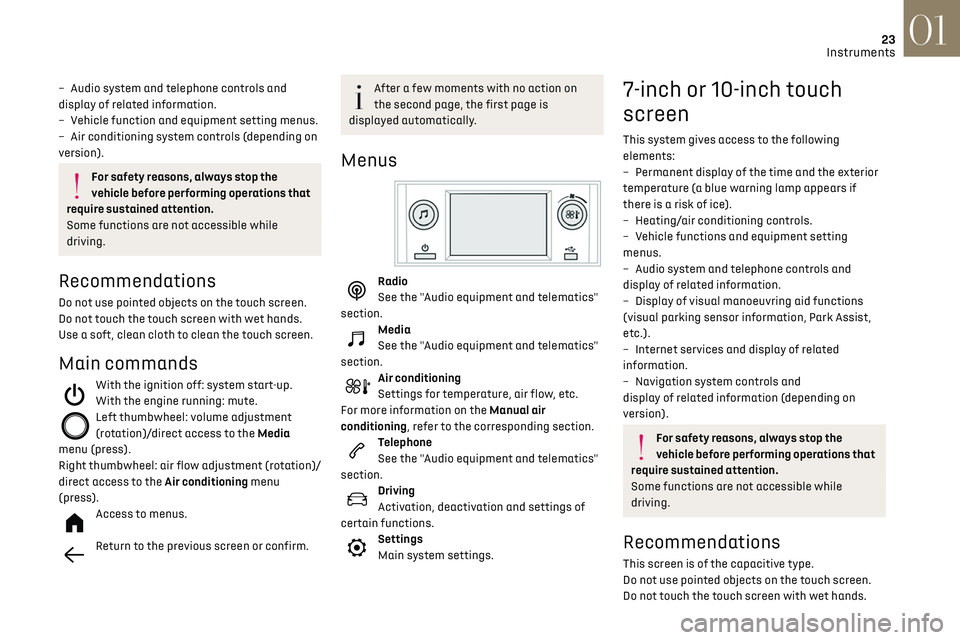
Main commands
With the ignition off: system start-up.
With the engine running: mute.
Left thumbwheel: volume adjustment
(rotation)/direct access to the Media
menu (press).
Right thumbwheel: air flow adjustment (rotation)/
direct access to the Air conditioning menu
(press).
Access to menus.
Return to the previous screen or confirm.
After a few moments with no action on
the second page, the first page is
displayed automatically.
Menus
Radio
See the "Audio equipment and telematics"
section.
Media
See the "Audio equipment and telematics"
section.
Air conditioning
Settings for temperature, air flow, etc.
For more information on the Manual air
conditioning, refer to the corresponding section.
Telephone
See the "Audio equipment and telematics"
section.
Driving
Activation, deactivation and settings of
certain functions.
Settings
Main system settings.
7-inch or 10-inch touch
screen
This system gives access to the following
elements:
–
Permanen
t display of the time and the exterior
temperature (a blue warning lamp appears if
there is a risk of ice).
–
Hea
ting/air conditioning controls.
–
V
ehicle functions and equipment setting
menus.
–
Audio s
ystem and telephone controls and
display of related information.
–
Displa
y of visual manoeuvring aid functions
(visual parking sensor information, Park Assist,
etc.).
–
In
ternet services and display of related
information.
–
Na
vigation system controls and
display of related information (depending on
version).
For safety reasons, always stop the
vehicle before performing operations that
require sustained attention.
Some functions are not accessible while
driving.
Recommendations
This screen is of the capacitive type.
Do not use pointed objects on the touch screen.
Do not touch the touch screen with wet hands.
Page 44 of 244
42
Ease of use and comfort03
Automatic "electrochrome" model
This system automatically and progressively
transitions between day and night modes, using a
sensor that measures the light entering from the
rear of the vehicle.
To ensure optimum visibility during your
manoeuvres, the mirror lightens
automatically when reverse gear is engaged.
Rear bench seat
Bench seat with fixed cushions and split folding
backrests (2/3-1/3) to adapt the boot load space.
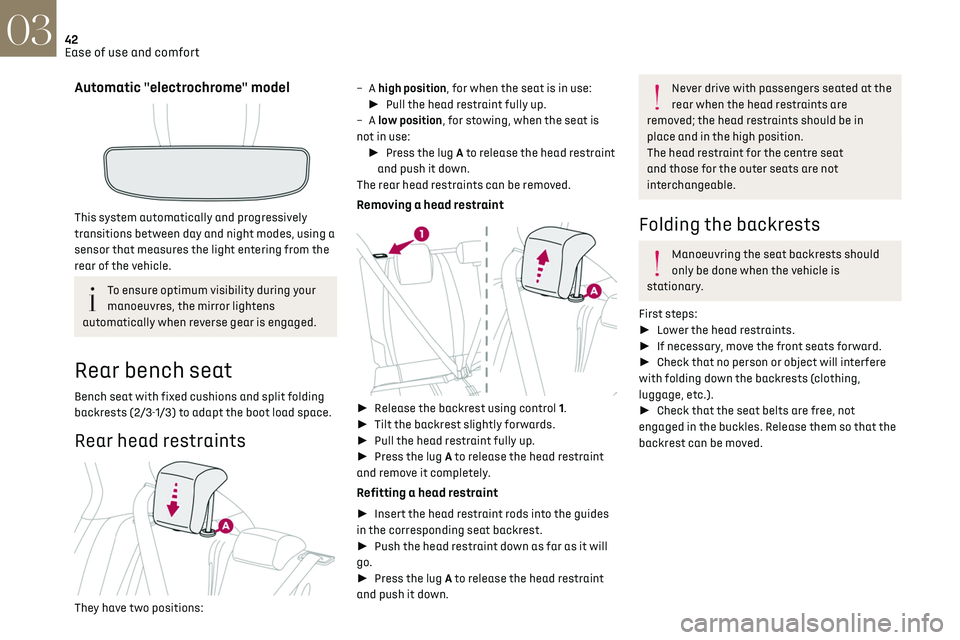
Rear head restraints
They have two positions: – A
high position, for when the seat is in use:
► Pull the head restraint fully up.
– A
low position, for stowing, when the seat is
not in use: ► Press the lug A to release the head restraint
and push it down.
The rear head restraints can be removed.
Removing a head restraint
► Release the backrest using control 1.
► Tilt the backrest slightly forwards.
► Pull the head restraint fully up.
► Press the lug A to release the head restraint
and remove it completely.
Refitting a head restraint
► Insert the head restraint rods into the guides
in the corresponding seat backrest.
► Push the head restraint down as far as it will
go.
► Press the lug A to release the head restraint
and push it down.
Never drive with passengers seated at the
rear when the head restraints are
removed; the head restraints should be in
place and in the high position.
The head restraint for the centre seat
and those for the outer seats are not
interchangeable.
Folding the backrests
Manoeuvring the seat backrests should
only be done when the vehicle is
stationary.
First steps:
► Lower the head restraints.
► If necessary, move the front seats forward.
► Check that no person or object will interfere
with folding down the backrests (clothing,
luggage, etc.).
► Check that the seat belts are free, not
engaged in the buckles. Release them so that the
backrest can be moved.
► Press the backrest release grip 1.
► Guide backrest 2 down to the horizontal
position.
When the backrest is released, the red
indicator is visible in the release grip.
Repositioning the backrests
First check that the outer seat belts are
lying vertically flat alongside the backrest
latching rings.
Page 46 of 244
44Ease of use and comfort03
air outlets and the air extractor in the boot free
from obstructions.
► Do not cover the sunshine sensor located
on the dashboard; this sensor is used to
regulate the automatic air conditioning
system.
► Operate the air conditioning system for at
least 5 to 10 minutes once or twice a month to
keep it in perfect working order.
► If the system does not produce cold air,
switch it off and contact a dealer or a qualified
workshop.
When towing the maximum load on a steep
gradient in high temperatures, switching off
the air conditioning increases the available
engine power, enhancing the towing capacity.
Avoid driving for too long with the
ventilation off or with prolonged operation
of interior air recirculation. Risk of misting and
deterioration of the air quality!
If the interior temperature is very high
after the vehicle has stood for a long
time in the sunshine, air the passenger
compartment for a few moments.
Put the air flow control at a setting high
enough to quickly change the air in the
passenger compartment.
Condensation created by the air
conditioning results in a discharge of
water underneath the vehicle. This is perfectly
normal.
Servicing the ventilation and air
conditioning system
► Ensure that the passenger compartment
filter is in good condition and have the filter
elements replaced regularly.
We recommend using a composite passenger
compartment filter. Thanks to its special
active additive, this type of filter helps to
purify the air breathed by the occupants
and keep the passenger compartment clean
(by reducing allergic symptoms, unpleasant
odours and greasy deposits).
► To ensure correct operation of the
air conditioning system, have it checked
according to the recommendations in the
Maintenance and Warranty Guide.
Stop & Start
The heating and air conditioning systems
only operate when the engine is running.
Temporarily deactivate the Stop & Start
system to maintain a comfortable temperature
in the passenger compartment.
For more information on the Stop & Start, refer
to the corresponding section.
Manual air conditioning
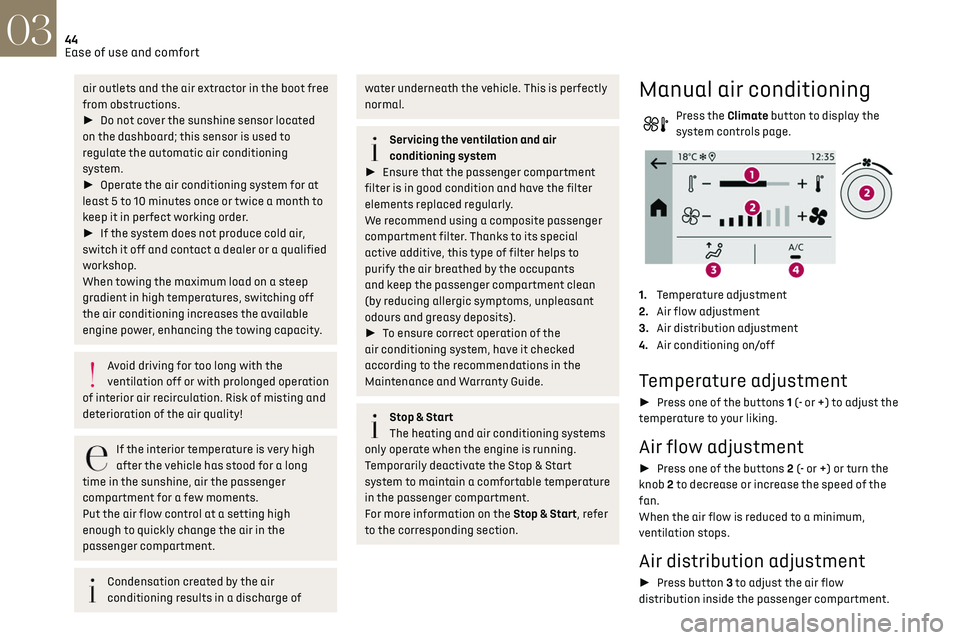
Press the Climate button to display the
system controls page.
1. Temperature adjustment
2. Air flow adjustment
3. Air distribution adjustment
4. Air conditioning on/off
Temperature adjustment
► Press one of the buttons 1 (- or +) to adjust the
temperature to your liking.
Air flow adjustment
► Press one of the buttons 2 (- or +) or turn the
knob 2 to decrease or increase the speed of the
fan.
When the air flow is reduced to a minimum,
ventilation stops.
Air distribution adjustment
► Press button 3 to adjust the air flow
distribution inside the passenger compartment.
Central and side air vents, footwells
Central and side air vents
Windscreen
Windscreen, footwells
Footwells
Air conditioning on / off
The air conditioning system is designed to
operate effectively in all seasons, with the
windows closed.
It is used to:
– lower the temperature in summer,
– increase the effectiveness of the demisting in
winter, above 3°C.
► Press button 4 to activate/deactivate the air
conditioning system.
Air conditioning does not operate when
the air flow is disabled.
To obtain cool air more quickly, enable interior
air recirculation for a brief period. Then return
to the intake of exterior air.
Switching off the air conditioning may result in
some discomfort (humidity or misting).
Page 57 of 244
55Lighting and visibility04
If the driver's door is opened, a temporary
audible signal warns the driver that the lamps
are on.
They will go off automatically after a period
of time that depends on the state of charge of
the battery (entering energy economy mode).
In some weather conditions (e.g. low
temperature or humidity), the presence of
misting on the internal surface of the glass of
the headlamps and rear lamps is normal; it
disappears after the lamps have been on for a
few minutes.
Never look too closely at the luminous
beam of “Full LED” headlamps: risk of
serious eye injury.
Travelling abroad
Vehicles equipped with halogen
headlamps:
If planning to use your vehicle in a country
that drives on the other side of the road, the
headlamp dipped beams must be adjusted to
avoid dazzling oncoming drivers. Contact a
dealer or a qualified workshop.
Daytime running lamps/
sidelamps
The front and rear lamps light up automatically
when the engine starts.
They provide the following functions:
– Da ytime running lamps (lighting control stalk at
position "AUTO" with adequate light level).
–
Sidelamp
s (lighting control stalk "AUTO"
position with low light levels or "Sidelamps only”
or "Dipped/main beam headlamps").
The LEDs are brighter when operating as
daytime running lamps.
Direction indicators
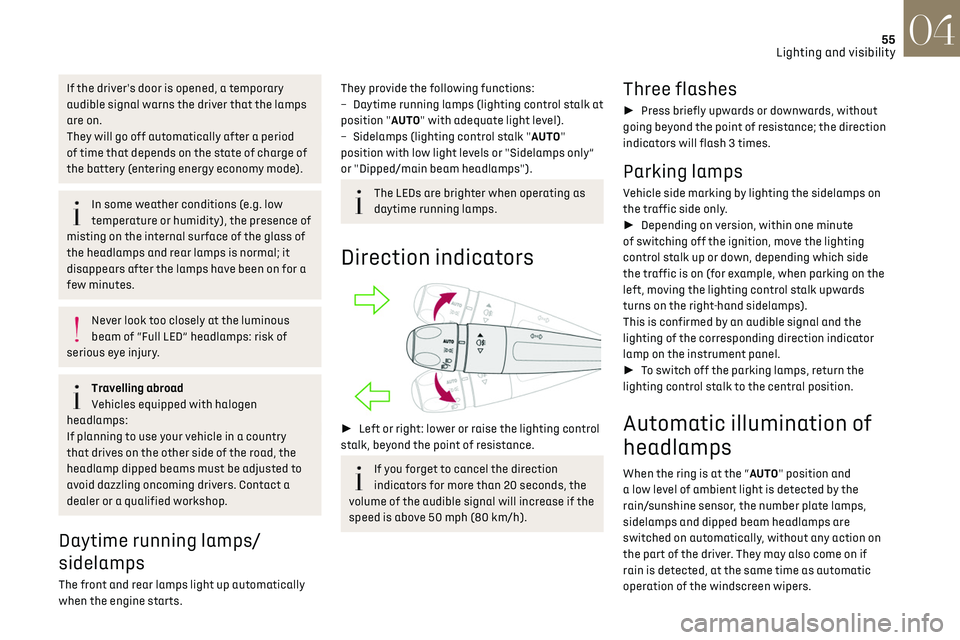
► Left or right: lower or raise the lighting control
stalk, beyond the point of resistance.
If you forget to cancel the direction
indicators for more than 20 seconds, the
volume of the audible signal will increase if the
speed is above 50 mph (80 km/h).
Three flashes
► Press briefly upwards or downwards, without
going beyond the point of resistance; the direction
indicators will flash 3 times.
Parking lamps
Vehicle side marking by lighting the sidelamps on
the traffic side only.
► Depending on version, within one minute
of switching off the ignition, move the lighting
control stalk up or down, depending which side
the traffic is on (for example, when parking on the
left, moving the lighting control stalk upwards
turns on the right-hand sidelamps).
This is confirmed by an audible signal and the
lighting of the corresponding direction indicator
lamp on the instrument panel.
► To switch off the parking lamps, return the
lighting control stalk to the central position.
Automatic illumination of
headlamps
When the ring is at the “AUTO" position and
a low level of ambient light is detected by the
rain/sunshine sensor, the number plate lamps,
sidelamps and dipped beam headlamps are
switched on automatically, without any action on
the part of the driver. They may also come on if
rain is detected, at the same time as automatic
operation of the windscreen wipers.
Page 58 of 244
56Lighting and visibility04
As soon as the brightness returns to a sufficient
level or after the windscreen wipers are switched
off, the lamps are switched off automatically.
Malfunction
In the event of a malfunction of the rain/
sunshine sensor, the vehicle’s lighting
comes on and this warning lamp is displayed in
the instrument panel, accompanied by an audible
signal and/or the display of a message.
Contact a dealer or a qualified workshop.
Do not cover the rain/sunshine sensor
located at the top centre of the
windscreen behind the interior rear view
mirror; the associated functions would no
longer be controlled.
In fog or snow, the rain/sunshine sensor
may detect sufficient light. In this case,
the lighting will not come on automatically.
Headlamp beam height
adjustment
Manual adjustment of the
halogen headlamps
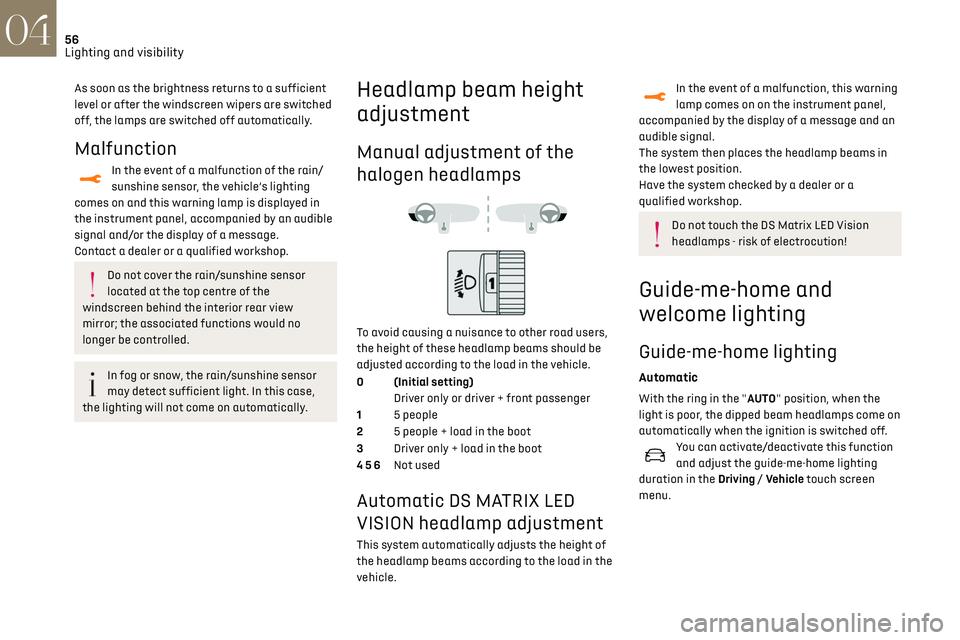
To avoid causing a nuisance to other road users,
the height of these headlamp beams should be
adjusted according to the load in the vehicle.
0 (Initial setting) Driver only or driver + front passenger
1 5 people
2 5 people + load in the boot
3 Driver only + load in the boot
4 5 6 Not used
Automatic DS MATRIX LED
VISION headlamp adjustment
This system automatically adjusts the height of
the headlamp beams according to the load in the
vehicle.
In the event of a malfunction, this warning
lamp comes on on the instrument panel,
accompanied by the display of a message and an
audible signal.
The system then places the headlamp beams in
the lowest position.
Have the system checked by a dealer or a
qualified workshop.
Do not touch the DS Matrix LED Vision
headlamps - risk of electrocution!
Guide-me-home and
welcome lighting
Guide-me-home lighting
Automatic
With the ring in the "AUTO" position, when the
light is poor, the dipped beam headlamps come on
automatically when the ignition is switched off.
You can activate/deactivate this function
and adjust the guide-me-home lighting
duration in the Driving / Vehicle touch screen
menu.
Manual
► With the ignition off, pull the lighting control
stalk toward you ("headlamp flash") to activate/
deactivate the function.
Manual guide-me-home lighting goes off
automatically after a period of time.
Welcome lighting
When the vehicle is unlocked in low light
conditions and the "Automatic illumination of
headlamps" function is activated, this system
automatically switches on:
– On the outside, sidelamps, dipped beam
headlamps and door mirror spotlamps.
– Inside, courtesy lamps and footwell lighting.
Activation / deactivation and adjustment
of the duration of the welcome lighting are
set via the Driving / Vehicle touch screen menu.
Door mirror spotlamps
These spotlamps facilitate access to the vehicle
by lighting the ground near the front doors.
The spotlamps come on automatically:
– when the vehicle is unlocked.
– when a door is opened.
Page 61 of 244
59
Lighting and visibility04
When an oncoming vehicle approaches, only
those lamp segments directed at this vehicle
go off, thereby creating a "tunnel" during the
duration of the approach.
Nominal main beam lighting is restored as soon
as the vehicle is no longer detected by the system.
Entering an illuminated area
At the entrance to an illuminated area (for
example, a town), the lamp segments are
gradually switched off from the outside to the
inside of the vehicle to switch to the dipped
beams.
Exiting an illuminated area
The lamp segments gradually light up from the
inside to the outside of the vehicle to restore the
main beams.
Activation/Deactivation
► Turn the lighting control stalk ring to the
"AUTO" position.
This indicator lamp comes on in the
instrument panel.
The function can be activated and
deactivated in the Driving / Vehicle touch
screen menu.
When deactivated, the lighting system changes to
"automatic illumination of lamps" mode.
The status of the system remains in the memory
when the ignition is switched off.
Pause
If the situation requires a change of headlamp
beam, the driver can take over at any time.
► Flashing the headlamps pauses the
function and the system changes to "automatic
illumination of headlamps" mode:
To reactivate the system, flash the headlamps
again.
Malfunction
If a fault occurs with the adaptive
headlamp lighting or the camera, this
warning lamp is displayed in the instrument
panel, accompanied by an audible signal and a
message.
Contact a dealer or a qualified workshop.
Do not cover the sunshine sensor, linked
to the rain sensor and located at the top
centre of the windscreen behind the interior
rear view mirror; the associated functions
would no longer be controlled.
The system may suffer interference or not
work correctly:
–
under c
onditions of poor visibility (snow,
heavy rain, etc.),
–
if the windscreen in fron
t of the camera is
dirty, misted or obscured (for example, by a
sticker, etc.),
–
if the v
ehicle is facing highly reflective signs
or safety barrier reflectors.
It is recommended to deactivate the function
in foggy or snowy conditions or in case of
heavy mist.
The function temporarily deactivates when
the system detects thick fog or when you
switch on the foglamps. This is signalled by
the extinction of the indicator lamp in the
instrument panel.
The system is not able to detect:
–
road users tha
t do not have their own
lighting, such as pedestrians,
–
v
ehicles whose lighting is obscured (for
example: vehicles running behind a safety
barrier on a motorway),
–
v
ehicles at the top or bottom of a steep
slope, on winding roads, on crossroads.
Clean the windscreen regularly,
particularly the area in front of the
camera.
Do not allow snow to accumulate on the
bonnet or roof of the vehicle as this could
obstruct the detection camera.
Travelling abroad
Vehicles equipped with the DS MATRIX
LED VISION function:
If using your vehicle in a country that drives
on the other side of the road to the country of
sale, deactivate this function to avoid dazzling
oncoming drivers.
Page 64 of 244
62
Lighting and visibility04
Do not apply "Rain X" type water-repellent
products.
► Unclip the worn wiper blade closest to you and
remove it.
► Install the new wiper blade and clip it to the
arm.
► Repeat the procedure for the other wiper
blade.
► Starting with the wiper blade closest to you,
once again hold each arm by the rigid section,
then guide it carefully onto the windscreen.
Removing/refitting at the rear
► Hold the arm by the rigid section and raise it
as far as possible.
► Clean the rear screen using screenwash fluid.
► Unclip the worn wiper blade and remove it.
► Install the new wiper blade and clip it to the
arm.
► Once again hold the arm by the rigid section,
then guide it carefully onto the rear screen.
Automatic windscreen
wipers
In AUTO mode, the windscreen wipers operate
automatically, without any action on the part of
the driver. If rain is detected, the wiping adapts to
the intensity of the rainfall automatically.
Detection of rainfall is by means of a rain/
sunshine sensor at the top centre of the
windscreen, behind the rear view mirror.
Do not cover the rain/sunshine sensor.
When using an automatic car wash,
switch off the automatic wipers and the
ignition.
In winter, wait until the windscreen is
completely clear of ice before activating the
automatic wipers.
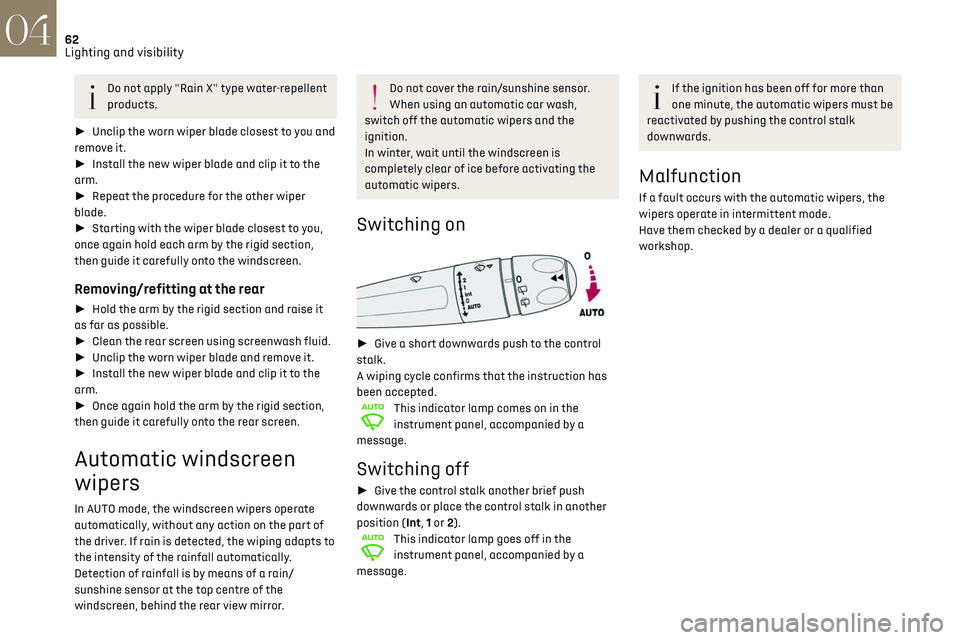
Switching on
► Give a short downwards push to the control
stalk.
A wiping cycle confirms that the instruction has
been accepted.
This indicator lamp comes on in the
instrument panel, accompanied by a
message.
Switching off
► Give the control stalk another brief push
downwards or place the control stalk in another
position (Int, 1 or 2).
This indicator lamp goes off in the
instrument panel, accompanied by a
message.
If the ignition has been off for more than
one minute, the automatic wipers must be
reactivated by pushing the control stalk
downwards.
Malfunction
If a fault occurs with the automatic wipers, the
wipers operate in intermittent mode.
Have them checked by a dealer or a qualified
workshop.
Page 74 of 244
72Safety05
Passengers must not place their feet on the
dashboard.
Do not smoke as deployment of the airbags
can cause burns or the risk of injury from a
cigarette or pipe.
Never remove or pierce the steering wheel or
hit it violently.
Do not fix or attach anything to the steering
wheel or dashboard, as this could cause
injuries when the airbags are deployed.
Lateral airbags
Use only approved covers on the seats,
compatible with the deployment of the lateral
airbags. For information on the range of seat
covers suitable for your vehicle, contact a
dealer.
Do not fix or attach anything to the seat
backrests (clothing, etc.), as this could cause
injuries to the chest or arm when the lateral
airbag is deployed.
Do not sit with the upper part of the body any
nearer to the door than necessary.
At the rear, any objects placed on the outer
seats or the folded backrest of the 1/3 bench
seat could become projectiles when the lateral
airbags are deployed.
The vehicle's front door panels include side
impact sensors.
A damaged door or any unauthorised or
incorrectly executed work (modification or
repair) on the front doors or their interior trim
could compromise the operation of these
sensors - risk of malfunction of the lateral
airbags!
Such work must only be done by a dealer or a
qualified workshop.
Curtain airbags
Do not fix or attach anything to the roof,
as this could cause head injuries when the
curtain airbag is deployed.
Do not remove the grab handles installed on
the roof, as they play a part in securing the
curtain airbags.
Child seats
The legislation on carrying children is
specific to each country. Refer to the
legislation in force in your country.
For maximum safety, please observe the following
recommendations:
–
In ac
cordance with European regulations, all
children under the age of 12 or less than one and
a half metres tall must travel in approved child
seats suited to their weight, on seats fitted with a
seat belt or ISOFIX mountings.
–
Statistically
, the safest seats in your vehicle for
carrying children are the rear seats.
–
A child w
eighing less than 9 kg must travel in
the "rearward facing" position both in the front
and in the rear.
It is recommended that children travel on
the rear seats of the vehicle:
–
"rearward facing" up to the age of 3,
–
"forward facing" over the age of 3.
Make sure that the seat belt is correctly
positioned and tightened.
For child seats with a support leg, ensure that
the support leg is in firm and steady contact
with the floor.
An incorrectly installed child seat
compromises the child's safety in the
event of an accident.
Ensure that there is no seat belt or seat belt
buckle under the child seat, as this could
destabilise it.
Remember to fasten the seat belts or the
harness of child seats, keeping the slack
relative to the child's body to a minimum, even
for short journeys.
When installing a child seat using the seat
belt, ensure that the seat belt is tightened
correctly on the child seat and that it secures
the child seat firmly on the seat of the vehicle.
If the passenger seat is adjustable, move it
forwards if necessary.
Remove the head restraint before installing a
child seat with a backrest on a passenger seat.
Ensure that the head restraint is stored or
attached securely to prevent it from being
thrown around the vehicle in the event of sharp