coolant level CITROEN DS3 CROSSBACK 2020 Owners Manual
[x] Cancel search | Manufacturer: CITROEN, Model Year: 2020, Model line: DS3 CROSSBACK, Model: CITROEN DS3 CROSSBACK 2020Pages: 244, PDF Size: 7.7 MB
Page 11 of 244

9Instruments01
Digital instrument panel
This digital instrument panel can be customised.
Depending on the display mode selected, certain
information is hidden or presented differently.
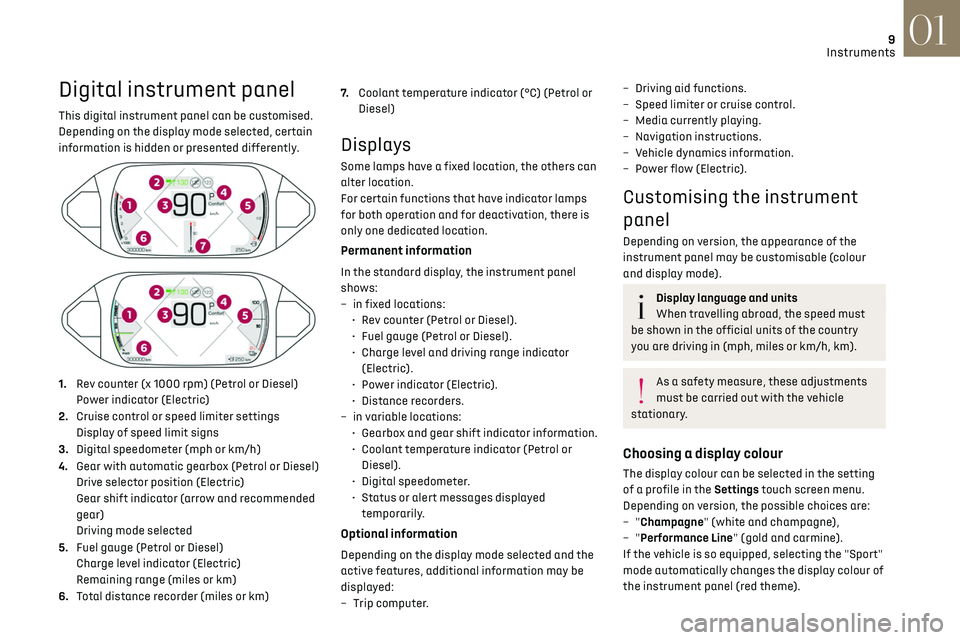
1. Rev counter (x 1000 rpm) (Petrol or Diesel)
Power indicator (Electric)
2. Cruise control or speed limiter settings
Display of speed limit signs
3. Digital speedometer (mph or km/h)
4. Gear with automatic gearbox (Petrol or Diesel)
Drive selector position (Electric)
Gear shift indicator (arrow and recommended
gear)
Driving mode selected
5. Fuel gauge (Petrol or Diesel)
Charge level indicator (Electric)
Remaining range (miles or km)
6. Total distance recorder (miles or km) 7.
Coolant temperature indicator (°C) (Petrol or
Diesel)
Displays
Some lamps have a fixed location, the others can
alter location.
For certain functions that have indicator lamps
for both operation and for deactivation, there is
only one dedicated location.
Permanent information
In the standard display, the instrument panel
shows:
–
in fix
ed locations:
•
R
ev counter (Petrol or Diesel).
•
Fuel gauge (Petrol or Die
sel).
•
C
harge level and driving range indicator
(Electric).
•
Po
wer indicator (Electric).
•
Dist
ance recorders.
–
in v
ariable locations:
•
Gearbo
x and gear shift indicator information.
•
Coolan
t temperature indicator (Petrol or
Diesel).
•
Digit
al speedometer.
•
St
atus or alert messages displayed
temporarily.
Optional information
Depending on the display mode selected and the
active features, additional information may be
displayed:
–
Trip c
omputer.
– Driving aid functions.
– Speed limit er or cruise control.
–
Media c
urrently playing.
–
Na
vigation instructions.
–
V
ehicle dynamics information.
–
Po
wer flow (Electric).
Customising the instrument
panel
Depending on version, the appearance of the
instrument panel may be customisable (colour
and display mode).
Display language and units
When travelling abroad, the speed must
be shown in the official units of the country
you are driving in (mph, miles or km/h, km).
As a safety measure, these adjustments
must be carried out with the vehicle
stationary.
Choosing a display colour
The display colour can be selected in the setting
of a profile in the Settings touch screen menu.
Depending on version, the possible choices are:
–
"Champagne" (white and champagne),
–
"Performance Line" (gold and carmine).
If the vehicle is so equipped, selecting the "Sport"
mode automatically changes the display colour of
the instrument panel (red theme).
Page 14 of 244

12Instruments01
Warning lamp continuously lit
The illumination of a red or orange warning lamp
indicates the occurrence of a fault that needs
further investigation.
If a warning lamp remains lit
The references (1), (2) and (3) in the warning and
indicator lamp description indicate whether you
should contact a qualified professional in addition
to the immediate recommended actions.
(1): You must stop the vehicle.
Stop as soon as it is safe to do so and switch off
the ignition.
(2): Contact a dealer or a qualified workshop.
(3): Visit a dealer or a qualified workshop.
List of warning and indicator
lamps
Red warning/indicator lamps
STOP
Fixed, associated with another warning
lamp, accompanied by the display of a
message and an audible signal.
A serious fault with the engine, braking system,
power steering, automatic gearbox or a major
electrical fault has been detected.
Carry out (1) and then (2).
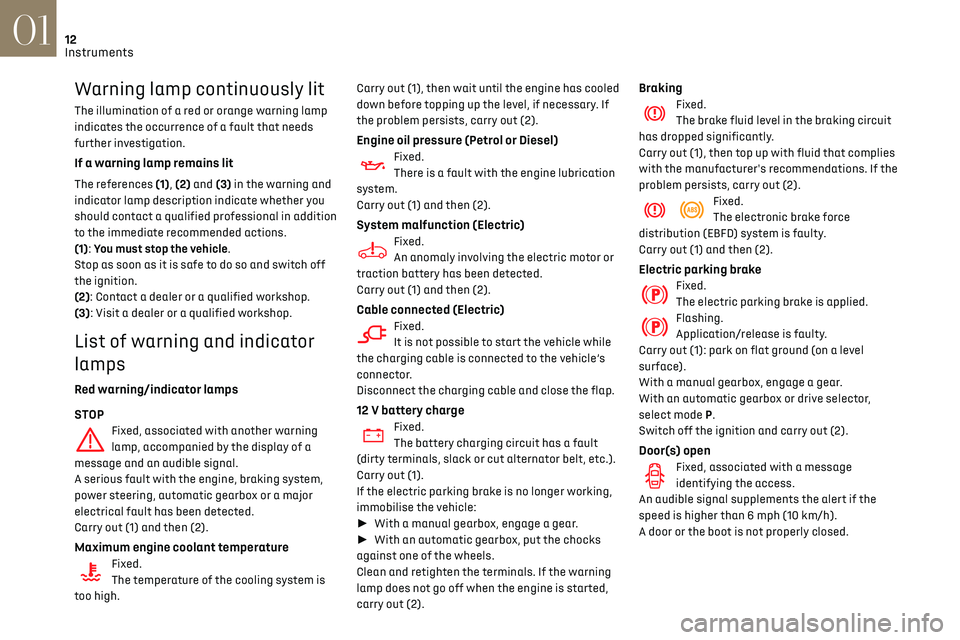
Maximum engine coolant temperatureFixed.
The temperature of the cooling system is
too high. Carry out (1), then wait until the engine has cooled
down before topping up the level, if necessary. If
the problem persists, carry out (2).
Engine oil pressure (Petrol or Diesel)Fixed.
There is a fault with the engine lubrication
system.
Carry out (1) and then (2).
System malfunction (Electric)Fixed.
An anomaly involving the electric motor or
traction battery has been detected.
Carry out (1) and then (2).
Cable connected (Electric)Fixed.
It is not possible to start the vehicle while
the charging cable is connected to the vehicle’s
connector.
Disconnect the charging cable and close the flap.
12 V battery chargeFixed.
The battery charging circuit has a fault
(dirty terminals, slack or cut alternator belt, etc.).
Carry out (1).
If the electric parking brake is no longer working,
immobilise the vehicle:
► With a manual gearbox, engage a gear.
► With an automatic gearbox, put the chocks
against one of the wheels.
Clean and retighten the terminals. If the warning
lamp does not go off when the engine is started,
carry out (2).
BrakingFixed.
The brake fluid level in the braking circuit
has dropped significantly.
Carry out (1), then top up with fluid that complies
with the manufacturer's recommendations. If the
problem persists, carry out (2).
Fixed.
The electronic brake force
distribution (EBFD) system is faulty.
Carry out (1) and then (2).
Electric parking brakeFixed.
The electric parking brake is applied.
Flashing.
Application/release is faulty.
Carry out (1): park on flat ground (on a level
surface).
With a manual gearbox, engage a gear.
With an automatic gearbox or drive selector,
select mode P.
Switch off the ignition and carry out (2).
Door(s) openFixed, associated with a message
identifying the access.
An audible signal supplements the alert if the
speed is higher than 6 mph (10 km/h).
A door or the boot is not properly closed.
Page 20 of 244

18
Instruments01
Retrieving the servicing information
You can view the servicing information by
pressing the “Check" button in the Driving
/ Vehicle touch screen menu.
Engine coolant temperature
indicator
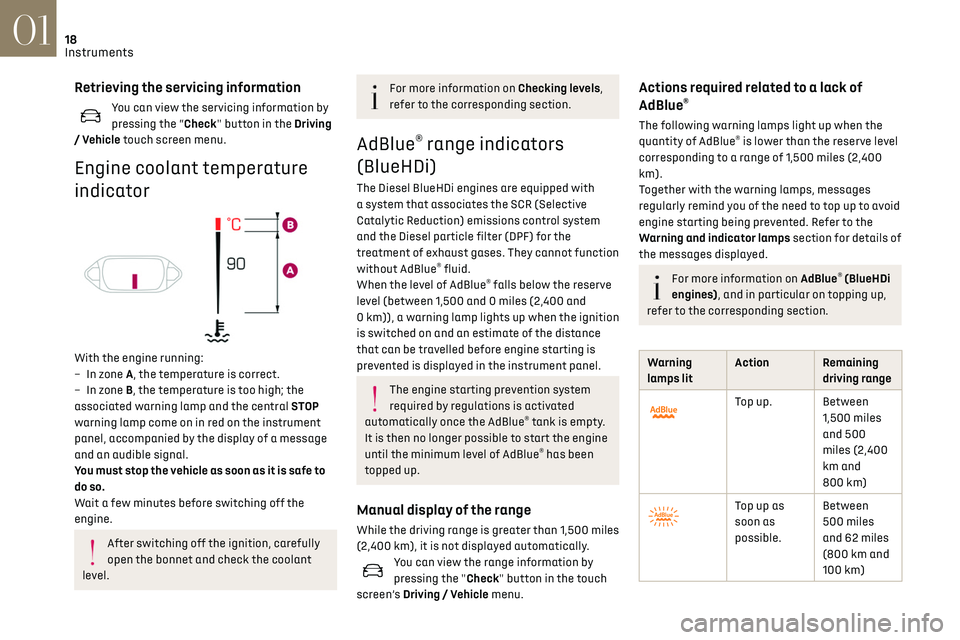
With the engine running:
– In z one A, the temperature is correct.
–
In z
one B, the temperature is too high; the
associated warning lamp and the central STOP
warning lamp come on in red on the instrument
panel, accompanied by the display of a message
and an audible signal.
You must stop the vehicle as soon as it is safe to
do so.
Wait a few minutes before switching off the
engine.
After switching off the ignition, carefully
open the bonnet and check the coolant
level.
For more information on Checking levels,
refer to the corresponding section.
AdBlue® range indicators
(BlueHDi)
The Diesel BlueHDi engines are equipped with
a system that associates the SCR (Selective
Catalytic Reduction) emissions control system
and the Diesel particle filter (DPF) for the
treatment of exhaust gases. They cannot function
without AdBlue
® fluid.
When the level of AdBlue® falls below the reserve
level (between 1,500 and 0 miles (2,400 and
0 km)), a warning lamp lights up when the ignition
is switched on and an estimate of the distance
that can be travelled before engine starting is
prevented is displayed in the instrument panel.
The engine starting prevention system
required by regulations is activated
automatically once the AdBlue
® tank is empty.
It is then no longer possible to start the engine
until the minimum level of AdBlue
® has been
topped up.
Manual display of the range
While the driving range is greater than 1,500 miles
(2,400 km), it is not displayed automatically.
You can view the range information by
pressing the "Check" button in the touch
screen’s Driving / Vehicle menu.
Actions required related to a lack of
AdBlue®
The following warning lamps light up when the
quantity of AdBlue® is lower than the reserve level
corresponding to a range of 1,500 miles (2,400
km).
Together with the warning lamps, messages
regularly remind you of the need to top up to avoid
engine starting being prevented. Refer to the
Warning and indicator lamps section for details of
the messages displayed.
For more information on AdBlue® (BlueHDi
engines), and in particular on topping up,
refer to the corresponding section.
Warning
lamps lit Action Remaining
driving range
Top up. Between 1,500 miles
and 500
miles (2,400
km and
800 km)
Top up as
soon as
possible.Between
500 miles
and 62 miles
(800 km and
100 km)
Page 142 of 244

140
Practical information07
► Clip the stay in its housing.
► Lower the bonnet and release it near the end
of its travel.
► Pull on the bonnet to check that it is locked
correctly.
Because of the presence of electrical
equipment under the bonnet, it is
recommended that exposure to water (rain,
washing, etc.) be limited.
Engine compartment
The engine represented is an example given for
illustration purposes only.
The locations of the following elements may vary:
–
Air filt
er.
–
Engine oil dip
stick.
–
Engine oil filler c
ap.
Petrol engine
Diesel engine
1.Screenwash fluid reservoir.
2.Engine coolant reservoir.
3.Brake fluid reservoir.
4.Battery/Fuses.
5.Remote earth point (-).
6.Fusebox.
7. Air filter.
8.Engine oil filler cap.
9.Engine oil dipstick.
The Diesel fuel system operates under
very high pressure.
All work on this circuit must be carried out only
by a dealer or a qualified workshop.
Electric motor
1. Screenwash fluid reservoir
2. Engine coolant reservoir
3.Brake fluid reservoir
4. Battery / Fuses
5. Remote earth point (-)
6. Fusebox
7. 400 V electrical system
8. Emergency circuit-breaker for firefighters and
maintenance technicians
For more information on the Charging system
(Electric), refer to the corresponding section.
Checking levels
Check all of the following levels regularly in
accordance with the manufacturer's service
schedule. Top them up if required, unless
otherwise indicated.
If a level drops significantly, have the
corresponding system checked by a dealer or a
qualified workshop.
The fluids must comply with the
manufacturer's requirements and with
the vehicle's engine.
Take care when working under the
bonnet, as certain areas of the engine
may be extremely hot (risk of burns) and the
cooling fan could start at any time (even with
the ignition off).
Used products
Avoid prolonged contact of used oil or
fluids with the skin.
Most of these fluids are harmful to health and
very corrosive.
Do not discard used oil or fluids into
sewers or onto the ground.
Empty used oil into the containers reserved
for this purpose at a dealer or a qualified
workshop.
Engine oil
The level is checked, with the engine
having been switched off for at least 30
minutes and on level ground, using the dipstick.
It is normal to top up the oil level between two
services (or oil changes). It is recommended that
you check the level, and top up if necessary, every
3,000 miles (5,000 km).
In order to maintain the reliability of the
engine and emissions control system,
never use additives in the engine oil.
Checking using the dipstick
For the location of the dipstick, please refer
to the illustration of the corresponding engine
compartment.
► Grasp the dipstick by its coloured grip and pull
it out completely.
Page 143 of 244

141
Practical information07
Used products
Avoid prolonged contact of used oil or
fluids with the skin.
Most of these fluids are harmful to health and
very corrosive.
Do not discard used oil or fluids into
sewers or onto the ground.
Empty used oil into the containers reserved
for this purpose at a dealer or a qualified
workshop.
Engine oil
The level is checked, with the engine
having been switched off for at least 30
minutes and on level ground, using the dipstick.
It is normal to top up the oil level between two
services (or oil changes). It is recommended that
you check the level, and top up if necessary, every
3,000 miles (5,000 km).
In order to maintain the reliability of the
engine and emissions control system,
never use additives in the engine oil.
Checking using the dipstick
For the location of the dipstick, please refer
to the illustration of the corresponding engine
compartment.
► Grasp the dipstick by its coloured grip and pull
it out completely.
► Wipe the end of the dipstick using a clean, lint-
free cloth.
► Reinsert the dipstick and push fully down,
then pull it out again to visually check the oil level:
the correct level is between marks A (max) and
B (min).
Do not start the engine if the level is:
–
abo
ve mark A: contact a dealer or a qualified
workshop.
–
belo
w mark B: top up the engine oil
immediately.
Oil grade
Before topping up or changing the engine
oil, check that the oil is suitable for the engine
and complies with the recommendations in
the service schedule supplied with the vehicle
(or available from your dealer and qualified
workshops).
Use of non-recommended oil may invalidate
the contractual warranty in the event of engine
failure.
Topping up the engine oil level
For the location of the engine oil filler cap, please
refer to the corresponding under-bonnet engine
compartment illustration.
► Add oil in small quantities, avoiding any spills
on engine components (risk of fire).
► Wait a few minutes before checking the level
again using the dipstick.
► Top up the level if necessary.
► After checking the level, carefully screw the
oil filler cap back on and replace the dipstick in
its tube.
Within 30 minutes of adding oil, the oil
level indication in the instrument panel
when the ignition is switched on is not valid.
Brake fluid
The level of this fluid should be close to the
"MAX" mark. If not, check the brake pad
wear.
To know how often the brake fluid should be
replaced, refer to the manufacturer's servicing
schedule.
Clean the cap before removing it to refill.
Use only DOT4 brake fluid from a sealed
container.
Engine coolant
It is normal to top up this fluid between
two services.
Page 224 of 244

222
Alphabetical index
G
Gauge, fuel 129
Gearbox, automatic
86–89, 91–93, 143
Gearbox, manual
86, 91–93, 143
Gear lever, manual gearbox
86
Gear shift indicator ~ Gear efficiency
indicator
91
Glove box
49
G.P.S.
203
H
Hazard warning lamps 63, 148
headlamp adjustment
56
Headlamp adjustment
56
Headlamps, automatic dipping
57–58
Headlamps, automatic illumination
55–56
Headlamps, dipped beam
156–157
Headlamps, halogen
56, 156–157
Headlamps, main beam
156
Head restraints, front
39
Head restraints, rear
42–43
Head-up display
10–11
Heating
43
Heating, programmable
26, 48
Hi-Fi system
50
High voltage
130
Hill start assist
90–91
Histogramme, fuel consumption
25–26
Horn
64
Horn for pedestrians
64, 80
I
Ignition 83, 213
Ignition on
83
Immobiliser, electronic
81
Indicator, AdBlue® range
18
Indicator, coolant temperature
18
Indicators, direction
55, 156
Inflating tyres
143
Inflating tyres and accessories
(using the kit)
150, 152
Infrared camera
95
Instrument panel
9, 21–22, 95
Internet browser
204, 207
ISOFIX mountings
75
J
Jack 149–150, 152, 211
Jump starting
162
K
Key 27, 29, 31–32
Key, electronic
29–30
Keyless Entry and Starting
28–30, 82
Key not recognised
83
Key with remote control
27, 81
Kit, hands-free
178, 190, 212
Kit, puncture repair
149
Kit, temporary puncture repair
148–150, 152
L
Labels, identification 172
Lamp, boot
53
Lamps, parking
55
Lamps, rear
157
Lane assist
103, 106–108, 110
Lane departure warning active
110, 114
Leather (care)
147
LEDs - Light-emitting diodes
55, 155–157
Level, AdBlue®
142
Level, brake fluid
141
Level, Diesel additive
143
Level, engine coolant
18, 141
Level, engine oil
141
Levels and checks
140–142
Level, screenwash fluid
60, 142
Light-emitting diodes - LEDs
55, 155–157
Lighting dimmer
21
Lighting, exterior
54
Lighting, guide-me home
56–57
Lighting, interior
51–52
Lighting, welcome
56–57
Loading
53, 137–138
Load reduction mode
139
Locating your vehicle
28
Locking
27, 29, 31
Locking from the inside
30
Locking the doors
31
Low fuel level
129
Lumbar
39–40
M