fuel CITROEN DS3 CROSSBACK 2021 Owners Manual
[x] Cancel search | Manufacturer: CITROEN, Model Year: 2021, Model line: DS3 CROSSBACK, Model: CITROEN DS3 CROSSBACK 2021Pages: 244, PDF Size: 7.7 MB
Page 5 of 244
3
Contents
bit.ly/helpPSA
115 Active Safety Brake with Collision Risk Alert and
Intelligent emergency braking assistance
117
Parking sensors
118 Reversing camera
121 Park Assist
124 DS PARK PILOT
07 Practical information
129 Compatibility of fuels
129 Refuelling
130 Misfuel prevention (Diesel)
130 Charging system (Electric)
134 Charging the traction battery (Electric)
137 Towing device
137 Roof bars
138 Snow chains
138 Energy economy mode
139 Bonnet
140 Engine compartment
140 Checking levels
142 Checks
144 AdBlue® (BlueHDi)
146 Free-wheeling
146 Advice on care and maintenance
08 In the event of a breakdown
148 Warning triangle
148 Running out of fuel (Diesel)
148 Tool kit
150 Temporary puncture repair kit
152 Spare wheel
155 Changing a bulb
159 Changing a fuse
161 12 V battery / Accessory battery
165 Towing the vehicle
09 Technical data
168 Engine technical data and towed loads
169 Petrol engines
170 Diesel engines
171 Electric motor
172 Identification markings
172 Dimensions
10 Touch screen BLUETOOTH audio system
173 First steps
173 Steering mounted controls
174 Menus
175 Radio
176 DAB (Digital Audio Broadcasting) radio
177 Media
178 Telephone
179 Settings
180 Frequently asked questions
11 DS CONNECT RADIO
182 First steps
183 Steering mounted controls
184 Menus
185 Applications
185 Radio
187 DAB (Digital Audio Broadcasting) radio
187 Media
188 Telephone
192 Settings
193 Frequently asked questions
12 DS CONNECT NAV
195 First steps
196 Steering mounted controls
196 Menus
198 Voice commands
201 Navigation
204 Connected navigation
206 Applications
209 Radio
210 DAB (Digital Audio Broadcasting) radio
210 Media
212 Telephone
214 Settings
216 Frequently asked questions
Alphabetical index
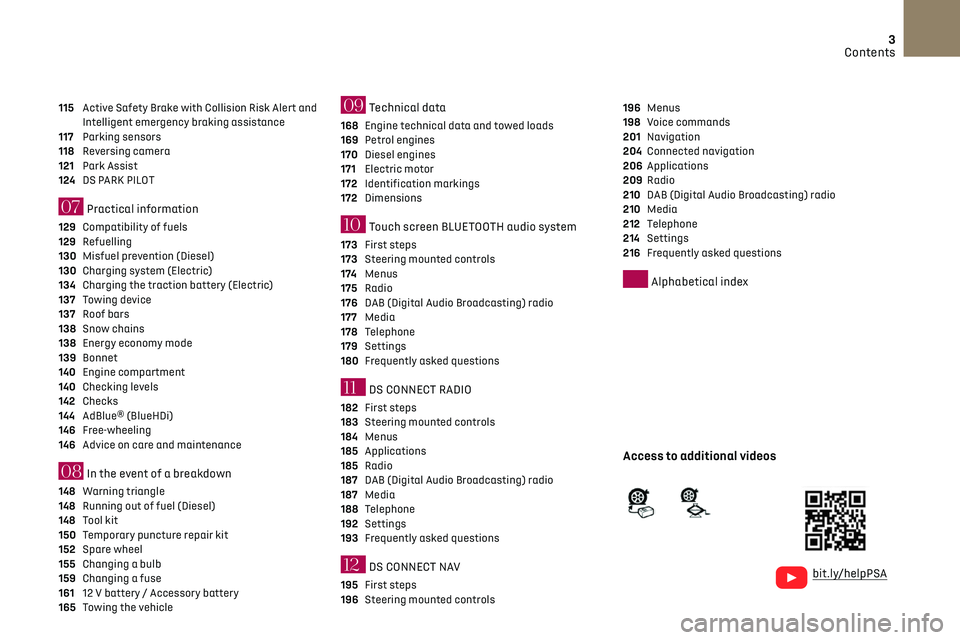
Access to additional videos
Page 9 of 244
7Eco-driving
Eco-driving
Eco-driving refers to a range of everyday practices
that allow the motorist to optimise their fuel
consumption and CO
2emissions.
Optimise your use of the gearbox
With a manual gearbox, move off gently and
change up promptly. While accelerating, change
up early.
With an automatic gearbox, favour automatic
mode and avoid pressing the accelerator pedal
heavily or suddenly.
The gear efficiency indicator prompts you to
engage the most suitable gear: whenever this
indication is displayed on the instrument panel,
follow it straight away.
With an automatic gearbox, this indicator
appears only in manual mode.
Drive smoothly
Maintain a safe distance between vehicles, use
engine braking rather than the brake pedal and
press the accelerator gradually. These attitudes
help to save fuel, reduce CO
2 emissions and
decrease general traffic noise.
Favour the use of the "Eco" driving mode by
selecting it using the "Drive Mode" control.
If the vehicle has the steering-mounted "CRUISE"
control, use cruise control at speeds above 25
mph (40 km/h) when the traffic is flowing well.
Use electrical equipment wisely
Before moving off, if the passenger compartment
is too warm, ventilate it by opening the windows
and air vents before using the air conditioning.
At speeds above 31 mph (50 km/h), close the
windows and leave the air vents open.
Consider using equipment that can help keep
the temperature in the passenger compartment
down.
Unless automatically regulated, switch off the air
conditioning as soon as the desired temperature
has been reached.
Switch off the demisting and defrosting
functions, if they are not managed automatically.
Switch off the heated seat as soon as possible.
Switch off the headlamps and foglamps when the
visibility conditions do not require their use.
Avoid running the engine before moving off,
particularly in winter; your vehicle will warm up
much faster while driving.
As a passenger, avoid connecting your multimedia
devices (film, music, video game, etc.) to help
reduce consumption of electrical energy, and
hence fuel.
Disconnect all portable devices before leaving the
vehicle.
Limit the causes of excess consumption
Spread loads throughout the vehicle; place the
heaviest items in the boot, as close as possible to
the rear seats. Limit the loads carried in the vehicle and minimise
wind resistance (roof bars, roof rack, bicycle
carrier, trailer, etc.). Preferably, use a roof box.
Remove roof bars and roof racks after use.
At the end of winter, remove snow tyres and refit
summer tyres.
Comply with servicing instructions
Check tyre pressures regularly, with the tyres
cold, referring to the label in the door aperture on
the driver's side.
Carry out this check in particular:
–
before a long journe
y.
–
a
t each change of season.
–
a
fter a long period out of use.
Do not overlook the spare wheel and, where
applicable, the tyres on your trailer or caravan.
Have your vehicle serviced regularly (engine oil,
oil filter, air filter, passenger compartment filter,
etc.) and observe the schedule of operations in
the manufacturer's service schedule.
With a BlueHDi Diesel engine, if the SCR system
is faulty, your vehicle will emit pollution; visit a
dealer or a qualified workshop as soon as possible
to restore your vehicle’s nitrogen oxide emissions
to regulatory compliance.
When filling the fuel tank, do not continue after
the third nozzle cut-out, to avoid overflow.
You will only see the fuel consumption of your new
vehicle settle down to a consistent average after
the first 1,900 miles (3,000 kilometres).
Page 11 of 244
9Instruments01
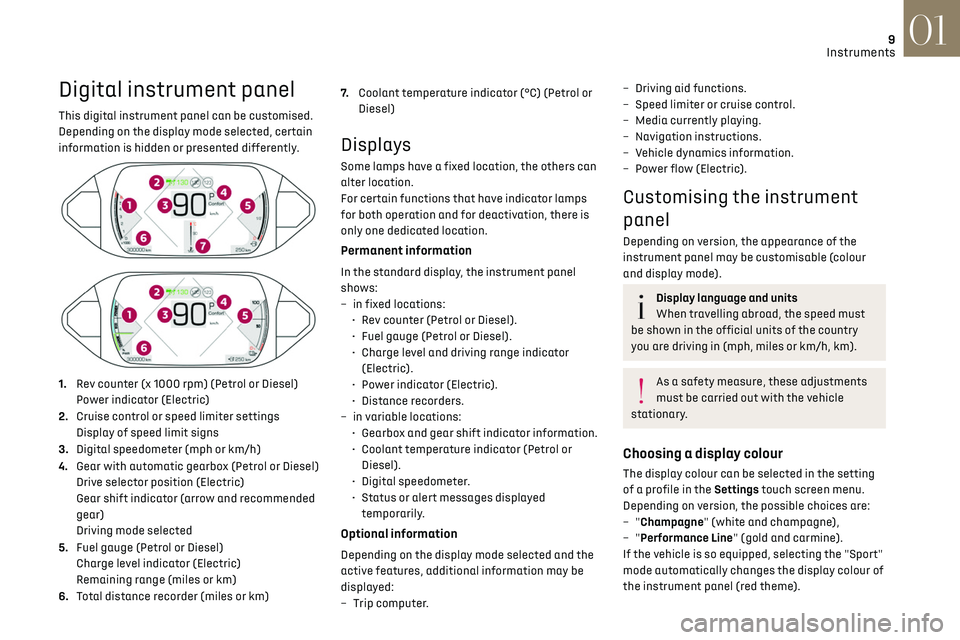
Digital instrument panel
This digital instrument panel can be customised.
Depending on the display mode selected, certain
information is hidden or presented differently.
1. Rev counter (x 1000 rpm) (Petrol or Diesel)
Power indicator (Electric)
2. Cruise control or speed limiter settings
Display of speed limit signs
3. Digital speedometer (mph or km/h)
4. Gear with automatic gearbox (Petrol or Diesel)
Drive selector position (Electric)
Gear shift indicator (arrow and recommended
gear)
Driving mode selected
5. Fuel gauge (Petrol or Diesel)
Charge level indicator (Electric)
Remaining range (miles or km)
6. Total distance recorder (miles or km) 7.
Coolant temperature indicator (°C) (Petrol or
Diesel)
Displays
Some lamps have a fixed location, the others can
alter location.
For certain functions that have indicator lamps
for both operation and for deactivation, there is
only one dedicated location.
Permanent information
In the standard display, the instrument panel
shows:
–
in fix
ed locations:
•
R
ev counter (Petrol or Diesel).
•
Fuel gauge (Petrol or Die
sel).
•
C
harge level and driving range indicator
(Electric).
•
Po
wer indicator (Electric).
•
Dist
ance recorders.
–
in v
ariable locations:
•
Gearbo
x and gear shift indicator information.
•
Coolan
t temperature indicator (Petrol or
Diesel).
•
Digit
al speedometer.
•
St
atus or alert messages displayed
temporarily.
Optional information
Depending on the display mode selected and the
active features, additional information may be
displayed:
–
Trip c
omputer.
– Driving aid functions.
– Speed limit er or cruise control.
–
Media c
urrently playing.
–
Na
vigation instructions.
–
V
ehicle dynamics information.
–
Po
wer flow (Electric).
Customising the instrument
panel
Depending on version, the appearance of the
instrument panel may be customisable (colour
and display mode).
Display language and units
When travelling abroad, the speed must
be shown in the official units of the country
you are driving in (mph, miles or km/h, km).
As a safety measure, these adjustments
must be carried out with the vehicle
stationary.
Choosing a display colour
The display colour can be selected in the setting
of a profile in the Settings touch screen menu.
Depending on version, the possible choices are:
–
"Champagne" (white and champagne),
–
"Performance Line" (gold and carmine).
If the vehicle is so equipped, selecting the "Sport"
mode automatically changes the display colour of
the instrument panel (red theme).
Page 12 of 244

10Instruments01
Setting the display mode
In each mode, specific types of information are
displayed on the instrument panel.
Changing the display mode
► Turn the thumbwheel on the left of the
steering wheel to display and scroll through the
various modes on the instrument panel.
► Press the thumbwheel to confirm the mode.
If you do not press the thumbwheel, the selected
display mode is automatically applied after a few
moments.
Display mode overview
– "DIALS": standard display of analogue and
digit al speedometers, distance recorder and:
•
fuel gauge
, coolant temperature indicator and
rev counter (Petrol or Diesel).
•
ba
ttery charge indicator and power indicator
(Electric).
–
NA
VIGATION": standard display plus current
navigation information (map and navigation
instructions).
–
"DRIVING" : standard display, plus information
relating to active driving aid systems. –
"PERSONAL 1" / "PERSONAL 2": displays the
information selected by the driver in the centre of
the instrument panel.
Configuring a "PERSONAL" display mode
With DS CONNECT RADIO► Press Settings in the upper banner of
the touch screen.
► Select "Configuration".
► Select "Instrument panel
personalisation".
With DS CONNECT NAV
► Press Settings in the side banner of the
touch screen.
► Select "OPTIONS".
► Select "Instrument panel
personalisation".
► Select "PERSONAL 1" or "PERSONAL 2".
► Select the type of information using the scroll
arrows in the touch screen: •
"Default" (empty).
•
"Trip computer".
•
"Media".
•
"G-metres" (depending on version).
•
"Power meters + Boost + Torque" (depending on version).
•
"Energy consumption" (depending on version).
► Confirm to save and exit.
Information is displayed immediately on the
instrument panel if the corresponding display
mode is selected.
The type of information selected in the
"PERSONAL 1" mode is not available in the
"PERSONAL 2" mode.
Head-up display
System which projects various information onto a
blade in the driver's field of vision so that they do
not have to take their eyes off the road.
Information displayed during
operation
Once the system has been activated, the
following information is grouped together in the
head-up display:
A. The speed of your vehicle.
B. Cruise control/speed limiter information and,
if the vehicle is so equipped, the Road signs
recognition function.
Page 17 of 244
15
Instruments01
In this case, do NOT install a "rearward facing"
child seat on the front passenger seat - risk of
serious injury!
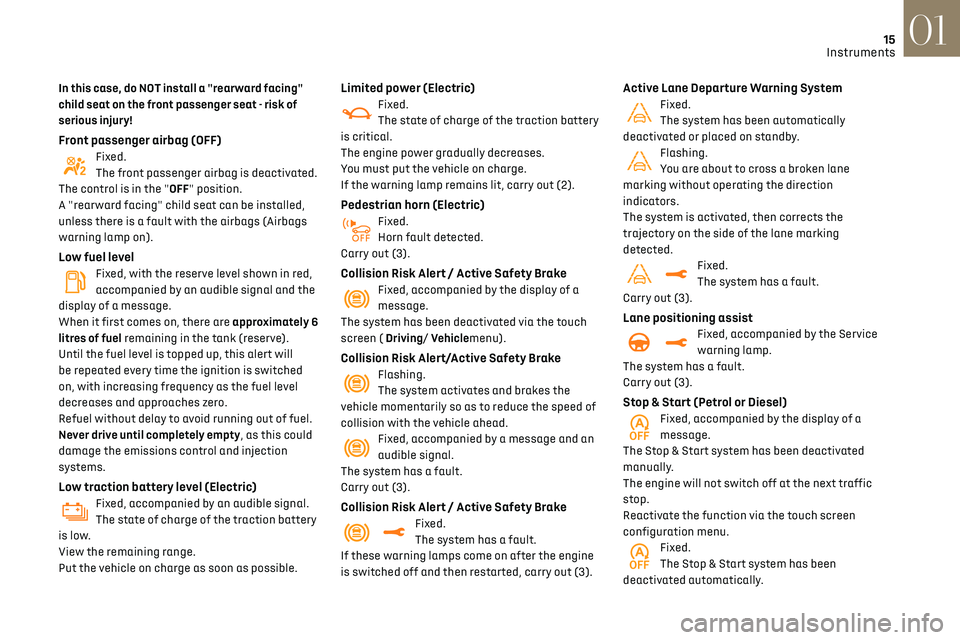
Front passenger airbag (OFF)Fixed.
The front passenger airbag is deactivated.
The control is in the "OFF" position.
A "rearward facing" child seat can be installed,
unless there is a fault with the airbags (Airbags
warning lamp on).
Low fuel levelFixed, with the reserve level shown in red,
accompanied by an audible signal and the
display of a message.
When it first comes on, there are approximately 6
litres of fuel remaining in the tank (reserve).
Until the fuel level is topped up, this alert will
be repeated every time the ignition is switched
on, with increasing frequency as the fuel level
decreases and approaches zero.
Refuel without delay to avoid running out of fuel.
Never drive until completely empty, as this could
damage the emissions control and injection
systems.
Low traction battery level (Electric)Fixed, accompanied by an audible signal.
The state of charge of the traction battery
is low.
View the remaining range.
Put the vehicle on charge as soon as possible.
Limited power (Electric)Fixed.
The state of charge of the traction battery
is critical.
The engine power gradually decreases.
You must put the vehicle on charge.
If the warning lamp remains lit, carry out (2).
Pedestrian horn (Electric)Fixed.
Horn fault detected.
Carry out (3).
Collision Risk Alert / Active Safety BrakeFixed, accompanied by the display of a
message.
The system has been deactivated via the touch
screen ( Driving/ Vehiclemenu).
Collision Risk Alert/Active Safety BrakeFlashing.
The system activates and brakes the
vehicle momentarily so as to reduce the speed of
collision with the vehicle ahead.
Fixed, accompanied by a message and an
audible signal.
The system has a fault.
Carry out (3).
Collision Risk Alert / Active Safety BrakeFixed.
The system has a fault.
If these warning lamps come on after the engine
is switched off and then restarted, carry out (3).
Active Lane Departure Warning SystemFixed.
The system has been automatically
deactivated or placed on standby.
Flashing.
You are about to cross a broken lane
marking without operating the direction
indicators.
The system is activated, then corrects the
trajectory on the side of the lane marking
detected.
Fixed.
The system has a fault.
Carry out (3).
Lane positioning assistFixed, accompanied by the Service
warning lamp.
The system has a fault.
Carry out (3).
Stop & Start (Petrol or Diesel)Fixed, accompanied by the display of a
message.
The Stop & Start system has been deactivated
manually.
The engine will not switch off at the next traffic
stop.
Reactivate the function via the touch screen
configuration menu.
Fixed.
The Stop & Start system has been
deactivated automatically.
Page 24 of 244

22
Instruments01
Trip computer
Information displayed about the current journey
(range, fuel consumption, average speed, etc.).
Data displayed on the
instrument panel
Display of the various tabs
► Pressing the button located on the end of the
wiper control stalk displays the following tabs in
turn:
–
Curren
t information:
•
D
riving range (Petrol or Diesel).
•
Curren
t fuel consumption.
•
St
op & Start time counter (Petrol or Diesel).
•
T
otal mileage (Electric).
–
Trip
s "1" then "2":
•
A
verage speed.
•
A
verage fuel consumption.
•
Dist
ance travelled.
Trip reset
► When the desired trip is displayed,
press the button on the end of the wiper
control stalk for more than 2 seconds.
Trips "1" and "2" are independent and are used
identically.
Definitions
Range
(miles or km)Distance that can still be travelled with the
fuel remaining in the tank (based on the
average fuel consumption over the last few miles
(kilometres) travelled).
This value may vary following a change in driving
style or relief, resulting in a significant change in
the current fuel consumption.
When the range falls below 19 miles (30 km),
dashes are displayed.
After filling with at least 5 litres of fuel, the range
is recalculated and is displayed if it exceeds 62
miles (100 km).
If dashes instead of figures continue to be
displayed while driving, contact a dealer or a
qualified workshop.
Current fuel consumption
(mpg or l/100 km or km/l)
(miles/kWh or kWh/100 km or km/kWh)
Calculated based on the past few
seconds. This function is only displayed at speeds above 19
mph (30 km/h).
Average fuel consumption
(mpg or l/100 km or km/l)
(miles/kWh or kWh/100 km or km/kWh)
Calculated since the last trip
computer reset.
Average speed
(mph or km/h)Calculated since the last trip computer
reset.
Distance travelled
(miles or km)Calculated since the last trip computer
reset.
Stop & Start time counter
(minutes/seconds or hours/minutes)
If your vehicle is equipped with Stop & Start, a
time counter calculates the time spent in STOP
mode during a journey.
It resets to zero every time the ignition is
switched on.
5-inch touch screen
This system gives access to the following
elements:
Page 29 of 244

27
Access02
Electronic key with remote
control function and
built-in key,
Remote control function
The remote control can be used for the following
remote functions, depending on version:
–
U
nlocking / Locking / Deadlocking the vehicle.
–
U
nlocking / Locking the boot.
–
Folding / U
nfolding the door mirrors.
–
Folding / U
nfolding the exterior door handles.
–
Activ
ating / Deactivating the alarm.
–
Loc
ating the vehicle.
–
O
pening / Closing the windows.
–
Activ
ating the vehicle’s electronic immobiliser.
Integral key
The key built into the remote control can be
used for the following operations, depending on
version:
–
Activ
ation/Deactivation of the manual child
lock. –
Activ
ation/Deactivation of the front passenger
airbag.
–
Back
-up Unlocking/Locking of the doors.
►
To eject the key or put it back in place, pull and
hold the button.
Unlocking the vehicle
The selective unlocking (driver’s door,
boot) is set via the Driving / Vehicle touch
screen menu.
Complete unlocking
► Press the unlocking button.
The vehicle's door handles, and depending on
version, the door mirrors, unfold.
Selective unlocking
Driver’s door and fuel/charging flap
► Press the unlocking button.
► Press it again to unlock the other doors and
the boot.
Complete or selective unlocking, and alarm
deactivation depending on version, is confirmed
by the flashing of the direction indicators and the
lighting of the daytime running lamps.
Selective unlocking of the boot
When selective unlocking of the boot is activated :► Press this button to unlock the boot.
The doors remain locked.
Depending on version, pressing and holding this
button causes the boot to open slightly.
If selective unlocking of the boot is deactivated,
pressing this button also unlocks the doors.
Do not forget to lock the boot again by
pressing the locking button.
Locking the vehicle
Normal locking
► Press the locking button.
The locking, and the activation of the alarm
depending on version, is confirmed by the lighting
of the direction indicators and the daytime
running lamps.
The vehicle's handles retract and, depending on
version, the door mirrors fold.
Page 31 of 244

29
Access02
Unlocking the vehicle
Selective unlocking (driver’s door, boot) is
configured in the Driving/Vehicle touch
screen menu.
Selective unlocking is deactivated by default.
Complete unlocking
The vehicle (doors and boot) unlocks:
► either automatically when the driver is
approaching (zone C), if the automatic functions
are activated;
► or by a light press on a handle.
The unlocking, and the deactivation of the
alarm depending on version, is confirmed by
flashing of the direction indicators and lighting of
the daytime running lamps.
The vehicle door handles, and depending on
version, the door mirrors, unfold.
If the key remains in zone B for more than
15 minutes without any action on the
vehicle doors, the automatic functions are
deactivated and the vehicle locks (as
confirmed by an audible signal).
To unlock the vehicle, use the remote control or
press on one of the handles.
Selective unlocking
Driver’s door and fuel filler flap
They unlock:
► either automatically when approaching the
driver’s door, if the automatic functions are
activated;
► or by a light press on the handle.
The driver's door handle unfolds.
► Once inside the vehicle, to unlock all accesses,
press the central locking button or pull the
opening control of any door.
If the user is outside zone A and presses
once on the unlocking button of their
electronic key, only the driver's door and the
fuel filler flap will unlock if selectivity is
activated. Pressing the button again unlocks
the rest of the vehicle.
Selective unlocking of the boot
The boot unlocks automatically as you approach
the rear of the vehicle.
► Press the tailgate control to open the boot.
The doors remain locked.
Locking the vehicle
Normal locking
With the doors and boot closed, the vehicle locks:
► either automatically when leaving recognition
zone B, if the automatic functions are activated;
► or by a light press on one of the front door
handles;
The locking is confirmed by the illumination of
the direction indicators and the daytime running
lamps as well as an audible signal for the locking
on moving away from the vehicle.
It is not possible to lock the vehicle if the
electronic key is left inside.
If the vehicle is unlocked with the handles
retracted, a first press on one of the front
handles unfolds the handle. The vehicle
remains unlocked.
Press the handle again to lock it.
Page 42 of 244

40
Ease of use and comfort03
Activation/Deactivation
► Press this button to activate/
deactivate the function.
Upon activation, the indicator lamp comes on.
The massage function is activated for a period of
one hour.
During this time, massage is performed in 6 cycles
of 10 minutes (6 minutes of massage followed by
a 4-minute break).
After one hour, the function is deactivated; the
indicator lamp goes off.
Heated seats
The function is active only with the engine
running.
On/Off
► Press the button corresponding to your seat.
► Each press changes the heating level; the
corresponding number of indicator lamps come
on.
► To stop heating, press the button again until
all the indicator lamps are off.
The system status is memorised when the ignition
is switched off.
Do not use the function when the seat is
not occupied.
Reduce the heating intensity as soon as
possible.
When the seat and passenger compartment
have reached a satisfactory temperature,
switch the function off; reducing electricity
consumption in turn decreases fuel
consumption.
Prolonged use of heated seats is not
recommended for people with sensitive
skin.
There is a risk of burns for people whose
perception of heat is impaired (illness, taking
medication, etc.).
To keep the heated pad intact and to prevent a
short circuit:
–
Do no
t place heavy or sharp objects on the
seat.
–
Do no
t kneel or stand on the seat.
–
Do no
t spill liquids onto the seat.
–
Ne
ver use the heating function if the seat
is damp.
Steering wheel
adjustment
► When stationary, pull the control to release
the steering wheel.
► Adjust the height and reach to suit your driving
position.
► Push the control lever to lock the steering
wheel.
As a safety measure, these adjustments
must only be carried out with the vehicle
stationary.
Mirrors
Door mirrors
Adjustment
► Turn control A to the right or to the left to
select the corresponding mirror.
► Move the control in any of the four directions
to adjust.
► Return the control to the central position.
As a safety measure, the mirrors should
be adjusted to reduce the blind spots.
The objects observed are, in reality, closer than
they appear. Take this into account in order
to correctly judge the distance of vehicles
approaching from behind.
Manual folding
The mirrors can be folded manually (parking
obstruction, narrow garage, etc.).
Page 49 of 244
47Ease of use and comfort03
Switching the system off
► Press this button.
Its indicator lamp comes on and all other indicator
lamps for the system go off.
This action deactivates all functions of the air
conditioning system.
The temperature is no longer regulated. A slight
flow of air can still be felt, due to the forward
movement of the vehicle.
Interior air recirculation
The intake of exterior air prevents the formation
of mist on the windscreen and side windows.
Recirculating the interior air isolates the
passenger compartment from outside odours
and fumes and allows the desired passenger
compartment temperature to be achieved more
rapidly.
► Press this button to activate/
deactivate the function (confirmed by the
illumination/extinction of the indicator lamp).
The function is activated automatically
when reverse gear is engaged.
Front demist - defrost
► Press this button to activate/
deactivate the demisting or defrosting of
the windscreen and side windows (confirmed by
the illumination/extinction of the indicator lamp).
The system automatically manages the air
conditioning, air flow and air intake, and provides
optimum distribution towards the windscreen and
side windows.
Rear screen demist
- defrost
Demisting/defrosting only operates with the
engine running.
Depending on version, this also applies to the door
mirrors.
► Press this button to activate/
deactivate the function (confirmed by the
illumination/extinction of the indicator lamp).
Demisting/defrosting switches off automatically
to prevent an excessive consumption of electrical
current.
Switch off demisting/defrosting as soon
as you no longer consider it necessary,
as reducing the consumption of electrical
current reduces fuel consumption.
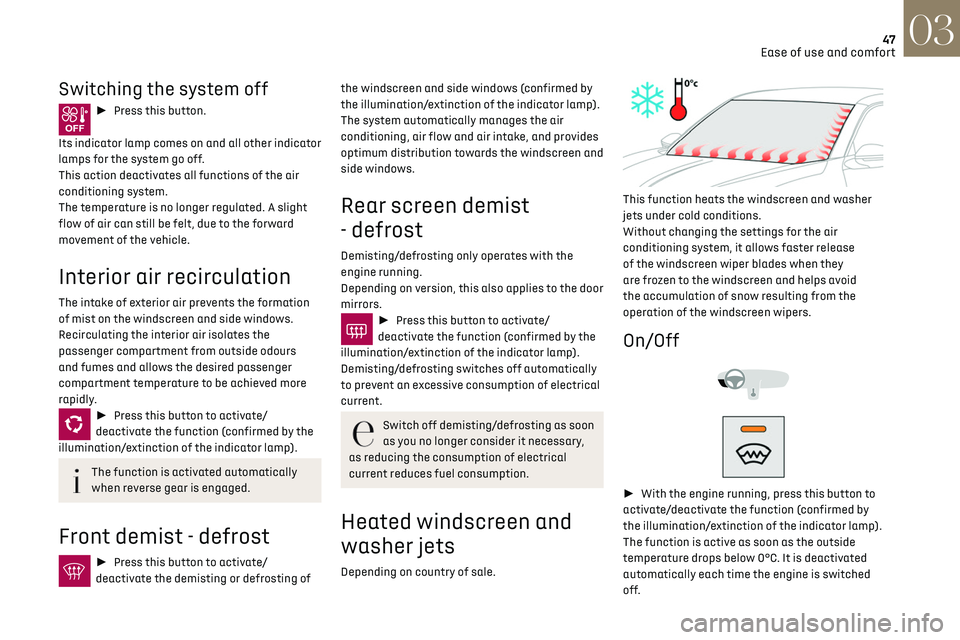
Heated windscreen and
washer jets
Depending on country of sale.
This function heats the windscreen and washer
jets under cold conditions.
Without changing the settings for the air
conditioning system, it allows faster release
of the windscreen wiper blades when they
are frozen to the windscreen and helps avoid
the accumulation of snow resulting from the
operation of the windscreen wipers.
On/Off
► With the engine running, press this button to
activate/deactivate the function (confirmed by
the illumination/extinction of the indicator lamp).
The function is active as soon as the outside
temperature drops below 0°C. It is deactivated
automatically each time the engine is switched
off.