tow CITROEN DS3 CROSSBACK 2023 Owners Manual
[x] Cancel search | Manufacturer: CITROEN, Model Year: 2023, Model line: DS3 CROSSBACK, Model: CITROEN DS3 CROSSBACK 2023Pages: 244, PDF Size: 7.7 MB
Page 5 of 244
3
Contents
bit.ly/helpPSA
115 Active Safety Brake with Collision Risk Alert and
Intelligent emergency braking assistance
117
Parking sensors
118 Reversing camera
121 Park Assist
124 DS PARK PILOT
07 Practical information
129 Compatibility of fuels
129 Refuelling
130 Misfuel prevention (Diesel)
130 Charging system (Electric)
134 Charging the traction battery (Electric)
137 Towing device
137 Roof bars
138 Snow chains
138 Energy economy mode
139 Bonnet
140 Engine compartment
140 Checking levels
142 Checks
144 AdBlue® (BlueHDi)
146 Free-wheeling
146 Advice on care and maintenance
08 In the event of a breakdown
148 Warning triangle
148 Running out of fuel (Diesel)
148 Tool kit
150 Temporary puncture repair kit
152 Spare wheel
155 Changing a bulb
159 Changing a fuse
161 12 V battery / Accessory battery
165 Towing the vehicle
09 Technical data
168 Engine technical data and towed loads
169 Petrol engines
170 Diesel engines
171 Electric motor
172 Identification markings
172 Dimensions
10 Touch screen BLUETOOTH audio system
173 First steps
173 Steering mounted controls
174 Menus
175 Radio
176 DAB (Digital Audio Broadcasting) radio
177 Media
178 Telephone
179 Settings
180 Frequently asked questions
11 DS CONNECT RADIO
182 First steps
183 Steering mounted controls
184 Menus
185 Applications
185 Radio
187 DAB (Digital Audio Broadcasting) radio
187 Media
188 Telephone
192 Settings
193 Frequently asked questions
12 DS CONNECT NAV
195 First steps
196 Steering mounted controls
196 Menus
198 Voice commands
201 Navigation
204 Connected navigation
206 Applications
209 Radio
210 DAB (Digital Audio Broadcasting) radio
210 Media
212 Telephone
214 Settings
216 Frequently asked questions
Alphabetical index
Access to additional videos
Page 34 of 244
32
Access02
► Unclip the cover by inserting a small
screwdriver in the slot and raise the cover.
► Remove the discharged battery from its
housing.
► Insert the new battery, observing the polarity,
and clip the cover onto the housing.
► Reinitialise the remote control.
For more information on Reinitialising the remote
control, refer to the corresponding section.
Do not throw remote control batteries
away, as they contain metals that are
harmful to the environment. Take them to an
approved disposal point.
Reinitialising the remote
control
Following replacement of the battery or in the
event of a fault, it may be necessary to reinitialise
the remote control.
Complete unlocking/locking of
the vehicle with the key
Use this procedure in the following situations:
– R emote control battery discharged.
–
R
emote control malfunction.
–
V
ehicle battery discharged.
–
V
ehicle in an area subject to strong
electromagnetic interference.
In the first case, change the remote control
battery.
In the second case, reinitialise the remote control.
Refer to the corresponding sections.
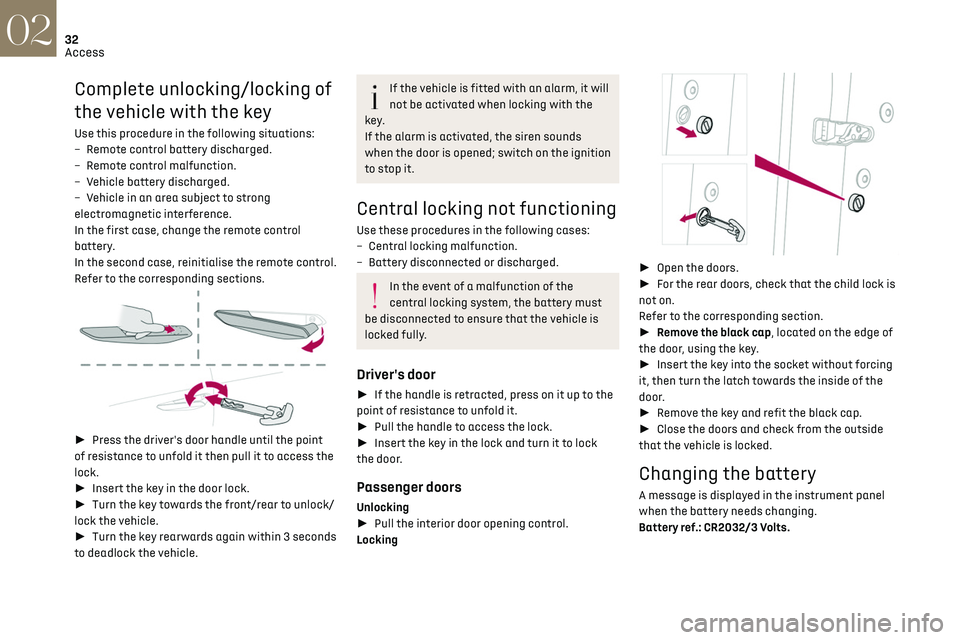
► Press the driver's door handle until the point
of resistance to unfold it then pull it to access the
lock.
► Insert the key in the door lock.
► Turn the key towards the front/rear to unlock/
lock the vehicle.
► Turn the key rearwards again within 3 seconds
to deadlock the vehicle.
If the vehicle is fitted with an alarm, it will
not be activated when locking with the
key.
If the alarm is activated, the siren sounds
when the door is opened; switch on the ignition
to stop it.
Central locking not functioning
Use these procedures in the following cases:
– Cen tral locking malfunction.
–
Ba
ttery disconnected or discharged.
In the event of a malfunction of the
central locking system, the battery must
be disconnected to ensure that the vehicle is
locked fully.
Driver's door
► If the handle is retracted, press on it up to the
point of resistance to unfold it.
► Pull the handle to access the lock.
► Insert the key in the lock and turn it to lock
the door.
Passenger doors
Unlocking
► Pull the interior door opening control.
Locking
► Open the doors.
► For the rear doors, check that the child lock is
not on.
Refer to the corresponding section.
► Remove the black cap, located on the edge of
the door, using the key.
► Insert the key into the socket without forcing
it, then turn the latch towards the inside of the
door.
► Remove the key and refit the black cap.
► Close the doors and check from the outside
that the vehicle is locked.
Changing the battery
A message is displayed in the instrument panel
when the battery needs changing.
Battery ref.: CR2032/3 Volts.
Page 41 of 244
39
Ease of use and comfort03
Cushion height and angle
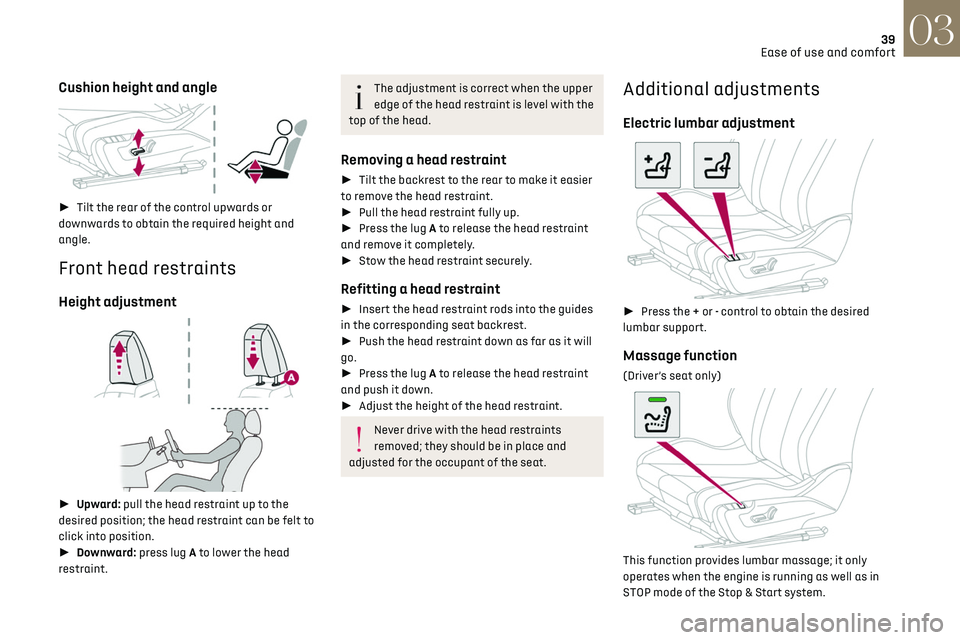
► Tilt the rear of the control upwards or
downwards to obtain the required height and
angle.
Front head restraints
Height adjustment
► Upward: pull the head restraint up to the
desired position; the head restraint can be felt to
click into position.
► Downward: press lug A to lower the head
restraint.
The adjustment is correct when the upper
edge of the head restraint is level with the
top of the head.
Removing a head restraint
► Tilt the backrest to the rear to make it easier
to remove the head restraint.
► Pull the head restraint fully up.
► Press the lug A to release the head restraint
and remove it completely.
► Stow the head restraint securely.
Refitting a head restraint
► Insert the head restraint rods into the guides
in the corresponding seat backrest.
► Push the head restraint down as far as it will
go.
► Press the lug A to release the head restraint
and push it down.
► Adjust the height of the head restraint.
Never drive with the head restraints
removed; they should be in place and
adjusted for the occupant of the seat.
Additional adjustments
Electric lumbar adjustment
► Press the + or - control to obtain the desired
lumbar support.
Massage function
(Driver’s seat only)
This function provides lumbar massage; it only
operates when the engine is running as well as in
STOP mode of the Stop & Start system.
Page 43 of 244
41
Ease of use and comfort03
Mirrors
Door mirrors
Adjustment
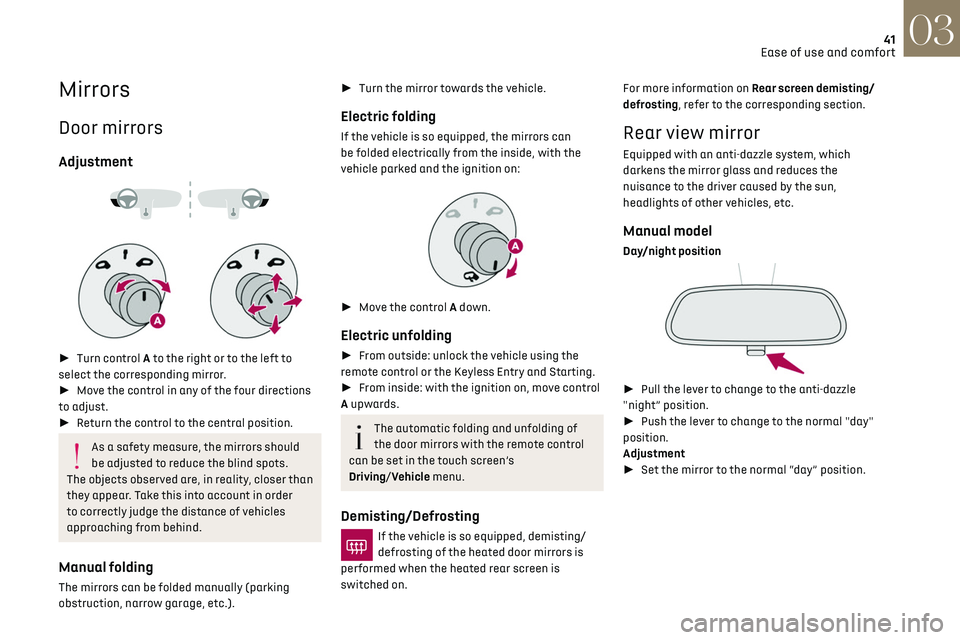
► Turn control A to the right or to the left to
select the corresponding mirror.
► Move the control in any of the four directions
to adjust.
► Return the control to the central position.
As a safety measure, the mirrors should
be adjusted to reduce the blind spots.
The objects observed are, in reality, closer than
they appear. Take this into account in order
to correctly judge the distance of vehicles
approaching from behind.
Manual folding
The mirrors can be folded manually (parking
obstruction, narrow garage, etc.).
► Turn the mirror towards the vehicle.
Electric folding
If the vehicle is so equipped, the mirrors can
be folded electrically from the inside, with the
vehicle parked and the ignition on:
► Move the control A down.
Electric unfolding
► From outside: unlock the vehicle using the
remote control or the Keyless Entry and Starting.
► From inside: with the ignition on, move control
A upwards.
The automatic folding and unfolding of
the door mirrors with the remote control
can be set in the touch screen’s
Driving/Vehicle menu.
Demisting/Defrosting
If the vehicle is so equipped, demisting/
defrosting of the heated door mirrors is
performed when the heated rear screen is
switched on. For more information on Rear screen demisting/
defrosting, refer to the corresponding section.
Rear view mirror
Equipped with an anti-dazzle system, which
darkens the mirror glass and reduces the
nuisance to the driver caused by the sun,
headlights of other vehicles, etc.
Manual model
Day/night position
►
Pull the lever to change to the anti-dazzle
"night” position.
► Push the lever to change to the normal "day"
position.
Adjustment
► Set the mirror to the normal “day” position.
Page 44 of 244
42
Ease of use and comfort03
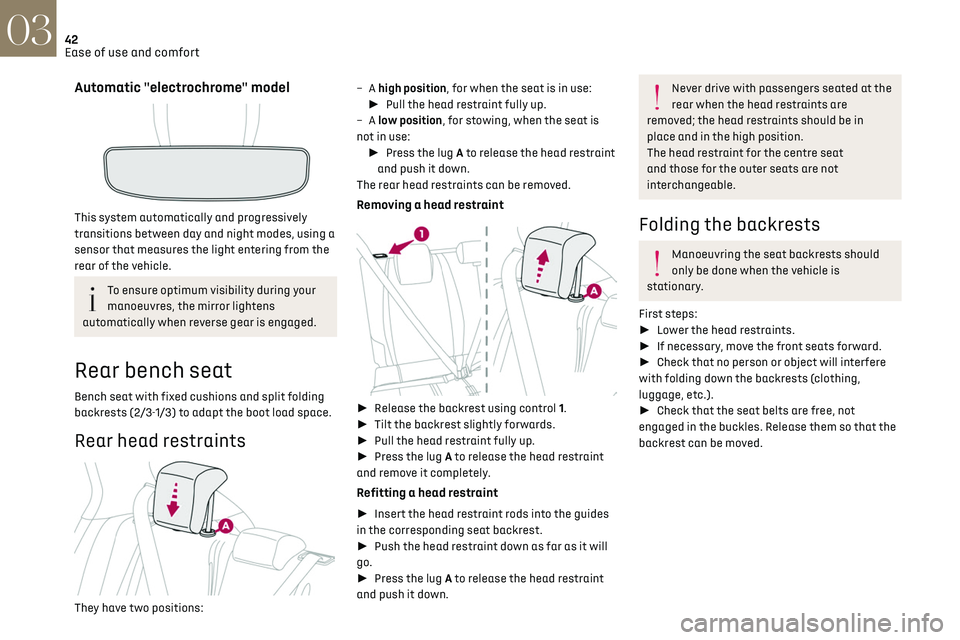
Automatic "electrochrome" model
This system automatically and progressively
transitions between day and night modes, using a
sensor that measures the light entering from the
rear of the vehicle.
To ensure optimum visibility during your
manoeuvres, the mirror lightens
automatically when reverse gear is engaged.
Rear bench seat
Bench seat with fixed cushions and split folding
backrests (2/3-1/3) to adapt the boot load space.
Rear head restraints
They have two positions: – A
high position, for when the seat is in use:
► Pull the head restraint fully up.
– A
low position, for stowing, when the seat is
not in use: ► Press the lug A to release the head restraint
and push it down.
The rear head restraints can be removed.
Removing a head restraint
► Release the backrest using control 1.
► Tilt the backrest slightly forwards.
► Pull the head restraint fully up.
► Press the lug A to release the head restraint
and remove it completely.
Refitting a head restraint
► Insert the head restraint rods into the guides
in the corresponding seat backrest.
► Push the head restraint down as far as it will
go.
► Press the lug A to release the head restraint
and push it down.
Never drive with passengers seated at the
rear when the head restraints are
removed; the head restraints should be in
place and in the high position.
The head restraint for the centre seat
and those for the outer seats are not
interchangeable.
Folding the backrests
Manoeuvring the seat backrests should
only be done when the vehicle is
stationary.
First steps:
► Lower the head restraints.
► If necessary, move the front seats forward.
► Check that no person or object will interfere
with folding down the backrests (clothing,
luggage, etc.).
► Check that the seat belts are free, not
engaged in the buckles. Release them so that the
backrest can be moved.
► Press the backrest release grip 1.
► Guide backrest 2 down to the horizontal
position.
When the backrest is released, the red
indicator is visible in the release grip.
Repositioning the backrests
First check that the outer seat belts are
lying vertically flat alongside the backrest
latching rings.
Page 46 of 244
44Ease of use and comfort03
air outlets and the air extractor in the boot free
from obstructions.
► Do not cover the sunshine sensor located
on the dashboard; this sensor is used to
regulate the automatic air conditioning
system.
► Operate the air conditioning system for at
least 5 to 10 minutes once or twice a month to
keep it in perfect working order.
► If the system does not produce cold air,
switch it off and contact a dealer or a qualified
workshop.
When towing the maximum load on a steep
gradient in high temperatures, switching off
the air conditioning increases the available
engine power, enhancing the towing capacity.
Avoid driving for too long with the
ventilation off or with prolonged operation
of interior air recirculation. Risk of misting and
deterioration of the air quality!
If the interior temperature is very high
after the vehicle has stood for a long
time in the sunshine, air the passenger
compartment for a few moments.
Put the air flow control at a setting high
enough to quickly change the air in the
passenger compartment.
Condensation created by the air
conditioning results in a discharge of
water underneath the vehicle. This is perfectly
normal.
Servicing the ventilation and air
conditioning system
► Ensure that the passenger compartment
filter is in good condition and have the filter
elements replaced regularly.
We recommend using a composite passenger
compartment filter. Thanks to its special
active additive, this type of filter helps to
purify the air breathed by the occupants
and keep the passenger compartment clean
(by reducing allergic symptoms, unpleasant
odours and greasy deposits).
► To ensure correct operation of the
air conditioning system, have it checked
according to the recommendations in the
Maintenance and Warranty Guide.
Stop & Start
The heating and air conditioning systems
only operate when the engine is running.
Temporarily deactivate the Stop & Start
system to maintain a comfortable temperature
in the passenger compartment.
For more information on the Stop & Start, refer
to the corresponding section.
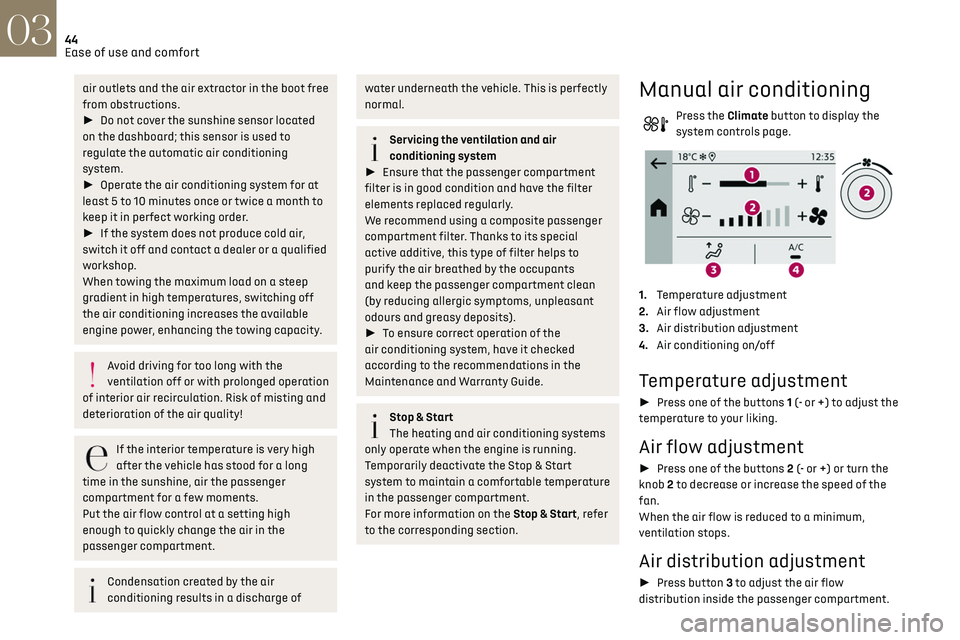
Manual air conditioning
Press the Climate button to display the
system controls page.
1. Temperature adjustment
2. Air flow adjustment
3. Air distribution adjustment
4. Air conditioning on/off
Temperature adjustment
► Press one of the buttons 1 (- or +) to adjust the
temperature to your liking.
Air flow adjustment
► Press one of the buttons 2 (- or +) or turn the
knob 2 to decrease or increase the speed of the
fan.
When the air flow is reduced to a minimum,
ventilation stops.
Air distribution adjustment
► Press button 3 to adjust the air flow
distribution inside the passenger compartment.
Central and side air vents, footwells
Central and side air vents
Windscreen
Windscreen, footwells
Footwells
Air conditioning on / off
The air conditioning system is designed to
operate effectively in all seasons, with the
windows closed.
It is used to:
– lower the temperature in summer,
– increase the effectiveness of the demisting in
winter, above 3°C.
► Press button 4 to activate/deactivate the air
conditioning system.
Air conditioning does not operate when
the air flow is disabled.
To obtain cool air more quickly, enable interior
air recirculation for a brief period. Then return
to the intake of exterior air.
Switching off the air conditioning may result in
some discomfort (humidity or misting).
Page 48 of 244
46Ease of use and comfort03
When the air flow is reduced to a minimum,
ventilation stops.
"OFF" is displayed alongside the fan.
Air distribution adjustment
► Press the buttons 3 to adjust the air flow
distribution inside the passenger compartment.
Windscreen and side windows
Central and side air vents
Footwells
The lighting of the button indicates that air is
being blown in the specified direction.
It is possible to activate all three buttons
simultaneously, for uniform distribution
throughout the passenger compartment.
Air conditioning on / off
The air conditioning system is designed to
operate effectively in all seasons, with the
windows closed.
It is used to:
–
lo
wer the temperature in summer,
–
increase the effectiv
eness of the demisting in
winter, above 3°C.
► Press button 4 to activate/deactivate the air
conditioning system.
Air conditioning does not operate when
the air flow is disabled.
To obtain cool air more quickly, enable interior
air recirculation for a brief period. Then return
to the intake of exterior air.
Switching off the air conditioning may result in
some discomfort (humidity or misting).
Automatic Comfort programme
This automatic mode ensures optimum
management of the passenger compartment
temperature, air flow and air distribution, based
on the selected comfort level.
► Press button 5 to activate or deactivate the air
conditioning system’s automatic mode .
The indicator lamp in the button lights up
when the air conditioning system is operating
automatically.
You can adjust the intensity of the
automatic Comfort programme by using the
"OPTIONS" button to select a profile:
–
"Soft": provides soft and quiet operation by
limiting air flow.
–
"Normal": offers the best compromise between
a comfortable temperature and quiet operation
(default setting).
–
"Fast": provides strong and effective air flow.
To change the current profile (shown by the
corresponding indicator lamp), press button 8
repeatedly until the desired profile is displayed:
The "Normal" or "Fast" profiles are the most
comfortable for passengers in the rear seats.
This profile setting is associated with automatic
mode only. However, on deactivation of the AUTO
mode, the indicator lamp for the most recently
selected profile remains on.
Changing the profile setting does not reactivate
AUTO mode if it was deactivated.
In cold weather with the engine cold, the
air flow is increased gradually until the
comfort setting has been reached, in order to
limit the delivery of cold air into the passenger
compartment.
On entering the vehicle, if the interior
temperature is much colder or warmer than
the comfort setting requested, there is no need
to alter the value displayed to more quickly
reach the required level of comfort. The system
automatically corrects the temperature
difference as quickly as possible.
Maximum air conditioning
This function automatically adjusts the
temperature setting to the lowest possible, the
air distribution towards the central and side air
vents, the air flow to maximum and activates
interior air recirculation.
► Press button 6 to activate / deactivate the
function (the indicator lamp will come on/switch
off).
Once the function is deactivated, the system
returns to the previous settings.
Switching the system off
► Press this button.
Its indicator lamp comes on and all other indicator
lamps for the system go off.
This action deactivates all functions of the air
conditioning system.
The temperature is no longer regulated. A slight
flow of air can still be felt, due to the forward
movement of the vehicle.
Interior air recirculation
The intake of exterior air prevents the formation
of mist on the windscreen and side windows.
Recirculating the interior air isolates the
passenger compartment from outside odours
and fumes and allows the desired passenger
compartment temperature to be achieved more
rapidly.
► Press this button to activate/
deactivate the function (confirmed by the
illumination/extinction of the indicator lamp).
The function is activated automatically
when reverse gear is engaged.
Front demist - defrost
► Press this button to activate/
deactivate the demisting or defrosting of
Page 49 of 244
47Ease of use and comfort03
Switching the system off
► Press this button.
Its indicator lamp comes on and all other indicator
lamps for the system go off.
This action deactivates all functions of the air
conditioning system.
The temperature is no longer regulated. A slight
flow of air can still be felt, due to the forward
movement of the vehicle.
Interior air recirculation
The intake of exterior air prevents the formation
of mist on the windscreen and side windows.
Recirculating the interior air isolates the
passenger compartment from outside odours
and fumes and allows the desired passenger
compartment temperature to be achieved more
rapidly.
► Press this button to activate/
deactivate the function (confirmed by the
illumination/extinction of the indicator lamp).
The function is activated automatically
when reverse gear is engaged.
Front demist - defrost
► Press this button to activate/
deactivate the demisting or defrosting of
the windscreen and side windows (confirmed by
the illumination/extinction of the indicator lamp).
The system automatically manages the air
conditioning, air flow and air intake, and provides
optimum distribution towards the windscreen and
side windows.
Rear screen demist
- defrost
Demisting/defrosting only operates with the
engine running.
Depending on version, this also applies to the door
mirrors.
► Press this button to activate/
deactivate the function (confirmed by the
illumination/extinction of the indicator lamp).
Demisting/defrosting switches off automatically
to prevent an excessive consumption of electrical
current.
Switch off demisting/defrosting as soon
as you no longer consider it necessary,
as reducing the consumption of electrical
current reduces fuel consumption.
Heated windscreen and
washer jets
Depending on country of sale.
This function heats the windscreen and washer
jets under cold conditions.
Without changing the settings for the air
conditioning system, it allows faster release
of the windscreen wiper blades when they
are frozen to the windscreen and helps avoid
the accumulation of snow resulting from the
operation of the windscreen wipers.
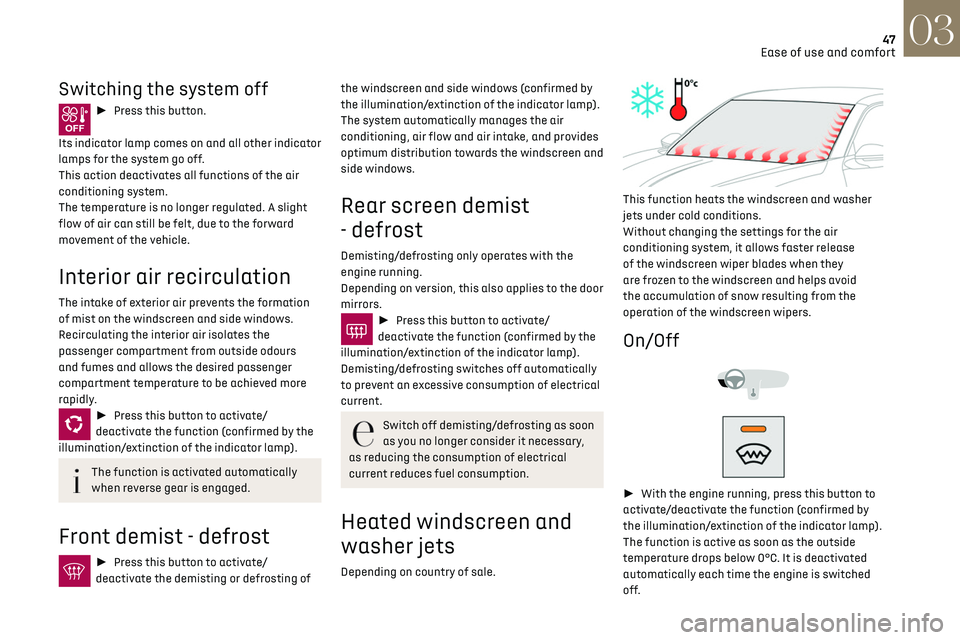
On/Off
► With the engine running, press this button to
activate/deactivate the function (confirmed by
the illumination/extinction of the indicator lamp).
The function is active as soon as the outside
temperature drops below 0°C. It is deactivated
automatically each time the engine is switched
off.
Page 54 of 244

52Ease of use and comfort03
Permanent lighting.
In "permanent lighting" mode, the lighting time
varies according to the circumstances:
–
when the ignition is o
ff, approximately ten
minutes,
–
in energy ec
onomy mode, approximately thirty
seconds,
–
with the engine running, unlimit
ed.
Map reading lamps
► With the ignition on, operate the
corresponding switch.
Take care not to place anything in contact
with the courtesy lamps.
Touch-sensitive courtesy
lamps
1. Front touch-sensitive courtesy lamp
2. Front touch-sensitive reading lamps
3.Rear touch-sensitive reading lamps
Front touch-sensitive courtesy
lamp
It comes on gradually:
–
when the v ehicle is unlocked.
–
when the ignition is s
witched off.
–
when a door is opened.
–
when the remo
te control locking button is
activated, in order to locate the vehicle.
It switches off:
–
when the v
ehicle is locked.
–
when the ignition is s
witched on.
–
30 sec
onds after the last door is closed.
The front and rear touch-sensitive reading lamps
come on and go off at the same time as the
courtesy lamp.
A long press on the courtesy lamp completely
deactivates it from coming on (confirmed by the
"OFF" symbol).
Touch-sensitive reading lamps
► With the ignition on, press the corresponding
reading lamp.
Boot fittings
1. Load space cover
2. Boot lamp
3. Stowing rings
4. Boot mat
5. Tool kit (depending on equipment)
6. Storage well
The stowing rings are designed to secure
luggage using different types of retaining
nets. They are used with the ISOFIX mounting
rings located behind the rear seats.
The retaining nets are available as an option or
as an accessory.
For more information, contact a dealer.
Load space cover
To remove the load space cover:
► unhook the two cords,
► gently lift the shelf, then remove it.
When sharp deceleration occurs, objects
placed on the load space cover can turn
into projectiles.
Storage well
► Fully raise the boot carpet to access the
storage well.
Page 58 of 244

56Lighting and visibility04
As soon as the brightness returns to a sufficient
level or after the windscreen wipers are switched
off, the lamps are switched off automatically.
Malfunction
In the event of a malfunction of the rain/
sunshine sensor, the vehicle’s lighting
comes on and this warning lamp is displayed in
the instrument panel, accompanied by an audible
signal and/or the display of a message.
Contact a dealer or a qualified workshop.
Do not cover the rain/sunshine sensor
located at the top centre of the
windscreen behind the interior rear view
mirror; the associated functions would no
longer be controlled.
In fog or snow, the rain/sunshine sensor
may detect sufficient light. In this case,
the lighting will not come on automatically.
Headlamp beam height
adjustment
Manual adjustment of the
halogen headlamps
To avoid causing a nuisance to other road users,
the height of these headlamp beams should be
adjusted according to the load in the vehicle.
0 (Initial setting) Driver only or driver + front passenger
1 5 people
2 5 people + load in the boot
3 Driver only + load in the boot
4 5 6 Not used
Automatic DS MATRIX LED
VISION headlamp adjustment
This system automatically adjusts the height of
the headlamp beams according to the load in the
vehicle.
In the event of a malfunction, this warning
lamp comes on on the instrument panel,
accompanied by the display of a message and an
audible signal.
The system then places the headlamp beams in
the lowest position.
Have the system checked by a dealer or a
qualified workshop.
Do not touch the DS Matrix LED Vision
headlamps - risk of electrocution!
Guide-me-home and
welcome lighting
Guide-me-home lighting
Automatic
With the ring in the "AUTO" position, when the
light is poor, the dipped beam headlamps come on
automatically when the ignition is switched off.
You can activate/deactivate this function
and adjust the guide-me-home lighting
duration in the Driving / Vehicle touch screen
menu.
Manual
► With the ignition off, pull the lighting control
stalk toward you ("headlamp flash") to activate/
deactivate the function.
Manual guide-me-home lighting goes off
automatically after a period of time.
Welcome lighting
When the vehicle is unlocked in low light
conditions and the "Automatic illumination of
headlamps" function is activated, this system
automatically switches on:
– On the outside, sidelamps, dipped beam
headlamps and door mirror spotlamps.
– Inside, courtesy lamps and footwell lighting.
Activation / deactivation and adjustment
of the duration of the welcome lighting are
set via the Driving / Vehicle touch screen menu.
Door mirror spotlamps
These spotlamps facilitate access to the vehicle
by lighting the ground near the front doors.
The spotlamps come on automatically:
– when the vehicle is unlocked.
– when a door is opened.