engine CITROEN DS4 2018 Owner's Manual
[x] Cancel search | Manufacturer: CITROEN, Model Year: 2018, Model line: DS4, Model: CITROEN DS4 2018Pages: 296, PDF Size: 9.91 MB
Page 35 of 296
33
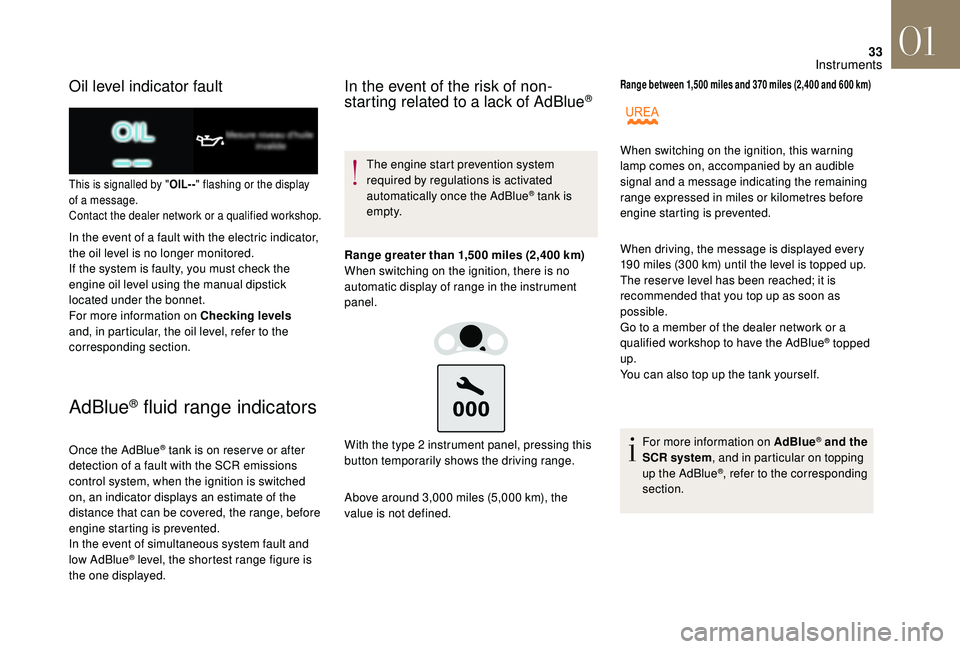
Oil level indicator fault
This is signalled by "OIL- -" flashing or the display
of a message.
Contact the dealer network or a qualified workshop.
In the event of a fault with the electric indicator,
the oil level is no longer monitored.
If the system is faulty, you must check the
engine oil level using the manual dipstick
located under the bonnet.
For more information on Checking levels
and, in particular, the oil level, refer to the
corresponding section.
AdBlue® fluid range indicators
Once the AdBlue® tank is on reser ve or after
detection of a fault with the SCR emissions
control system, when the ignition is switched
on, an indicator displays an estimate of the
distance that can be covered, the range, before
engine starting is prevented.
In the event of simultaneous system fault and
low AdBlue
® level, the shortest range figure is
the one displayed.
In the event of the risk of non-
starting related to a lack of AdBlue®
The engine start prevention system
required by regulations is activated
automatically once the AdBlue
® tank is
e m pt y.
Range greater than 1,500 miles (2,400 km)
When switching on the ignition, there is no
automatic display of range in the instrument
panel.
Above around 3,000 miles (5,000 km), the
value is not defined. With the type 2 instrument panel, pressing this
button temporarily shows the driving range.
Range between 1,500 miles and 370 miles (2,400 and 600 km)
When driving, the message is displayed every
190 miles (300 km) until the level is topped up.
The reser ve level has been reached; it is
recommended that you top up as soon as
possible.
Go to a member of the dealer network or a
qualified workshop to have the AdBlue
® topped
up.
You can also top up the tank yourself.
For more information on AdBlue
® and the
SCR system , and in particular on topping
up the AdBlue
®, refer to the corresponding
section.
When switching on the ignition, this warning
lamp comes on, accompanied by an audible
signal and a message indicating the remaining
range expressed in miles or kilometres before
engine starting is prevented.
01
Instruments
Page 36 of 296
34
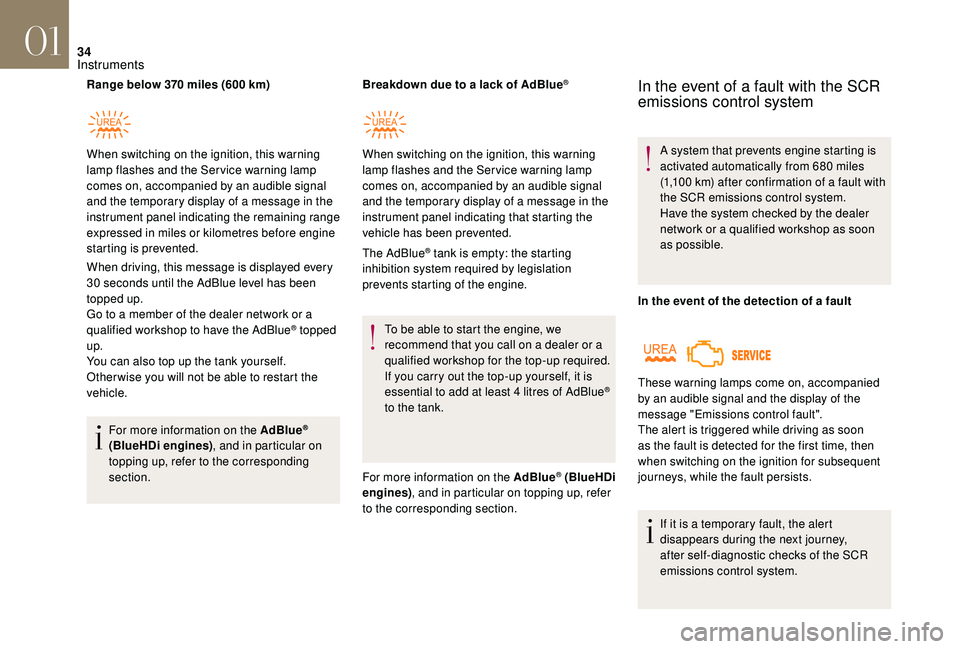
Range below 370 miles (600 km)
When driving, this message is displayed every
30 seconds until the AdBlue level has been
topped up.
Go to a member of the dealer network or a
qualified workshop to have the AdBlue
® topped
up.
You can also top up the tank yourself.
Other wise you will not be able to restart the
vehicle.
For more information on the AdBlue
®
(BlueHDi engines) , and in particular on
topping up, refer to the corresponding
section. Breakdown due to a lack of AdBlue
®
The AdBlue® tank is empty: the starting
inhibition system required by legislation
prevents starting of the engine.
To be able to start the engine, we
recommend that you call on a dealer or a
qualified workshop for the top-up required.
If you carry out the top-up yourself, it is
essential to add at least 4 litres of AdBlue
®
to the tank.
For more information on the AdBlue
® (BlueHDi
engines) , and in particular on topping up, refer
to the corresponding section.
When switching on the ignition, this warning
lamp flashes and the Service warning lamp
comes on, accompanied by an audible signal
and the temporary display of a message in the
instrument panel indicating the remaining range
expressed in miles or kilometres before engine
starting is prevented.
When switching on the ignition, this warning
lamp flashes and the Service warning lamp
comes on, accompanied by an audible signal
and the temporary display of a message in the
instrument panel indicating that starting the
vehicle has been prevented.
In the event of a fault with the SCR
emissions control system
A system that prevents engine starting is
activated automatically from 680 miles
(1,100 km) after confirmation of a fault with
the SCR emissions control system.
Have the system checked by the dealer
network or a qualified workshop as soon
as possible.
In the event of the detection of a fault
If it is a temporary fault, the alert
disappears during the next journey,
after self-diagnostic checks of the SCR
emissions control system.
These warning lamps come on, accompanied
by an audible signal and the display of the
message "Emissions control fault".
The alert is triggered while driving as soon
as the fault is detected for the first time, then
when switching on the ignition for subsequent
journeys, while the fault persists.
01
Instruments
Page 37 of 296
35
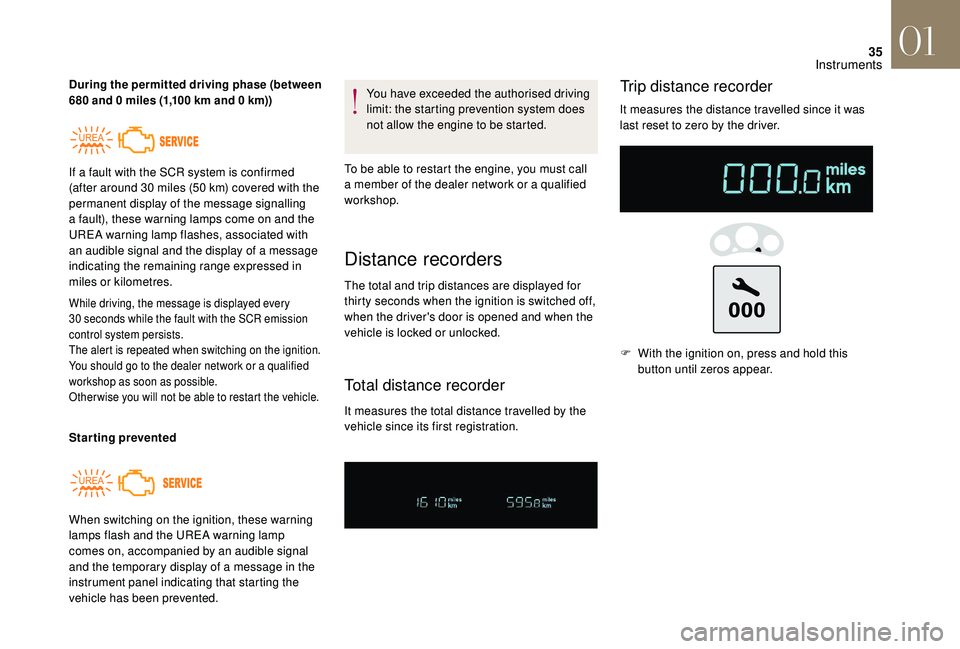
During the permitted driving phase (between
680 and 0 miles (1,100 km and 0 km))
While driving, the message is displayed every
30 seconds while the fault with the SCR emission
control system persists.
The alert is repeated when switching on the ignition.
You should go to the dealer network or a qualified
workshop as soon as possible.
Other wise you will not be able to restart the vehicle.
Starting prevented You have exceeded the authorised driving
limit: the starting prevention system does
not allow the engine to be started.
To be able to restart the engine, you must call
a member of the dealer network or a qualified
workshop.
When switching on the ignition, these warning
lamps flash and the UREA warning lamp
comes on, accompanied by an audible signal
and the temporary display of a message in the
instrument panel indicating that starting the
vehicle has been prevented. If a fault with the SCR system is confirmed
(after around 30 miles (50 km) covered with the
permanent display of the message signalling
a fault), these warning lamps come on and the
UREA warning lamp flashes, associated with
an audible signal and the display of a message
indicating the remaining range expressed in
miles or kilometres.
Distance recorders
The total and trip distances are displayed for
thirty seconds when the ignition is switched off,
when the driver's door is opened and when the
vehicle is locked or unlocked.
Total distance recorder
It measures the total distance travelled by the
vehicle since its first registration.
Trip distance recorder
It measures the distance travelled since it was
last reset to zero by the driver. F
W
ith the ignition on, press and hold this
button until zeros appear.
01
Instruments
Page 38 of 296
36
Manual test in the type 2
instrument panel central screen
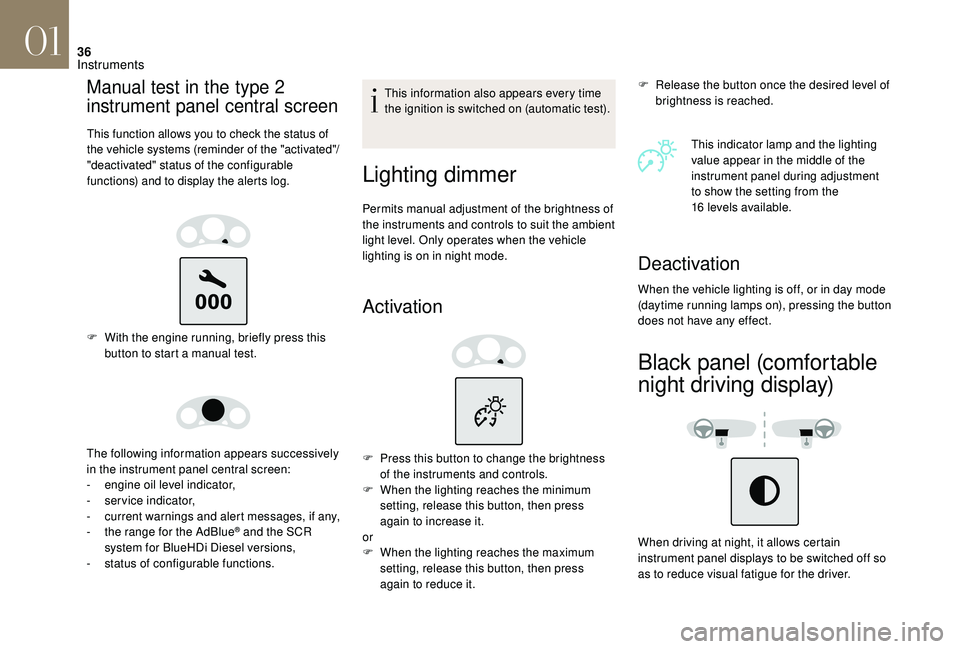
This function allows you to check the status of
the vehicle systems (reminder of the "activated"/
"deactivated" status of the configurable
functions) and to display the alerts log.
F With the engine running, briefly press this button to start a manual test.
The following information appears successively
in the instrument panel central screen:
-
e
ngine oil level indicator,
-
ser
vice indicator,
-
c
urrent warnings and alert messages, if any,
-
t
he range for the AdBlue
® and the SCR
system for BlueHDi Diesel versions,
-
s
tatus of configurable functions. This information also appears every time
the ignition is switched on (automatic test).
Lighting dimmer
Permits manual adjustment of the brightness of
the instruments and controls to suit the ambient
light level. Only operates when the vehicle
lighting is on in night mode.
Activation
F Release the button once the desired level of
brightness is reached.
This indicator lamp and the lighting
value appear in the middle of the
instrument panel during adjustment
to show the setting from the
16
levels available.
F
P
ress this button to change the brightness
of the instruments and controls.
F
W
hen the lighting reaches the minimum
setting, release this button, then press
again to increase it.
or
F
W
hen the lighting reaches the maximum
setting, release this button, then press
again to reduce it.
Deactivation
When the vehicle lighting is off, or in day mode
(daytime running lamps on), pressing the button
does not have any effect.
Black panel (comfortable
night driving display)
When driving at night, it allows certain
instrument panel displays to be switched off so
as to reduce visual fatigue for the driver.
01
Instruments
Page 54 of 296

52
In order to preser ve the battery in the
electronic key and the vehicle's battery,
the "hands-free" functions are put into
long-term standby after 21 days without
use. To restore these functions, press
one of the remote control buttons or start
the engine with the electronic key in the
reader.
For more information on starting with
Keyless Entr y and Star ting, refer to the
corresponding section.
Locking the vehicle
Normal locking
F With the electronic key on your person and in the recognition zone A , press with a
finger or thumb on one of the door handles
(at the markings). Ensure that nothing could prevent the
correct operation of the windows.
Be particularly aware of children when
operating the windows.
Maintaining pressure allows the windows to be
raised to the desired position.
The direction indicators come on for a few
seconds.
Depending on your version, the door
mirrors fold, the alarm is activated.
Deadlocking
Deadlocking renders the interior door
controls inoperative.
It also deactivates the central locking
button.
Therefore, never leave anyone inside the
vehicle when it is deadlocked. F
W
ith the electronic key in the recognition
zone A , press with a finger or thumb on one
of the front door handles (at the markings)
to lock the vehicle.
F
W
ithin five seconds, press the door handle
again to deadlock the vehicle.
02
Access
Page 57 of 296
55
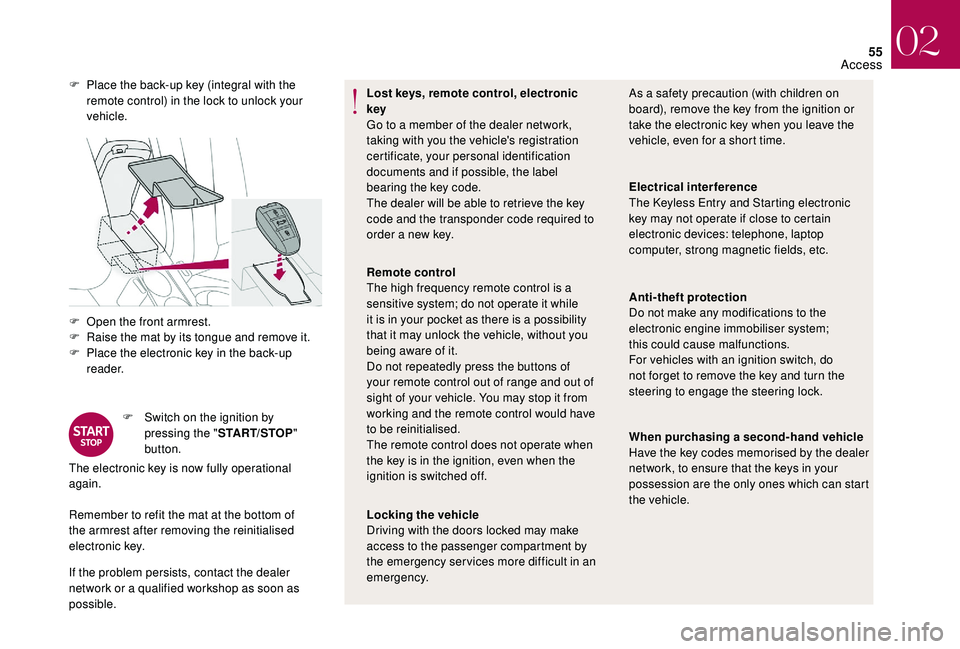
F Open the front armrest.
F R aise the mat by its tongue and remove it.
F
P
lace the electronic key in the back-up
reader.
F
S
witch on the ignition by
pressing the " START/STOP "
button.
Remember to refit the mat at the bottom of
the armrest after removing the reinitialised
electronic key.
If the problem persists, contact the dealer
network or a qualified workshop as soon as
possible. Lost keys, remote control, electronic
key
Go to a member of the dealer network,
taking with you the vehicle's registration
certificate, your personal identification
documents and if possible, the label
bearing the key code.
The dealer will be able to retrieve the key
code and the transponder code required to
order a new key.
The electronic key is now fully operational
again. F
P
lace the back-up key (integral with the
remote control) in the lock to unlock your
vehicle. As a safety precaution (with children on
board), remove the key from the ignition or
take the electronic key when you leave the
vehicle, even for a short time.
Remote control
The high frequency remote control is a
sensitive system; do not operate it while
it is in your pocket as there is a possibility
that it may unlock the vehicle, without you
being aware of it.
Do not repeatedly press the buttons of
your remote control out of range and out of
sight of your vehicle. You may stop it from
working and the remote control would have
to be reinitialised.
The remote control does not operate when
the key is in the ignition, even when the
ignition is switched off.
Locking the vehicle
Driving with the doors locked may make
access to the passenger compartment by
the emergency ser vices more difficult in an
emergency. Electrical interference
The Keyless Entry and Starting electronic
key may not operate if close to certain
electronic devices: telephone, laptop
computer, strong magnetic fields, etc.
Anti-theft protection
Do not make any modifications to the
electronic engine immobiliser system;
this
could cause malfunctions.
For vehicles with an ignition switch, do
not forget to remove the key and turn the
steering to engage the steering lock.
When purchasing a second-hand vehicle
Have the key codes memorised by the dealer
network, to ensure that the keys in your
possession are the only ones which can start
the vehicle.
02
Access
Page 62 of 296
60
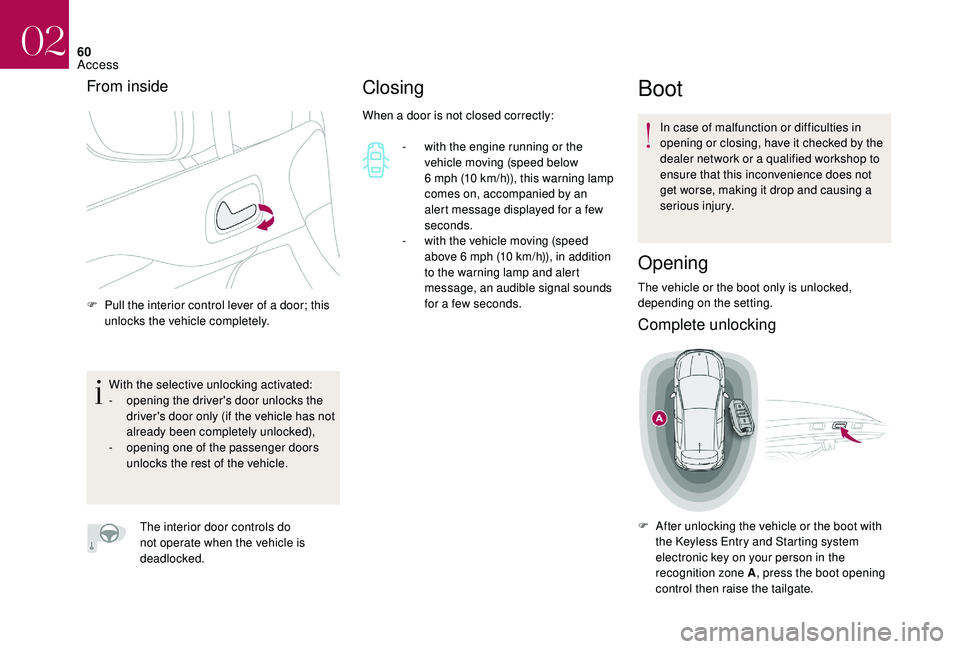
From inside
With the selective unlocking activated:
- o pening the driver's door unlocks the
driver's door only (if the vehicle has not
already been completely unlocked),
-
o
pening one of the passenger doors
unlocks the rest of the vehicle.
The interior door controls do
not operate when the vehicle is
deadlocked.
Closing
F Pull the interior control lever of a door; this unlocks the vehicle completely. -
w
ith the engine running or the
vehicle moving (speed below
6 mph (10 km/h)), this warning lamp
comes on, accompanied by an
alert message displayed for a few
seconds.
-
w
ith the vehicle moving (speed
above 6 mph (10 km/h)), in addition
to the warning lamp and alert
message, an audible signal sounds
for a few seconds.
When a door is not closed correctly:
Boot
Opening
The vehicle or the boot only is unlocked,
depending on the setting.
Complete unlocking
F After unlocking the vehicle or the boot with
the Keyless Entry and Starting system
electronic key on your person in the
recognition zone A , press the boot opening
control then raise the tailgate. In case of malfunction or difficulties in
opening or closing, have it checked by the
dealer network or a qualified workshop to
ensure that this inconvenience does not
get worse, making it drop and causing a
serious injury.
02
Access
Page 63 of 296
61
When unlocking of the boot only is activated:
F W ith the electronic key on your person and
in the recognition zone A , press the boot
unlocking control to unlock just the boot,
then raise the tailgate.
Unlocking is signalled by rapid flashing of the
direction indicators for a few seconds.
Closing
F Lower the tailgate using one of the interior grab handles.
If the tailgate is not fully closed:
-
w
ith the engine running or the
vehicle moving (speed below
6
mph (10 km/h)), this warning lamp
comes on, accompanied by an alert
message for a few seconds.
-
w
ith the vehicle moving (speed
above 6 mph (10 km/h), in addition
to the warning lamp and alert
message, there is an audible signal
for a few seconds.
Back-up control
System allowing the mechanical unlocking
of the boot in the event of a battery or central
locking system malfunction.
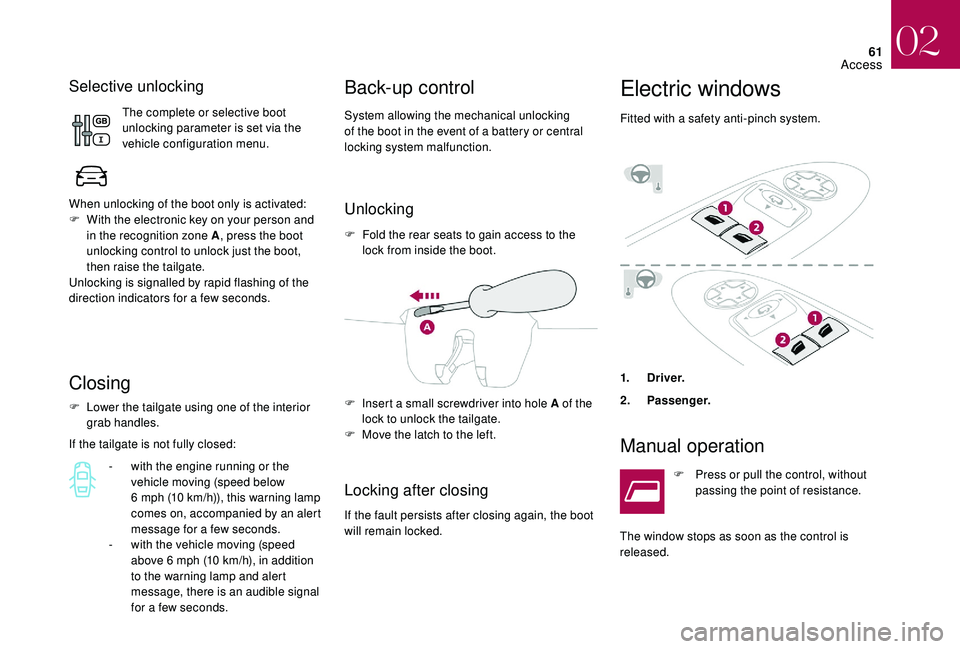
Unlocking
F Fold the rear seats to gain access to the lock from inside the boot.
Locking after closing
If the fault persists after closing again, the boot
will remain locked. F
I
nsert a small screwdriver into hole A of the
lock to unlock the tailgate.
F
M
ove the latch to the left.
Electric windows
Fitted with a safety anti-pinch system.
1.
Driver.
2. Pa s se n g e r.
Manual operation
F Press or pull the control, without
passing the point of resistance.
The window stops as soon as the control is
released.
Selective unlocking
The complete or selective boot
unlocking parameter is set via the
vehicle configuration menu.
02
Access
Page 69 of 296
67
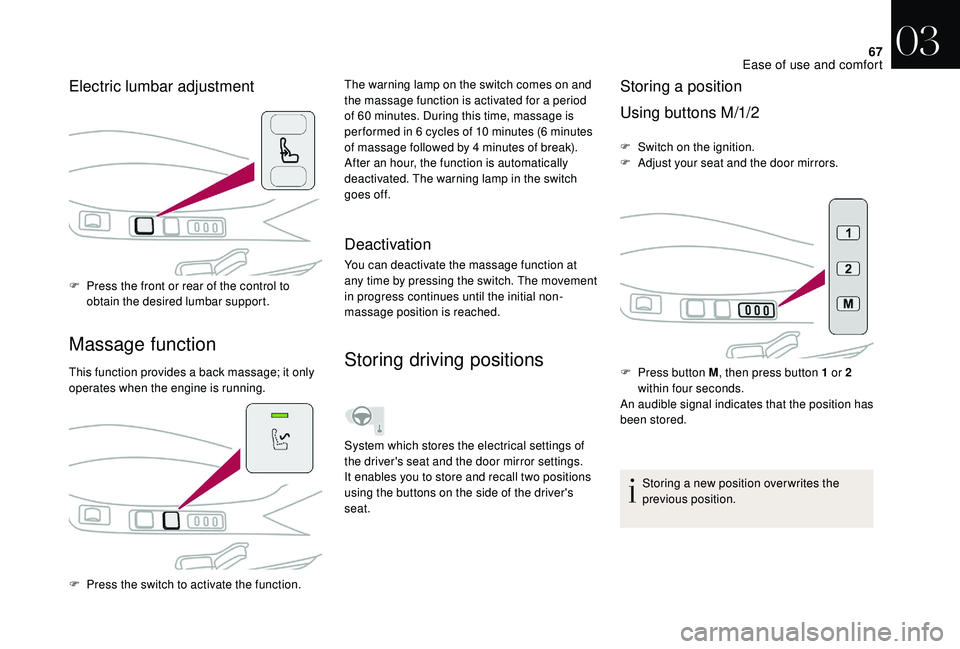
Massage function
Electric lumbar adjustment
F Press the front or rear of the control to obtain the desired lumbar support.
This function provides a back massage; it only
operates when the engine is running. The warning lamp on the switch comes on and
the massage function is activated for a period
of 60 minutes. During this time, massage is
per formed in 6 cycles of 10 minutes (6 minutes
of massage followed by 4 minutes of break).
After an hour, the function is automatically
deactivated. The warning lamp in the switch
goes off.
F
P
ress the switch to activate the function.
Deactivation
You can deactivate the massage function at
any time by pressing the switch. The movement
in progress continues until the initial non-
massage position is reached.
Storing driving positions
System which stores the electrical settings of
the driver's seat and the door mirror settings.
It enables you to store and recall two positions
using the buttons on the side of the driver's
seat.
Storing a position
Using buttons M/1/2
F Switch on the ignition.
F A djust your seat and the door mirrors.
Storing a new position over writes the
previous position.
F
P
ress button M , then press button 1 or 2
within four seconds.
An audible signal indicates that the position has
been stored.
03
Ease of use and comfort
Page 70 of 296
68
Recalling a stored position
Ignition on or engine running
F Press button 1 or 2 to recall the corresponding position. An audible signal
indicates the completion of the adjustment.
You can interrupt the current movement by
pressing button M , 1 or 2 or by using one
of the seat controls.
A stored position cannot be recalled while
driving.
Recalling stored positions is deactivated
45 seconds after switching off the ignition.
Heated seats control
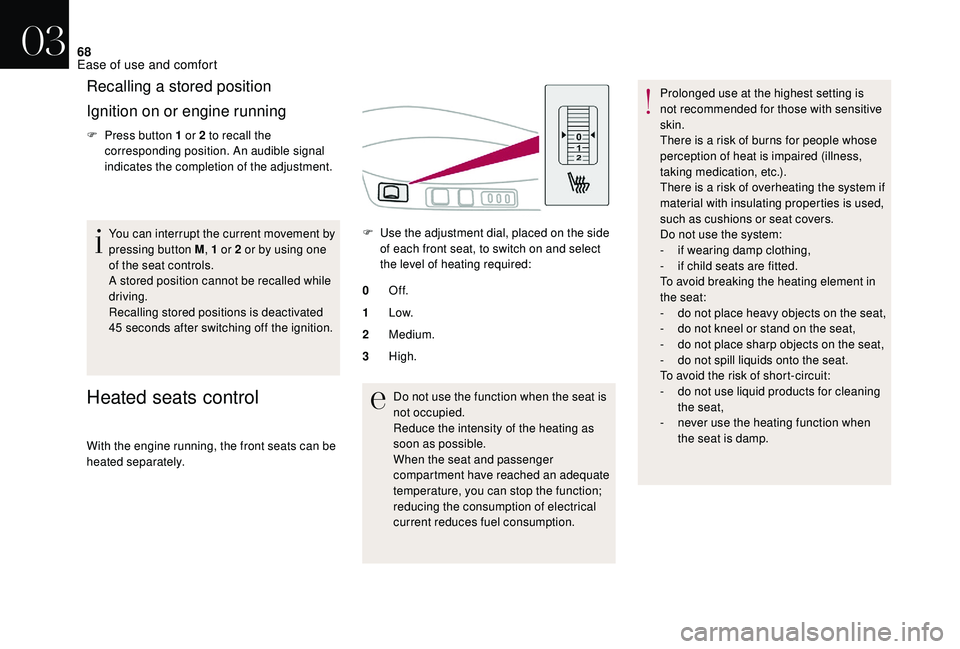
F Use the adjustment dial, placed on the side of each front seat, to switch on and select
the level of heating required:
0 Of f.
1 Low.
2 Medium.
3 High.
With the engine running, the front seats can be
heated separately. Do not use the function when the seat is
not occupied.
Reduce the intensity of the heating as
soon as possible.
When the seat and passenger
compartment have reached an adequate
temperature, you can stop the function;
reducing the consumption of electrical
current reduces fuel consumption.Prolonged use at the highest setting is
not recommended for those with sensitive
skin.
There is a risk of burns for people whose
perception of heat is impaired (illness,
taking medication, etc.).
There is a risk of overheating the system if
material with insulating properties is used,
such as cushions or seat covers.
Do not use the system:
-
i
f wearing damp clothing,
-
i
f child seats are fitted.
To avoid breaking the heating element in
the seat:
-
d
o not place heavy objects on the seat,
-
d
o not kneel or stand on the seat,
-
d
o not place sharp objects on the seat,
-
d
o not spill liquids onto the seat.
To avoid the risk of short-circuit:
-
d
o not use liquid products for cleaning
the seat,
-
n
ever use the heating function when
the seat is damp.
03
Ease of use and comfort