engine CITROEN DS4 2018 Service Manual
[x] Cancel search | Manufacturer: CITROEN, Model Year: 2018, Model line: DS4, Model: CITROEN DS4 2018Pages: 296, PDF Size: 9.91 MB
Page 94 of 296
92
Lighting controls
System for selection and control of the various
front and rear lamps providing the vehicle's
lighting.
Main lighting
The various front and rear lamps of the vehicle
are designed to adapt the driver's visibility
progressively according to weather conditions:
-
s
idelamps, to be seen,
-
d
ipped beam headlamps to see without
dazzling other drivers,
-
m
ain beam headlamps to see clearly when
the road is clear.
In some weather conditions (e.g. low
temperature or humidity), the presence
of misting on the internal sur face of the
glass of the headlamps and rear lamps is
normal; it disappears after the lamps have
been on for a few minutes.
Additional lighting
Other lamps are provided to meet the
requirements of particular driving conditions:
-
r
ear foglamps,
Settings
You can adjust the settings of certain functions:
- a utomatic illumination of headlamps,
-
gu
ide-me-home lighting,
-
w
elcome lighting,
-
d
irectional lighting.
Travelling abroad
Halogen and xenon headlamps
If planning to use your vehicle in a country
that drives on the other side of the road,
the headlamp dipped beams must be
adjusted to avoid dazzling oncoming
drivers.
Contact the dealer network or a qualified
workshop.
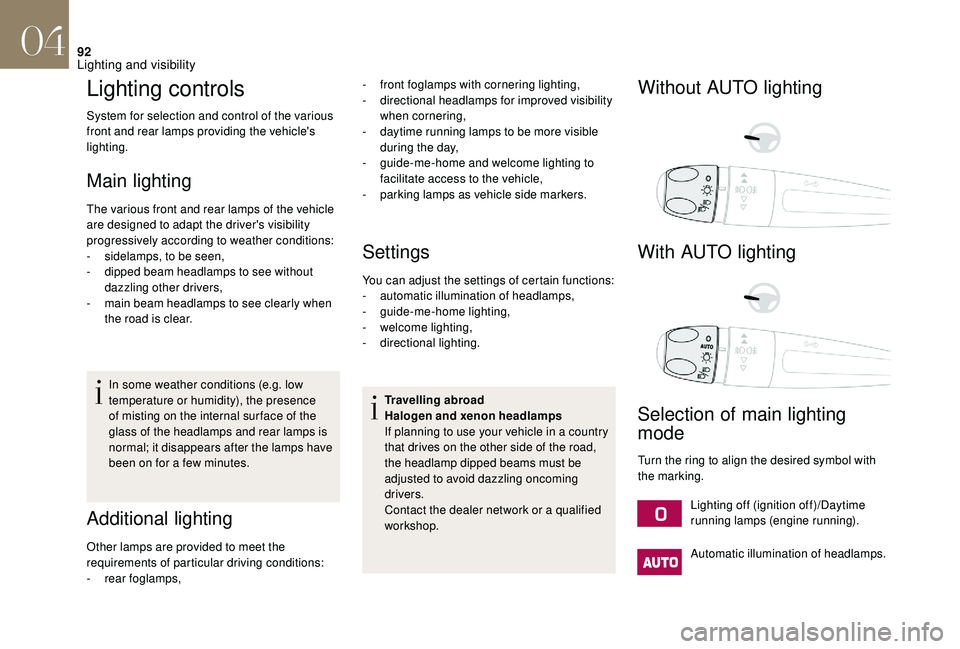
Without AUTO lighting
With AUTO lighting
Selection of main lighting
mode
Turn the ring to align the desired symbol with
the marking. Lighting off (ignition off)/Daytime
running lamps (engine running).
Automatic illumination of headlamps.
-
f
ront foglamps with cornering lighting,
-
d
irectional headlamps for improved visibility
when cornering,
-
d
aytime running lamps to be more visible
during the day,
-
g
uide-me-home and welcome lighting to
facilitate access to the vehicle,
-
p
arking lamps as vehicle side markers.
04
Lighting and visibility
Page 96 of 296
94
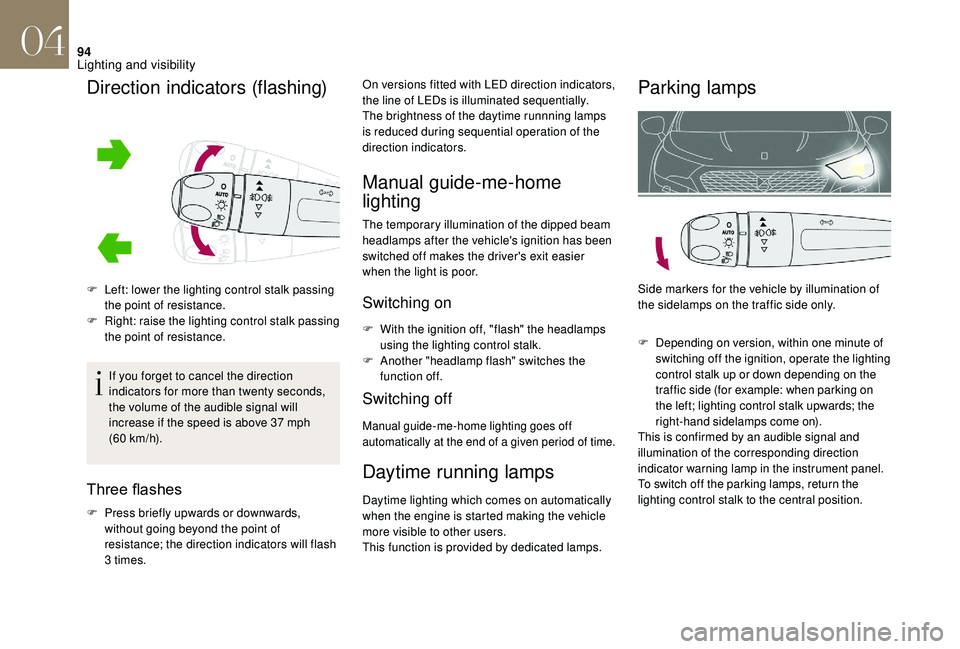
F Left: lower the lighting control stalk passing the point of resistance.
F
R
ight: raise the lighting control stalk passing
the point of resistance.
If you forget to cancel the direction
indicators for more than twenty seconds,
the volume of the audible signal will
increase if the speed is above 37 mph
(60
km/h).
Three flashes
F Press briefly upwards or downwards, without going beyond the point of
resistance; the direction indicators will flash
3 times. On versions fitted with LED direction indicators,
the line of LEDs is illuminated sequentially.
The brightness of the daytime runnning lamps
is reduced during sequential operation of the
direction indicators.
Daytime running lamps
Daytime lighting which comes on automatically
when the engine is started making the vehicle
more visible to other users.
This function is provided by dedicated lamps.
Parking lamps
Direction indicators (flashing)
Side markers for the vehicle by illumination of
the sidelamps on the traffic side only.
F Depending on version, within one minute of
switching off the ignition, operate the lighting
control stalk up or down depending on the
traffic side (for example: when parking on
the left; lighting control stalk upwards; the
right-hand sidelamps come on).
This is confirmed by an audible signal and
illumination of the corresponding direction
indicator warning lamp in the instrument panel.
To switch off the parking lamps, return the
lighting control stalk to the central position.
Manual guide-me-home
lighting
The temporary illumination of the dipped beam
headlamps after the vehicle's ignition has been
switched off makes the driver's exit easier
when the light is poor.
Switching on
F With the ignition off, "flash" the headlamps using the lighting control stalk.
F
A
nother "headlamp flash" switches the
function off.
Switching off
Manual guide-me-home lighting goes off
automatically at the end of a given period of time.
04
Lighting and visibility
Page 102 of 296
100
Malfunction
If a fault occurs with the automatic rain sensitive
wipers, the wipers will operate in intermittent mode.
Contact the dealer network or a qualified workshop.
Do not cover the rain sensor, linked with
the sunshine sensor and located in the top
centre of the windscreen, behind the rear
view mirror.
When using an automatic car wash, switch
off the automatic rain sensitive wipers.
In winter, it is advisable to wait until the
windscreen is completely clear of ice before
activating the automatic rain sensitive wipers.
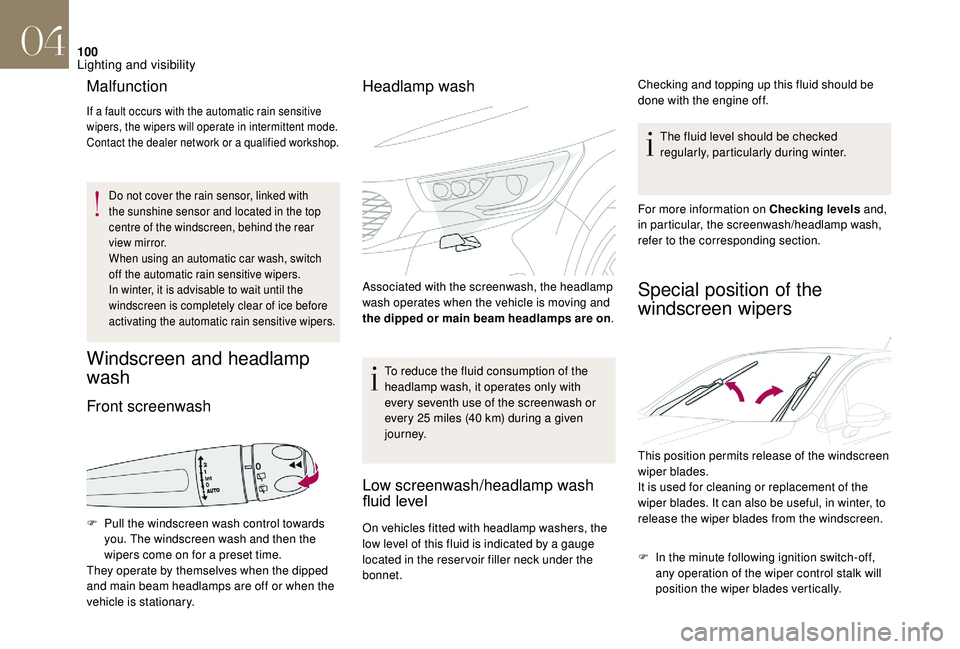
Windscreen and headlamp
wash
Front screenwashHeadlamp wash
To reduce the fluid consumption of the
headlamp wash, it operates only with
every seventh use of the screenwash or
every 25 miles (40 km) during a given
j o u r n ey.
Low screenwash/headlamp wash
fluid
level
Checking and topping up this fluid should be
done with the engine off.
The fluid level should be checked
regularly, particularly during winter.
For more information on Checking levels and,
in particular, the screenwash/headlamp wash,
refer to the corresponding section.
Special position of the
windscreen wipers
This position permits release of the windscreen
wiper blades.
It is used for cleaning or replacement of the
wiper blades. It can also be useful, in winter, to
release the wiper blades from the windscreen.
F
P
ull the windscreen wash control towards
you. The windscreen wash and then the
wipers come on for a preset time.
They operate by themselves when the dipped
and main beam headlamps are off or when the
vehicle is stationary. Associated with the screenwash, the headlamp
wash operates when the vehicle is moving and
the dipped or main beam headlamps are on
.
On vehicles fitted with headlamp washers, the
low level of this fluid is indicated by a gauge
located in the reser voir filler neck under the
bonnet. F
I
n the minute following ignition switch-off,
any operation of the wiper control stalk will
position the wiper blades vertically.
04
Lighting and visibility
Page 110 of 296
108
Electronic stability control
(ESC)
Electronic stability control (ESC: Electronic
Stability Control) integrating the following
systems:
-
a
nti-lock braking system (ABS) and
electronic brake force distribution (EBFD),
-
em
ergency braking assistance (EBA),
-
w
heel anti-slip regulation (ASR) or traction
control,
-
d
ynamic stability control (DSC).
Definitions
Anti-lock braking system (ABS) and
electronic brake force distribution
(EBFD)
These systems improve the stability and
manoeuvrability of your vehicle when braking
and contribute towards improved control in
corners, in particular on poor or slippery road
surfaces.
The ABS prevents wheel lock in the event of
emergency braking.
The electronic brake force distribution system
manages the braking pressure wheel by wheel.
Emergency braking assistance
(EBA)
In an emergency, this system enables you to
reach the optimum braking pressure more
quickly and therefore reduce the stopping
distance.
It is triggered in relation to the speed at which
the brake pedal is pressed. This is felt by a
reduction in the resistance of the pedal and an
increase in the effectiveness of the braking.
Anti-slip regulation (ASR)
This system (also known as Traction Control)
optimises traction in order to limit wheel slip by
acting on the brakes of the driving wheels and
on the engine. It also improves the directional
stability of the vehicle on acceleration.
Dynamic stability control (DSC)
If there is a difference between the path
followed by the vehicle and that required by
the driver, the DSC monitors each wheel and
automatically acts on the brake of one or more
wheels and on the engine to return the vehicle
to the required path, within the limits of the laws
of physics.
Intelligent traction control
system ("Snow motion")
Depending on version, your vehicle has a
system to help driving on snow: intelligent
traction control.
This system detects situations of poor sur face
grip that could make it difficult to move off
or make progress on deep fresh snow or
compacted snow.
In these situations, the intelligent traction
control limits the amount of wheel spin to
provide the best traction and trajectory control
for your vehicle.
The use of snow tyres is strongly
recommended on sur faces offering low
levels of adhesion.
Anti-lock braking system
(ABS) and electronic brake
force distribution (EBFD)
When lit up continuously, this
warning lamp indicates a fault with
the ABS.
The vehicle retains conventional braking. Drive
carefully at moderate speed.
05
Safety
Page 111 of 296
109
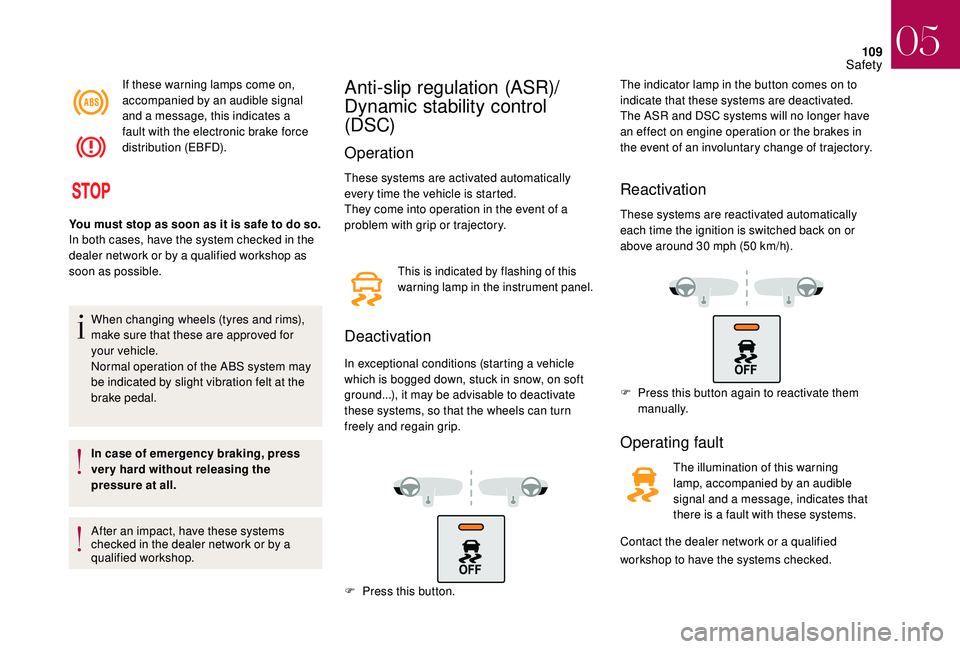
If these warning lamps come on,
accompanied by an audible signal
and a message, this indicates a
fault with the electronic brake force
distribution (EBFD).
When changing wheels (tyres and rims),
make sure that these are approved for
your vehicle.
Normal operation of the ABS system may
be indicated by slight vibration felt at the
brake pedal.
In case of emergency braking, press
ver y hard without releasing the
pressure at all.
After an impact, have these systems
checked in the dealer network or by a
qualified workshop.Anti-slip regulation (ASR)/
Dynamic stability control
(DSC)
Operation
These systems are activated automatically
every time the vehicle is started.
They come into operation in the event of a
problem with grip or trajectory.
Deactivation
In exceptional conditions (starting a vehicle
which is bogged down, stuck in snow, on soft
ground...), it may be advisable to deactivate
these systems, so that the wheels can turn
freely and regain grip. The indicator lamp in the button comes on to
indicate that these systems are deactivated.
The ASR and DSC systems will no longer have
an effect on engine operation or the brakes in
the event of an involuntary change of trajectory.
Reactivation
These systems are reactivated automatically
each time the ignition is switched back on or
above around 30 mph (50 km/h).
F
P
ress this button again to reactivate them
manually.
Operating fault
The illumination of this warning
lamp, accompanied by an audible
signal and a message, indicates that
there is a fault with these systems.
Contact the dealer network or a qualified
You must stop as soon as it is safe to do so.
In both cases, have the system checked in the
dealer network or by a qualified workshop as
soon as possible.
This is indicated by flashing of this
warning lamp in the instrument panel.
workshop to have the systems checked.
F
P
ress this button.
05
Safety
Page 113 of 296
111
Seat belt not fastened/unfastened
warning lamps display
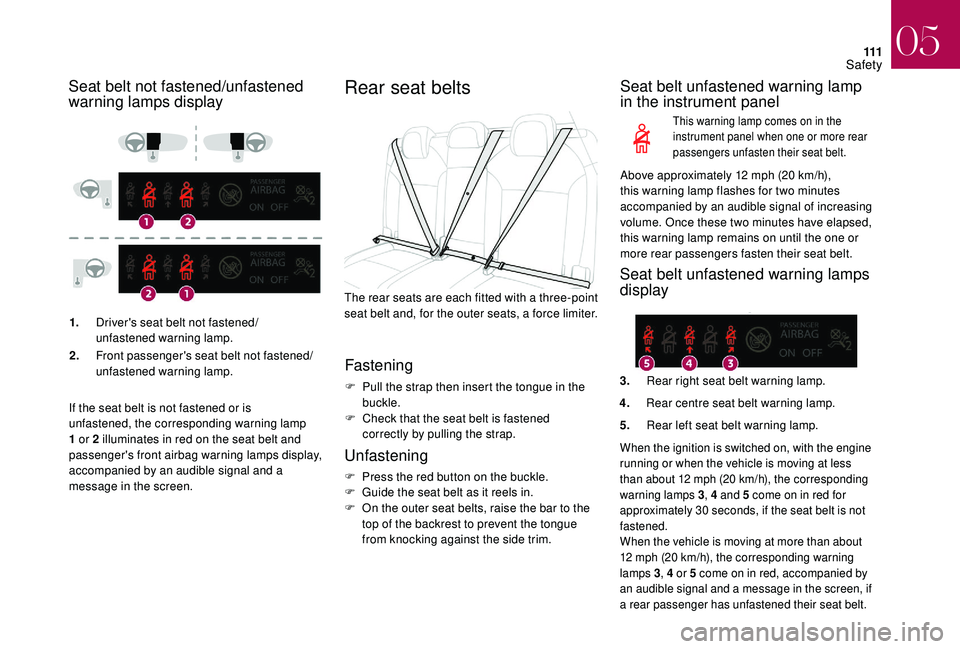
1.Driver's seat belt not fastened/
unfastened warning lamp.
2. Front passenger's seat belt not fastened/
unfastened warning lamp.
If the seat belt is not fastened or is
unfastened, the corresponding warning lamp
1 or 2 illuminates in red on the seat belt and
passenger's front airbag warning lamps display,
accompanied by an audible signal and a
message in the screen.
Rear seat belts
The rear seats are each fitted with a three-point
seat belt and, for the outer seats, a force limiter.
Fastening
F Pull the strap then insert the tongue in the buckle.
F
C
heck that the seat belt is fastened
correctly by pulling the strap.
Unfastening
F Press the red button on the buckle.
F G uide the seat belt as it reels in.
F
O
n the outer seat belts, raise the bar to the
top of the backrest to prevent the tongue
from knocking against the side trim.
Seat belt unfastened warning lamp
in the instrument panel
This warning lamp comes on in the
instrument panel when one or more rear
passengers unfasten their seat belt.
Above approximately 12 mph (20 km/h),
this warning lamp flashes for two minutes
accompanied by an audible signal of increasing
volume. Once these two minutes have elapsed,
this warning lamp remains on until the one or
more rear passengers fasten their seat belt.
Seat belt unfastened warning lamps
display
3. Rear right seat belt warning lamp.
4. Rear centre seat belt warning lamp.
5. Rear left seat belt warning lamp.
When the ignition is switched on, with the engine
running or when the vehicle is moving at less
than about 12 mph (20 km/h), the corresponding
warning lamps 3 , 4 and 5 come on in red for
approximately 30 seconds, if the seat belt is not
fastened.
When the vehicle is moving at more than about
12 mph (20 km/h), the corresponding warning
lamps 3 , 4 or 5 come on in red, accompanied by
an audible signal and a message in the screen, if
a rear passenger has unfastened their seat belt.
05
Safety
Page 134 of 296
132
Driving recommendations
Observe the driving regulations and remain
vigilant whatever the traffic conditions.
Pay close attention to the traffic and keep your
hands on the wheel so that you are ready to
react at any time to any eventuality.
As a safety measure, the driver should only
carry out any operations that require close
attention when the vehicle is stationary.
On a long journey, a break every two hours is
strongly recommended.
In bad weather, drive smoothly, anticipate the
need to brake and increase the distance from
other vehicles.Never leave the engine running in
an enclosed area without adequate
ventilation: internal combustion engines
emit toxic exhaust gases, such as carbon
monoxide. There is a risk of poisoning and
death!
In very severe wintry conditions
(temperatures below -23°C), to guarantee
correct operation and the longevity of
the mechanical elements of your vehicle,
engine and gearbox, the engine must be
left running for 4 minutes before driving.
Important!
Never drive with the parking brake applied
– Risk of overheating and damage to the
braking system!
Do not park and do not run the engine,
the vehicle is stationary, in areas where
substances and combustible materials
(dry grass, leaves ...) can come into
contact with the hot exhaust system – Risk
of fire!
Never leave a vehicle unsuper vised with
the engine running. If you have to leave
your vehicle with the engine running, apply
the parking brake and put the gearbox into
neutral or position N or P , depending on
the type of gearbox.
Driving on flooded roads
We strongly advise against driving on flooded
roads, as this could cause serious damage
to the engine or gearbox, as well as to the
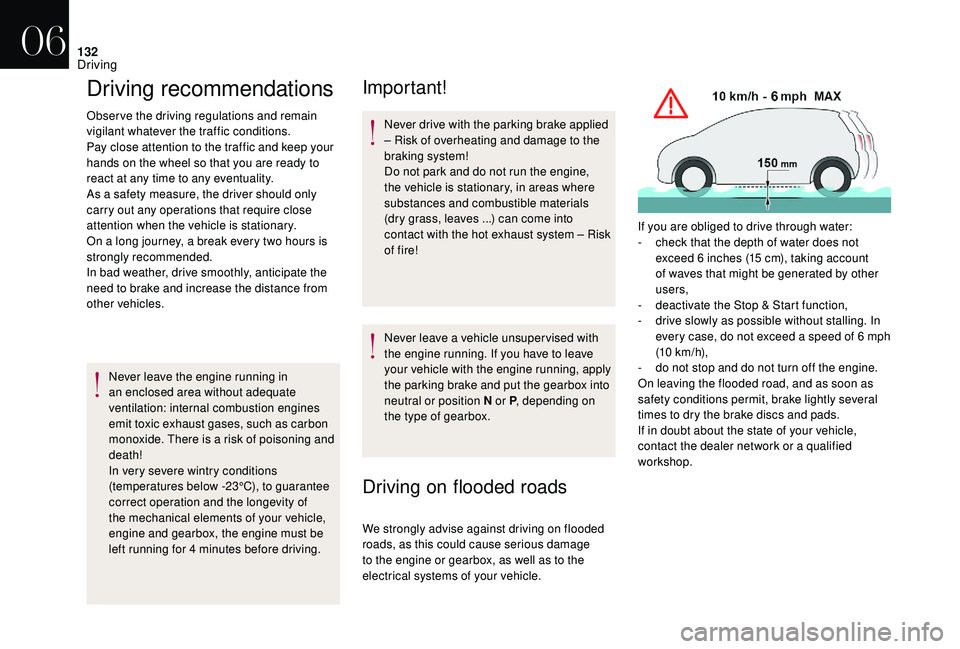
electrical systems of your vehicle. If you are obliged to drive through water:
-
c
heck that the depth of water does not
exceed 6 inches (15 cm), taking account
of waves that might be generated by other
users,
-
d
eactivate the Stop & Start function,
-
d
rive slowly as possible without stalling. In
every case, do not exceed a speed of 6 mph
(10 km/h),
-
d
o not stop and do not turn off the engine.
On leaving the flooded road, and as soon as
safety conditions permit, brake lightly several
times to dry the brake discs and pads.
If in doubt about the state of your vehicle,
contact the dealer network or a qualified
workshop.
06
Driving
Page 135 of 296
133
In case of towing
Driving with a trailer places greater
demands on the towing vehicle and
requires extra care from the driver.
Distribution of loads
F Distribute the load in the trailer so that the heaviest items are as close as possible to
the axle and the nose weight approaches
the maximum permitted without exceeding
it.
Air density decreases with altitude, thus
reducing engine performance. The maximum
towed load must be reduced by 10% for every
1,000 metres of altitude.
For more information on the Technical
data of your vehicle and particularly on
towable loads, refer to the corresponding
section.
If the exterior temperature is high, it is
recommended that the engine be allowed
to idle for 1 to 2 minutes after the vehicle
comes to a stop, to facilitate its cooling.
Side wind
F Take into account the increased sensitivity to wind.
Cooling
Towing a trailer on a slope increases the
temperature of the coolant.
As the fan is electrically controlled, its cooling
capacity is not dependent on the engine speed.
F
T
o lower the engine speed, reduce your
speed.
The maximum towed load on a long incline
depends on the gradient and the exterior
temperature.
In all cases, keep a check on the coolant
temperature.
F
I
f this warning lamp and the
STOP warning lamp come on,
stop the vehicle and switch off
the engine as soon as possible.
Braking
Towing a trailer increases the braking distance.
To avoid overheating of the brakes, the use of
engine braking is recommended.
Ty r e s
F Check the tyre pressures of the towing vehicle and of the trailer, observing the
recommended pressures.
Lighting
F Check the electrical lighting and signalling on the trailer and the headlamp beam height
of your vehicle.
For more information on Headlamp
adjustment , refer to the corresponding
section.
The rear parking sensors will be
deactivated automatically to avoid
the audible signal if a genuine DS
AUTOMOBILES towbar is used.
06
Driving
Page 136 of 296
134
Anti-theft protection
Electronic immobiliser
The keys contain an electronic chip which has
a specific code. When the ignition is switched
on, this code must be recognised to allow the
engine to be started.
This electronic engine immobiliser locks the
engine management system a few minutes
after the ignition is switched off and prevents
starting of the engine by anyone who does not
have the key.In the event of a fault, you are
informed by illumination of this
warning lamp, an audible signal
and/or the display of a message,
depending on version.
Starting/Switching off the
engine with the key
Ignition switch
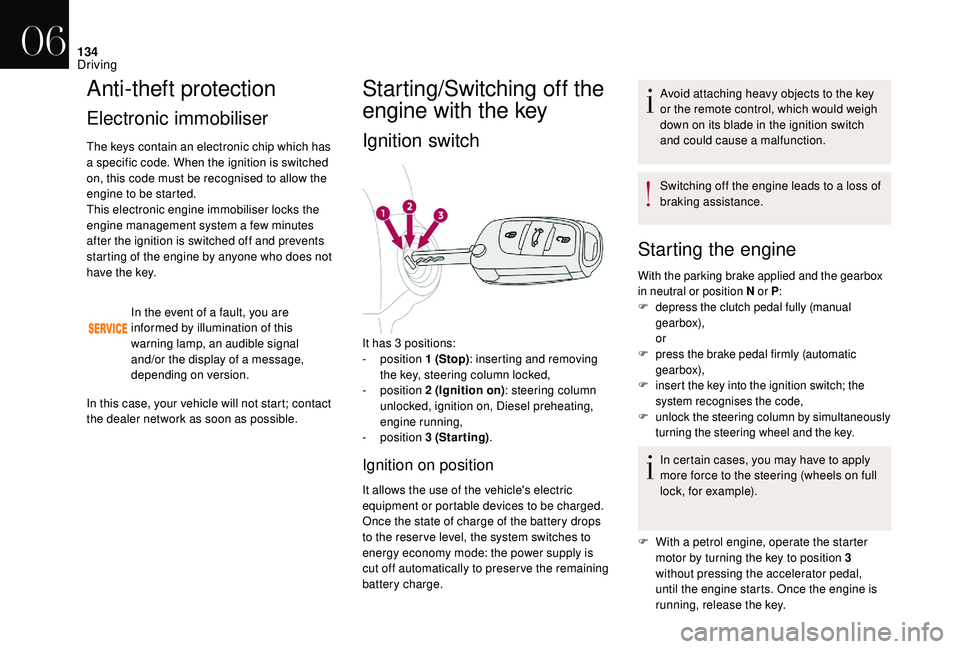
It has 3 positions:
- position 1 (Stop): inserting and removing
the key, steering column locked,
-
position 2 (Ignition on) : steering column
unlocked, ignition on, Diesel preheating,
engine running,
-
position 3 (Starting) .
Ignition on position
It allows the use of the vehicle's electric
equipment or portable devices to be charged.
Once the state of charge of the battery drops
to the reser ve level, the system switches to
energy economy mode: the power supply is
cut off automatically to preser ve the remaining
battery charge. Avoid attaching heavy objects to the key
or the remote control, which would weigh
down on its blade in the ignition switch
and could cause a malfunction.
Switching off the engine leads to a loss of
braking assistance.
Starting the engine
With the parking brake applied and the gearbox
in neutral or position N
or P:
F
d
epress the clutch pedal fully (manual
gearbox),
or
F
p
ress the brake pedal firmly (automatic
gearbox),
F
i
nsert the key into the ignition switch; the
system recognises the code,
F
u
nlock the steering column by simultaneously
turning the steering wheel and the key.
In certain cases, you may have to apply
more force to the steering (wheels on full
lock, for example).
F
W
ith a petrol engine, operate the starter
motor by turning the key to position 3
without pressing the accelerator pedal,
until the engine starts. Once the engine is
running, release the key.
In this case, your vehicle will not start; contact
the dealer network as soon as possible.
06
Driving
Page 137 of 296
135
Wait until this warning lamp goes off in
the instrument panel then operate the
starter motor by turning the key to position
3 without pressing the accelerator pedal,
until the engine starts. Once the engine is
running, release the key.
In wintry conditions, the warning lamp
can stay on for a longer period. When the
engine is hot, the warning lamp does not
come on.
If the engine does not start straight away,
switch off the ignition. Wait a few moments
before operating the starter motor again.
If the engine does not start after several
attempts, do not keep trying: you risk
damaging the starter motor or the engine.
Contact the dealer network or a qualified
workshop.
In temperate conditions, do not leave
the engine at idle to warm up but move
off straight away and drive at moderate
spe ed. Never leave the engine running in
an enclosed area without adequate
ventilation: internal combustion engines
emit toxic exhaust gases, such as carbon
monoxide. Danger of poisoning and death!
In very severe wintry conditions
(temperature below -23°C), to guarantee
correct operation and the longevity of
the mechanical elements of your vehicle,
engine and gearbox, the engine must be
left running for 4 minutes before driving
away.
Switching off the engine
F Stop the vehicle.
F
W ith the engine idling, turn the key to
position 1 .
F
R
emove the key from the ignition switch.
F
T
o lock the steering column, turn the
steering wheel until it locks.
To facilitate unlocking of the steering
column, it is recommended that the
wheels be returned to the straight-ahead
position before switching off the engine. F
C
heck that the parking brake is correctly
applied, particularly on sloping ground.
Never switch off the ignition before the
vehicle is at a complete stop. With the
engine off, the braking and steering
assistance systems are also cut off: risk of
loss of control of the vehicle.
When you leave the vehicle, keep the key
with you and lock the vehicle.
F With a Diesel engine, turn the key to position 2, i
gnition on, to operate the engine
pre-heating system.
06
Driving