oil type CITROEN DS4 2018 Owners Manual
[x] Cancel search | Manufacturer: CITROEN, Model Year: 2018, Model line: DS4, Model: CITROEN DS4 2018Pages: 296, PDF Size: 9.91 MB
Page 12 of 296
10
Customisable colour
instrument panel – Type 1
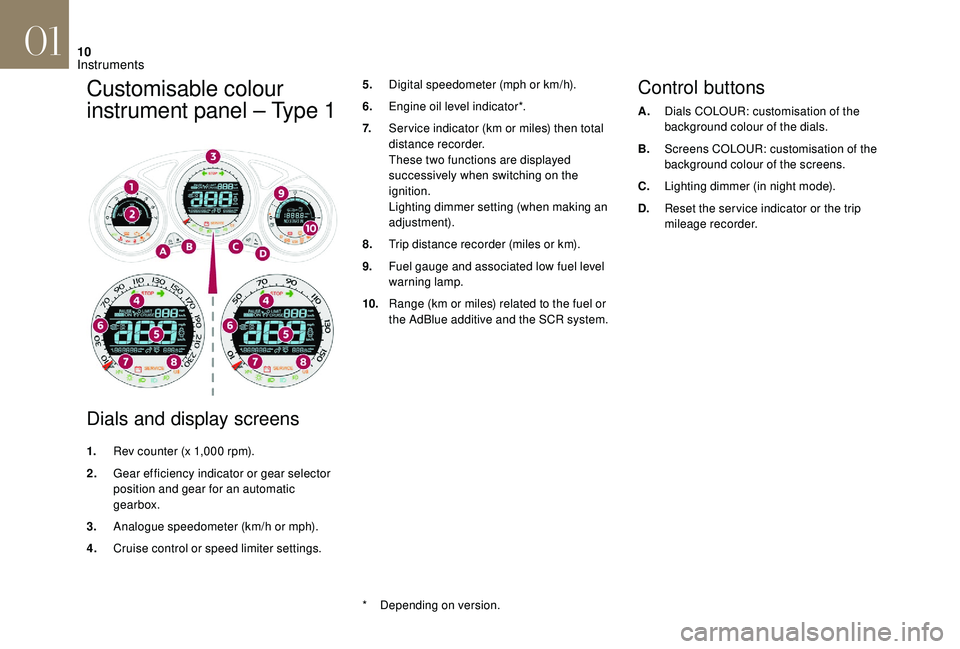
Dials and display screens
5.Digital speedometer (mph or km/h).
6. Engine oil level indicator*.
7. Ser vice indicator (km or miles) then total
distance recorder.
These two functions are displayed
successively when switching on the
ignition.
Lighting dimmer setting (when making an
adjustment).
8. Trip distance recorder (miles or km).
9. Fuel gauge and associated low fuel level
warning lamp.
10. Range (km or miles) related to the fuel or
the AdBlue additive and the SCR system.Control buttons
A.Dials COLOUR: customisation of the
background colour of the dials.
B. Screens COLOUR: customisation of the
background colour of the screens.
C. Lighting dimmer (in night mode).
D. Reset the ser vice indicator or the trip
mileage recorder.
1. Rev counter (x 1,000 rpm).
2. Gear efficiency indicator or gear selector
position and gear for an automatic
gearbox.
3. Analogue speedometer (km/h or mph).
4. Cruise control or speed limiter settings.
*
D
epending on version.
01
Instruments
Page 13 of 296
11
Customisable colour
instrument panel – Type 2
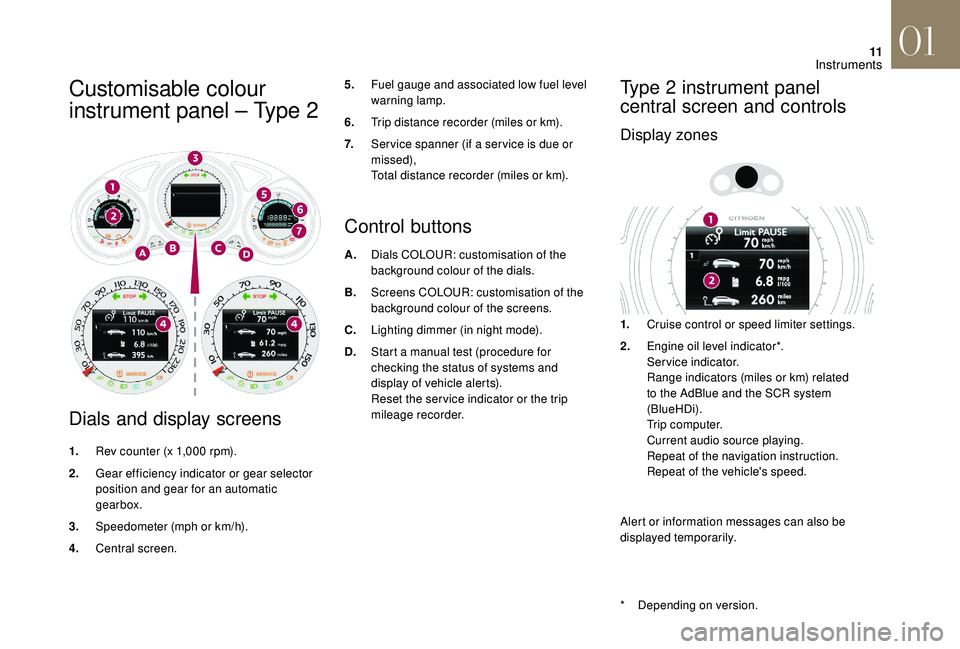
Dials and display screens
1.Rev counter (x 1,000 rpm).
2. Gear efficiency indicator or gear selector
position and gear for an automatic
gearbox.
3. Speedometer (mph or km/h).
4. Central screen.
Control buttons
A.Dials COLOUR: customisation of the
background colour of the dials.
B. Screens COLOUR: customisation of the
background colour of the screens.
C. Lighting dimmer (in night mode).
D. Start a manual test (procedure for
checking the status of systems and
display of vehicle alerts).
Reset the ser vice indicator or the trip
mileage recorder.
Type 2 instrument panel
central screen and controls
Display zones
5.Fuel gauge and associated low fuel level
warning lamp.
6. Trip distance recorder (miles or km).
7. Ser vice spanner (if a ser vice is due or
missed),
Total distance recorder (miles or km).
1.Cruise control or speed limiter settings.
2. Engine oil level indicator*.
Service indicator.
Range indicators (miles or km) related
to the AdBlue and the SCR system
(BlueHDi).
Trip computer.
Current audio source playing.
Repeat of the navigation instruction.
Repeat of the vehicle's speed.
Alert or information messages can also be
displayed temporarily.
*
D
epending on version.
01
Instruments
Page 34 of 296
32
Resetting the service indicator
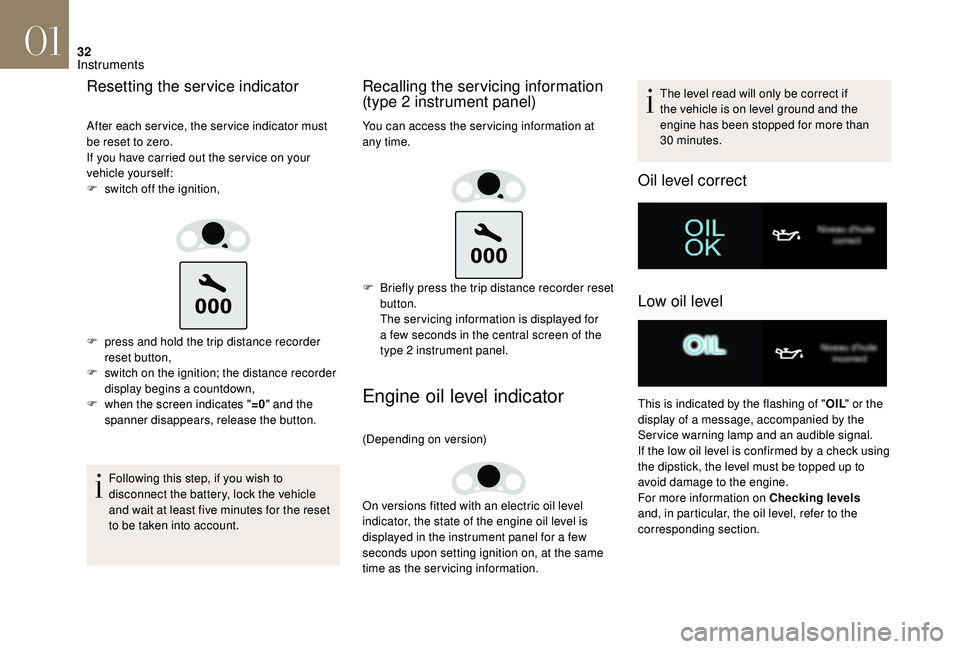
After each service, the service indicator must
be reset to zero.
If you have carried out the ser vice on your
vehicle yourself:
F
s
witch off the ignition,
F
p
ress and hold the trip distance recorder
reset button,
F
s
witch on the ignition; the distance recorder
display begins a countdown,
F
w
hen the screen indicates " =0" and the
spanner disappears, release the button.
Following this step, if you wish to
disconnect the battery, lock the vehicle
and wait at least five minutes for the reset
to be taken into account.
Recalling the servicing information
(type 2 instrument panel)
You can access the ser vicing information at
any time.
F
B
riefly press the trip distance recorder reset
button.
The ser vicing information is displayed for
a few seconds in the central screen of the
type 2 instrument panel.
Engine oil level indicator
(Depending on version)
On versions fitted with an electric oil level
indicator, the state of the engine oil level is
displayed in the instrument panel for a few
seconds upon setting ignition on, at the same
time as the servicing information. The level read will only be correct if
the vehicle is on level ground and the
engine has been stopped for more than
30
minutes.
Oil level correct
Low oil level
This is indicated by the flashing of "
OIL" or the
display of a message, accompanied by the
Service warning lamp and an audible signal.
If the low oil level is confirmed by a check using
the dipstick, the level must be topped up to
avoid damage to the engine.
For more information on Checking levels
and, in particular, the oil level, refer to the
corresponding section.
01
Instruments
Page 35 of 296
33
Oil level indicator fault
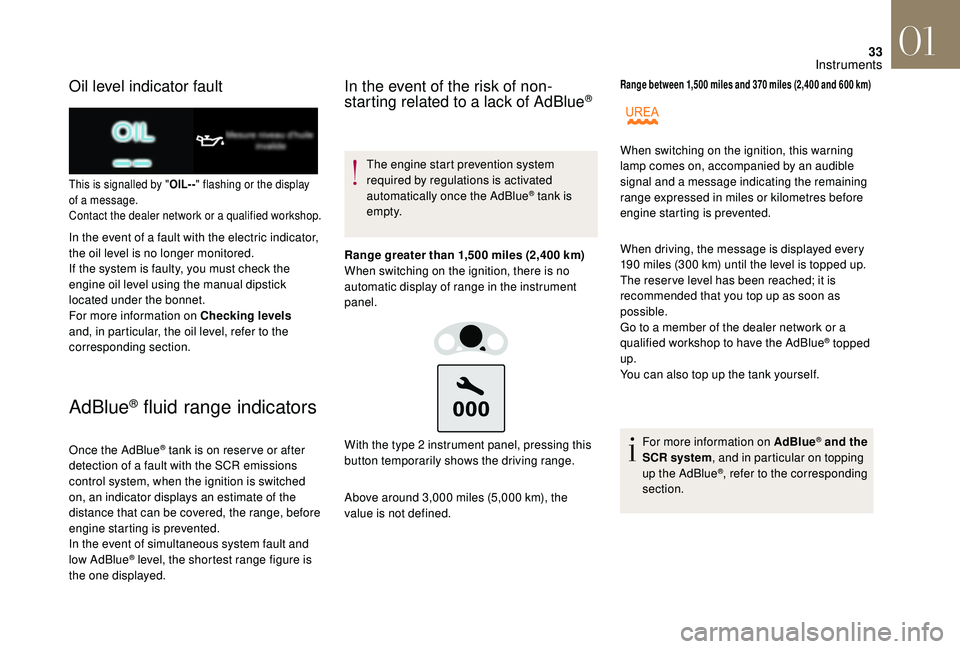
This is signalled by "OIL- -" flashing or the display
of a message.
Contact the dealer network or a qualified workshop.
In the event of a fault with the electric indicator,
the oil level is no longer monitored.
If the system is faulty, you must check the
engine oil level using the manual dipstick
located under the bonnet.
For more information on Checking levels
and, in particular, the oil level, refer to the
corresponding section.
AdBlue® fluid range indicators
Once the AdBlue® tank is on reser ve or after
detection of a fault with the SCR emissions
control system, when the ignition is switched
on, an indicator displays an estimate of the
distance that can be covered, the range, before
engine starting is prevented.
In the event of simultaneous system fault and
low AdBlue
® level, the shortest range figure is
the one displayed.
In the event of the risk of non-
starting related to a lack of AdBlue®
The engine start prevention system
required by regulations is activated
automatically once the AdBlue
® tank is
e m pt y.
Range greater than 1,500 miles (2,400 km)
When switching on the ignition, there is no
automatic display of range in the instrument
panel.
Above around 3,000 miles (5,000 km), the
value is not defined. With the type 2 instrument panel, pressing this
button temporarily shows the driving range.
Range between 1,500 miles and 370 miles (2,400 and 600 km)
When driving, the message is displayed every
190 miles (300 km) until the level is topped up.
The reser ve level has been reached; it is
recommended that you top up as soon as
possible.
Go to a member of the dealer network or a
qualified workshop to have the AdBlue
® topped
up.
You can also top up the tank yourself.
For more information on AdBlue
® and the
SCR system , and in particular on topping
up the AdBlue
®, refer to the corresponding
section.
When switching on the ignition, this warning
lamp comes on, accompanied by an audible
signal and a message indicating the remaining
range expressed in miles or kilometres before
engine starting is prevented.
01
Instruments
Page 38 of 296
36
Manual test in the type 2
instrument panel central screen
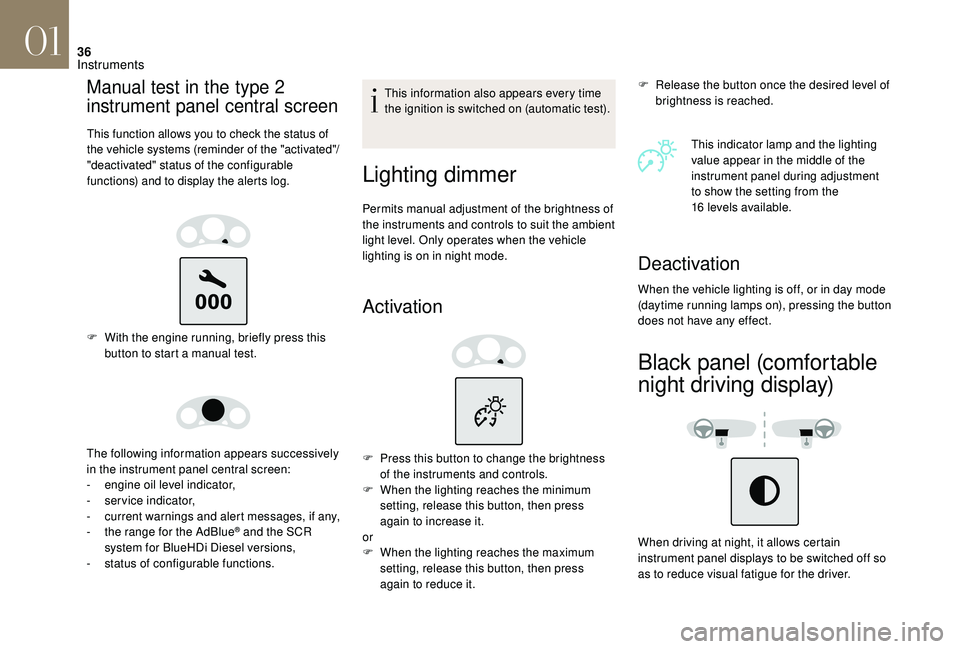
This function allows you to check the status of
the vehicle systems (reminder of the "activated"/
"deactivated" status of the configurable
functions) and to display the alerts log.
F With the engine running, briefly press this button to start a manual test.
The following information appears successively
in the instrument panel central screen:
-
e
ngine oil level indicator,
-
ser
vice indicator,
-
c
urrent warnings and alert messages, if any,
-
t
he range for the AdBlue
® and the SCR
system for BlueHDi Diesel versions,
-
s
tatus of configurable functions. This information also appears every time
the ignition is switched on (automatic test).
Lighting dimmer
Permits manual adjustment of the brightness of
the instruments and controls to suit the ambient
light level. Only operates when the vehicle
lighting is on in night mode.
Activation
F Release the button once the desired level of
brightness is reached.
This indicator lamp and the lighting
value appear in the middle of the
instrument panel during adjustment
to show the setting from the
16
levels available.
F
P
ress this button to change the brightness
of the instruments and controls.
F
W
hen the lighting reaches the minimum
setting, release this button, then press
again to increase it.
or
F
W
hen the lighting reaches the maximum
setting, release this button, then press
again to reduce it.
Deactivation
When the vehicle lighting is off, or in day mode
(daytime running lamps on), pressing the button
does not have any effect.
Black panel (comfortable
night driving display)
When driving at night, it allows certain
instrument panel displays to be switched off so
as to reduce visual fatigue for the driver.
01
Instruments
Page 170 of 296
168
Compatibility of fuels
Fuel used for petrol engines
The petrol engines are compatible with biofuels
that conform to current and future European
standards and which can be obtained from
filling stations:Petrol that meets standard EN228,
mixed with a biofuel that meets
standard EN15376.
The only petrol additives authorised for
use are those that meet the B715001
standard.
Fuel used for Diesel engines
The Diesel engines are compatible with
biofuels that conform to current and future
European standards and which can be
obtained from filling stations. Diesel fuel that meets standard
EN590 mixed with a biofuel that
meets standard EN14214 (possibly
containing 0 to 7% Fatty Acid Methyl
Ester), For more information, contact the dealer
network or a qualified workshop.Diesel fuel that meets standard
EN16734 mixed with a biofuel that
meets standard EN14214 (possibly
containing 0 to 10% Fatty Acid
Methyl Ester),
Paraffinic Diesel fuel that meets
standard EN15940 mixed with
a biofuel that meets standard
EN14214 (possibly containing 0 to
7% Fatty Acid Methyl Ester).
The use of B20 or B30 fuel meeting
standard EN16709 is possible in
your Diesel engine. However, this
use, even occasional, requires strict
application of the special ser vicing
conditions referred to as "Arduous
conditions".
The use of any other type of (bio)fuel
(vegetable or animal oils, pure or diluted,
domestic fuel...) is strictly prohibited (risk
of damage to the engine and fuel system). The only Diesel additives authorised for
use are those that meet the B715000
standard.
Diesel at low temperature
At temperatures below 0°C (+32°F), the
formation of paraffins in summer-type Diesel
fuels could entail an abnormal operation
of the fuel supply circuit. To avoid this, we
recommend using winter-type Diesel fuel and
keeping the fuel tank more than 50% full.
If, despite this, at temperatures below -15°C
(+5°F) the engine has problems starting,
just leave the vehicle in a garage or heated
workshop for a little while.
Travelling abroad
Certain fuels could damage the engine of your
vehicle.
In certain countries, the use of a particular
fuel may be required (specific octane rating,
specific sales name…) to ensure correct
operation of the engine.
For any additional information, contact the
dealer network.
07
Practical information
Page 193 of 296
191
After about 7 minutes, if a pressure of
2 bars is not reached, this indicates
that the tyre is not repairable; contact a
network dealer or a qualified workshop for
assistance.
F
P
lace the switch in the " O" position.
F
D
isconnect the compressor's electric plug
from the vehicle's 12 V socket.
F
R
eplace the cap on the valve.
F
R
emove the kit.
F
R
emove and then store the bottle of sealant. Take care, the sealant product is harmful
if swallowed and causes irritation to the
eyes.
Keep this product out of the reach of
children.
The use-by date for the liquid is marked
on the bottle.
After use, do not discard the bottle by the
roadside, take it to a member of the dealer
network or an authorised waste disposal
site.
Do not forget to obtain a new bottle of
sealant, available from the dealer network
or a qualified workshop.
Do not exceed the speed of 50 mph
(80
km/h) when driving with a tyre repaired
using this type of kit.
Checking/adjusting tyre
pressures
You can also use the compressor,
without injecting sealant, to check and if
necessary adjust the tyre pressures.
F
R
emove the valve cap from the tyre and
place it in a clean area.
F
U
ncoil the pipe stowed under the
compressor.
F
S
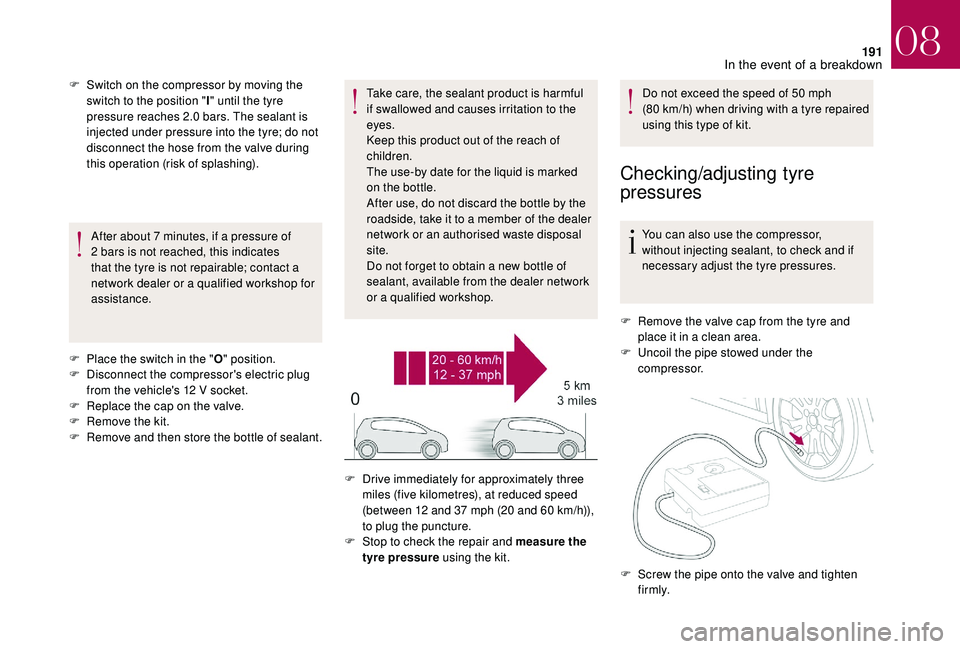
witch on the compressor by moving the
switch to the position " I" until the tyre
pressure reaches 2.0 bars. The sealant is
injected under pressure into the tyre; do not
disconnect the hose from the valve during
this operation (risk of splashing).
F
D
rive immediately for approximately three
miles (five kilometres), at reduced speed
(between 12 and 37 mph (20 and 60 km/h)),
to plug the puncture.
F
S
top to check the repair and measure the
tyre pressure using the kit.
F
S
crew the pipe onto the valve and tighten
f i r m l y.
08
In the event of a breakdown