tailgate Citroen DS4 RHD 2013.5 1.G Owner's Manual
[x] Cancel search | Manufacturer: CITROEN, Model Year: 2013.5, Model line: DS4 RHD, Model: Citroen DS4 RHD 2013.5 1.GPages: 400, PDF Size: 31.86 MB
Page 117 of 400

11 5Access
Boot
System allowing the mechanical unlocking
of the boot in the event of a battery or central
locking system malfunction.
Ta i l g a t e r e l e a s e
Unlocking
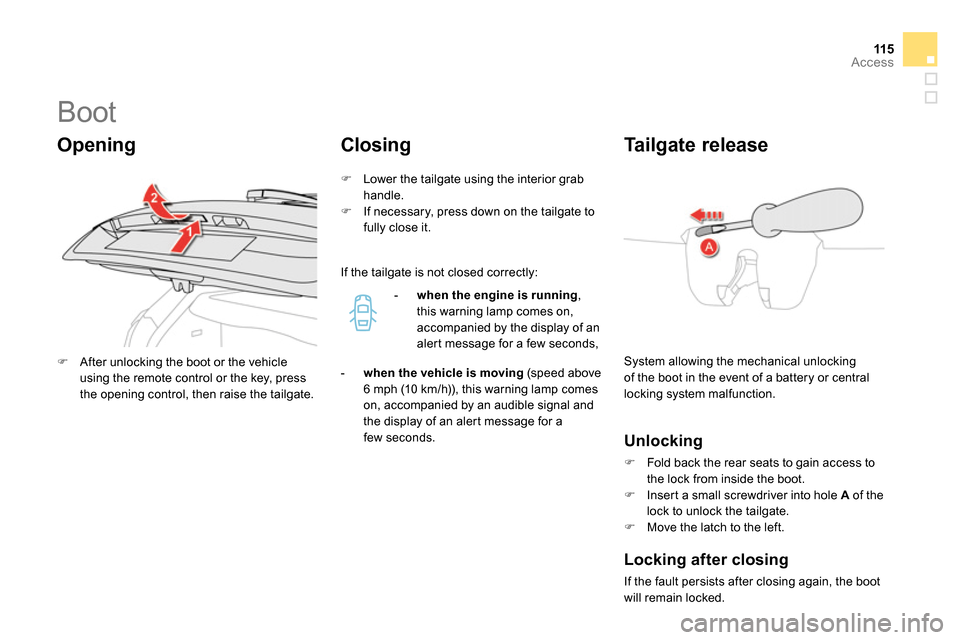
Fold back the rear seats to gain access to
the lock from inside the boot.
Insert a small screwdriver into hole A
of the
lock to unlock the tailgate.
Move the latch to the left.
After unlocking the boot or the vehicle
using the remote control or the key, press
the opening control, then raise the tailgate.
Opening
Closing
Lower the tailgate using the interior grab
handle.
If necessary, press down on the tailgate to
fully close it.
- when the engine is running
,
this warning lamp comes on,
accompanied by the display of an
alert message for a few seconds,
- when the vehicle is moving
(speed above
6 mph (10 km/h)), this warning lamp comes
on, accompanied by an audible signal and
the display of an alert message for a
few seconds.
Locking after closing
If the fault persists after closing again, the boot
will remain locked.
If the tailgate is not closed correctly:
Page 139 of 400

137Visibility
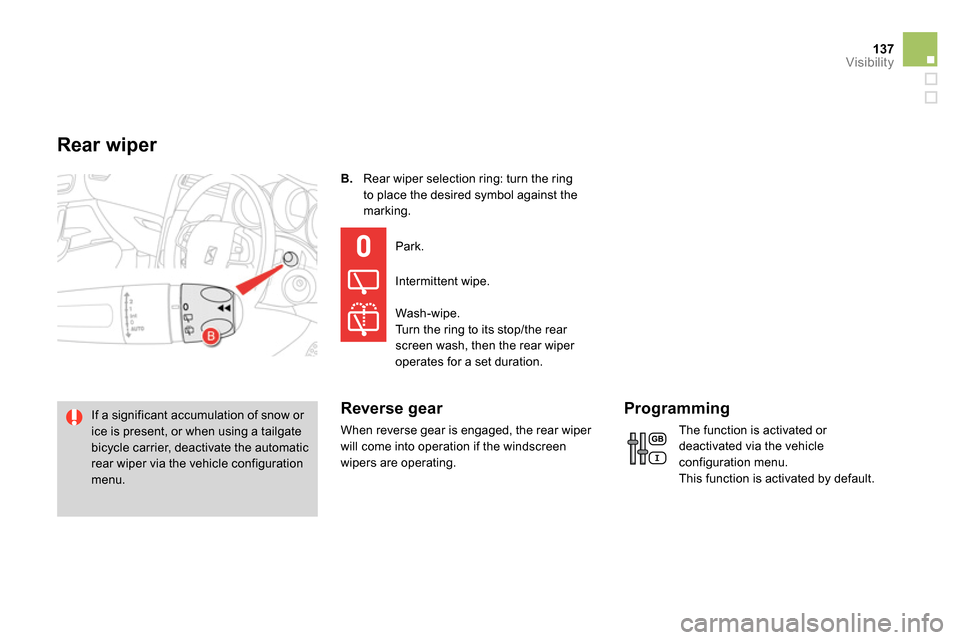
B.
Rear wiper selection ring: turn the ring
to place the desired symbol against the
marking.
If a significant accumulation of snow or
ice is present, or when using a tailgate
bicycle carrier, deactivate the automatic
rear wiper via the vehicle configuration
menu. Park.
Intermittent wipe.
Wash-wipe.
Turn the ring to its stop/the rear
screen wash, then the rear wiper
operates for a set duration.
Reverse gear
When reverse gear is engaged, the rear wiper
will come into operation if the windscreen
wipers are operating.
Programming
Rear wiper
The function is activated or
deactivated via the vehicle
configuration menu.
This function is activated by default.
Page 268 of 400

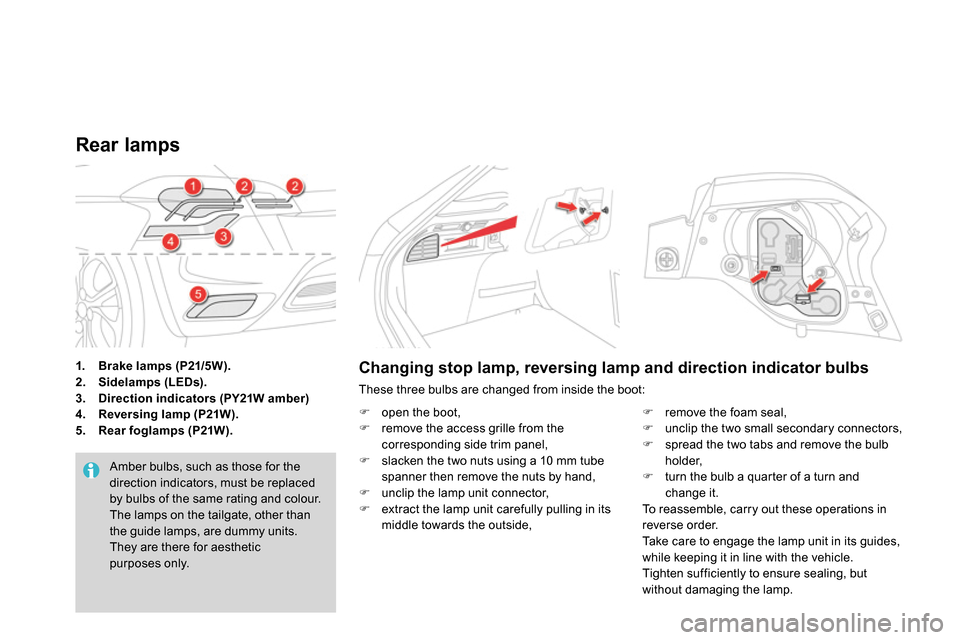
1.
Brake lamps (P21/5W).
2.
Sidelamps (LEDs).
3.
Direction indicators (PY21W amber)
4.
Reversing lamp (P21W).
5.
Rear foglamps (P21W).
Rear lamps
Amber bulbs, such as those for the
direction indicators, must be replaced
by bulbs of the same rating and colour.
The lamps on the tailgate, other than
the guide lamps, are dummy units.
They are there for aesthetic
purposes only.
Changing stop lamp, reversing lamp and direction indicator bulbs
These three bulbs are changed from inside the boot:
open the boot,
remove the access grille from the
corresponding side trim panel,
slacken the two nuts using a 10 mm tube
spanner then remove the nuts by hand,
unclip the lamp unit connector,
extract the lamp unit carefully pulling in its
middle towards the outside,
remove the foam seal,
unclip the two small secondary connectors,
spread the two tabs and remove the bulb
holder,
turn the bulb a quarter of a turn and
change it.
To reassemble, carry out these operations in
reverse order.
Take care to engage the lamp unit in its guides,
while keeping it in line with the vehicle.
Tighten sufficiently to ensure sealing, but
without damaging the lamp.
Page 269 of 400

267Practical information
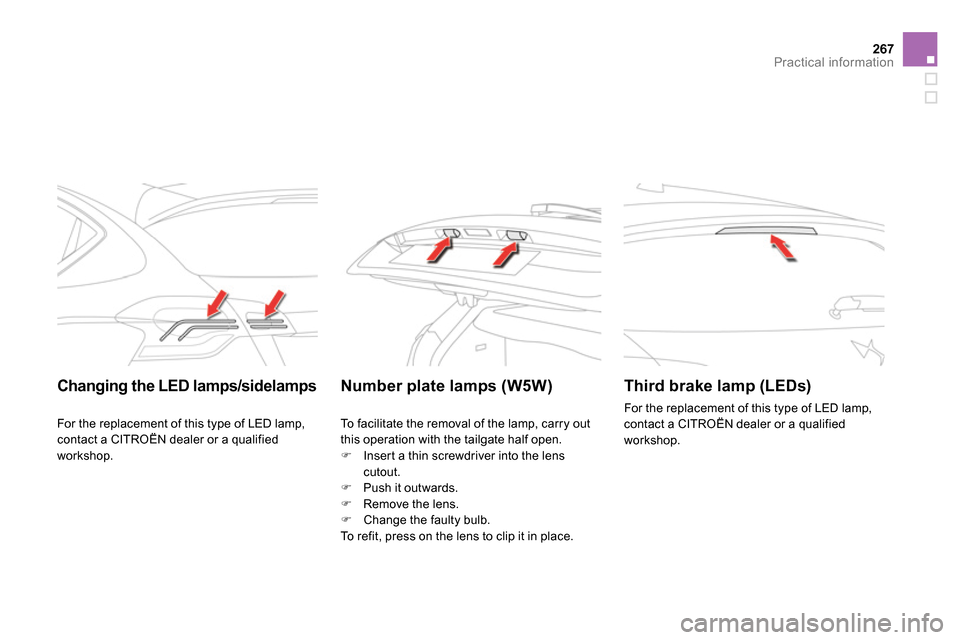
Changing the LED lamps/sidelamps
Number plate lamps (W5W)
Third brake lamp (LEDs)
For the replacement of this type of LED lamp,
contact a CITROËN dealer or a qualified
workshop.
For the replacement of this type of LED lamp,
contact a CITROËN dealer or a qualified
workshop. To facilitate the removal of the lamp, carry out
this operation with the tailgate half open.
Insert a thin screwdriver into the lens
cutout.
Push it outwards.
Remove the lens.
Change the faulty bulb.
To refit, press on the lens to clip it in place.