start stop button Citroen DS4 RHD 2014.5 1.G Owner's Manual
[x] Cancel search | Manufacturer: CITROEN, Model Year: 2014.5, Model line: DS4 RHD, Model: Citroen DS4 RHD 2014.5 1.GPages: 444, PDF Size: 12.99 MB
Page 12 of 444

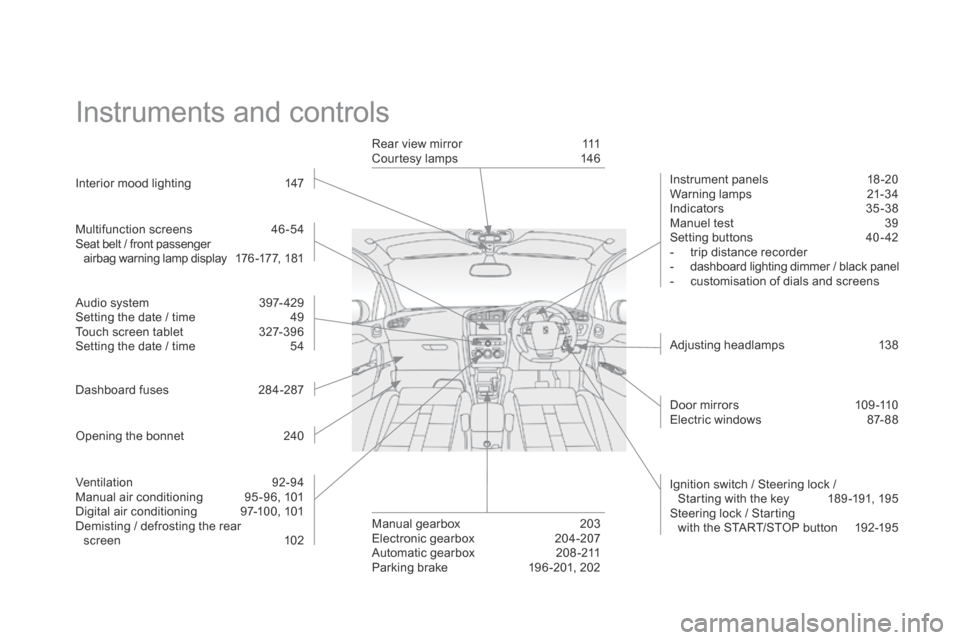
Instruments and controls
Instrument panels 18 -20
Warning lamps 2 1-34
Indicators
35
-38
Manuel test
3
9
Setting buttons
4
0 - 42
-
t
rip distance recorder
-
d
ashboard lighting dimmer / black panel
-
c
ustomisation of dials and screens
Adjusting headlamps
1
38
Door mirrors
1
09 -110
Electric windows
87
- 88
Dashboard fuses
2
84-287
Opening the bonnet
2
40
Multifunction screens
4
6 -54
Seat belt / front passenger
airbag warning lamp display
1
76 -177, 181
Manual gearbox
2
03
Electronic gearbox
20
4-207
Automatic gearbox
2
08 -211
Parking brake
1
96 -201, 202
Rear view mirror
1
11
Courtesy lamps
1
46
Ventilation
9
2-94
Manual air conditioning
9
5 -96, 101
Digital air conditioning
9
7-100, 101
Demisting / defrosting the rear screen
1
02
Audio system
3
97- 429
Setting the date / time
4
9
Touch screen tablet
3
27-396
Setting the date / time
5
4
Interior mood lighting
1
47
Ignition switch / Steering lock /
Starting with the key
1
89 -191, 195
Steering lock / Starting with the START/STOP button
1
92-195
Page 34 of 444

Lighting dimmerfixed. The lighting dimmer is making an
adjustment. You can adjust the level of illumination of the
instruments between 1 and 16.
Automatic wiping
fixed. The wiper control is pushed
downwards. Automatic front wiping is activated.
To deactivate automatic wiping, operate the control
stalk downwards or put the stalk into another position.
Warning
/indicator lampis on Cause Action/Observations
Diesel engine
pre-heating fixed.
The ignition switch is at the
2
nd position (Ignition on) or the
" ST
ART/STOP " starting button has
been pressed. Wait until the warning lamp goes off before starting.
Once it goes off, starting is immediate, on condition
that the brake pedal remains pressed with an
automatic or electronic gearbox, or the clutch pedal is
pressed fully down with a manual gearbox.
The period of illumination of the warning lamp is
determined by the ambient conditions (up to about
thirty seconds in severe winter conditions).
If the engine does not start, switch the ignition off and
then on, wait until the warning lamp goes off again,
then start the engine.
Page 58 of 444

- the current information tab with:● t he range,
●
t
he current fuel consumption,
●
t
he Stop & Start time counter.
-
t
he trip "1" tab with:
●
t
he distance travelled,
●
t
he average fuel consumption,
●
t
he average speed,
f
or the first trip.
-
t
he trip "2" tab with:
●
t
he distance travelled,
●
t
he average fuel consumption,
●
t
he average speed,
f
or the second trip.
Trip zero reset
F When the trip required is displayed, press the button on the end of the wiper stalk for
more than two seconds.
Tr i p s "1" and "2" are independent but their use
is identical.
For example, trip "1" can be used for daily
figures, and trip "2" for monthly figures.
Page 60 of 444

Touch screen tablet
Display of information
Permanent display:Temporary display in a new window:
F
P
ress the end of the wiper control stalk for
access to the information and display the
different tabs.
The current instantaneous fuel
consumption tab with:
-
t
he range,
-
t
he current fuel consumption,
-
t
he Stop & Start time counter.
The trip "1" tab with:
-
t
he distance travelled.
-
t
he average fuel consumption,
-
t
he average speed,
f
or the first trip.
The trip "2" tab with:
-
t
he distance travelled.
-
t
he average fuel consumption,
-
t
he average speed,
f
or the second trip.
Trip reset
F Select the "Driving assistance "
menu.
The trip computer information is displayed in
the primary page of the menu.
F
P
ress one of the buttons to display the
desired tab. F
W hen the desired trip is
displayed, press the reset button
or press and hold the end of the
wiper control stalk.
Tr i p s "1" and "2" are independent but their use
is identical.
For example, trip "1" can be used for daily
figures, and trip "2" for monthly figures.
Page 64 of 444

Remote control keySystem which permits central unlocking or locking of the vehicle using the door lock or from a distance. It is also used to locate and start the vehicle,
as well as providing protection against theft.
Unlocking the vehicle
Unfolding the key
F Press this button to unfold the key.
Complete unlocking using
the remote control
Selective unlocking using
the remote control
F Press the open padlock to unlock the vehicle completely.
F
P
ress the open padlock once to
unlock the driver's door only.
F
P
ress the open padlock again to unlock the
other doors and the boot.
Opening the windows using
the remote control
F Maintain the press on the open padlock until the desired position
is obtained. The windows stop as
soon as you release the button.
The complete or selective door
unlocking parameter is set via the
vehicle configuration menu.
Page 75 of 444

73
Back-up key
Unlocking / Locking using the integral key with Keyless
Entry and Starting
The integral key is used to lock and unlock the
vehicle when the electronic key cannot operate:
-
c
ell battery flat, vehicle battery discharged
or disconnected, ...
-
v
ehicle located in an area with strong
electromagnetic signals.
F
M
aintain a pull on button 1 , to extract the
integral key 2 . If the alarm is activated, the audible
signal triggered on opening a door
with the key (integral with the remote
control) will stop when the ignition is
switched on.Locking the driver's
door
F Insert the integral key in the door lock, then
turn it to the rear.
Unlocking the driver's
door
F Insert the integral key in the door lock, then turn it to the front.
Access
Page 77 of 444

75
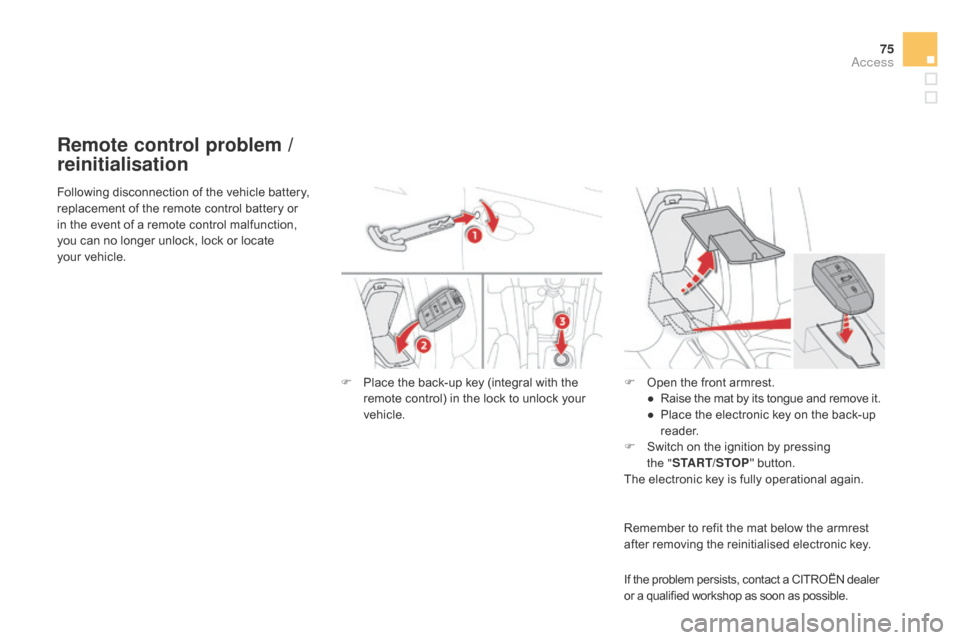
Remote control problem /
reinitialisation
If the problem persists, contact a CITROËN dealer
or a qualified workshop as soon as possible.
Following disconnection of the vehicle battery,
replacement of the remote control battery or
in the event of a remote control malfunction,
you can no longer unlock, lock or locate
your
vehicle.
F
P
lace the back-up key (integral with the
remote control) in the lock to unlock your
vehicle. F
O
pen the front armrest.
●
R
aise the mat by its tongue and remove it.
●
P
lace the electronic key on the back-up
reader.
F
S
witch on the ignition by pressing
the "
START/STOP " button.
The electronic key is fully operational again.
Remember to refit the mat below the armrest
after removing the reinitialised electronic key.
Access
Page 78 of 444

Do not throw the remote control batteries away, they contain metals which are harmful to the environment.
Take them to an approved collection point.
Lost keys, remote control, electronic key
Visit a CITROËN dealer with the vehicle's V5 registration document and your personal identification documents.
The CITROËN dealer will be able to retrieve the key code and the transponder code required to order a replacement.
Remote control
The high frequency remote control is a sensitive system; do not operate it while it is in your pocket as there is a possibility that it may unlock
the vehicle, without you being aware of it.
Do not repeatedly press the buttons of your remote control out of range and out of sight of your vehicle. You run the risk of stopping it from
working and the remote control would have to be reinitialised.
The remote control does not operate when the key is in the ignition, even when the ignition is switched off.
Locking the vehicle
Driving with the doors locked may make access to the passenger compartment by the emergency services more difficult in an emergency.
As a safety precaution (with children on board), remove the key from the ignition or take the electronic key when you leave the vehicle, even
for a short time.
Electrical interference
The Keyless Entry and Starting electronic key may not operate if close to certain electronic devices: telephone, laptop computer, strong
magnetic fields, ...
Anti-theft protection
Do not make any modifications to the electronic engine immobiliser system; this could cause malfunctions.
Don't forget to turn the steering to engage the steering lock.
When purchasing a second-hand vehicle
Have the key codes memorised by a CITROËN dealer, to ensure that the keys in your possession are the only ones which can start
the vehicle.
Page 84 of 444

Triggering of the alarm
This is indicated by sounding of the siren
and flashing of the direction indicators for
thirty seconds.
The monitoring functions remain active until
the alarm has been triggered eleven times in
succession.
When the vehicle is unlocked using the remote
control or the Keyless Entry and Starting
system, rapid flashing of the indicator lamp
in the button informs you that the alarm was
triggered during your absence. When the
ignition is switched on, this flashing stops
immediately.
Failure of the remote control
To deactivate the monitoring functions:
Locking the vehicle without
activating the alarm
F Lock or deadlock the vehicle using the key (integral to the remote control) in the
driver's door lock.
F
u
nlock the vehicle using the key (integral to
the remote control) in the driver's door lock,
F
o
pen the door; the alarm is triggered,
F
s
witch on the ignition; the alarm stops; the
indicator lamp in the button goes off.
Operating fault
When the ignition is switched on, fixed
illumination of the indicator lamp in the button
indicates a fault with the system.
Have it checked by a CITROËN dealer or a
qualified workshop.
Page 100 of 444

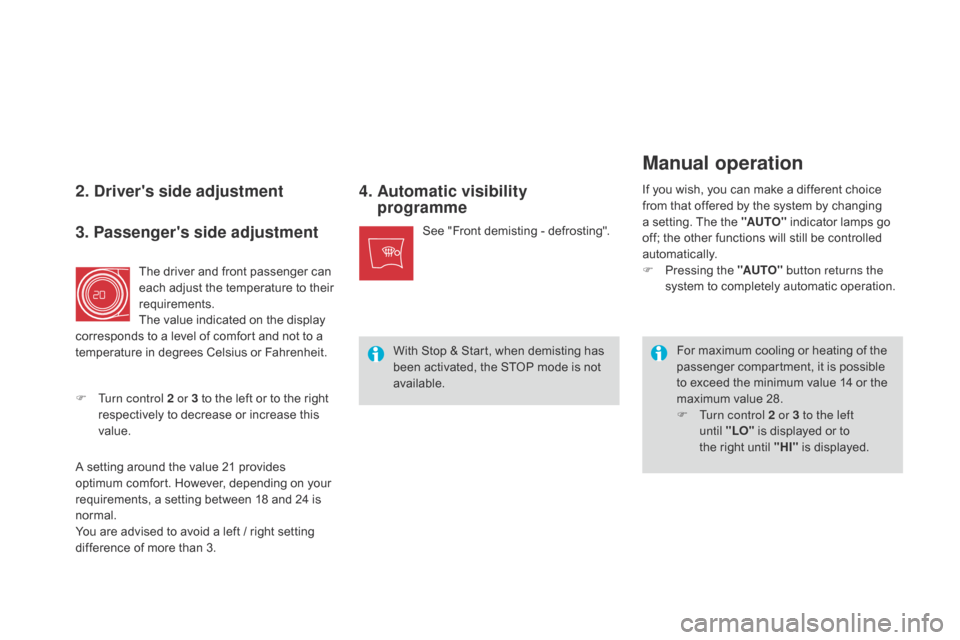
2. Driver's side adjustment 4. A utomatic visibility
programme
For maximum cooling or heating of the
passenger compartment, it is possible
to exceed the minimum value 14 or the
maximum value 28.
F
T
urn control 2 or 3 to the left
until
"LO" is displayed or to
the right until "HI" is displayed.
See "Front demisting - defrosting".
3. Passenger's side adjustment
The driver and front passenger can
each adjust the temperature to their
requirements.
The value indicated on the display
corresponds to a level of comfort and not to a
temperature in degrees Celsius or Fahrenheit.
F
T
urn control 2 or 3 to the left or to the right
respectively to decrease or increase this
value.
A setting around the value 21 provides
optimum comfort. However, depending on your
requirements, a setting between 18 and 24 is
normal.
You are advised to avoid a left / right setting
difference of more than 3.
Manual operation
If you wish, you can make a different choice
from that offered by the system by changing
a setting. The the "AUTO" indicator lamps go
off; the other functions will still be controlled
automatically.
F
P
ressing the "AUTO" button returns the
system to completely automatic operation.
With Stop & Start, when demisting has
been activated, the STOP mode is not
available.