tyre pressure Citroen DS4 RHD 2014.5 1.G Owner's Manual
[x] Cancel search | Manufacturer: CITROEN, Model Year: 2014.5, Model line: DS4 RHD, Model: Citroen DS4 RHD 2014.5 1.GPages: 444, PDF Size: 12.99 MB
Page 10 of 444
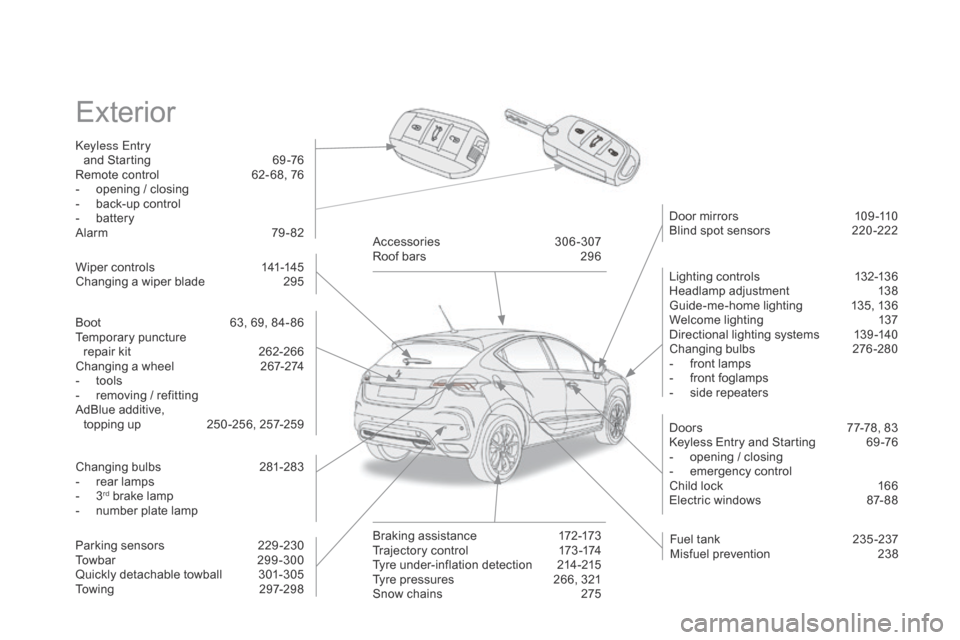
Exterior
Keyless Entry and Starting 6 9 -76
Remote control
6
2- 68, 76
-
o
pening / closing
-
b
ack-up control
-
b
attery
Alarm
7
9-82 Lighting controls
1
32-136
Headlamp adjustment
1
38
Guide-me-home lighting
1
35, 136
Welcome lighting
1
37
Directional lighting systems
1
39 -140
Changing bulbs
2
76-280
-
f
ront lamps
-
f
ront foglamps
-
s
ide repeaters
Wiper controls
1
41-145
Changing a wiper blade
2
95 Door mirrors
1
09 -110
Blind spot sensors
2
20 -222
Doors
7
7-78, 83
Keyless Entry and Starting
6
9 -76
-
o
pening / closing
-
em
ergency control
Child lock
1
66
Electric windows
87
- 88
Fuel tank
2
35 -237
Misfuel prevention
2
38
Accessories
3
06-307
Roof bars
2
96
Braking assistance
1
72-173
Trajectory control
1
73 -174
Tyre under-inflation detection
2
14-215
Tyre pressures
2
66, 321
Snow chains
2
75
Boot
6
3, 69, 84- 86
Temporary puncture
repair kit
2
62-266
Changing a wheel
2
67-274
-
t
ools
-
r
emoving / refitting
AdBlue additive, topping up
2
50 -256, 257-259
Changing bulbs
2
81-283
-
r
ear lamps
-
3rd brake lamp
-
n
umber plate lamp
Parking sensors
2
29 -230
To w b a r
2
9 9 - 3 0 0
Quickly detachable towball
3
01-305
Towing
29
7-298
Page 17 of 444
15
Limit the causes of excess consumption
Spread loads throughout the vehicle; place the heaviest items in the
bottom of the boot, as close as possible to the rear seats.
Limit the loads carried in the vehicle and reduce wind resistance (roof
bars, roof rack, bicycle carrier, trailer...). Use a roof box in preference.
Remove roof bars and roof racks after use.
At the end of winter, remove snow tyres and refit your summer tyres.
Observe the recommendations on maintenance
Check the tyre pressures regularly, when cold, referring to the label in
the door aperture, driver's side.
Carry out this check in particular:
-
b
efore a long journey,
-
a
t each change of season,
-
a
fter a long period out of use.
Don't forget the spare wheel and the tyres on any trailer or caravan.
Have your vehicle serviced regularly (engine oil, oil filter, air filter,
passenger compartment filter...) and observe the schedule of
operations recommended in the manufacturer's service schedule.
With a BlueHDi Diesel engine, if the SCR system is faulty your vehicle
becomes polluting; go to a CITROËN dealer or a qualified workshop
without delay to have the emissions of nitrous oxides brought back to
the legal level.
When refuelling, do not continue after the third cut-off of the nozzle to
avoid any over flow.
At the wheel of your new vehicle, it is only after the first 1 800 miles
(3 000 kilometres) that you will see the fuel consumption settle down to
a consistent average.
Eco-driving
Page 29 of 444
27
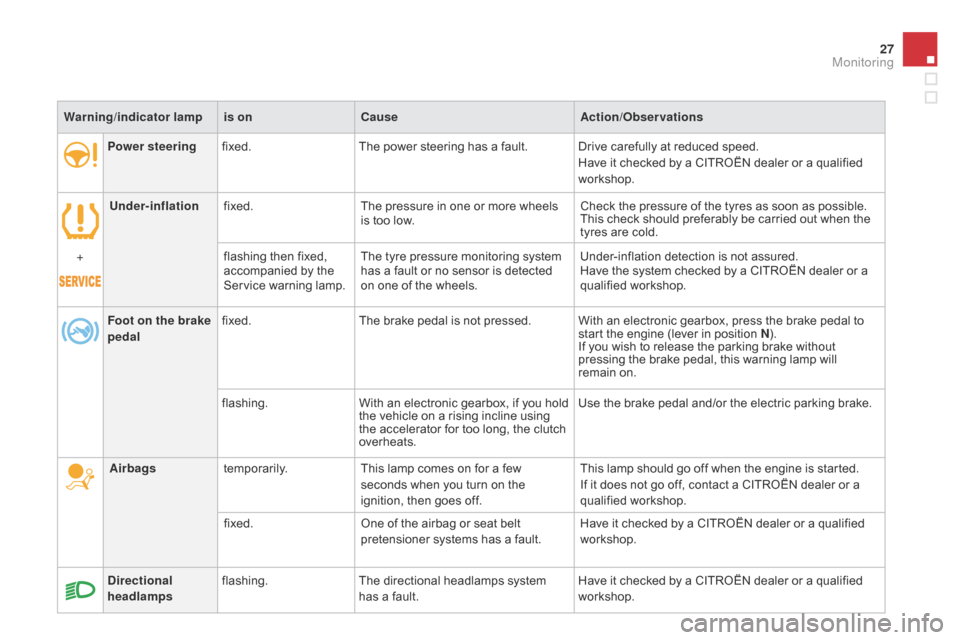
Power steeringfixed. The power steering has a fault. Drive carefully at reduced speed.
Have it checked by a CITROËN dealer or a qualified
workshop.
Under-inflation fixed. The pressure in one or more wheels
is too low. Check the pressure of the tyres as soon as possible.
This check should preferably be carried out when the
tyres are cold.
+ flashing then fixed,
accompanied by the
Service warning lamp.The tyre pressure monitoring system
has a fault or no sensor is detected
on one of the wheels. Under-inflation detection is not assured.
Have the system checked by a CITROËN dealer or a
qualified workshop.
Directional
headlamps flashing.
The directional headlamps system
has a fault. Have it checked by a CITROËN dealer or a qualified
workshop.
Warning
/indicator lampis on Cause Action/Observations
Foot on the brake
pedal fixed.
The brake pedal is not pressed. With an electronic gearbox, press the brake pedal to
start the engine (lever in position N).
If you wish to release the parking brake without
pressing the brake pedal, this warning lamp will
remain
on.
flashing. With an electronic gearbox, if you hold
the vehicle on a rising incline using
the accelerator for too long, the clutch
overheats. Use the brake pedal and/or the electric parking brake.
Airbags temporarily. This lamp comes on for a few
seconds when you turn on the
ignition, then goes off. This lamp should go off when the engine is started.
If it does not go off, contact a CITROËN dealer or a
qualified workshop.
fixed. One of the airbag or seat belt
pretensioner systems has a fault. Have it checked by a CITROËN dealer or a qualified
workshop.
Monitoring
Page 174 of 444
Braking assistance systems
Group of supplementary systems which help
you to obtain optimum braking in complete
safety in emergency situations:
-
a
nti-lock braking system (ABS),
-
e
lectronic brake force distribution (EBFD),
-
e
mergency braking assistance (EBA).Anti-lock braking system
and electronic brake force
distribution
Linked systems which improve the stability and
manoeuvrability of your vehicle when braking,
in particular on poor or slippery sur faces.
Activation
The anti-lock braking system comes into
operation automatically when there is a risk of
wheel lock.
Normal operation of the ABS may make itself
felt by slight vibration of the brake pedal. When braking in an emergency,
press very firmly without releasing
the
pressure.
Operating fault
If this warning lamp comes on,
together with the STOP and ABS
warning lamps, accompanied by an
audible signal and a message in the screen, it
indicates a malfunction of the electronic brake
force distribution which could result in loss of
control of the vehicle when braking.
You must stop as soon as it is safe to do so.
When replacing wheels (tyres and
rims), ensure that they conform to the
manufacturer's recommendations.If this warning lamp comes on,
accompanied by an audible signal
and a message in the screen, it
indicates a malfunction of the anti-lock braking
system which could result in loss of control of
the vehicle when braking.
In either case, contact a CITROËN dealer or a
qualified workshop.
Page 175 of 444
173
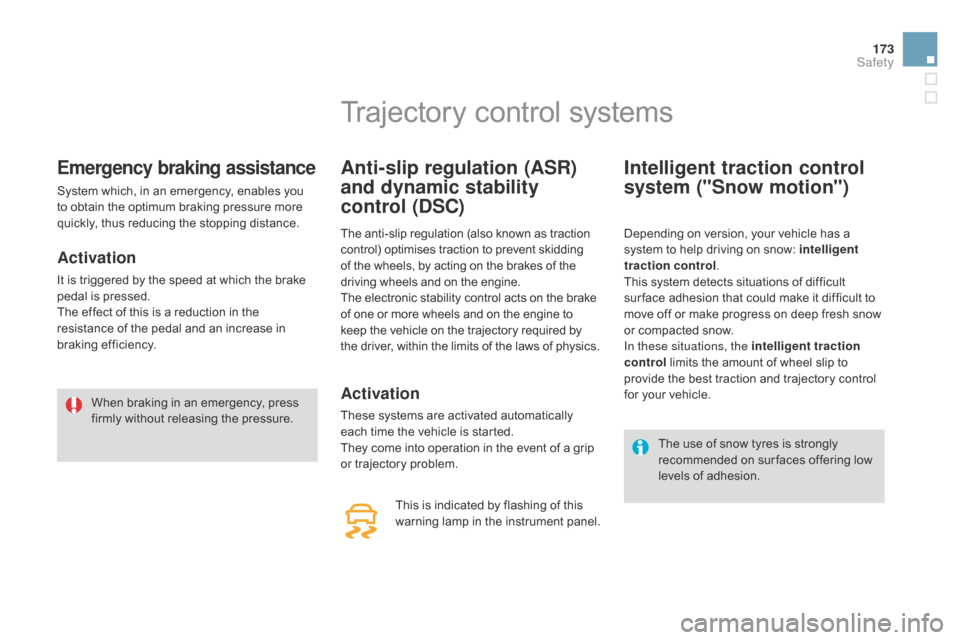
Emergency braking assistance
System which, in an emergency, enables you
to obtain the optimum braking pressure more
quickly, thus reducing the stopping distance.
Activation
It is triggered by the speed at which the brake
pedal is pressed.
The effect of this is a reduction in the
resistance of the pedal and an increase in
braking efficiency.When braking in an emergency, press
firmly without releasing the pressure.
Trajectory control systems
Anti-slip regulation (ASR)
and dynamic stability
control (DSC)
The anti-slip regulation (also known as traction
control) optimises traction to prevent skidding
of the wheels, by acting on the brakes of the
driving wheels and on the engine.
The electronic stability control acts on the brake
of one or more wheels and on the engine to
keep the vehicle on the trajectory required by
the driver, within the limits of the laws of physics.
Activation
These systems are activated automatically
each time the vehicle is started.
They come into operation in the event of a grip
or trajectory problem. This is indicated by flashing of this
warning lamp in the instrument panel.
Intelligent traction control
system ("Snow motion")
Depending on version, your vehicle has a
system to help driving on snow: intelligent
traction control .
This system detects situations of difficult
sur face adhesion that could make it difficult to
move off or make progress on deep fresh snow
or compacted snow.
In these situations, the intelligent traction
control limits the amount of wheel slip to
provide the best traction and trajectory control
for your vehicle.
The use of snow tyres is strongly
recommended on sur faces offering low
levels of adhesion.
Safety
Page 216 of 444
Tyre under-inflation detection
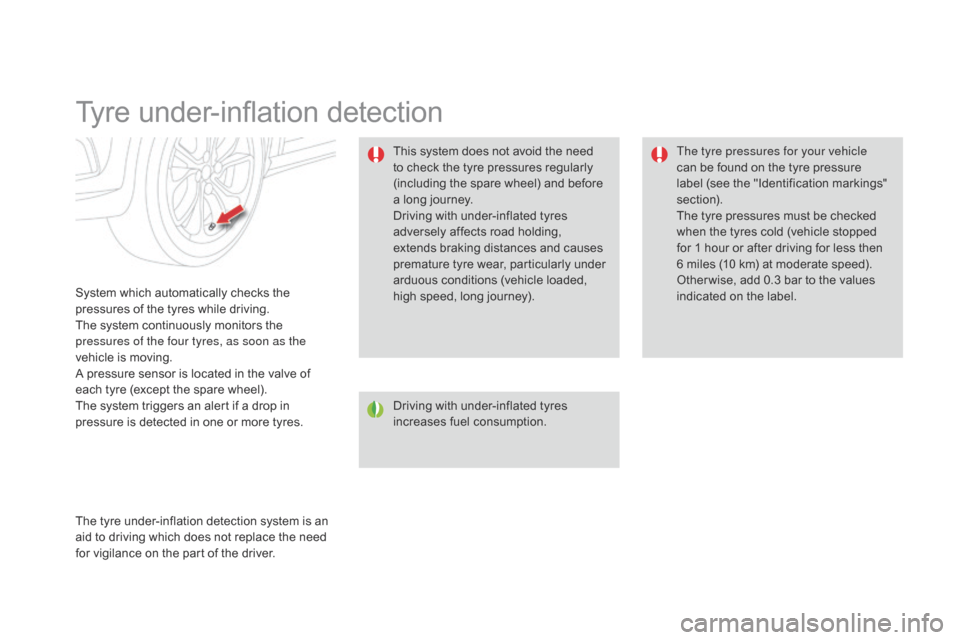
System which automatically checks the
pressures of the tyres while driving.
The system continuously monitors the
pressures of the four tyres, as soon as the
vehicle is moving.
A pressure sensor is located in the valve of
each tyre (except the spare wheel).
The system triggers an alert if a drop in
pressure is detected in one or more tyres.Driving with under-inflated tyres
increases fuel consumption.The tyre pressures for your vehicle
can be found on the tyre pressure
label (see the "Identification markings"
section).
The tyre pressures must be checked
when the tyres cold (vehicle stopped
for 1 hour or after driving for less then
6 miles (10 km) at moderate speed).
Other wise, add 0.3 bar to the values
indicated on the label.
This system does not avoid the need
to check the tyre pressures regularly
(including the spare wheel) and before
a long journey.
Driving with under-inflated tyres
adversely affects road holding,
extends braking distances and causes
premature tyre wear, particularly under
arduous conditions (vehicle loaded,
high speed, long journey).
The tyre under-inflation detection system is an
aid to driving which does not replace the need
for vigilance on the part of the driver.
Page 217 of 444
215
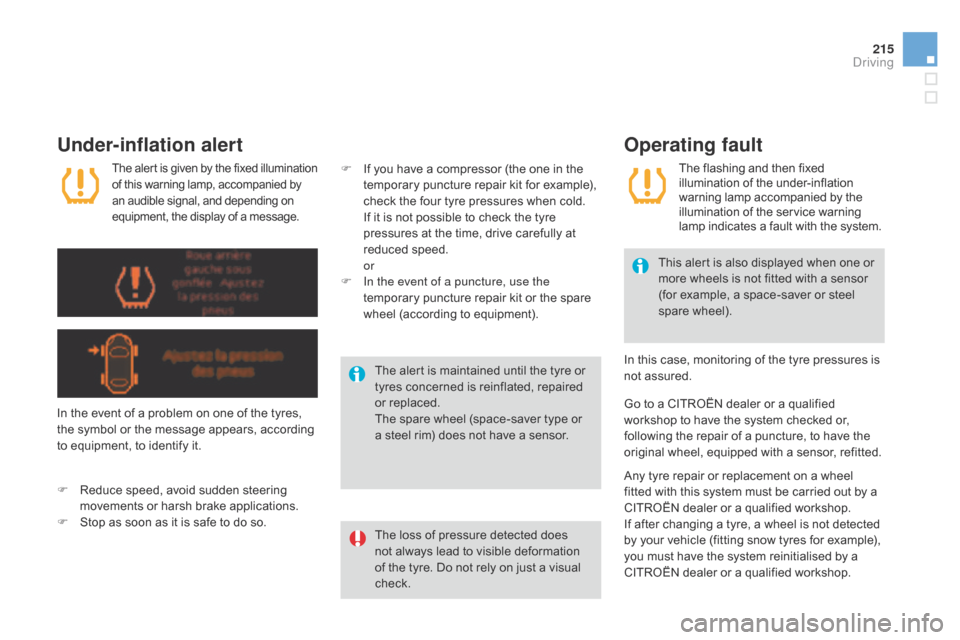
Under-inflation alert
The loss of pressure detected does
not always lead to visible deformation
of the tyre. Do not rely on just a visual
check.This alert is also displayed when one or
more wheels is not fitted with a sensor
(for example, a space-saver or steel
spare wheel).
The alert is maintained until the tyre or
tyres concerned is reinflated, repaired
or replaced.
The spare wheel (space-saver type or
a steel rim) does not have a sensor.
The aler t is given by the fixed illumination
of this warning lamp, accompanied by
an audible signal, and depending on
equipment, the display of a message.
In the event of a problem on one of the tyres,
the symbol or the message appears, according
to equipment, to identify it.
F
R
educe speed, avoid sudden steering
movements or harsh brake applications.
F
S
top as soon as it is safe to do so.
Operating fault
The flashing and then fixed
illumination of the under-inflation
warning lamp accompanied by the
illumination of the service warning
lamp indicates a fault with the system.
Go to a CITROËN dealer or a qualified
workshop
to have the system checked or,
following the repair of a puncture, to have the
original wheel, equipped with a sensor, refitted.
F
I
f you have a compressor (the one in the
temporary puncture repair kit for example),
check the four tyre pressures when cold.
I
f it is not possible to check the tyre
pressures at the time, drive carefully at
reduced speed.
or
F
I
n the event of a puncture, use the
temporary puncture repair kit or the spare
wheel (according to equipment).
Any tyre repair or replacement on a wheel
fitted with this system must be carried out by a
CITROËN dealer or a qualified workshop.
If after changing a tyre, a wheel is not detected
by your vehicle (fitting snow tyres for example),
you must have the system reinitialised by a
CITROËN dealer or a qualified workshop. In this case, monitoring of the tyre pressures is
not assured.
Driving
Page 266 of 444
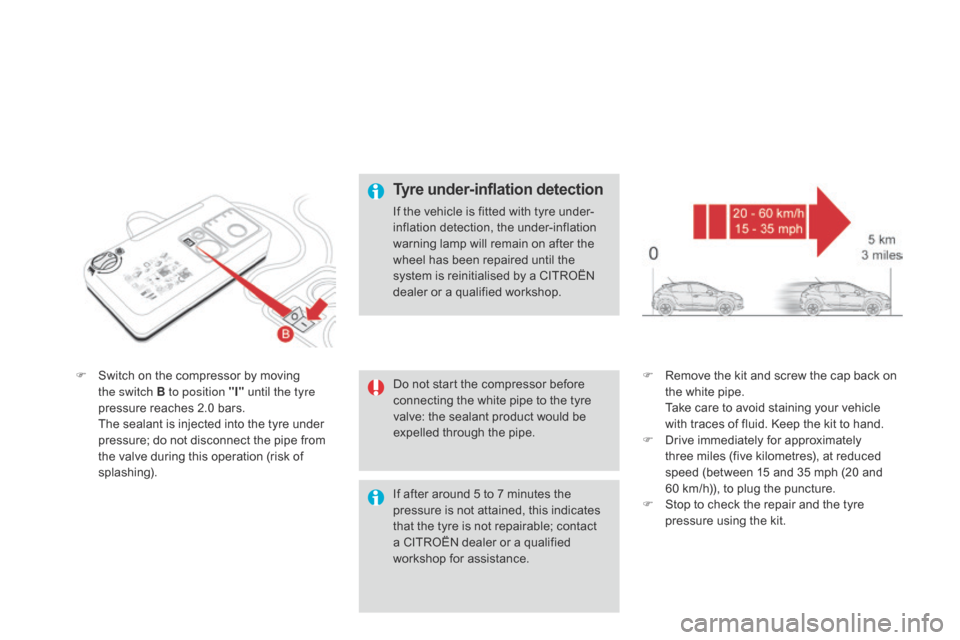
F Switch on the compressor by moving the switch B to position "I" until the tyre
pressure reaches 2.0 bars.
T
he sealant is injected into the tyre under
pressure; do not disconnect the pipe from
the valve during this operation (risk of
splashing). F
R emove the kit and screw the cap back on
the white pipe.
T
ake care to avoid staining your vehicle
with traces of fluid. Keep the kit to hand.
F
D
rive immediately for approximately
three
miles (five kilometres), at reduced
speed (between 15 and 35 mph (20 and
60
km/h)), to plug the puncture.
F
S
top to check the repair and the tyre
pressure using the kit.
Do not start the compressor before
connecting the white pipe to the tyre
valve: the sealant product would be
expelled through the pipe.
Tyre under-inflation detection
If the vehicle is fitted with tyre under-
inflation detection, the under-inflation
warning lamp will remain on after the
wheel has been repaired until the
system is reinitialised by a CITROËN
dealer or a qualified workshop.
If after around 5 to 7 minutes the
pressure is not attained, this indicates
that the tyre is not repairable; contact
a CITROËN dealer or a qualified
workshop for assistance.
Page 267 of 444
265
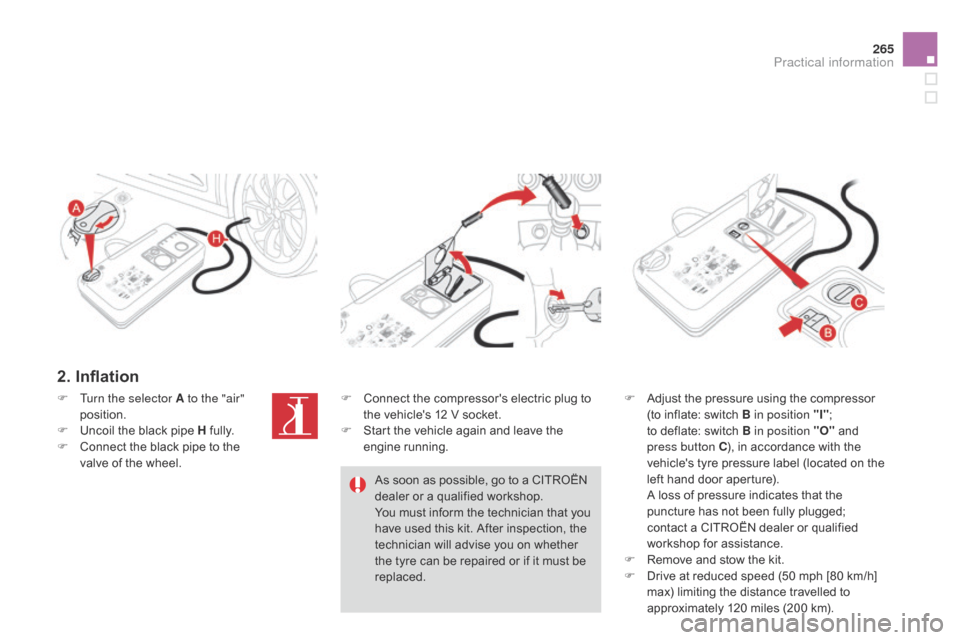
2. Inflation
F Adjust the pressure using the compressor (to inflate: switch B in position "I" ;
to
deflate: switch B in position "O" and
press button C ), in accordance with the
vehicle's tyre pressure label (located on the
left hand door aperture).
A l
oss of pressure indicates that the
puncture has not been fully plugged;
contact a CITROËN dealer or qualified
workshop for assistance.
F
R
emove and stow the kit.
F
D
rive at reduced speed (50 mph [80 km/h]
max) limiting the distance travelled to
approximately 120 miles (200 km).
F
T
urn the selector A to the "air"
position.
F
U
ncoil the black pipe H fully.
F
C
onnect the black pipe to the
valve of the wheel. F
C
onnect the compressor's electric plug to
the vehicle's 12 V socket.
F
S
tart the vehicle again and leave the
engine running.
As soon as possible, go to a CITROËN
dealer or a qualified workshop.
You must inform the technician that you
have used this kit. After inspection, the
technician will advise you on whether
the tyre can be repaired or if it must be
replaced.
Practical information
Page 268 of 444
Removing the cartridge
F Stow the black pipe.
F D etach the angled base from the white pipe.
F
S
upport the compressor vertically.
F
U
nscrew the cartridge from the bottom.
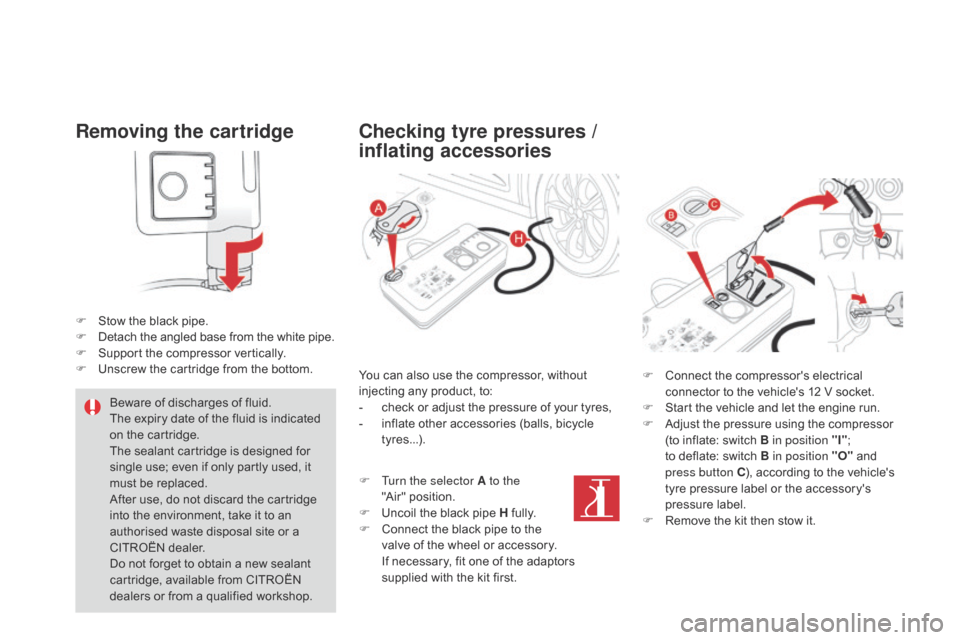
Checking tyre pressures /
inflating accessories
Beware of discharges of fluid.
The expiry date of the fluid is indicated
on the cartridge.
The sealant cartridge is designed for
single use; even if only partly used, it
must be replaced.
After use, do not discard the cartridge
into the environment, take it to an
authorised waste disposal site or a
CITROËN dealer.
Do not forget to obtain a new sealant
cartridge, available from CITROËN
dealers or from a qualified workshop. You can also use the compressor, without
injecting any product, to:
-
c heck or adjust the pressure of your tyres,
-
i
nflate other accessories (balls, bicycle
tyres...). F
C
onnect the compressor's electrical
connector to the vehicle's 12 V socket.
F S tart the vehicle and let the engine run.
F
A
djust the pressure using the compressor
(to inflate: switch B in position "I" ;
to
deflate: switch B in position "O" and
press button C ), according to the vehicle's
tyre pressure label or the accessory's
pressure label.
F
R
emove the kit then stow it.
F
T
urn the selector A to the
"Air"
position.
F
U
ncoil the black pipe H fully.
F
C
onnect the black pipe to the
valve of the wheel or accessory.
I
f necessary, fit one of the adaptors
supplied with the kit first.