wheel Citroen DS4 RHD 2015.5 1.G Owner's Manual
[x] Cancel search | Manufacturer: CITROEN, Model Year: 2015.5, Model line: DS4 RHD, Model: Citroen DS4 RHD 2015.5 1.GPages: 436, PDF Size: 10.13 MB
Page 5 of 436
COMFORT
88 Front seats
92
R
ear seats
93
S
teering wheel adjustment
94
M
irrors
97
V
entilation / Heating
100
M
anual air conditioning
102
D
ual-zone digital air
conditioning
106
F
ront demist -
defrost
107
R
ear screen demist -
defrost 110 F
ront fittings
113
P
anoramic windscreen
114
C
entre consoles
116
F
ront armrest
119
R
ear fittings
120
B
oot fittings
004005
003FITTIngS
126 Lighting controls
130
A
utomatic illumination of
headlamps
131
W
elcome lighting
132
H
eadlamp beam height
adjustment
133
D
irectional lighting
135
W
iper controls
136
A
utomatic rain sensitive
wipers
14 0
C
ourtesy lamps
141
I
nterior mood lighting
142
B
oot lamp
006VISIBILITY CHILd
SAFETY
14 6 Child seats
14 8
D
eactivating the passenger's
front airbag
155
I
SOFIX child seats
160
C
hild lock
Page 6 of 436
SAFETYdRIVIngP R ACTICAL
I
nF
ORMATIO
n
182 Driving recommendations
184
S
tarting / Switching off the
engine with the key
187
S
tarting / Switching off the
engine with Keyless Entry
and Starting
190
E
lectric parking brake
196
M
anual parking brake
197
M
anual gearbox
198
A
utomatic gearbox
164 D
irection indicators
164
H
azard warning lamps
165
Horn
165
E
mergency or assistance
call
166
B
raking assistance systems
167
T
rajectory control systems
169
F
ront seat belts
173
A
irbags 226 T
emporary puncture repair
kit
231
C
hanging a wheel
239
S
now chains
240
C
hanging a bulb
249
C
hanging a fuse
255
1
2 V battery
259
E
nergy economy mode
260
C
hanging a wiper blade
260
V
ery cold climate screen
261
F
itting roof bars
262
T
owing the vehicle
264
T
owing a trailer
265
T
owbar with quickly
detachable towball
270
Accessories
008009
007
202 Hill start assist
203
G
ear ef ficiency indicator
204
T
yre under-inflation detection
206
St
op & Start
210
B
lind spot sensors
213
M
emorising speeds
215
Spe
ed limiter
218
C
ruise control
221
P
arking sensors
223
R
eversing camera
Page 10 of 436
Exterior
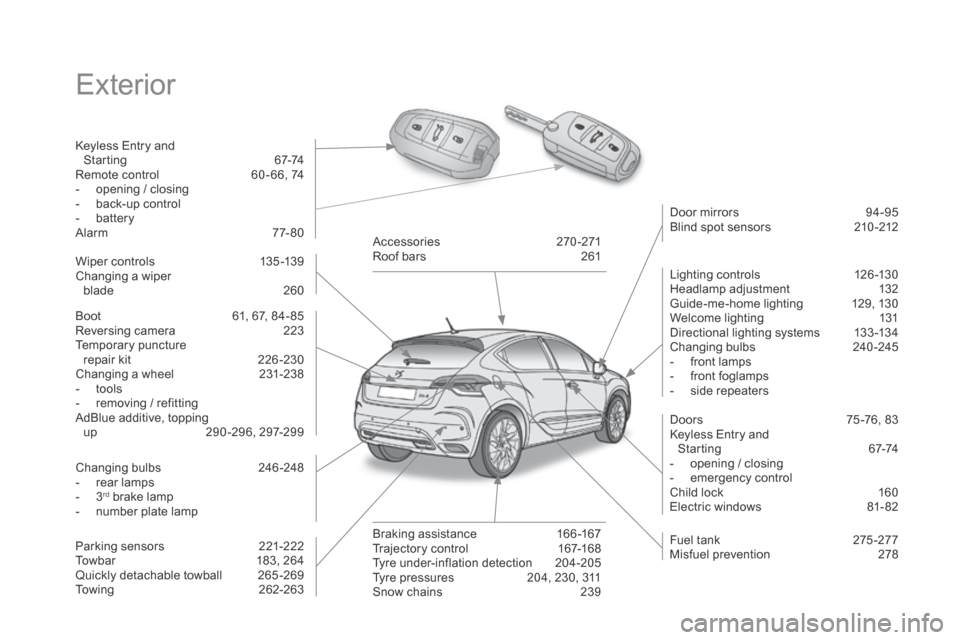
Keyless Entry and Starting 6 7-74
Remote control
6
0 - 66, 74
-
o
pening / closing
-
b
ack-up control
-
b
attery
Alarm
7
7-80
Boot
6
1, 67, 84- 85
Reversing camera
2
23
Temporary puncture
repair kit
2
26 -230
Changing a wheel
2
31-238
-
t
ools
-
r
emoving / refitting
AdBlue additive, topping up
29
0-296, 297-299 Door mirrors
9
4-95
Blind spot sensors
2
10 -212
Wiper controls
1
35 -139
Changing a wiper blade
2
60
Changing bulbs
2
46-248
-
r
ear lamps
-
3rd brake lamp
-
n
umber plate lamp
Parking sensors
2
21-222
Towbar
1
83, 264
Quickly detachable towball
2
65 -269
Towing
2
62-263Accessories
2
70-271
Roof bars
2
61
Braking assistance
1
66 -167
Trajectory control
1
67-168
Tyre under-inflation detection
2
04-205
Tyre pressures
2
04, 230, 311
Snow chains
2
39Lighting controls
1
26 -130
Headlamp adjustment
1
32
Guide-me-home lighting
1
29, 130
Welcome lighting
1
31
Directional lighting systems
1
33 -134
Changing bulbs
2
40-245
-
f
ront lamps
-
f
ront foglamps
-
s
ide repeaters
Doors
7
5 -76, 83
Keyless Entry and Starting
6
7-74
-
o
pening / closing
-
em
ergency control
Child lock 1 60
Electric windows 8 1- 82
Fuel tank
2
75 -277
Misfuel prevention
2
78
Page 13 of 436
11
Instruments and controls
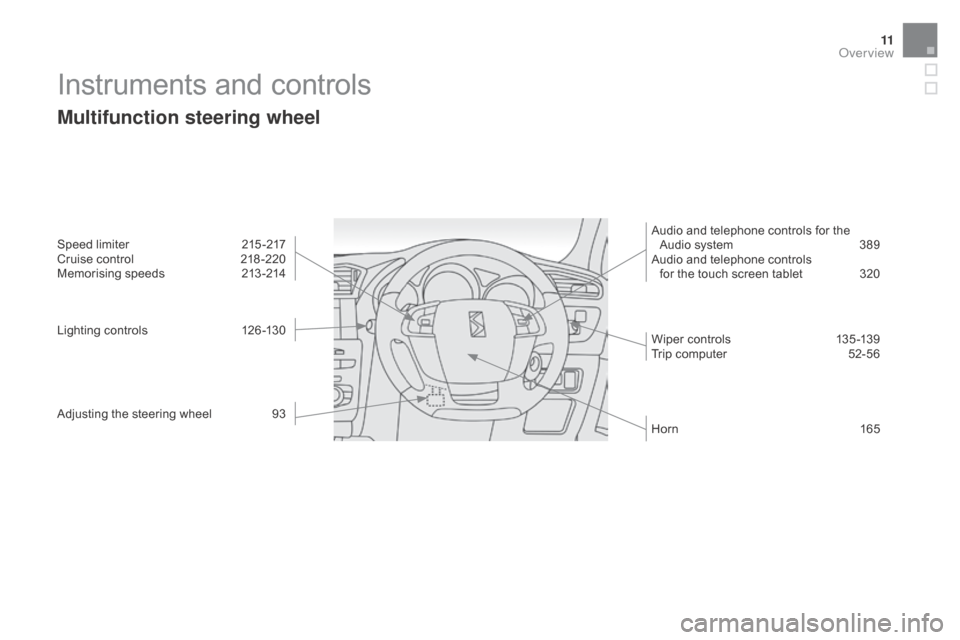
Multifunction steering wheel
Speed limiter 215 -217
Cruise control 2 18 -220
Memorising speeds
2
13 -214
Lighting controls
1
26 -130
Adjusting the steering wheel
9
3 Audio and telephone controls for the
Audio system 3 89
Audio and telephone controls for the touch screen tablet
3
20
Wiper controls
1
35 -139
Trip computer
5
2-56
Horn
16
5
Over view
Page 17 of 436
15
Limit the causes of excess consumption
Spread loads throughout the vehicle; place the heaviest items in the
bottom of the boot, as close as possible to the rear seats.
Limit the loads carried in the vehicle and reduce wind resistance (roof
bars, roof rack, bicycle carrier, trailer...). Use a roof box in preference.
Remove roof bars and roof racks after use.
At the end of winter, remove snow tyres and refit your summer tyres.
Observe the recommendations on maintenance
Check the tyre pressures regularly, when cold, referring to the label in
the door aperture, driver's side.
Carry out this check in particular:
-
b
efore a long journey,
-
a
t each change of season,
-
a
fter a long period out of use.
Don't forget the spare wheel and the tyres on any trailer or caravan.
Have your vehicle serviced regularly (engine oil, oil filter, air filter,
passenger compartment filter...) and observe the schedule of
operations recommended in the manufacturer's service schedule.
With a BlueHDi Diesel engine, if the SCR system is faulty your vehicle
becomes polluting; go to a CITROËN dealer or a qualified workshop
without delay to have the emissions of nitrous oxides brought back to
the legal level.
When refuelling, do not continue after the third cut-off of the nozzle to
avoid any over flow.
At the wheel of your new vehicle, it is only after the first 1 800 miles
(3
000 kilometres) that you will see the fuel consumption settle down to
a consistent average.
Eco-driving
Page 29 of 436
27
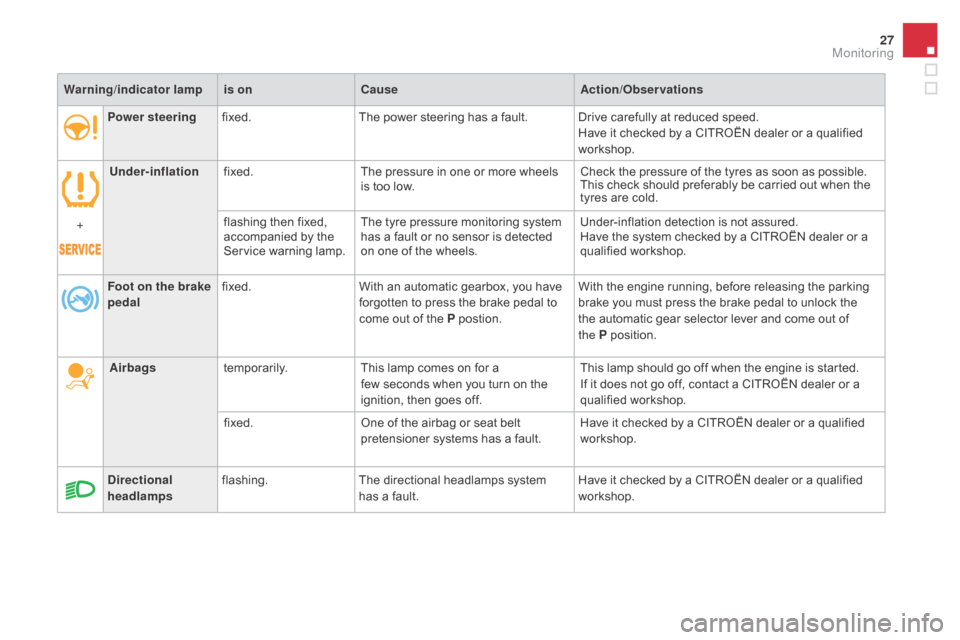
Power steeringfixed. The power steering has a fault. Drive carefully at reduced speed.
Have it checked by a CITROËN dealer or a qualified
workshop.
Under-inflation fixed. The pressure in one or more wheels
is too low. Check the pressure of the tyres as soon as possible.
This check should preferably be carried out when the
tyres are cold.
+ flashing then fixed,
accompanied by the
Service warning lamp.The tyre pressure monitoring system
has a fault or no sensor is detected
on one of the wheels. Under-inflation detection is not assured.
Have the system checked by a CITROËN dealer or a
qualified workshop.
di
rectional
headlamps flashing.
The directional headlamps system
has a fault. Have it checked by a CITROËN dealer or a qualified
workshop.
Warning
/indicator lampis on Cause Action/Observations
Foot on the brake
pedal fixed.
With an automatic gearbox, you have
forgotten to press the brake pedal to
come out of the P postion. With the engine running, before releasing the parking
brake you must press the brake pedal to unlock the
the automatic gear selector lever and come out of
the
P
p
osition.
Airbags temporarily. This lamp comes on for a
few
seconds when you turn on the
ignition, then goes off. This lamp should go off when the engine is started.
If it does not go off, contact a CITROËN dealer or a
qualified workshop.
fixed. One of the airbag or seat belt
pretensioner systems has a fault. Have it checked by a CITROËN dealer or a qualified
workshop.
Monitoring
Page 81 of 436
79
Deactivate the interior volumetric and anti-tilt
monitoring to avoid unwanted triggering of the
alarm in certain cases such as:
-
l
eaving a pet in the vehicle,
-
l
eaving a window partially open,
-
w
ashing your vehicle,
-
c
hanging a wheel,
-
h
aving your vehicle towed,
-
t
ransport by sea.
Locking the vehicle
with exterior perimeter
monitoring only
deactivation of the interior
volumetric and anti-tilt monitoring
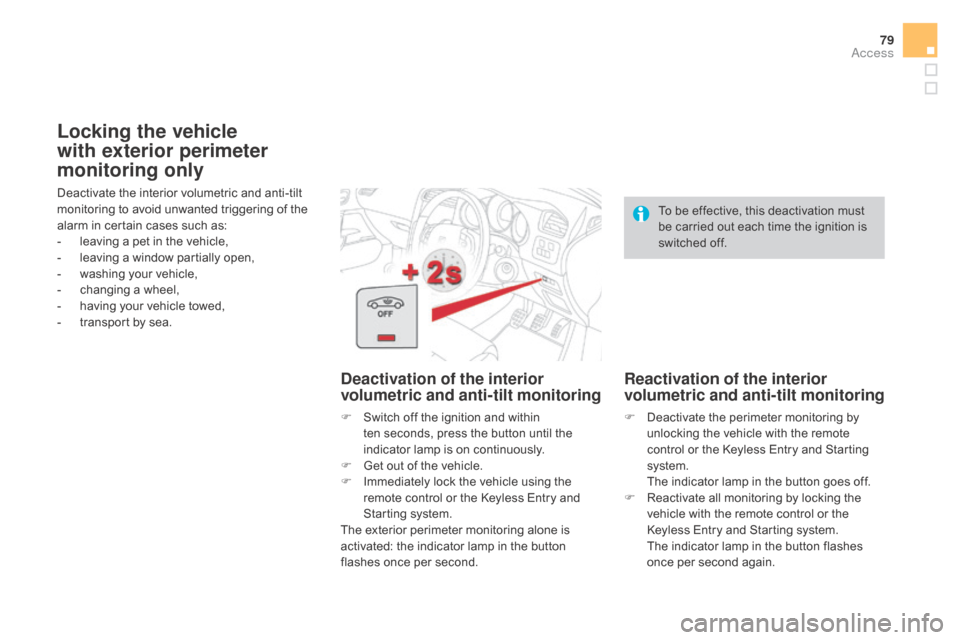
F Switch off the ignition and within ten seconds, press the button until the
indicator lamp is on continuously.
F
G
et out of the vehicle.
F
I
mmediately lock the vehicle using the
remote control or the Keyless Entry and
Starting system.
The exterior perimeter monitoring alone is
activated: the indicator lamp in the button
flashes once per second. To be effective, this deactivation must
be carried out each time the ignition is
switched off.
Reactivation of the interior
volumetric and anti-tilt monitoring
F Deactivate the perimeter monitoring by
unlocking the vehicle with the remote
control or the Keyless Entry and Starting
system.
T
he indicator lamp in the button goes off.
F
R
eactivate all monitoring by locking the
vehicle with the remote control or the
Keyless Entry and Starting system.
T
he indicator lamp in the button flashes
once per second again.
Access
Page 95 of 436
93
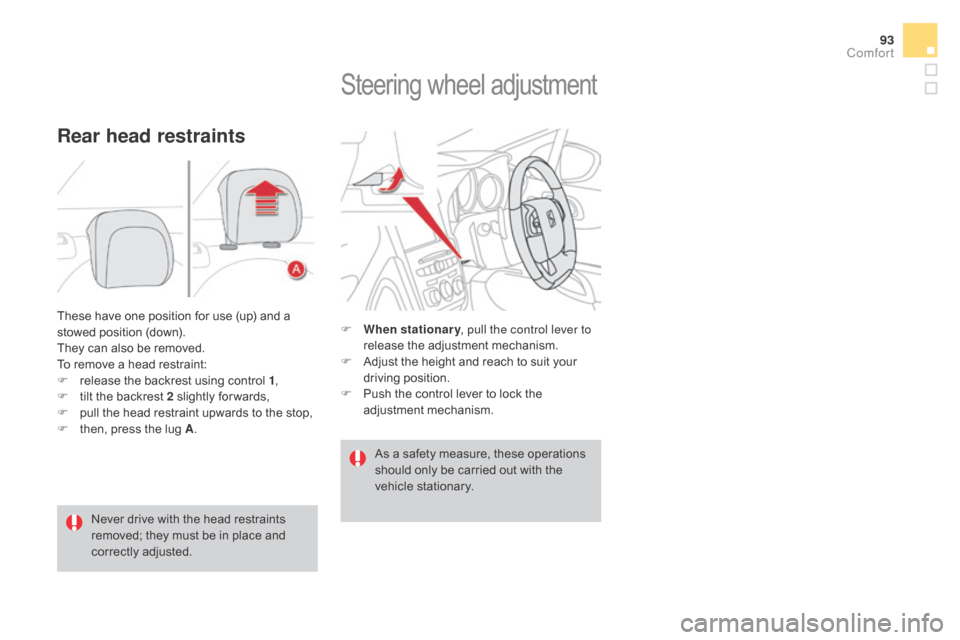
These have one position for use (up) and a
stowed position (down).
They can also be removed.
To remove a head restraint:
F
r
elease the backrest using control 1 ,
F
t
ilt the backrest 2 slightly for wards,
F
p
ull the head restraint upwards to the stop,
F
t
hen, press the lug A .
Rear head restraints
Never drive with the head restraints
removed; they must be in place and
correctly adjusted.
Steering wheel adjustment
F When stationary , pull the control lever to
release the adjustment mechanism.
F
A
djust the height and reach to suit your
driving position.
F
P
ush the control lever to lock the
adjustment mechanism.
As a safety measure, these operations
should only be carried out with the
vehicle stationary.
Comfort
Page 123 of 436
121
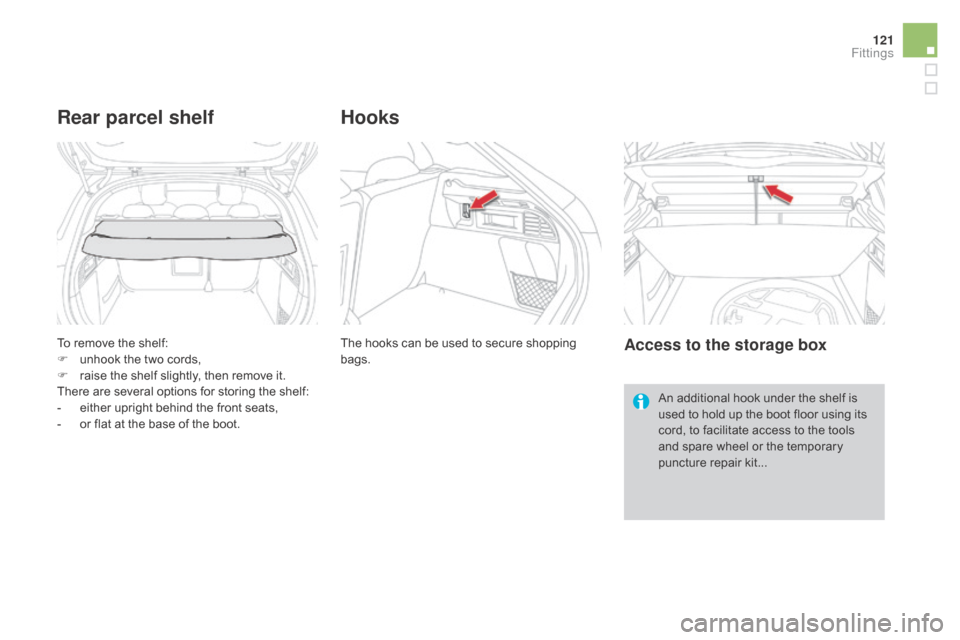
To remove the shelf:
F u nhook the two cords,
F
r
aise the shelf slightly, then remove it.
There are several options for storing the shelf:
-
e
ither upright behind the front seats,
-
o
r flat at the base of the boot.
Rear parcel shelf
The hooks can be used to secure shopping
bags.
Hooks
Access to the storage box
An additional hook under the shelf is
used to hold up the boot floor using its
cord, to facilitate access to the tools
and spare wheel or the temporary
puncture repair kit...
Fittings
Page 125 of 436
123
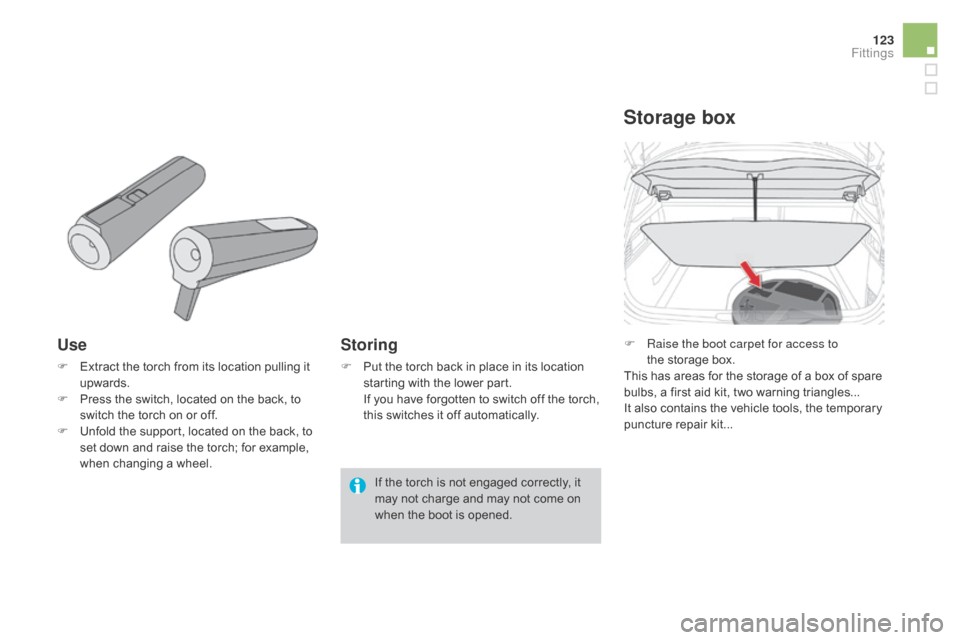
Use
F Extract the torch from its location pulling it upwards.
F
P
ress the switch, located on the back, to
switch the torch on or off.
F
U
nfold the support, located on the back, to
set down and raise the torch; for example,
when changing a wheel.
Storing
F Put the torch back in place in its location starting with the lower part.
I
f you have forgotten to switch off the torch,
this switches it off automatically.
Storage box
F Raise the boot carpet for access to the storage box.
This has areas for the storage of a box of spare
bulbs, a first aid kit, two warning triangles...
It also contains the vehicle tools, the temporary
puncture repair kit...
If the torch is not engaged correctly, it
may not charge and may not come on
when the boot is opened.
Fittings