rear view mirror Citroen DS5 2014 1.G Owner's Manual
[x] Cancel search | Manufacturer: CITROEN, Model Year: 2014, Model line: DS5, Model: Citroen DS5 2014 1.GPages: 372, PDF Size: 32.58 MB
Page 11 of 372
14 9
138
19614 0
9Familiarisation
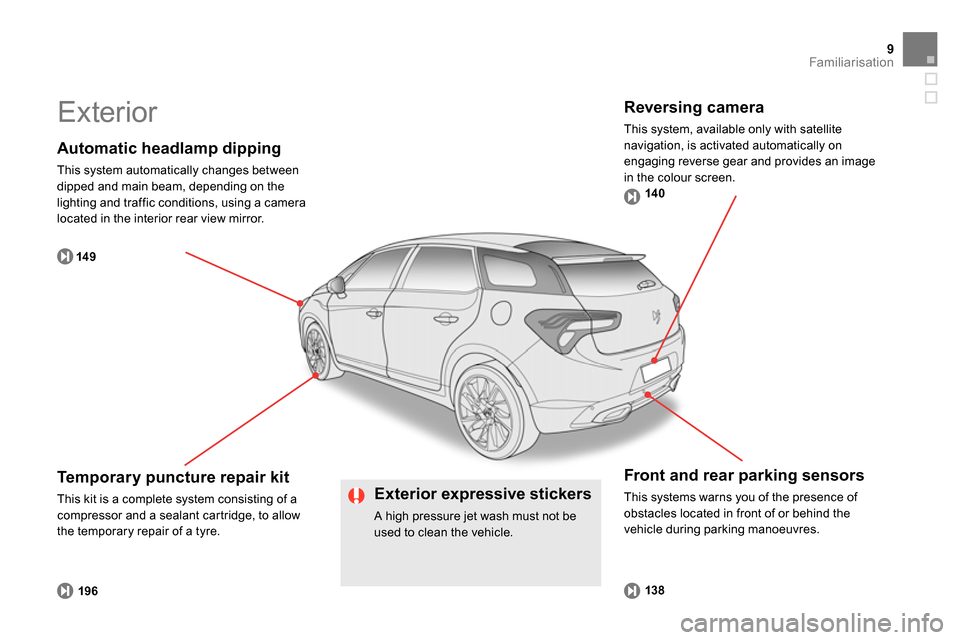
Automatic headlamp dipping
This system automatically changes between
dipped and main beam, depending on the
lighting and traffic conditions, using a camera
located in the interior rear view mirror.
Front and rear parking sensors
This systems warns you of the presence of
obstacles located in front of or behind the
vehicle during parking manoeuvres.
Temporary puncture repair kit
This kit is a complete system consisting of a
compressor and a sealant cartridge, to allow
the temporary repair of a tyre.
Exterior
Reversing camera
This system, available only with satellite
navigation, is activated automatically on
engaging reverse gear and provides an image
in the colour screen.
Exterior expressive stickers
A high pressure jet wash must not be
used to clean the vehicle.
Page 19 of 372
8687
186
17Familiarisation
Sitting comfortably
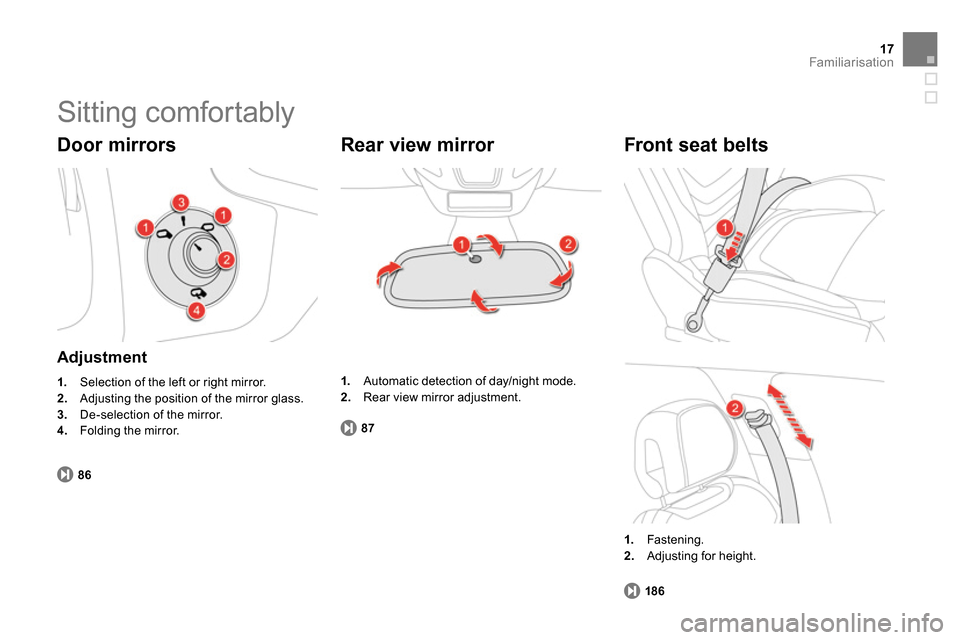
Door mirrors
Adjustment
1.
Selection of the left or right mirror.
2.
Adjusting the position of the mirror glass.
3.
De-selection of the mirror.
4.
Folding the mirror.
Rear view mirror
1.
Automatic detection of day/night mode.
2.
Rear view mirror adjustment.
Front seat belts
1.
Fastening.
2.
Adjusting for height.
Page 34 of 372
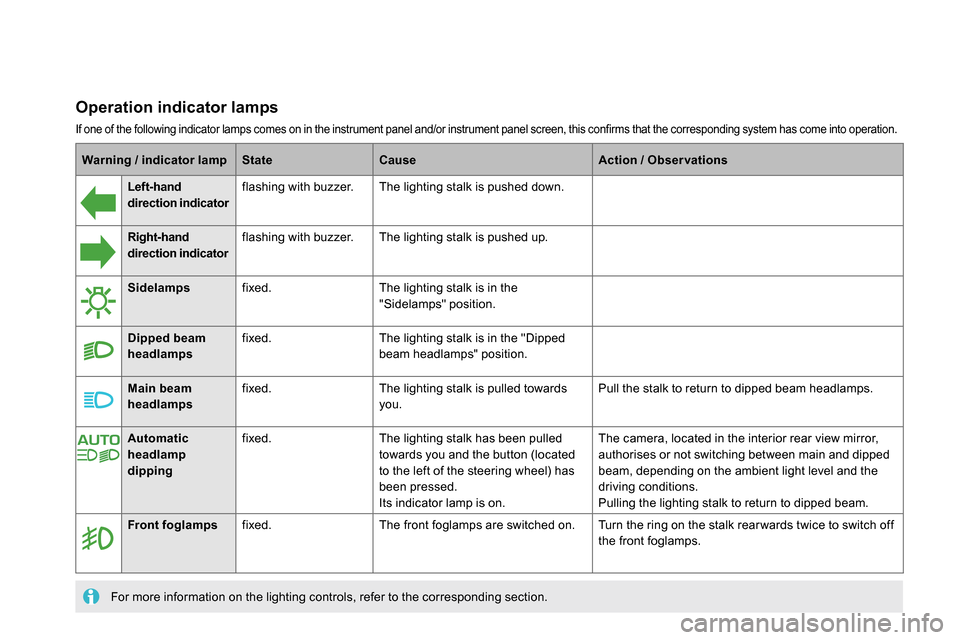
Warning / indicator lamp
State
Cause
Action / Observations
Left-hand
direction indicato
r
flashing with buzzer. The lighting stalk is pushed down.
Right-hand
direction indicator
flashing with buzzer. The lighting stalk is pushed up.
Sidelamps
fixed. The lighting stalk is in the
"Sidelamps" position.
Dipped beam
headlamps
fixed. The lighting stalk is in the "Dipped
beam headlamps" position.
Main beam
headlamps
fixed. The lighting stalk is pulled towards
you. Pull the stalk to return to dipped beam headlamps.
Front foglamps
fixed. The front foglamps are switched on. Turn the ring on the stalk rear wards twice to switch off
the front foglamps.
For more information on the lighting controls, refer to the corresponding section.
Automatic
headlamp
dipping
fixed. The lighting stalk has been pulled
towards you and the button (located
to the left of the steering wheel) has
been pressed.
Its indicator lamp is on. The camera, located in the interior rear view mirror,
authorises or not switching between main and dipped
beam, depending on the ambient light level and the
driving conditions.
Pulling the lighting stalk to return to dipped beam.
Operation indicator lamps
If one of the following indicator lamps comes on in the instrument panel and/or instrument panel screen, this confirms that the corresponding system has come into operation.
Page 89 of 372
87Comfort
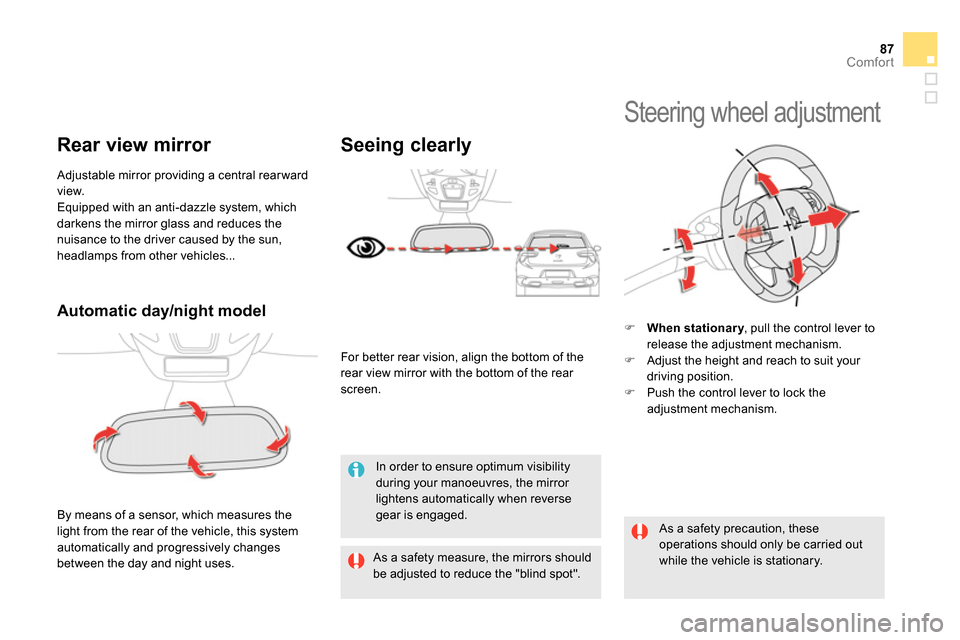
Automatic day/night model
By means of a sensor, which measures the
light from the rear of the vehicle, this system
automatically and progressively changes
between the day and night uses. Adjustable mirror providing a central rear ward
view.
Equipped with an anti-dazzle system, which
darkens the mirror glass and reduces the
nuisance to the driver caused by the sun,
headlamps from other vehicles...
Rear view mirror
In order to ensure optimum visibility
during your manoeuvres, the mirror
lightens automatically when reverse
gear is engaged.
Steering wheel adjustment
When stationary
, pull the control lever to
release the adjustment mechanism.
Adjust the height and reach to suit your
driving position.
Push the control lever to lock the
adjustment mechanism.
As a safety precaution, these
operations should only be carried out
while the vehicle is stationary.
As a safety measure, the mirrors should
be adjusted to reduce the "blind spot".
Seeing clearly
For better rear vision, align the bottom of the
rear view mirror with the bottom of the rear
screen.
Page 150 of 372
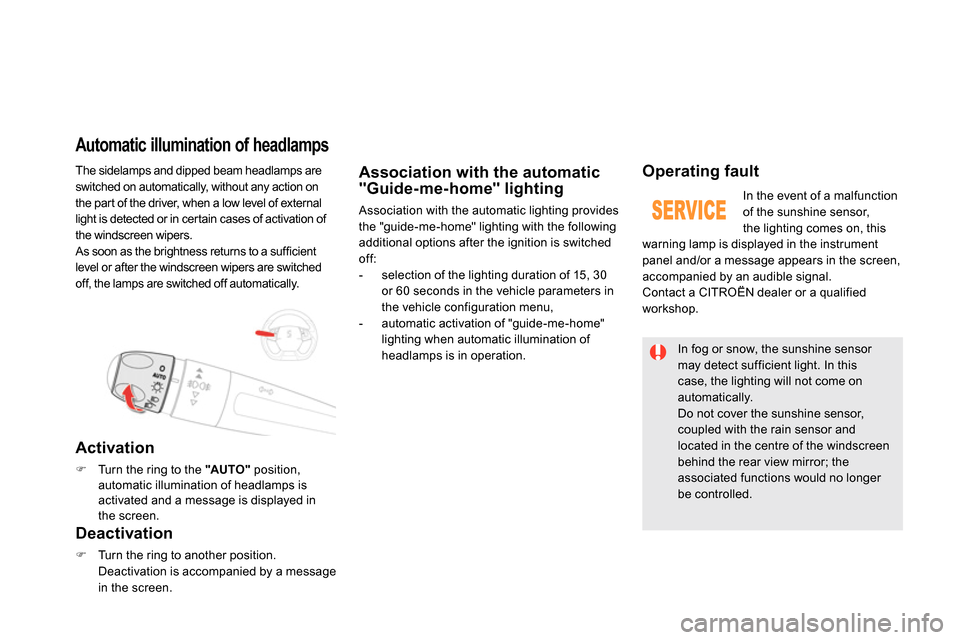
The sidelamps and dipped beam headlamps are
switched on automatically, without any action on
the part of the driver, when a low level of external
light is detected or in certain cases of activation of
the windscreen wipers.
As soon as the brightness returns to a sufficient
level or after the windscreen wipers are switched
off, the lamps are switched off automatically.
Automatic illumination of headlamps
Activation
Turn the ring to the "AUTO "
position,
automatic illumination of headlamps is
activated and a message is displayed in
the screen.
Deactivation
Turn the ring to another position.
Deactivation is accompanied by a message
in the screen.
Association with the automatic
"Guide-me-home" lighting
Association with the automatic lighting provides
the "guide-me-home" lighting with the following
additional options after the ignition is switched
off:
- selection of the lighting duration of 15, 30
or 60 seconds in the vehicle parameters in
the vehicle configuration menu,
- automatic activation of "guide-me-home"
lighting when automatic illumination of
headlamps is in operation.
Operating fault
In the event of a malfunction
of the sunshine sensor,
the lighting comes on, this
warning lamp is displayed in the instrument
panel and/or a message appears in the screen,
accompanied by an audible signal.
Contact a CITROËN dealer or a qualified
workshop.
In fog or snow, the sunshine sensor
may detect sufficient light. In this
case, the lighting will not come on
automatically.
Do not cover the sunshine sensor,
coupled with the rain sensor and
located in the centre of the windscreen
behind the rear view mirror; the
associated functions would no longer
be controlled.
Page 151 of 372
149Visibility
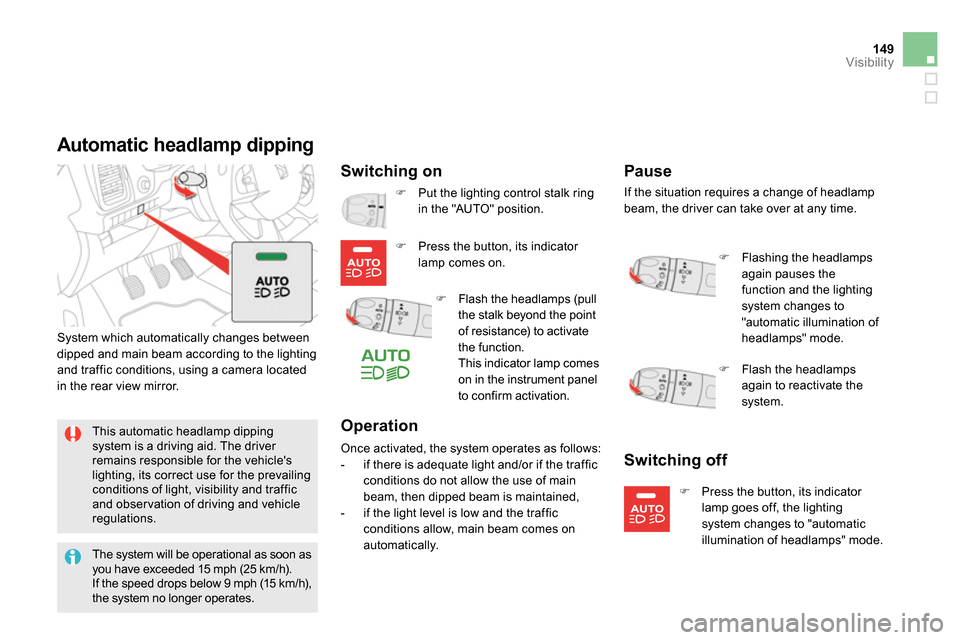
Automatic headlamp dipping
Switching on
System which automatically changes between
dipped and main beam according to the lighting
and traffic conditions, using a camera located
in the rear view mirror.
Put the lighting control stalk ring
in the "AUTO" position.
This automatic headlamp dipping
system is a driving aid. The driver
remains responsible for the vehicle's
lighting, its correct use for the prevailing
conditions of light, visibility and traffic
and obser vation of driving and vehicle
regulations.
Flash the headlamps (pull
the stalk beyond the point
of resistance) to activate
the function.
This indicator lamp comes
on in the instrument panel
to confirm activation.
Press the button, its indicator
lamp comes on.
Switching off
Press the button, its indicator
lamp goes off, the lighting
system changes to "automatic
illumination of headlamps" mode.
Pause
Flashing the headlamps
again pauses the
function and the lighting
system changes to
"automatic illumination of
headlamps" mode.
Flash the headlamps
again to reactivate the
system.
The system will be operational as soon as
you have exceeded 15 mph (25 km/h).
If the speed drops below 9 mph (15 km/h),
the system no longer operates.
Operation
If the situation requires a change of headlamp
beam, the driver can take over at any time.
Once activated, the system operates as follows:
- if there is adequate light and/or if the traffic
conditions do not allow the use of main
beam, then dipped beam is maintained,
- if the light level is low and the traffic
conditions allow, main beam comes on
automatically.
Page 159 of 372
157Visibility
Automatic rain sensitive
windscreen wipers
The windscreen wipers operate automatically,
without any action on the part of the driver, if
rain is detected (sensor behind the rear view
mirror), adapting their speed to the intensity of
the rainfall.
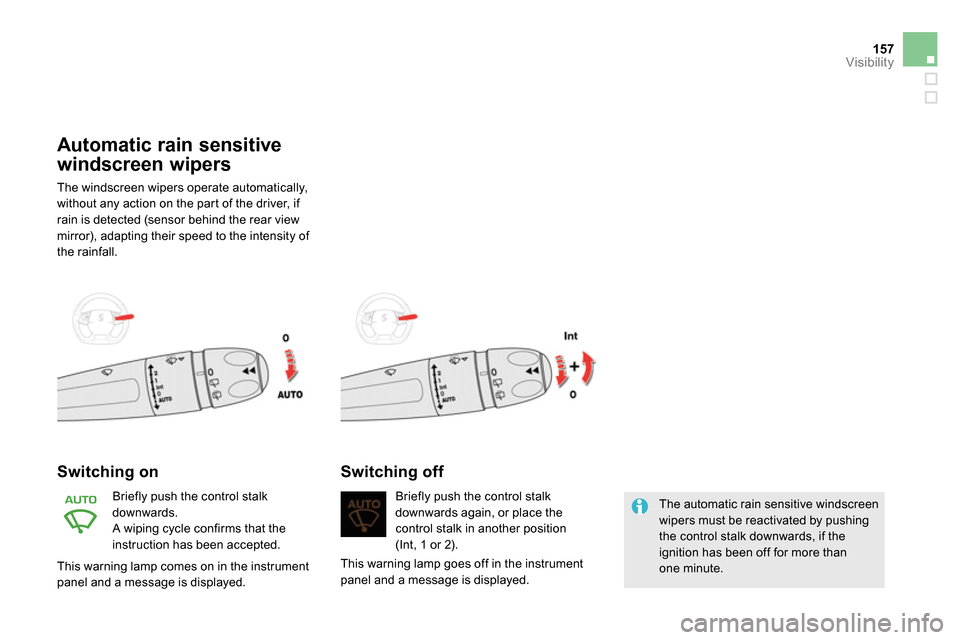
Switching on
Briefly push the control stalk
downwards.
A wiping cycle confirms that the
instruction has been accepted. Briefly push the control stalk
downwards again, or place the
control stalk in another position
(Int, 1 or 2).
Switching off
The automatic rain sensitive windscreen
wipers must be reactivated by pushing
the control stalk downwards, if the
ignition has been off for more than
one minute. This warning lamp goes off in the instrument
panel and a message is displayed. This warning lamp comes on in the instrument
panel and a message is displayed.
Page 160 of 372
Do not cover the rain sensor, linked with
the sunshine sensor and located in the
centre of the windscreen behind the rear
view mirror.
Switch off the automatic rain sensitive
wipers when using an automatic car wash.
In winter, it is advisable to wait until the
windscreen is completely clear of ice
before activating the automatic rain
sensitive wipers.
Operating fault
If a fault occurs with the automatic rain
sensitive wipers, the wipers will operate in
intermittent mode.
Have it checked by CITROËN dealer or a
qualified workshop.
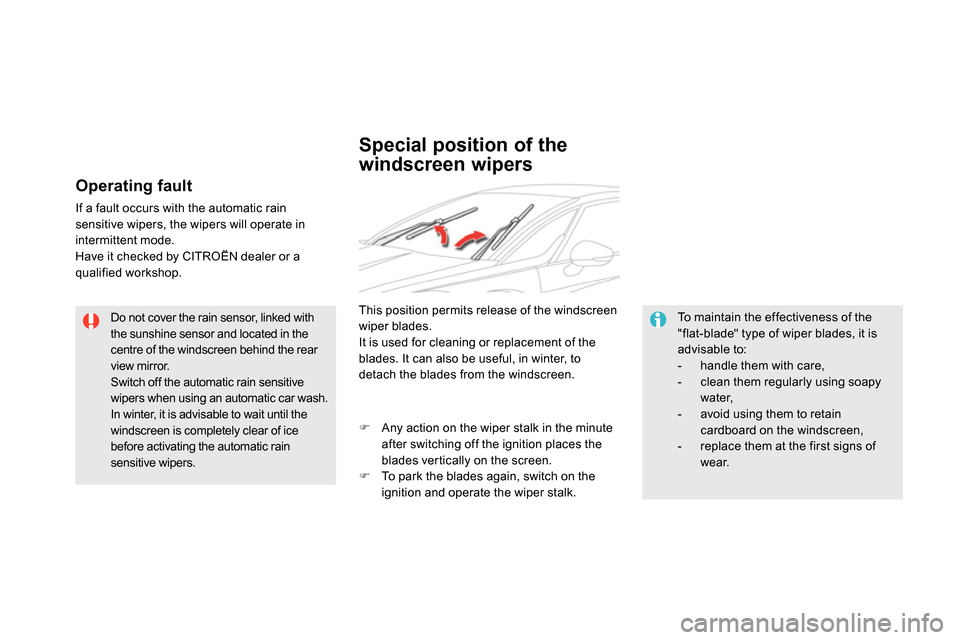
Special position of the
windscreen wipers
This position permits release of the windscreen
wiper blades.
It is used for cleaning or replacement of the
blades. It can also be useful, in winter, to
detach the blades from the windscreen.
To maintain the effectiveness of the
"flat-blade" type of wiper blades, it is
advisable to:
- handle them with care,
- clean them regularly using soapy
water,
- avoid using them to retain
cardboard on the windscreen,
- replace them at the first signs of
wear.
Any action on the wiper stalk in the minute
after switching off the ignition places the
blades vertically on the screen.
To park the blades again, switch on the
ignition and operate the wiper stalk.
Page 360 of 372
M
Jack ............................................................. 202
JACK socket ................................. 90, 305, 335
J
Lighting, guide-me home .................... 148, 150
Lighting, interior .................................. 159, 160
Lighting on reminder ................................... 147
Loading .................................................25, 230
Load reduction mode .................................. 225
Locating your vehicle .................................... 57
Locking from the inside ................................. 62
Locking the doors ......................................... 62
Long objects, transporting ............................ 91
Low fuel level .................................... 19, 40, 72
Lumbar .......................................................... 82
Main beam ............................. 32, 144, 211-213
Maintenance ................................................. 25
Map reading lamps ..................................... 159
Markings, identification ...............................260
Massage function ......................................... 82
Mat ................................................................ 89
Menu, main ................................................. 326
Mirror, rear view ............................................ 87
Mirrors, door.................................................. 86
Misfuel prevention ......................................... 73
Motorway function
(direction indicators) ................................. 180
Mountings for
ISOFIX seats ............................................ 172
MP3 CD .......................................305, 331, 332
Music media players .......................... 304, 330 Keeping children
safe .................................... 162-177, 188, 190
Key .......................................................... 54- 61
Key, electronic ................................... 54-57, 59
Keyless Entry and Starting ..................... 56, 61
Labels, identification ...................................260
Lamps, warning and indicator ................. 31- 41
Lane Departure Warning System
(LDWS) ..................................................... 130
LED daytime running lamps ....................... 147
Level, brake fluid ......................................... 242
Level, headlamp wash ................................ 243
Level, power steering fluid .......................... 242
Levels and checks .............................. 234-247
Lighting ........................................................ 160
Lighting bulbs
(replac ement) ..................................... 211-218
Lighting control stalk ........................... 144, 150
Lighting dimmer ............................................ 46
K
L
Identification plates .....................................260
Ignition on.................................................... 105
Indicator lamps,
status ..................................................... 31- 41
Indicators, direction .................................... 180
Inflating accessories
(using the kit) ............................................ 201
Inflating tyres ................................................ 25
Inputs for audio system ................ 90, 305, 335
Instrument panel ........................................... 30
Instrument panel lighting .............................. 46
Instrument panel screen ............................... 30
Intelligent Traction
Control ...................................................... 183
Interior fittings ............................................... 88
Interior mood lighting .................................. 160
ISOFIX ........................................................ 173
ISOFIX child seats ............................... 172-174
ISOFIX mountings....................................... 172
I
Head restraints, front .............................. 78, 81
Head restraints, rear ..................................... 85
Head-up display .......................... 131, 134, 136
Heated seats ................................................. 82
Heating .......................................................... 96
Height and reach adjustment,
steering wheel ............................................ 87
Hill start assist ............................................. 114
Page 364 of 372
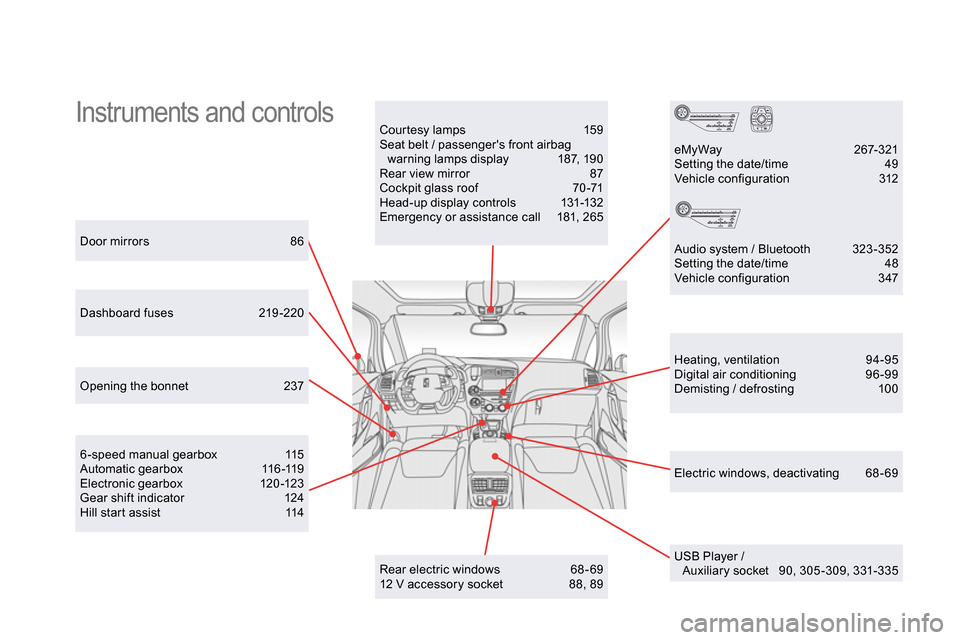
Instruments and controls
Courtesy lamps 159
Seat belt / passenger's front airbag
warning lamps display 187, 190
Rear view mirror 87
Cockpit glass roof 70 -71
Head-up display controls 131-132
Emergency or assistance call 181, 265
Door mirrors 86
Heating, ventilation 94-95
Digital air conditioning 96 -99
Demisting / defrosting 100
USB Player /
Auxiliary socket 90, 305 -309, 331-335
Dashboard fuses 219 -220
6 -speed manual gearbox 115
Automatic gearbox 116 -119
Electronic gearbox 120 -123
Gear shift indicator 124
Hill start assist 114
eMyWay 267-321
Setting the date/time 49
Vehicle configuration 312
Audio system / Bluetooth 323 -352
Setting the date/time 48
Vehicle configuration 347
Opening the bonnet 237
Rear electric windows 68- 69
12 V accessory socket 88, 89
Electric windows, deactivating 68-69