Citroen DS5 HYBRID4 2014 1.G Owner's Manual
Manufacturer: CITROEN, Model Year: 2014, Model line: DS5 HYBRID4, Model: Citroen DS5 HYBRID4 2014 1.GPages: 380, PDF Size: 13.62 MB
Page 231 of 380
229Practical information
DS5-HYBRID_EN_CHAP08_INFO PRATIQUES_ED02-2013
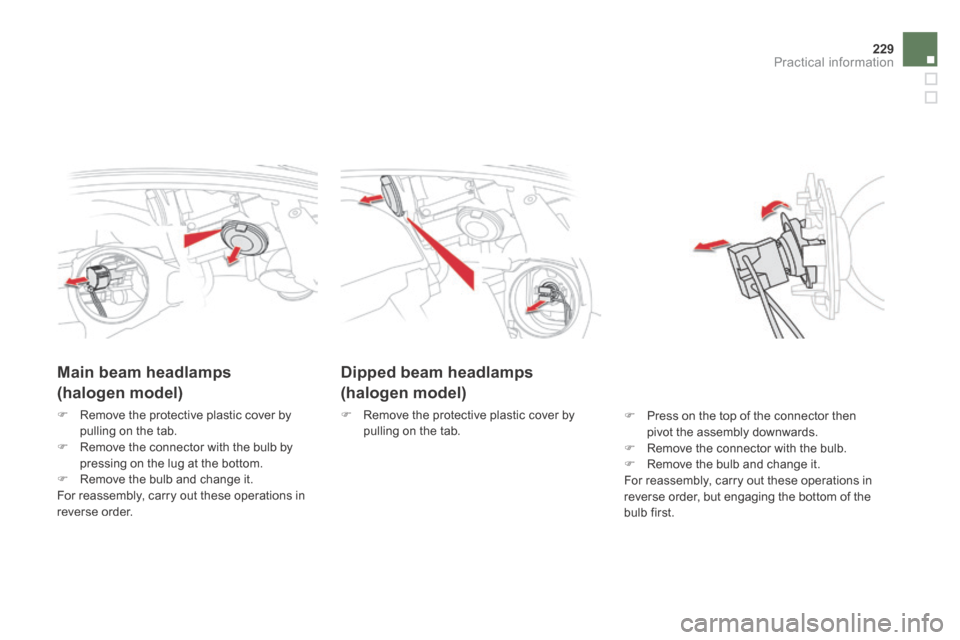
Dipped beam headlamps
(halogen model)
Remove the protective plastic cover by pulling on the tab.
Main beam headlamps
(halogen model)
Remove the protective plastic cover by pulling on the tab. Remove the connector with the bulb by pressing on the lug at the bottom. Remove the bulb and change it. For reassembly, carry out these operations in reverse order.
Press on the top of the connector then pivot the assembly downwards. Remove the connector with the bulb. Remove the bulb and change it. For reassembly, carry out these operations in reverse order, but engaging the bottom of the bulb first.
Page 232 of 380
DS5-HYBRID_EN_CHAP08_INFO PRATIQUES_ED02-2013
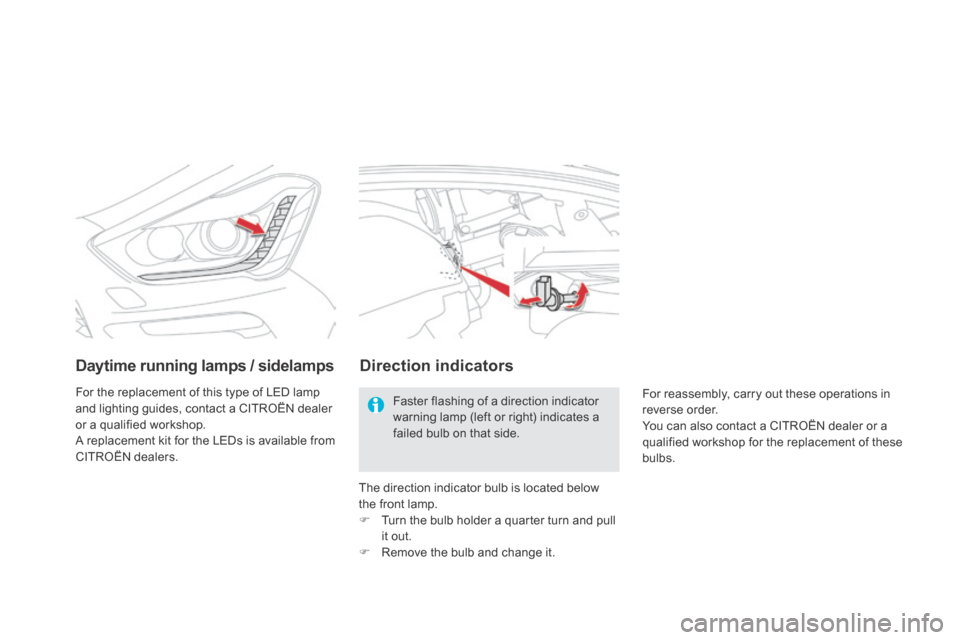
Daytime running lamps / sidelamps
For the replacement of this type of LED lamp and lighting guides, contact a CITROËN dealer or a qualified workshop. A replacement kit for the LEDs is available from CITROËN dealers.
Direction indicators
Faster flashing of a direction indicator warning lamp (left or right) indicates a failed bulb on that side.
The direction indicator bulb is located below the front lamp. Turn the bulb holder a quarter turn and pull it out. Remove the bulb and change it.
For reassembly, carry out these operations in reverse order. You can also contact a CITROËN dealer or a qualified workshop for the replacement of these bulbs.
Page 233 of 380
231Practical information
DS5-HYBRID_EN_CHAP08_INFO PRATIQUES_ED02-2013
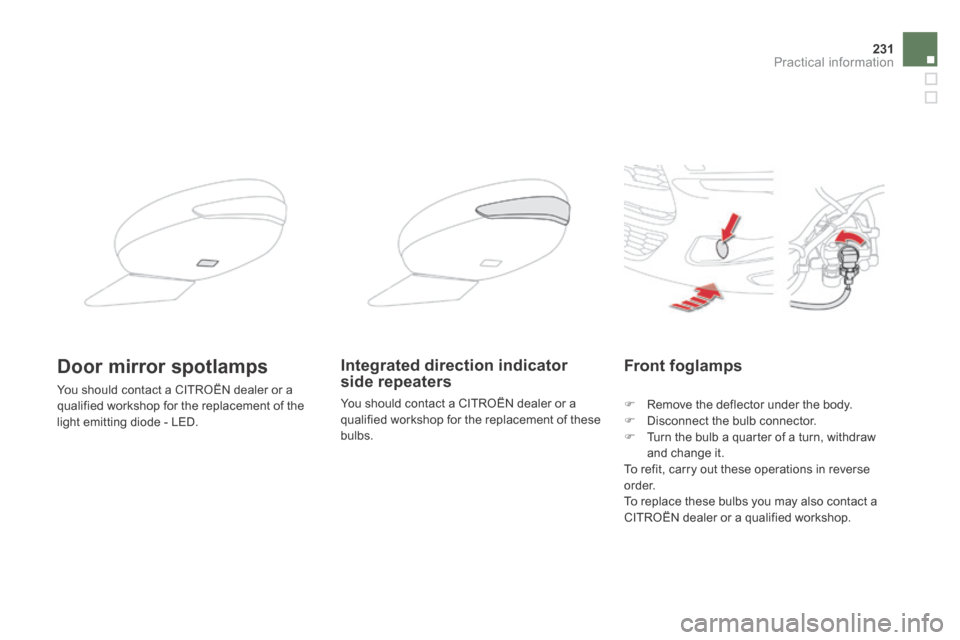
Front foglamps
Remove the deflector under the body. Disconnect the bulb connector. Turn the bulb a quarter of a turn, withdraw and change it. To refit, carry out these operations in reverse o r d e r. To replace these bulbs you may also contact a CITROËN dealer or a qualified workshop.
Integrated direction indicator side repeaters
You should contact a CITROËN dealer or a qualified workshop for the replacement of these bulbs.
Door mirror spotlamps
You should contact a CITROËN dealer or a qualified workshop for the replacement of the light emitting diode - LED.
Page 234 of 380
DS5-HYBRID_EN_CHAP08_INFO PRATIQUES_ED02-2013
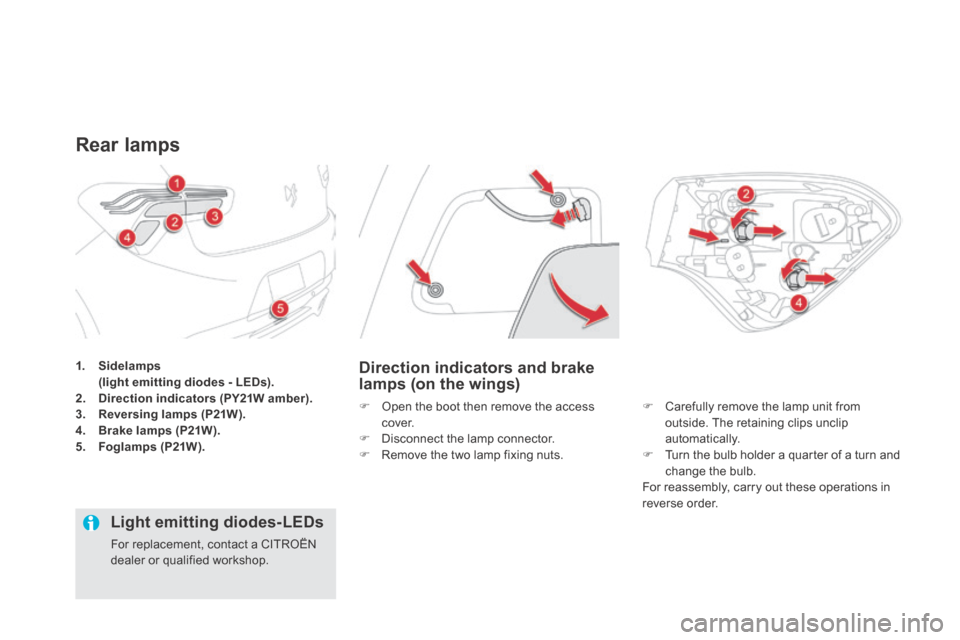
1. Sidelamps (light emitting diodes - LEDs).2. Direction indicators (PY21W amber).3. Reversing lamps (P21W).4. Brake lamps (P21W).5. Foglamps (P21W).
Rear lamps
Direction indicators and brake lamps (on the wings)
Open the boot then remove the access cover. Disconnect the lamp connector. Remove the two lamp fixing nuts.
Carefully remove the lamp unit from outside. The retaining clips unclip automatically. Turn the bulb holder a quarter of a turn and change the bulb. For reassembly, carry out these operations in reverse order.
Light emitting diodes-LEDs
For replacement, contact a CITROËN dealer or qualified workshop.
Page 235 of 380
233Practical information
DS5-HYBRID_EN_CHAP08_INFO PRATIQUES_ED02-2013
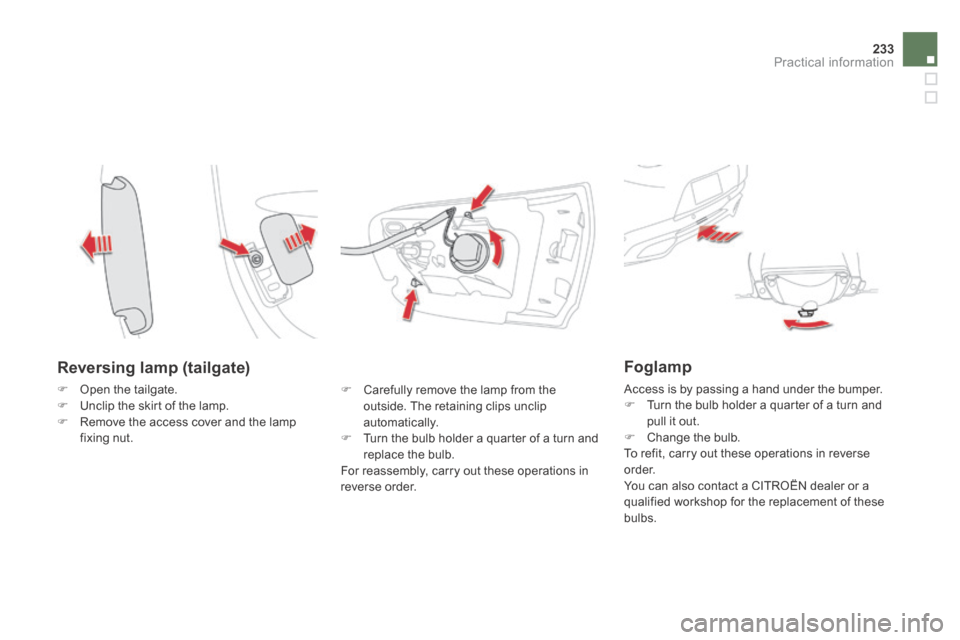
Reversing lamp (tailgate)
Open the tailgate. Unclip the skirt of the lamp. Remove the access cover and the lamp
fixing nut.
Carefully remove the lamp from the outside. The retaining clips unclip automatically.
Turn the bulb holder a quarter of a turn and replace the bulb. For reassembly, carry out these operations in reverse order.
Foglamp
Access is by passing a hand under the bumper. Turn the bulb holder a quarter of a turn and pull it out. Change the bulb. To refit, carry out these operations in reverse o r d e r. You can also contact a CITROËN dealer or a qualified workshop for the replacement of these bulbs.
Page 236 of 380
DS5-HYBRID_EN_CHAP08_INFO PRATIQUES_ED02-2013
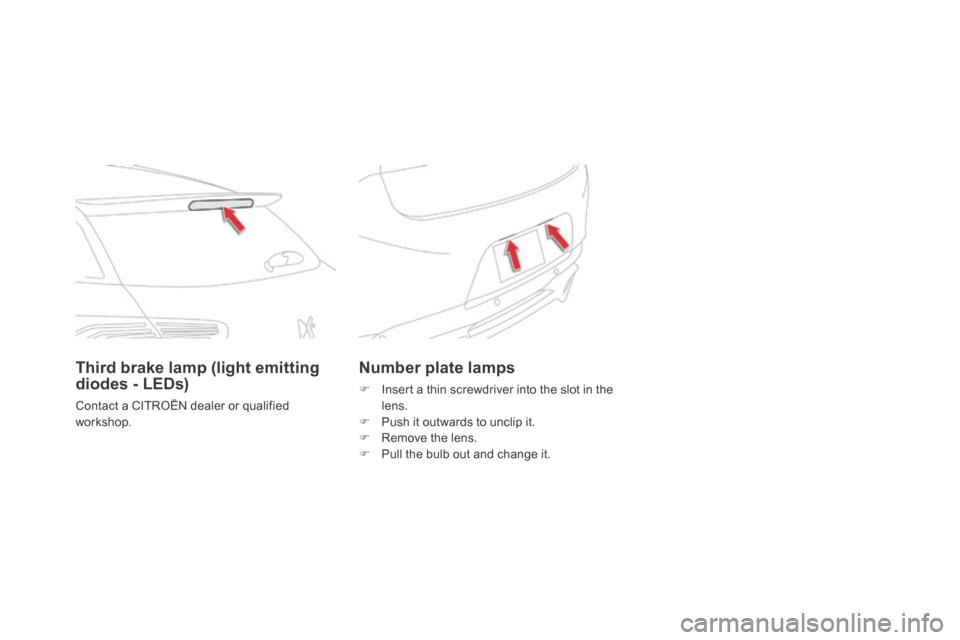
Number plate lamps
Insert a thin screwdriver into the slot in the lens. Push it outwards to unclip it. Remove the lens. Pull the bulb out and change it.
Third brake lamp (light emitting diodes - LEDs)
Contact a CITROËN dealer or qualified workshop.
Page 237 of 380
235Practical information
DS5-HYBRID_EN_CHAP08_INFO PRATIQUES_ED02-2013
Changing a fuse Procedure for replacing a failed fuse with a new fuse to rectify a failure of the corresponding function.
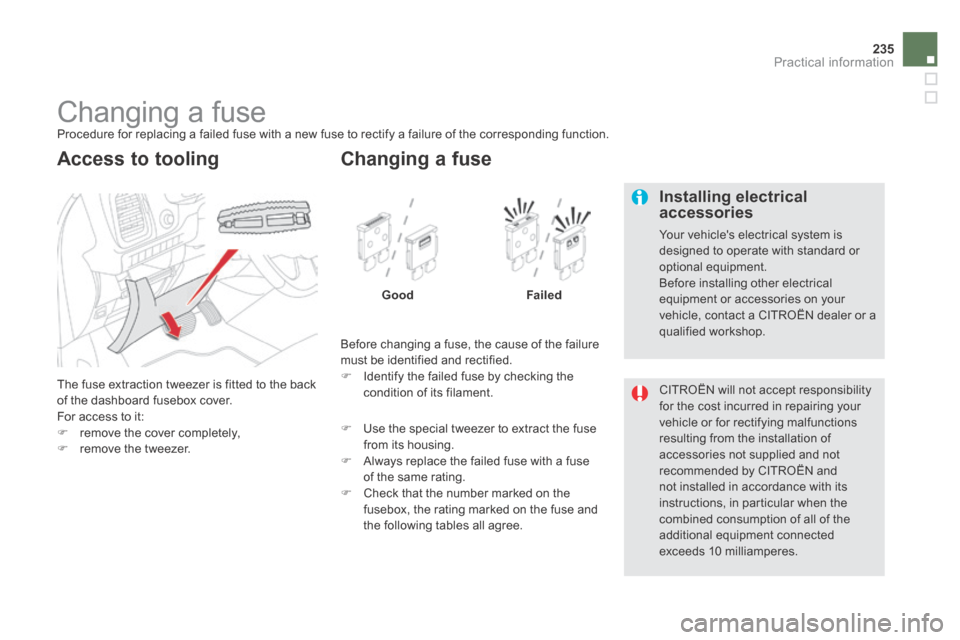
The fuse extraction tweezer is fitted to the back of the dashboard fusebox cover. For access to it: remove the cover completely, remove the tweezer.
Access to tooling
Before changing a fuse, the cause of the failure must be identified and rectified. Identify the failed fuse by checking the condition of its filament.
Changing a fuse
GoodFailed
Use the special tweezer to extract the fuse from its housing. Always replace the failed fuse with a fuse of the same rating. Check that the number marked on the fusebox, the rating marked on the fuse and the following tables all agree.
CITROËN will not accept responsibility for the cost incurred in repairing your vehicle or for rectifying malfunctions
resulting from the installation of accessories not supplied and not recommended by CITROËN and not installed in accordance with its instructions, in particular when the combined consumption of all of the additional equipment connected exceeds 10 milliamperes.
Installing electrical accessories
Your vehicle's electrical system is designed to operate with standard or optional equipment. Before installing other electrical equipment or accessories on your vehicle, contact a CITROËN dealer or a qualified workshop.
Page 238 of 380
DS5-HYBRID_EN_CHAP08_INFO PRATIQUES_ED02-2013
Dashboard fuses
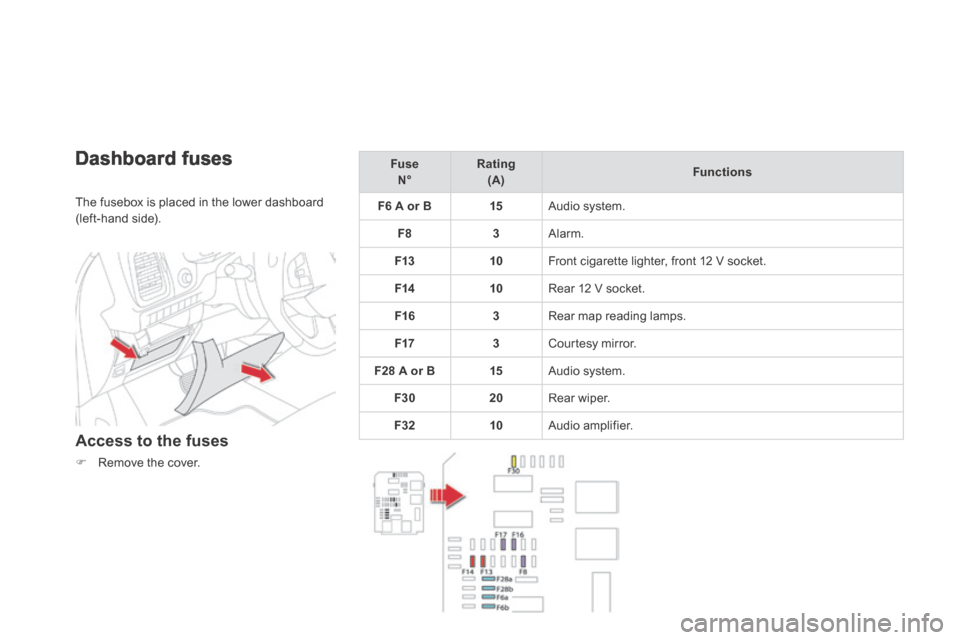
The fusebox is placed in the lower dashboard (left-hand side).
Access to the fuses
Remove the cover.
Fuse N° Rating (A) Functions
F6 A or B15 Audio system.
F83 Alarm.
F1310 Front cigarette lighter, front 12 V socket.
F1410 Rear 12 V socket.
F163 Rear map reading lamps.
F173 Courtesy mirror.
F28 A or B15 Audio system.
F3020 Rear wiper.
F3210 Audio amplifier.
Page 239 of 380
237Practical information
DS5-HYBRID_EN_CHAP08_INFO PRATIQUES_ED02-2013
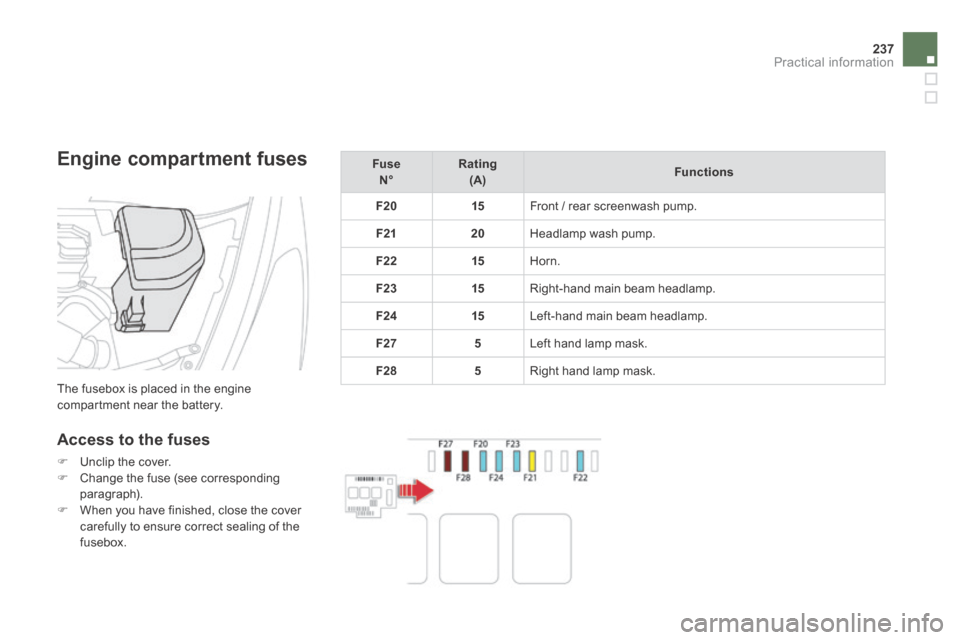
Engine compartment fuses
The fusebox is placed in the engine compartment near the battery.
Access to the fuses
Unclip the cover. Change the fuse (see corresponding paragraph). When you have finished, close the cover carefully to ensure correct sealing of the fusebox.
Fuse N° Rating (A)Functions
F2015 Front / rear screenwash pump.
F2120 Headlamp wash pump.
F2215 Horn.
F2315 Right-hand main beam headlamp.
F2415 Left-hand main beam headlamp.
F275 Left hand lamp mask.
F285 Right hand lamp mask.
Page 240 of 380

DS5-HYBRID_EN_CHAP08_INFO PRATIQUES_ED02-2013
12 V battery
The presence of this label indicates the use of a 12 V lead-acid battery with special technology and specification, for which the involvement of a CITROËN dealer or qualified workshop is required when replacing or disconnecting the battery. Failure to observe this recommendation may cause premature wear of the battery.
The battery is located under the bonnet. To gain access to it: open the bonnet using the interior release lever, then the exterior safety catch, remove the plastic cover on the (+)
terminal, if necessary, unclip the fusebox to remove the battery.
Access to the battery
Raise the locking tab D fully to release the cable terminal clamp E .
Reconnecting the (+) cable
Position the open clamp E of the cable on the positive post (+) of the battery. Press vertically on the clamp E to position it correctly on the battery. Lock the clamp by spreading the positioning lug and then lowering the tab D .
Do not apply excessive force on the tab as locking will not be possible if the clamp is not positioned correctly; start the procedure again.
Before doing any work on your vehicle, switch off the ignition ( Ready lamp off) to avoid any risk of injury resulting from automatic operation of the engine.
Your vehicle is fitted with a conventional 12 V battery, located under the bonnet, in addition to the high voltage battery used by the hybrid system. In certain conditions, if the 12 V battery is too discharged to activate the hybrid system, recharging from another conventional 12 V battery is possible. Do not carry out this recharge if the Readylamp is on.
Procedure for starting the engine using another battery or charging a discharged battery.
Disconnecting the (+) cable