steering wheel Citroen DS5 HYBRID4 RHD 2013.5 1.G Owner's Manual
[x] Cancel search | Manufacturer: CITROEN, Model Year: 2013.5, Model line: DS5 HYBRID4 RHD, Model: Citroen DS5 HYBRID4 RHD 2013.5 1.GPages: 380, PDF Size: 13.63 MB
Page 5 of 380
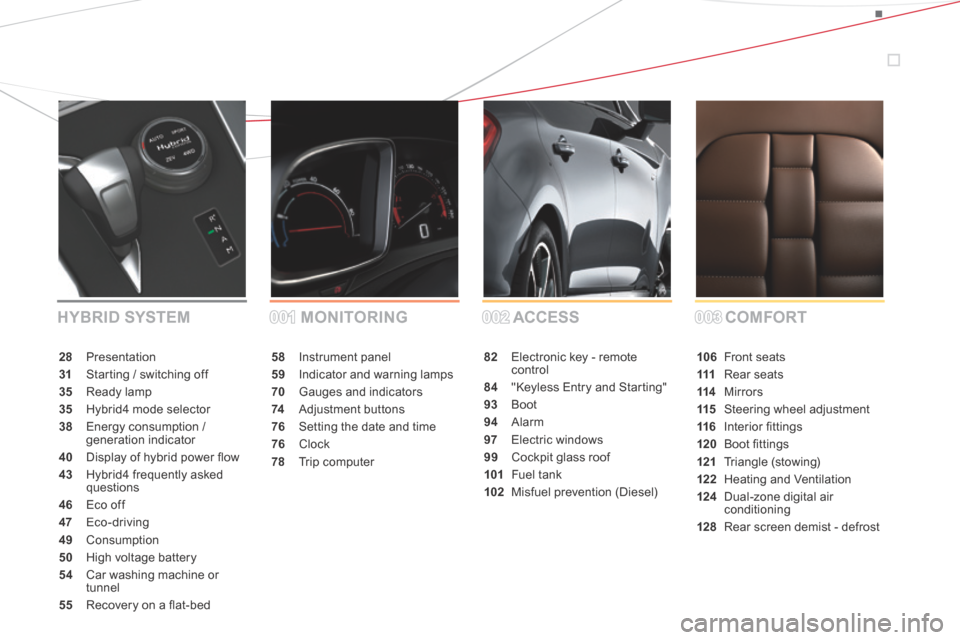
58 Instrument panel
59 Indicator and warning lamps
70 Gauges and indicators
74 Adjustment buttons
76 Setting the date and time
76 Clock
78 Trip computer
82 Electronic key - remote control
84 "Keyless Entry and Starting"
93 Boot
94 Alarm
97 Electric windows
99 Cockpit glass roof
101 Fuel tank
102 Misfuel prevention (Diesel)
106 Front seats
111 Rear seats
114 Mirrors
115 Steering wheel adjustment
116 Interior fi ttings
120 Boot fi ttings
121 Triangle (stowing)
122 Heating and Ventilation
124 Dual-zone digital air conditioning
128 Rear screen demist - defrost
28 Presentation
31 Starting / switching off
35 Ready lamp
35 Hybrid4 mode selector
38 Energy consumption / generation indicator
40 Display of hybrid power fl ow
43 Hybrid4 frequently asked questions
46 Eco off
47 Eco-driving
49 Consumption
50 High voltage battery
54 Car washing machine or tunnel
55 Recovery on a fl at-bed
001002003COMFORT
ACCESS
MONITORING
HYBRID SYSTEM
Page 20 of 380
Sitting comfortably
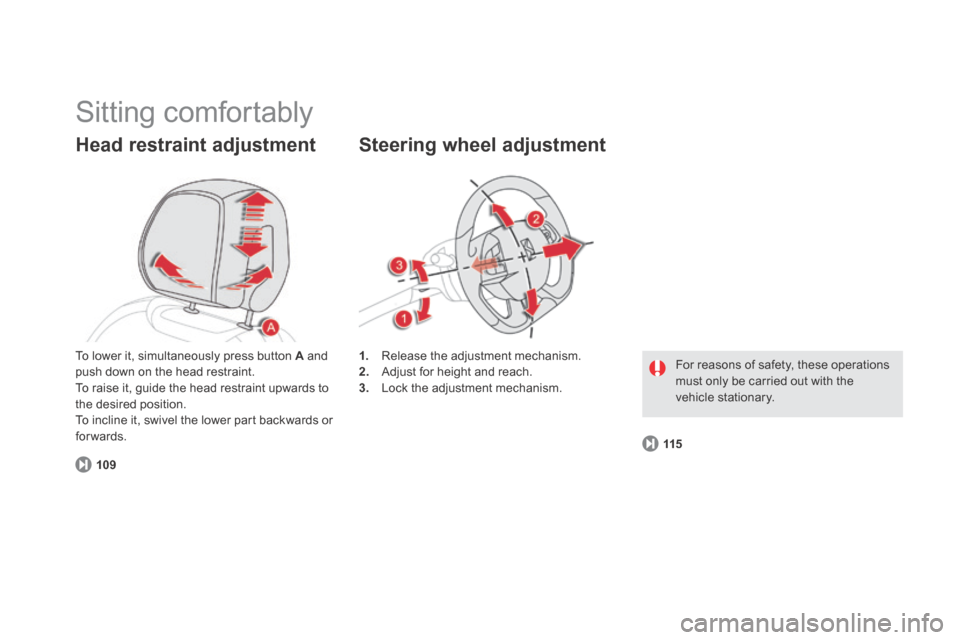
Head restraint adjustment
1. Release the adjustment mechanism. 2. Adjust for height and reach. 3. Lock the adjustment mechanism.
Steering wheel adjustment
For reasons of safety, these operations must only be carried out with the vehicle stationary.
To lower it, simultaneously press button A and push down on the head restraint. To raise it, guide the head restraint upwards to the desired position. To incline it, swivel the lower part backwards or forwards.
109
115
Page 32 of 380
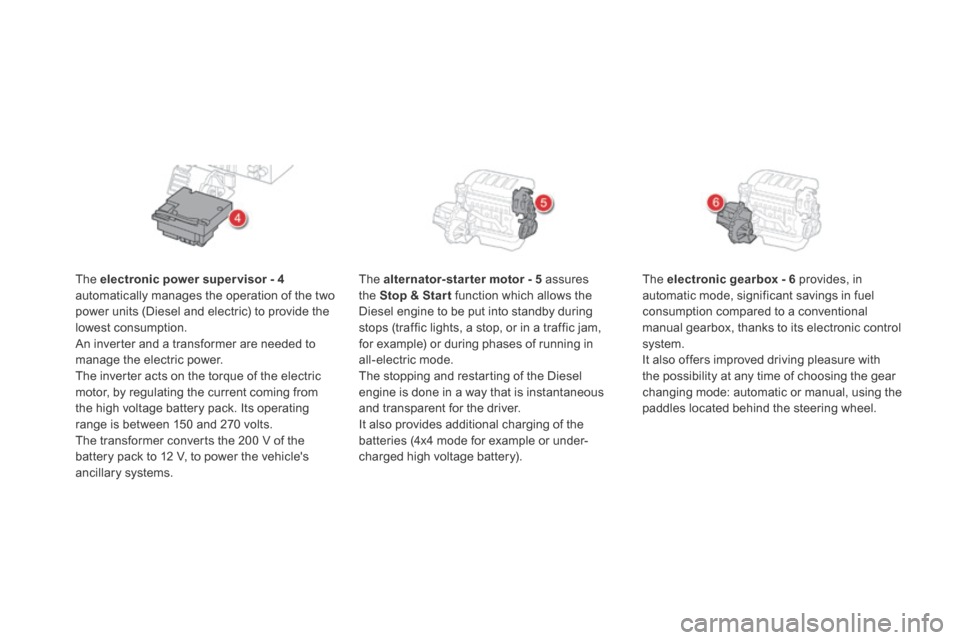
The electronic power super visor - 4automatically manages the operation of the two power units (Diesel and electric) to provide the lowest consumption. An inverter and a transformer are needed to manage the electric power. The inverter acts on the torque of the electric motor, by regulating the current coming from the high voltage battery pack. Its operating range is between 150 and 270 volts. The transformer converts the 200 V of the battery pack to 12 V, to power the vehicle's ancillary systems.
The alternator-starter motor - 5 assures the Stop & Star t function which allows the Diesel engine to be put into standby during stops (traffic lights, a stop, or in a traffic jam, for example) or during phases of running in all-electric mode. The stopping and restarting of the Diesel engine is done in a way that is instantaneous and transparent for the driver. It also provides additional charging of the batteries (4x4 mode for example or under-charged high voltage battery).
The electronic gearbox - 6 provides, in automatic mode, significant savings in fuel consumption compared to a conventional manual gearbox, thanks to its electronic control system. It also offers improved driving pleasure with the possibility at any time of choosing the gear changing mode: automatic or manual, using the paddles located behind the steering wheel.
Page 33 of 380
31Hybrid system
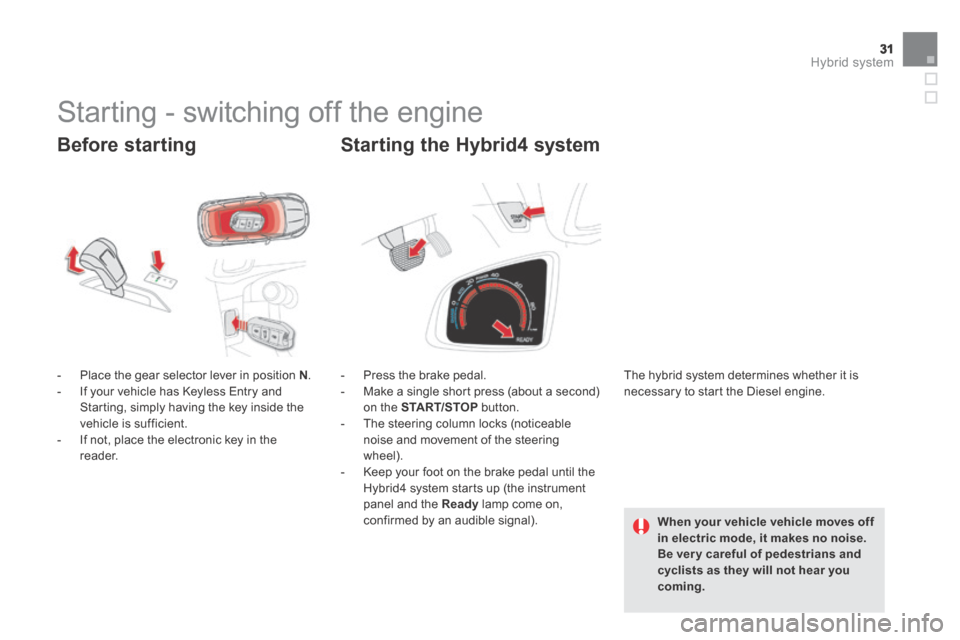
Before starting
- Place the gear selector lever in position N . - If your vehicle has Keyless Entry and Starting, simply having the key inside the vehicle is sufficient. - If not, place the electronic key in the reader.
- Press the brake pedal. - Make a single short press (about a second) on the START/STOP button. - The steering column locks (noticeable noise and movement of the steering wheel). - Keep your foot on the brake pedal until the Hybrid4 system starts up (the instrument panel and the Ready lamp come on, confirmed by an audible signal).
Starting the Hybrid4 system
Starting - switching off the engine
The hybrid system determines whether it is necessary to start the Diesel engine.
When your vehicle vehicle moves off
in electric mode, it makes no noise. Be ver y careful of pedestrians and cyclists as they will not hear you coming.
Page 62 of 380
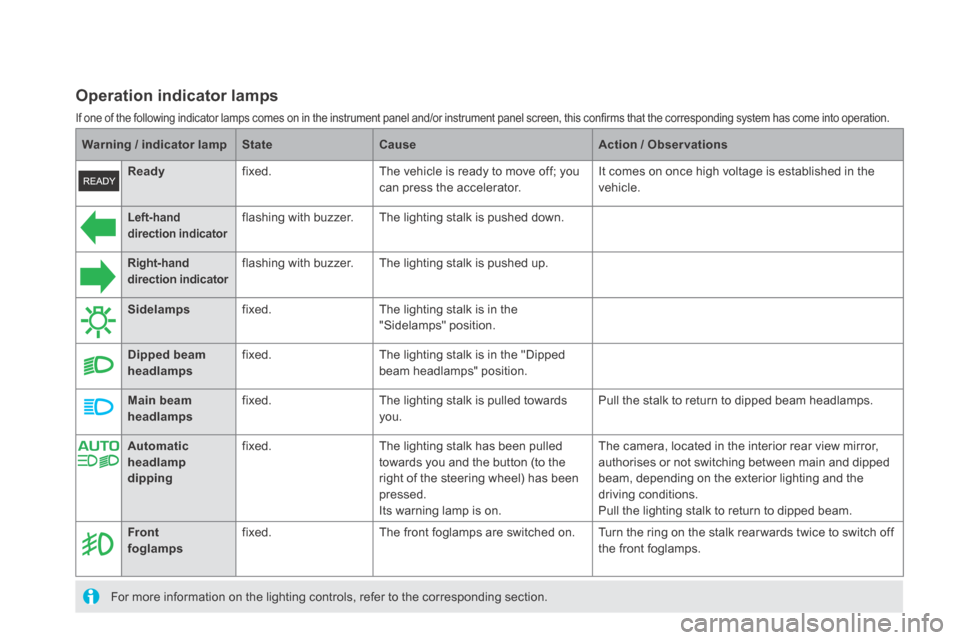
Warning / indicator lampStateCauseAction / Observations
Left-hand direction indicator flashing with buzzer. The lighting stalk is pushed down.
Right-hand direction indicator flashing with buzzer. The lighting stalk is pushed up.
Sidelamps fixed. The lighting stalk is in the "Sidelamps" position.
Dipped beam headlamps fixed. The lighting stalk is in the "Dipped beam headlamps" position.
Main beam headlamps fixed. The lighting stalk is pulled towards you. Pull the stalk to return to dipped beam headlamps.
Front foglamps fixed. The front foglamps are switched on. Turn the ring on the stalk rear wards twice to switch off the front foglamps.
For more information on the lighting controls, refer to the corresponding section.
Automatic headlamp dipping
fixed. The lighting stalk has been pulled towards you and the button (to the right of the steering wheel) has been pressed. Its warning lamp is on.
The camera, located in the interior rear view mirror, authorises or not switching between main and dipped beam, depending on the exterior lighting and the driving conditions. Pull the lighting stalk to return to dipped beam.
Ready fixed. The vehicle is ready to move off; you can press the accelerator. It comes on once high voltage is established in the vehicle.
Operation indicator lamps
If one of the following indicator lamps comes on in the instrument panel and/or instrument panel screen, this confirms that the corresponding system has come into operation.
Page 80 of 380
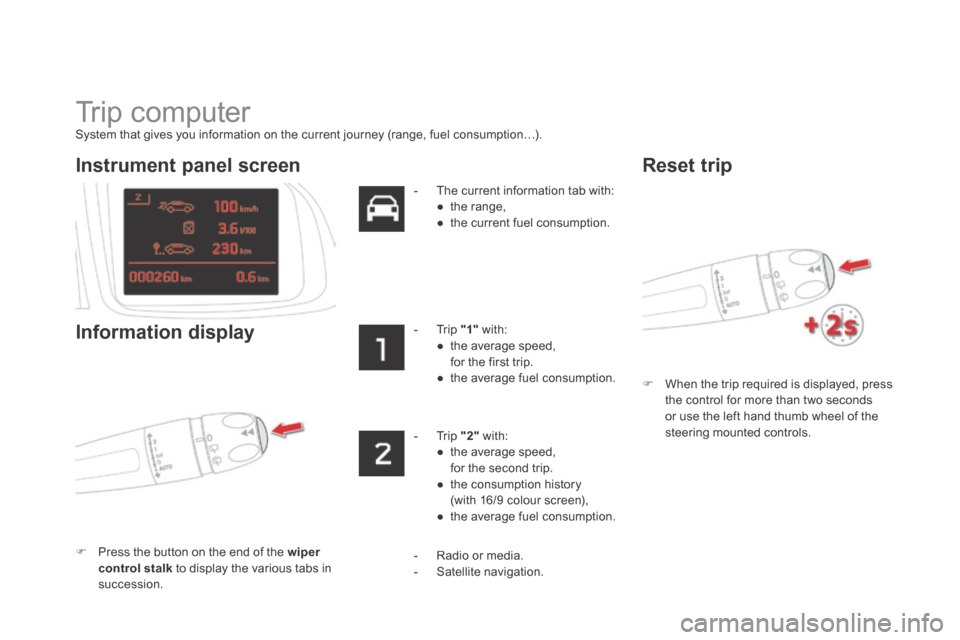
Trip computer
System that gives you information on the current journey (range, fuel consumption…).
When the trip required is displayed, press the control for more than two seconds or use the left hand thumb wheel of the steering mounted controls.
Instrument panel screen
Information display
Press the button on the end of the wiper control stalk to display the various tabs in succession.
- The current information tab with: ● t h e r a n g e , ● the current fuel consumption.
- Trip "1" with: ● the average speed, for the first trip. ● the average fuel consumption.
- Trip "2" with: ● the average speed, for the second trip. ● the consumption history (with 16/9 colour screen), ● the average fuel consumption.
Reset trip
- Radio or media. - Satellite navigation.
Page 117 of 380
11 5Comfort
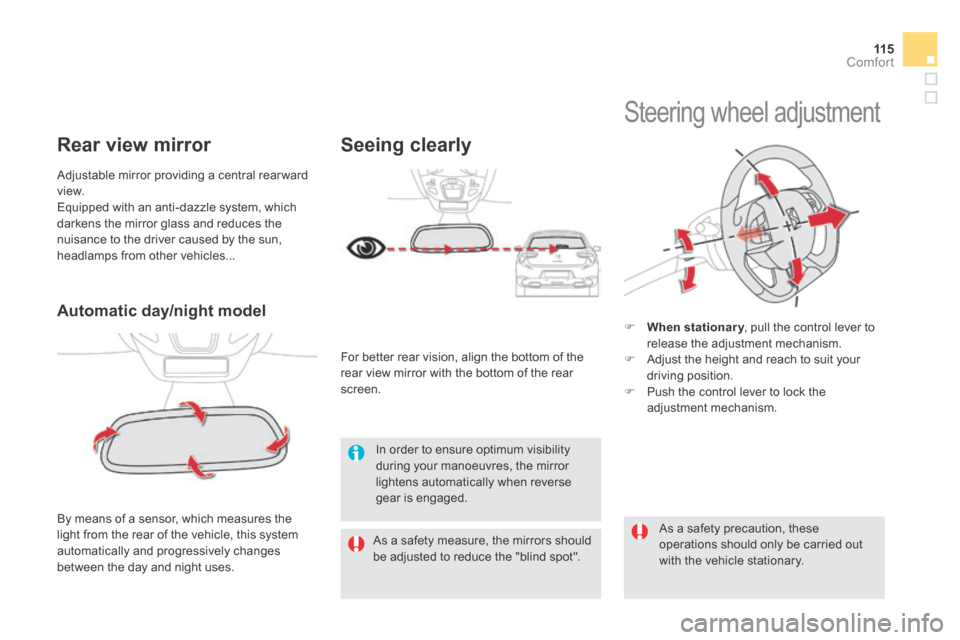
Automatic day/night model
By means of a sensor, which measures the light from the rear of the vehicle, this system automatically and progressively changes between the day and night uses.
Adjustable mirror providing a central rearward view. Equipped with an anti-dazzle system, which darkens the mirror glass and reduces the nuisance to the driver caused by the sun, headlamps from other vehicles...
Rear view mirror
In order to ensure optimum visibility during your manoeuvres, the mirror lightens automatically when reverse gear is engaged.
Steering wheel adjustment
When stationary , pull the control lever to When stationary , pull the control lever to When stationaryrelease the adjustment mechanism. Adjust the height and reach to suit your driving position. Push the control lever to lock the adjustment mechanism.
As a safety precaution, these operations should only be carried out with the vehicle stationary.
As a safety measure, the mirrors should be adjusted to reduce the "blind spot".
Seeing clearly
For better rear vision, align the bottom of the rear view mirror with the bottom of the rear screen.
Page 142 of 380
Electronic gearbox
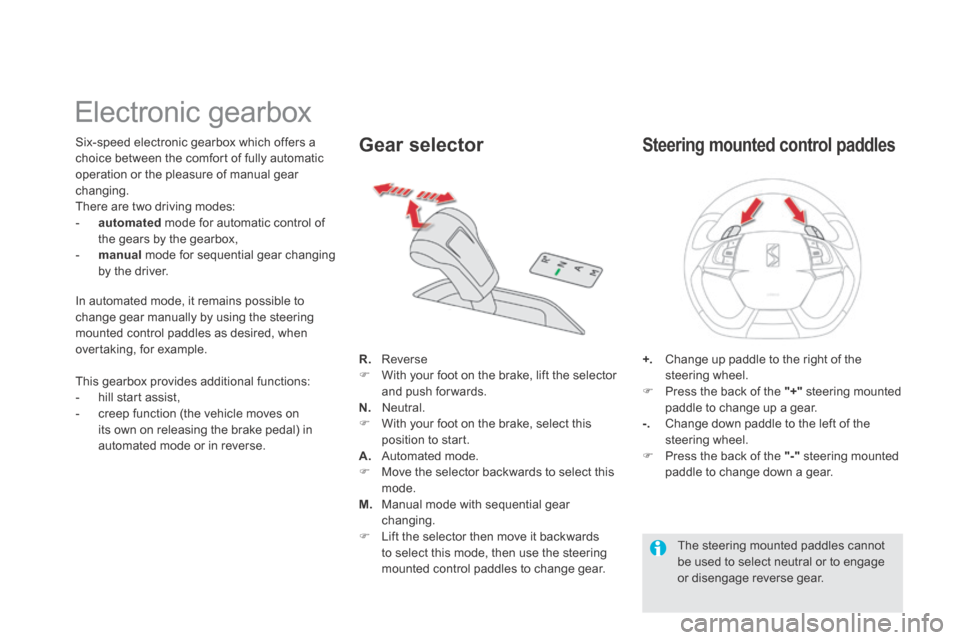
Six-speed electronic gearbox which offers a choice between the comfort of fully automatic operation or the pleasure of manual gear changing. There are two driving modes: - automated mode for automatic control of the gears by the gearbox, - manual mode for sequential gear changing by the driver.
R. Reverse With your foot on the brake, lift the selector and push forwards. N. Neutral. With your foot on the brake, select this position to start. A. Automated mode. Move the selector backwards to select this mode. M. Manual mode with sequential gear changing. Lift the selector then move it backwards to select this mode, then use the steering mounted control paddles to change gear.
Gear selector
+. Change up paddle to the right of the steering wheel. Press the back of the "+" steering mounted paddle to change up a gear. -. Change down paddle to the left of the steering wheel. Press the back of the "-" steering mounted paddle to change down a gear.
Steering mounted control paddles
The steering mounted paddles cannot be used to select neutral or to engage or disengage reverse gear.
This gearbox provides additional functions: - hill start assist, - creep function (the vehicle moves on its own on releasing the brake pedal) in automated mode or in reverse.
In automated mode, it remains possible to change gear manually by using the steering mounted control paddles as desired, when overtaking, for example.
Page 147 of 380
145Driving
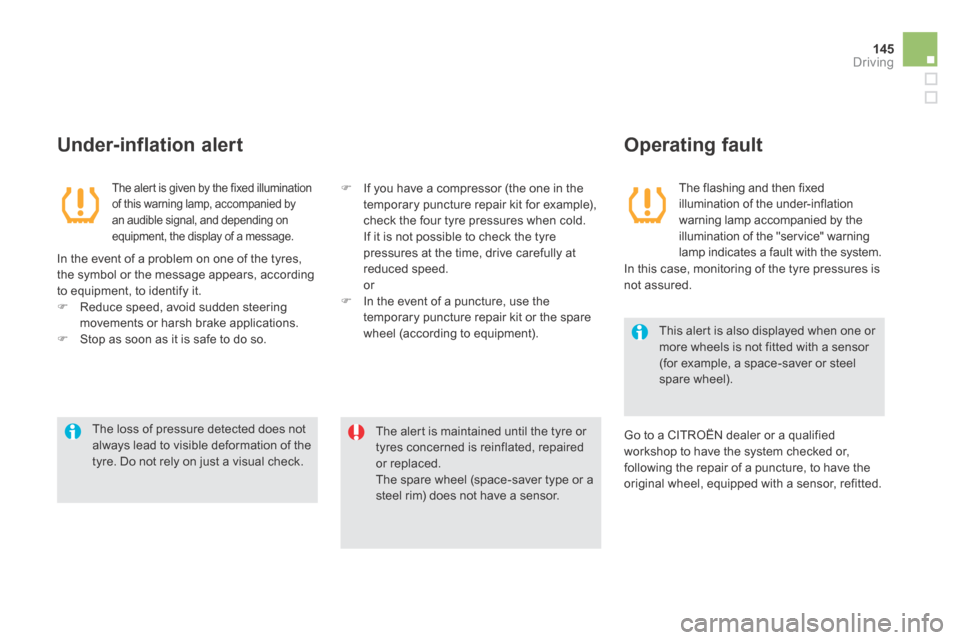
The alert is maintained until the tyre or tyres concerned is reinflated, repaired or replaced. The spare wheel (space-saver type or a steel rim) does not have a sensor.
The loss of pressure detected does not
always lead to visible deformation of the tyre. Do not rely on just a visual check.
This alert is also displayed when one or more wheels is not fitted with a sensor (for example, a space-saver or steel spare wheel).
The alert is given by the fixed illumination of this warning lamp, accompanied by an audible signal, and depending on equipment, the display of a message.
The flashing and then fixed illumination of the under-inflation warning lamp accompanied by the illumination of the "service" warning lamp indicates a fault with the system.
Under-inflation alert Operating fault
In the event of a problem on one of the tyres, the symbol or the message appears, according to equipment, to identify it. Reduce speed, avoid sudden steering movements or harsh brake applications. Stop as soon as it is safe to do so.
Go to a CITROËN dealer or a qualified workshop to have the system checked or, following the repair of a puncture, to have the original wheel, equipped with a sensor, refitted.
In this case, monitoring of the tyre pressures is not assured.
If you have a compressor (the one in the temporary puncture repair kit for example), check the four tyre pressures when cold. If it is not possible to check the tyre pressures at the time, drive carefully at reduced speed. or In the event of a puncture, use the temporary puncture repair kit or the spare wheel (according to equipment).
Page 152 of 380
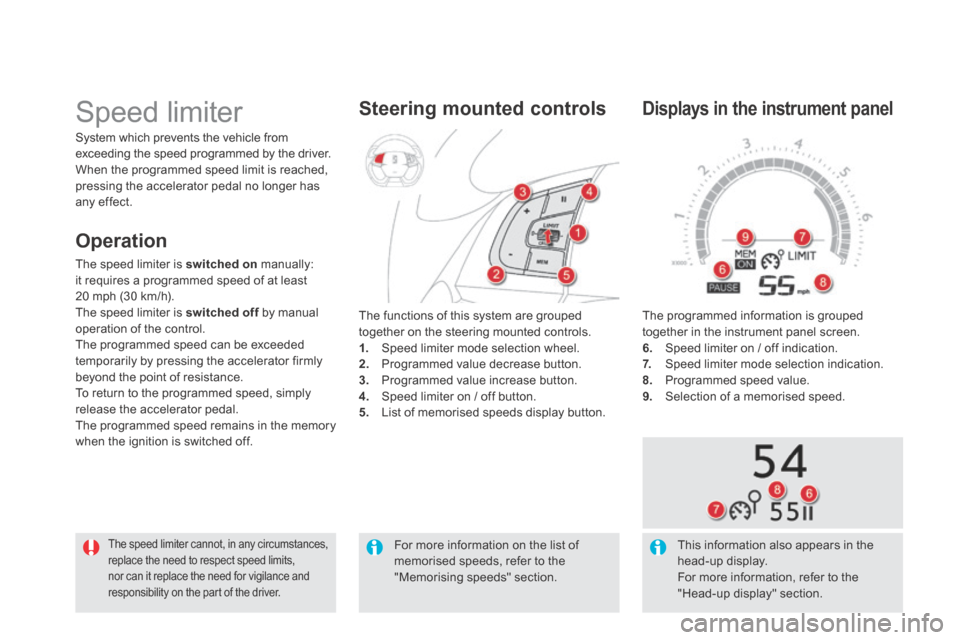
The programmed information is grouped together in the instrument panel screen. 6. Speed limiter on / off indication. 7. Speed limiter mode selection indication. 8. Programmed speed value. 9. Selection of a memorised speed.
Displays in the instrument panel
Speed limiter
The speed limiter cannot, in any circumstances, replace the need to respect speed limits, nor can it replace the need for vigilance and
responsibility on the part of the driver.
The functions of this system are grouped together on the steering mounted controls. 1. Speed limiter mode selection wheel. 2. Programmed value decrease button. 3. Programmed value increase button. 4. Speed limiter on / off button. 5. List of memorised speeds display button.
Steering mounted controls
System which prevents the vehicle from exceeding the speed programmed by the driver. When the programmed speed limit is reached, pressing the accelerator pedal no longer has any effect.
This information also appears in the head-up display. For more information, refer to the "Head-up display" section.
Operation
The speed limiter is switched on manually: it requires a programmed speed of at least 20 mph (30 km/h). The speed limiter is switched off by manual switched off by manual switched offoperation of the control. The programmed speed can be exceeded temporarily by pressing the accelerator firmly beyond the point of resistance. To return to the programmed speed, simply release the accelerator pedal. The programmed speed remains in the memory when the ignition is switched off.
For more information on the list of memorised speeds, refer to the "Memorising speeds" section.