start stop button Citroen DS5 HYBRID4 RHD 2014 1.G User Guide
[x] Cancel search | Manufacturer: CITROEN, Model Year: 2014, Model line: DS5 HYBRID4 RHD, Model: Citroen DS5 HYBRID4 RHD 2014 1.GPages: 382, PDF Size: 14.52 MB
Page 90 of 382
Back-up mechanical key
Unlocking/locking using the integral key
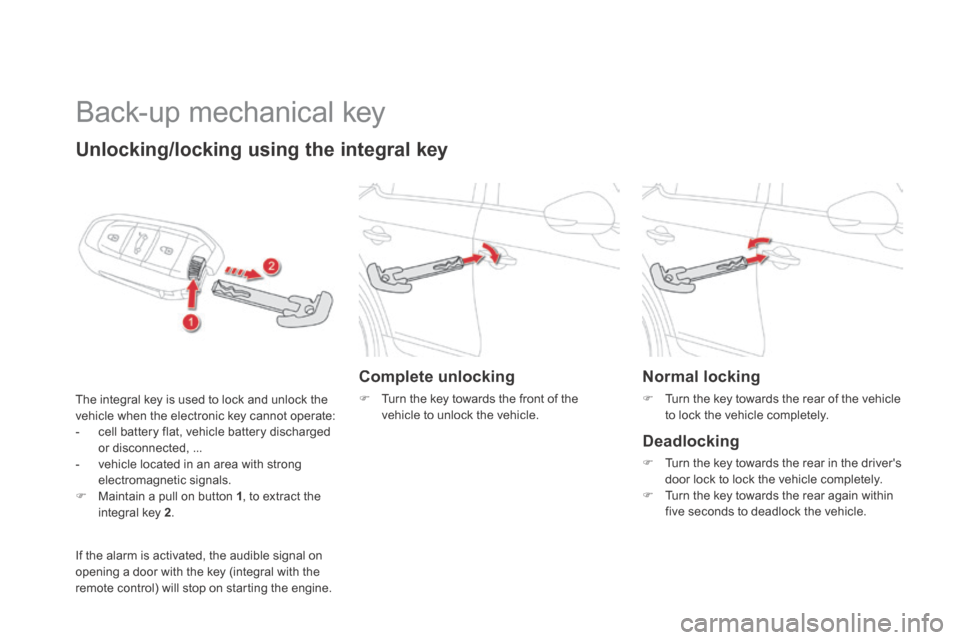
The integral key is used to lock and unlock the vehicle when the electronic key cannot operate: - cell battery flat, vehicle battery discharged or disconnected, ... - vehicle located in an area with strong electromagnetic signals. Maintain a pull on button 1 , to extract the integral key 2 .
Complete unlocking
Turn the key towards the front of the vehicle to unlock the vehicle.
Normal locking
Turn the key towards the rear of the vehicle to lock the vehicle completely.
Deadlocking
Turn the key towards the rear in the driver's door lock to lock the vehicle completely. Turn the key towards the rear again within five seconds to deadlock the vehicle.
If the alarm is activated, the audible signal on opening a door with the key (integral with the remote control) will stop on starting the engine.
Page 92 of 382
Lost electronic key
Visit a CITROËN dealer with the vehicle's registration document and your personal identification documents and if possible the key code label. The CITROËN dealer will be able to retrieve the key code and the transponder code required to order a new key.
Electronic key
The electronic key is a sensitive system; do not operate it while it is in your pocket as there is a possibility that it may unlock the vehicle, without you being aware of it. Do not repeatedly press the buttons of your electronic key out of range and out of sight of your vehicle. You run the risk of stopping it from working and the remote control would have to be reinitialised. The electronic key cannot operate as a remote control when it is in the reader or even when the ignition is switched on.
Locking the vehicle
Driving with the doors locked may make access to the passenger compartment by the emergency services more difficult in an emergency. As a safety precaution, never leave children alone in the vehicle, even for a very short time. In all cases, take the remote control or electronic key (if Keyless Entry and Starting) with you when leaving the vehicle.
Electrical interference
The Keyless Entry and Starting electronic key may not operate if close to certain electronic devices: telephone, laptop computer, strong magnetic fields, ...
Anti-theft protection
Do not make any modifications to the electronic engine immobiliser system; this could cause malfunctions. Don't forget to turn the steering to engage the steering lock.
When purchasing a second-hand vehicle
Have all of the keys in your possession paired by a CITROËN dealer, to ensure that only your keys allow your vehicle to be unlocked and started.
Page 98 of 382
OFF
OFF
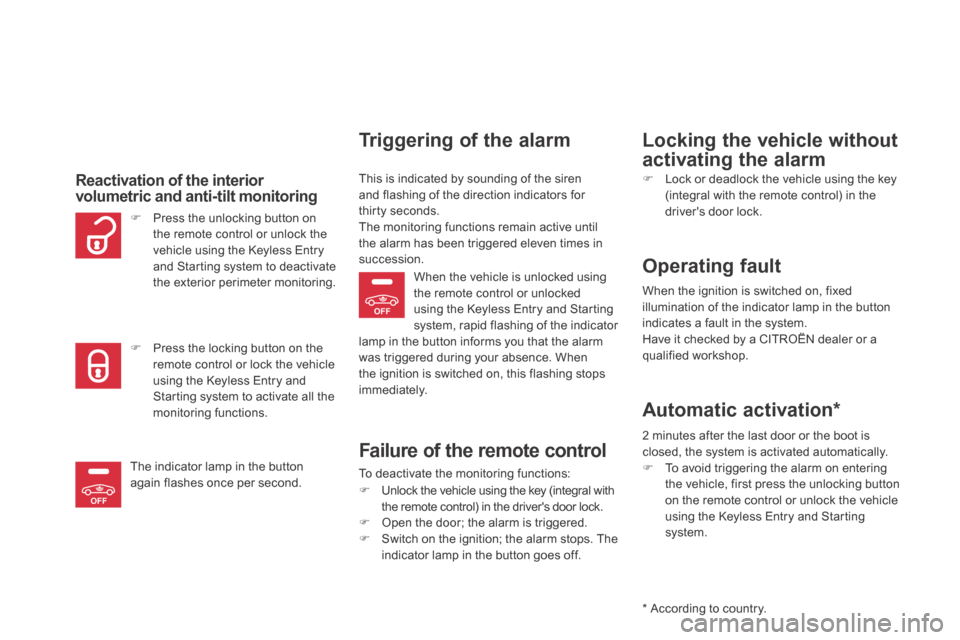
Reactivation of the interior volumetric and anti-tilt monitoring
Triggering of the alarm
This is indicated by sounding of the siren and flashing of the direction indicators for thirty seconds.
The monitoring functions remain active until the alarm has been triggered eleven times in succession.
Press the unlocking button on the remote control or unlock the vehicle using the Keyless Entry and Starting system to deactivate the exterior perimeter monitoring.
Press the locking button on the remote control or lock the vehicle using the Keyless Entry and Starting system to activate all the monitoring functions.
The indicator lamp in the button again flashes once per second.
When the vehicle is unlocked using the remote control or unlocked using the Keyless Entry and Starting system, rapid flashing of the indicator lamp in the button informs you that the alarm was triggered during your absence. When the ignition is switched on, this flashing stops immediately.
Failure of the remote control
To deactivate the monitoring functions:
Unlock the vehicle using the key (integral with the remote control) in the driver's door lock. Open the door; the alarm is triggered. Switch on the ignition; the alarm stops. The indicator lamp in the button goes off.
Locking the vehicle without
activating the alarm
Lock or deadlock the vehicle using the key (integral with the remote control) in the driver's door lock.
Operating fault
When the ignition is switched on, fixed illumination of the indicator lamp in the button indicates a fault in the system. Have it checked by a CITROËN dealer or a qualified workshop.
* According to country.
Automatic activation *
2 minutes after the last door or the boot is closed, the system is activated automatically. To avoid triggering the alarm on entering the vehicle, first press the unlocking button on the remote control or unlock the vehicle using the Keyless Entry and Starting system.
Page 100 of 382
Safety anti-pinch
When the window rises and meets an obstacle, it stops and immediately partially lowers again. In the event of unwanted opening of the window on closing, press the switch until the window opens completely, then pull the switch immediately until the window closes. Continue to hold the switch for approximately one second after the window has closed. The safety anti-pinch function is not active during this operation.
Deactivating the rear window controls
Reinitialisation of the
electric windows
In the event of contact during operation of the windows, you must reverse the
movement of the window. To do this, press the switch concerned. When operating the passenger electric window switches, the driver must ensure that no one is preventing correct closing of the windows. The driver must ensure that the passengers use the electric windows c o r r e c t l y. Be aware of children when operating the windows. Be aware of passengers or other persons present when closing the windows using the the electronic key or the "Keyless Entry and Starting" system.
Following reconnection of the battery, the safety anti-pinch function must be reinitialised. The safety anti-pinch function is not active during these operations: - lower the window completely, then raise it, it will rise in steps of a few centimetres each time the switch is pressed. Repeat the operation until the window closes completely, - continue to press the switch for at least one second after reaching this position, window closed. For the safety of your children, press switch 5 to prevent operation of the rear windows irrespective of their position.
The warning lamp in the button comes on, accompanied by a message confirming activation. It remains on, as long as the child lock is activated. The interior controls for the rear doors are also deactivated. Opening the doors from the outside and operation of the rear electric windows from the driver's controls remain possible.
Page 103 of 382
101Access
Fuel tank Capacity of the tank: approximately 60 litres.
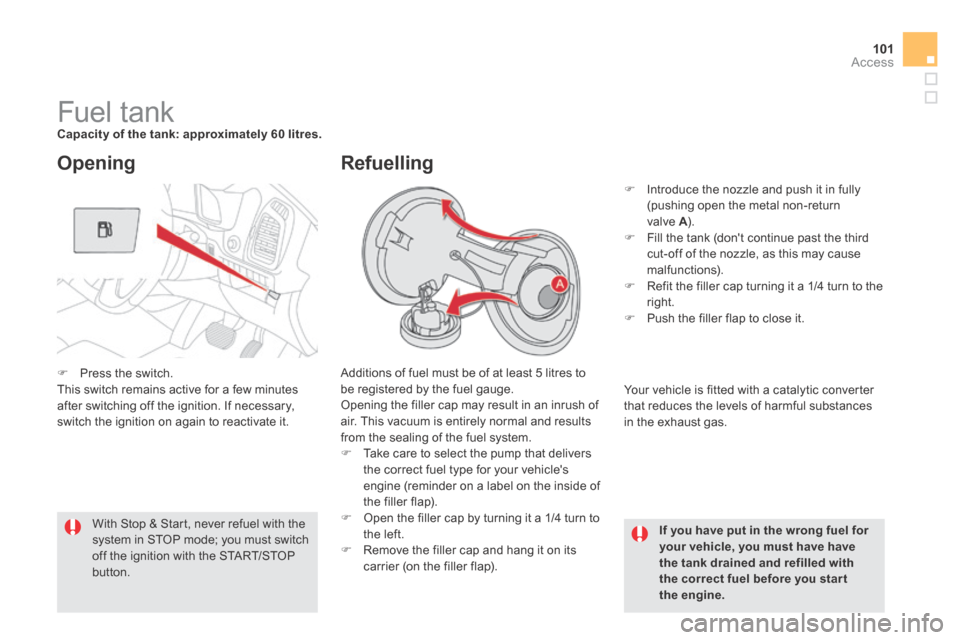
Additions of fuel must be of at least 5 litres to be registered by the fuel gauge. Opening the filler cap may result in an inrush of air. This vacuum is entirely normal and results from the sealing of the fuel system. Take care to select the pump that delivers the correct fuel type for your vehicle's engine (reminder on a label on the inside of the filler flap). Open the filler cap by turning it a 1/4 turn to the left. Remove the filler cap and hang it on its carrier (on the filler flap).
Opening
If you have put in the wrong fuel for your vehicle, you must have have the tank drained and refilled with the correct fuel before you star t
the engine.
With Stop & Start, never refuel with the system in STOP mode; you must switch off the ignition with the START/STOP button.
Refuelling
Introduce the nozzle and push it in fully (pushing open the metal non-return valve A ). A ). A
Fill the tank (don't continue past the third cut-off of the nozzle, as this may cause malfunctions). Refit the filler cap turning it a 1/4 turn to the right. Push the filler flap to close it.
Your vehicle is fitted with a catalytic converter that reduces the levels of harmful substances in the exhaust gas.
Press the switch . This switch remains active for a few minutes after switching off the ignition. If necessary, switch the ignition on again to reactivate it.
Page 127 of 382
125Comfort
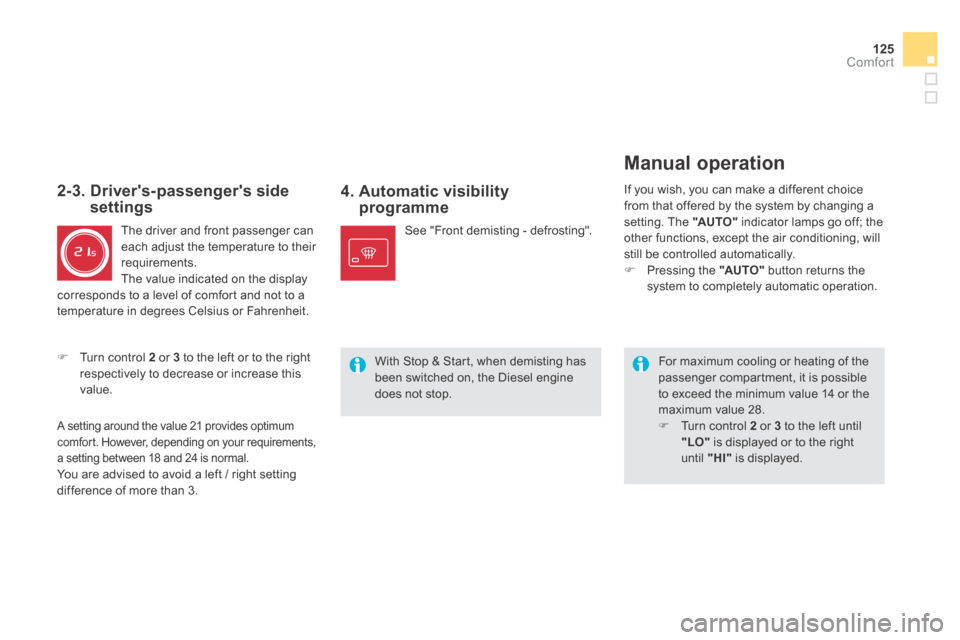
4. Automatic visibility programme
For maximum cooling or heating of the passenger compartment, it is possible to exceed the minimum value 14 or the maximum value 28. Turn control 2 or 3 to the left until "LO" is displayed or to the right until "HI" is displayed.
See "Front demisting - defrosting".
2-3. Driver's-passenger's side settings
The driver and front passenger can each adjust the temperature to their requirements. The value indicated on the display corresponds to a level of comfort and not to a temperature in degrees Celsius or Fahrenheit.
Turn control 2 or 3 to the left or to the right respectively to decrease or increase this value.
A setting around the value 21 provides optimum comfort. However, depending on your requirements, a setting between 18 and 24 is normal. You are advised to avoid a left / right setting difference of more than 3.
Manual operation
If you wish, you can make a different choice from that offered by the system by changing a setting. The "AUTO" indicator lamps go off; the other functions, except the air conditioning, will still be controlled automatically. Pressing the "AUTO" button returns the system to completely automatic operation.
With Stop & Start, when demisting has been switched on, the Diesel engine does not stop.
Page 130 of 382
Switch off the demisting/defrosting of the rear screen and door mirrors as soon as appropriate, as lower current consumption results in reduced fuel consumption.
Front Demist -
Defrost Rear screen and door mirrors demist -
defrost
It is possible to stop the demisting/defrosting operation before it is switched off automatically by pressing the button again. The indicator lamp associated with the button goes off.
Automatic visibility programme Switching on
With Stop & Start, when demisting has been activated, the STOP mode is not available.
Switching off
The demisting/defrosting switches off automatically to prevent an excessive consumption of current.
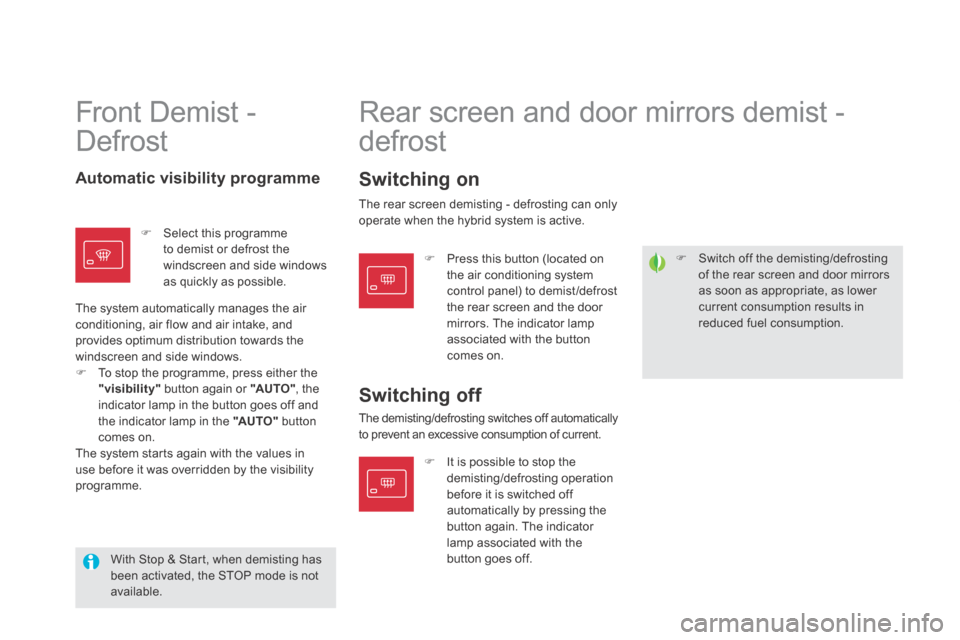
Select this programme to demist or defrost the windscreen and side windows as quickly as possible.
The system automatically manages the air conditioning, air flow and air intake, and provides optimum distribution towards the windscreen and side windows. To stop the programme, press either the "visibility" button again or "AUTO" , the indicator lamp in the button goes off and the indicator lamp in the "AUTO" button comes on. The system starts again with the values in use before it was overridden by the visibility programme.
Press this button (located on the air conditioning system control panel) to demist /defrost the rear screen and the door mirrors. The indicator lamp associated with the button comes on.
The rear screen demisting - defrosting can only operate when the hybrid system is active.
Page 150 of 382
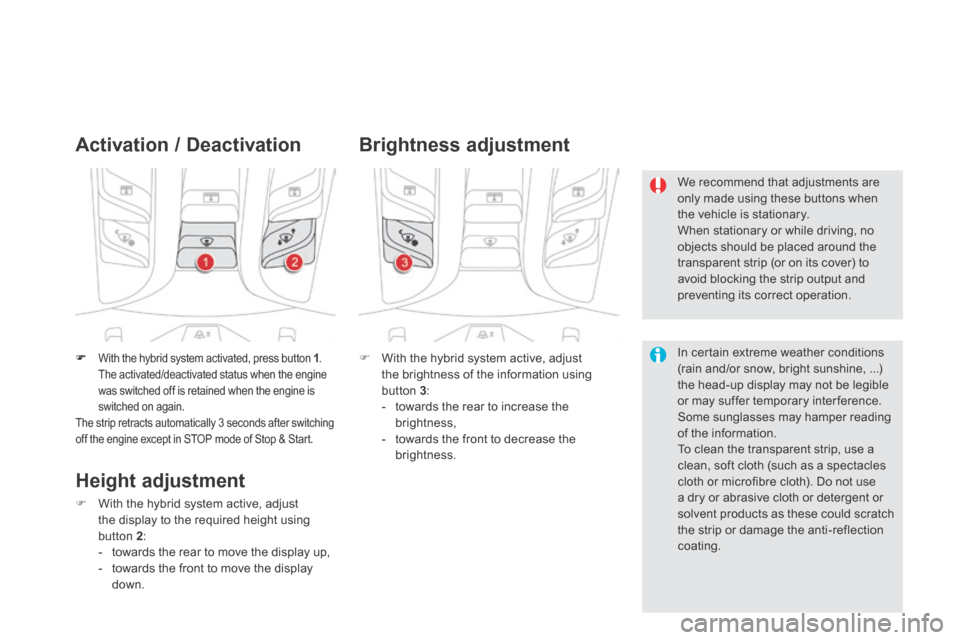
With the hybrid system activated, press button 1 . The activated/deactivated status when the engine was switched off is retained when the engine is switched on again. The strip retracts automatically 3 seconds after switching off the engine except in STOP mode of Stop & Start.
Activation / Deactivation
With the hybrid system active, adjust the brightness of the information using button 3 : - towards the rear to increase the brightness, - towards the front to decrease the brightness.
Brightness adjustment
We recommend that adjustments are only made using these buttons when the vehicle is stationary.
When stationary or while driving, no objects should be placed around the transparent strip (or on its cover) to avoid blocking the strip output and preventing its correct operation.
In certain extreme weather conditions (rain and/or snow, bright sunshine, ...) the head-up display may not be legible or may suffer temporary interference. Some sunglasses may hamper reading
of the information. To clean the transparent strip, use a clean, soft cloth (such as a spectacles cloth or microfibre cloth). Do not use a dry or abrasive cloth or detergent or solvent products as these could scratch the strip or damage the anti-reflection coating.
Height adjustment
With the hybrid system active, adjust the display to the required height using button 2 : - towards the rear to move the display up, - towards the front to move the display down.