remote start CITROEN DS7 CROSSBACK 2022 User Guide
[x] Cancel search | Manufacturer: CITROEN, Model Year: 2022, Model line: DS7 CROSSBACK, Model: CITROEN DS7 CROSSBACK 2022Pages: 244, PDF Size: 6.87 MB
Page 55 of 244

53
Ease of use and comfort03
Air conditioning does not operate when
the air flow is deactivated.
To obtain cool air more quickly, enable interior
air recirculation for a brief period. Then return
to the intake of exterior air.
Switching off the air conditioning may result in
some discomfort (humidity or misting).
"Rear" function
Activating the function switches on the blower in
the rear air vents.
► In the Climate touch screen
application, select the Rear tab.
► Press the line "Activate rear climate" to
activate/deactivate the function.
Remote settings controls
With the "Rear" function activated and the
remote settings controls unlocked, the rear
passengers can take control of the main air
conditioning system settings using the touch
control panel located at the rear of the centre
console. The settings displayed on the screen are
modified accordingly.
1. Adjusting the air flow
2. Automatic Comfort programme
3. Adjusting the temperature
Locking the remote settings controls
It is possible to prevent the rear passengers from
accessing these settings.
► In the Climate touch screen
application, select the Rear tab.
► Press the line "Lock rear climate controls" to
lock/unlock the remote settings controls.
A padlock appears on the rear air conditioning
screen.
Switching off the air
conditioning system
► Press button 12-OFF.
Its indicator lamp lights up and all the other
indicator lamps of the air conditioning system
go off.
This action deactivates all of the functions of the
air conditioning system.
The temperature is no longer regulated. A slight
flow of air can still be felt, due to the forward
movement of the vehicle.
Interior air recirculation
The intake of exterior air prevents the formation
of mist on the windscreen and side windows.
Recirculating the interior air isolates the
passenger compartment from outside odours
and fumes and allows the desired passenger
compartment temperature to be achieved more
rapidly.
► Press this button to activate/
deactivate the function (confirmed by the
illumination/extinction of the indicator lamp).
This function is activated automatically
when the front screenwash is used or
reverse gear is engaged.
Front
demisting/defrosting
This mode allows the windscreen and side
windows to be demisted or defrosted as quickly
as possible.
► Press this button to activate/
deactivate the mode (confirmed by the
illumination/extinction of the indicator lamp).
The mode automatically manages the air
conditioning, air flow, air intake and distributes
ventilation optimally to the windscreen and side
windows.
The air flow can be changed manually without
deactivating this mode.
With Stop & Start, when demisting has
been activated, STOP mode is not
available.
Page 57 of 244
55
Ease of use and comfort03
► Press + to add a programme.
► Select the time of entry into the vehicle and
the desired days. Press OK.
► Press ON to activate this programming.
The pre-conditioning sequence begins
approximately 45 minutes before the programmed
time when the vehicle is connected (20 minutes
when it is not connected) and is maintained for
10 minutes after.
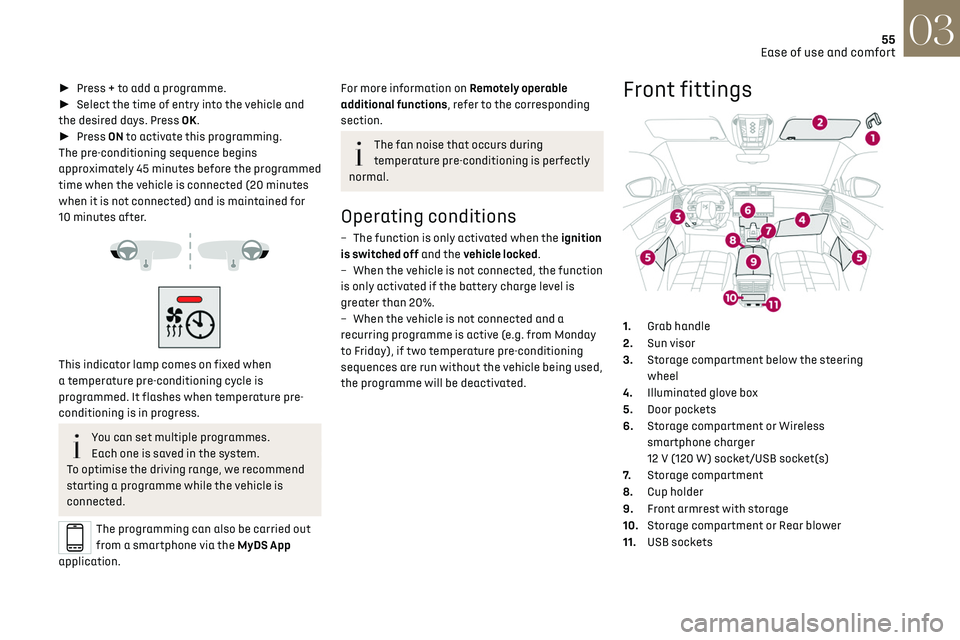
This indicator lamp comes on fixed when
a temperature pre-conditioning cycle is
programmed. It flashes when temperature pre-
conditioning is in progress.
You can set multiple programmes.
Each one is saved in the system.
To optimise the driving range, we recommend
starting a programme while the vehicle is
connected.
The programming can also be carried out
from a smartphone via the MyDS App
application.
For more information on Remotely operable
additional functions, refer to the corresponding
section.
The fan noise that occurs during
temperature pre-conditioning is perfectly
normal.
Operating conditions
– The function is only activ ated when the ignition
is switched off and the vehicle locked.
–
When the v
ehicle is not connected, the function
is only activated if the battery charge level is
greater than 20%.
–
When the v
ehicle is not connected and a
recurring programme is active (e.g. from Monday
to Friday), if two temperature pre-conditioning
sequences are run without the vehicle being used,
the programme will be deactivated.
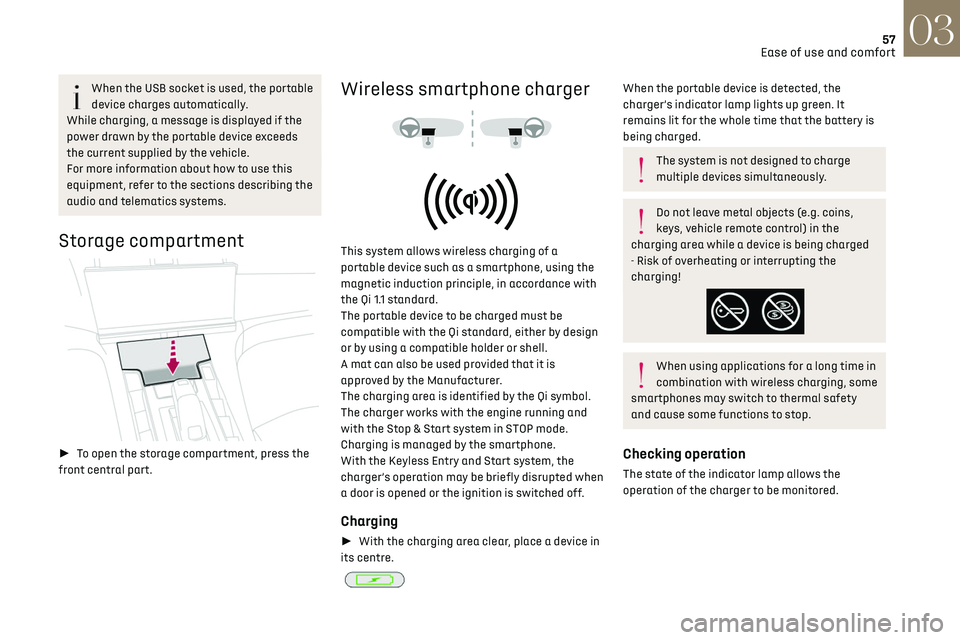
Front fittings
1. Grab handle
2. Sun visor
3. Storage compartment below the steering
wheel
4. Illuminated glove box
5. Door pockets
6. Storage compartment or Wireless
smartphone charger
12 V (120 W) socket/USB socket(s)
7. Storage compartment
8. Cup holder
9. Front armrest with storage
10. Storage compartment or Rear blower
11. USB sockets
Page 59 of 244
57
Ease of use and comfort03
When the USB socket is used, the portable
device charges automatically.
While charging, a message is displayed if the
power drawn by the portable device exceeds
the current supplied by the vehicle.
For more information about how to use this
equipment, refer to the sections describing the
audio and telematics systems.
Storage compartment
► To open the storage compartment, press the
front central part.
Wireless smartphone charger
This system allows wireless charging of a
portable device such as a smartphone, using the
magnetic induction principle, in accordance with
the Qi 1.1 standard.
The portable device to be charged must be
compatible with the Qi standard, either by design
or by using a compatible holder or shell.
A mat can also be used provided that it is
approved by the Manufacturer.
The charging area is identified by the Qi symbol.
The charger works with the engine running and
with the Stop & Start system in STOP mode.
Charging is managed by the smartphone.
With the Keyless Entry and Start system, the
charger’s operation may be briefly disrupted when
a door is opened or the ignition is switched off.
Charging
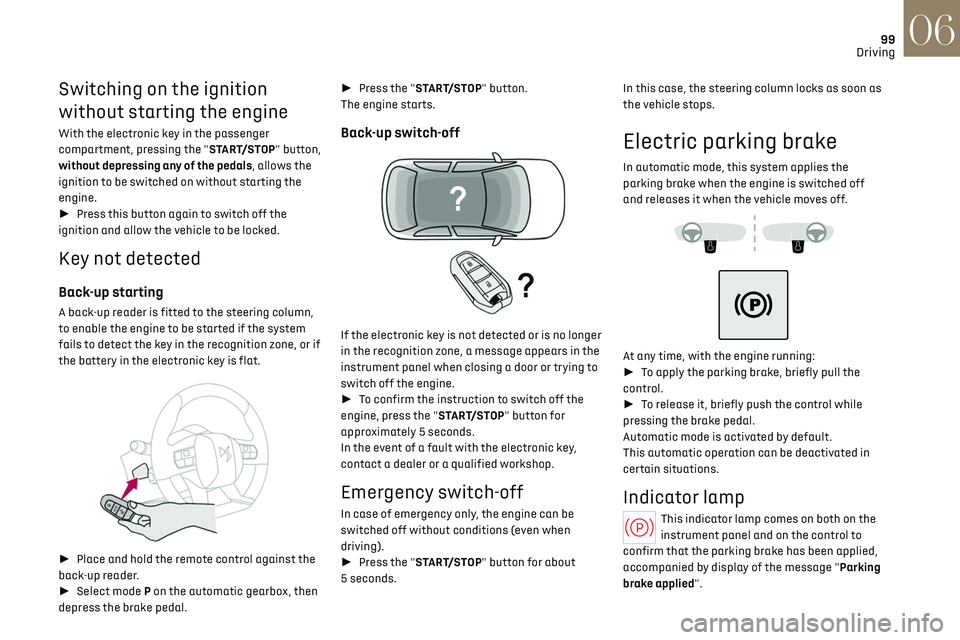
► With the charging area clear, place a device in
its centre.
When the portable device is detected, the
charger’s indicator lamp lights up green. It
remains lit for the whole time that the battery is
being charged.
The system is not designed to charge
multiple devices simultaneously.
Do not leave metal objects (e.g. coins,
keys, vehicle remote control) in the
charging area while a device is being charged
- Risk of overheating or interrupting the
charging!
When using applications for a long time in
combination with wireless charging, some
smartphones may switch to thermal safety
and cause some functions to stop.
Checking operation
The state of the indicator lamp allows the
operation of the charger to be monitored.
Page 101 of 244
99Driving06
Switching on the ignition
without starting the engine
With the electronic key in the passenger
compartment, pressing the "START/STOP" button,
without depressing any of the pedals, allows the
ignition to be switched on without starting the
engine.
► Press this button again to switch off the
ignition and allow the vehicle to be locked.
Key not detected
Back-up starting
A back-up reader is fitted to the steering column,
to enable the engine to be started if the system
fails to detect the key in the recognition zone, or if
the battery in the electronic key is flat.
► Place and hold the remote control against the
back-up reader.
► Select mode P on the automatic gearbox, then
depress the brake pedal. ►
Press the "START/STOP" button.
The engine starts.
Back-up switch-off
If the electronic key is not detected or is no longer
in the recognition zone, a message appears in the
instrument panel when closing a door or trying to
switch off the engine.
► To confirm the instruction to switch off the
engine, press the "START/STOP" button for
approximately 5 seconds.
In the event of a fault with the electronic key,
contact a dealer or a qualified workshop.
Emergency switch-off
In case of emergency only, the engine can be
switched off without conditions (even when
driving).
► Press the "START/STOP" button for about
5 seconds. In this case, the steering column locks as soon as
the vehicle stops.
Electric parking brake
In automatic mode, this system applies the
parking brake when the engine is switched off
and releases it when the vehicle moves off.
At any time, with the engine running:
► To apply the parking brake, briefly pull the
control.
► To release it, briefly push the control while
pressing the brake pedal.
Automatic mode is activated by default.
This automatic operation can be deactivated in
certain situations.
Indicator lamp
This indicator lamp comes on both on the
instrument panel and on the control to
confirm that the parking brake has been applied,
accompanied by display of the message "Parking
brake applied".
Page 155 of 244

153
Practical information07
Charging the traction
battery (Rechargeable
hybrid)
For a full charge, follow the charging
procedure without interrupting it, until it stops
automatically. Charging may be performed either
immediately (by default) or deferred.
Deferred charging is set via the touch
screen or the MyDS App application.
When the vehicle is connected, the following
information is displayed on the instrument panel:
–
Traction ba
ttery charge status (%).
–
R
emaining range (miles or km).
–
Estima
ted charging time (calculation may take
a few seconds).
–
C
harging speed (miles or km gained per hour).
After the instrument panel has been put into
standby mode, this information can be displayed
again by unlocking the vehicle or opening a door.
It is also possible to monitor the charging
progress using the MyDS App application.
For more information on Remotely
operable additional functions, refer to the
corresponding section.
Low charging / Driving
Driving when the charge level of the
traction battery is too low can lead to the
vehicle breaking down and can lead to
accidents or serious injuries. ALWAYS make
sure the traction battery has a sufficient
charge level.
Low charging / Parking
If the outside temperature is negative,
it is recommended not to park your vehicle
outside for several hours at a low charging
(less than 20%).
Vehicle in storage for more than 1 month
In the event of a long period of non-use
of the vehicle (beyond 4 weeks) without the
possibility of charging when restarting, the
self-discharge may make it impossible to
restart if the traction battery charge level is a
low or very low, especially at negative ambient
temperatures. ALWAYS make sure that the
traction battery has a charge between 20%
and 40% if you do not plan to use your vehicle
for several weeks.
Do not connect the charging cable.
Always park the vehicle in a place with
temperatures between -10°C and 30°C
(parking in a place with extreme temperatures
can damage the traction battery).
Refer to the Accessory battery (Rechargeable
hybrid) section for the battery disconnection
procedure.
Precautions
Rechargeable hybrid vehicles have
been developed in accordance with the
recommendations for maximum electromagnetic
field limits established by the ICNIRP
(International Commission on Non-Ionizing
Radiation Protection - 1998 Guidelines).
Wearers of pacemakers or equivalent
devices should consult a doctor to enquire
about any applicable precautionary measures, or
contact the manufacturer of their implanted
electronic medical device to check that it is
guaranteed to operate in an environment
compliant with the ICNIRP guidelines.
If in doubt, during charging, do not remain inside
or near the vehicle, near the charging cable or the
charging unit, even for a short time.
Before charging
Depending on the context:
► Have a professional check that the
electrical system to be used complies with
applicable standards and is compatible with
the vehicle.
► Have a professional electrician install
a dedicated domestic power socket or
accelerated charging unit (Wallbox)
compatible with the vehicle.
Use the charging cable supplied with the
vehicle.
For more information, contact a dealer or a
qualified workshop.
During charging
As a safety measure, the engine will not
start if the charging cable is plugged into
Page 157 of 244

155
Practical information07
► If the vehicle is unlocked, lock it and then
unlock it.
If selective unlocking of the doors is
activated, press the unlocking button on
the remote control twice to disconnect the
nozzle.
The red indicator lamp in the flap goes out to
confirm that the nozzle is unlocked.
► Within 30 seconds, remove the charging
nozzle.
Domestic charging (mode 2)
The end of charging is confirmed when the
green CHARGE indicator lamp on the control unit
comes on fixed and the green light guides in the
flap come on fixed.
► After disconnection, replace the protective
cover over the nozzle and close the charging flap.
► Disconnect the control unit's charging cable
from the domestic socket.
Accelerated charging (mode 3)
The end of charging is confirmed by the
accelerated charging unit (Wallbox) and when the
green light guides in the flap come on fixed.
► After disconnection, replace the nozzle on to
the charging unit and close the charging flap.
Deferred charging
By default, the deferred charging start time is set
to be around midnight. Depending on equipment, this time can be
changed.
Settings
►
In the Energy touch screen application,
select the Charging tab.
► Set the charging start time.
► Press OK.
The setting is saved in the system.
You can also programme the deferred
charging function using a smartphone, via
the MyDS App application.
For more information on Remotely operable
additional functions, refer to the corresponding
section.
Activation
► After programming the deferred charging,
connect the vehicle to the desired charging
equipment.
► Press this button in the flap within one
minute to activate the deferred charging
(confirmed by the light guides coming on in blue).
Towing device
Load distribution
► Distribute the load in the trailer so that
the heaviest items are as close as possible to
the axle, and the nose weight approaches the
maximum permitted without exceeding it.
Air density decreases with altitude, thus reducing
engine performance. The maximum towable
load must be reduced by 10% per 1,000 metres of
altitude.
Use genuine towing devices and wiring
harnesses approved by the Manufacturer.
We recommend having them fitted by a dealer
or a qualified workshop.
If not fitted by a dealer, they must still be
fitted in accordance with the Manufacturer's
instructions.
Important: if the vehicle has a motorised
tailgate and Hands-Free Tailgate Access
function, and a towing device has been fitted
outside the dealer network, it is essential to
visit a dealer or a qualified workshop to have
the detection system recalibrated - risk of
malfunction of the Hands-Free Tailgate Access
function.
Certain driving or manoeuvring aid functions
are automatically deactivated while an
approved towing system is in use.
For more information about driving with a
towing device fitted to a trailer and associated
with the Trailer stability assist, refer to the
corresponding section.
Comply with the maximum authorised
towable weight, as indicated on your
vehicle's registration certificate, on the
manufacturer's label and in the Technical data
section of this guide.
Page 163 of 244
161
Practical information07
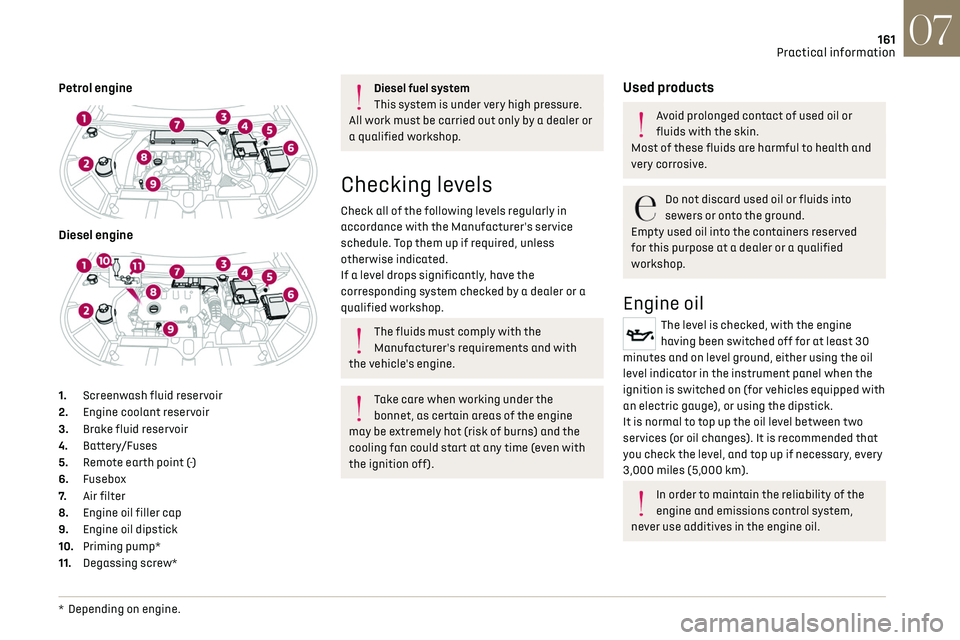
Petrol engine
Diesel engine
1. Screenwash fluid reservoir
2. Engine coolant reservoir
3. Brake fluid reservoir
4. Battery/Fuses
5. Remote earth point (-)
6. Fusebox
7. Air filter
8. Engine oil filler cap
9. Engine oil dipstick
10. Priming pump*
11. Degassing screw*
* Depending on engine .
Diesel fuel system
This system is under very high pressure.
All work must be carried out only by a dealer or
a qualified workshop.
Checking levels
Check all of the following levels regularly in
accordance with the Manufacturer's service
schedule. Top them up if required, unless
otherwise indicated.
If a level drops significantly, have the
corresponding system checked by a dealer or a
qualified workshop.
The fluids must comply with the
Manufacturer's requirements and with
the vehicle's engine.
Take care when working under the
bonnet, as certain areas of the engine
may be extremely hot (risk of burns) and the
cooling fan could start at any time (even with
the ignition off).
Used products
Avoid prolonged contact of used oil or
fluids with the skin.
Most of these fluids are harmful to health and
very corrosive.
Do not discard used oil or fluids into
sewers or onto the ground.
Empty used oil into the containers reserved
for this purpose at a dealer or a qualified
workshop.
Engine oil
The level is checked, with the engine
having been switched off for at least 30
minutes and on level ground, either using the oil
level indicator in the instrument panel when the
ignition is switched on (for vehicles equipped with
an electric gauge), or using the dipstick.
It is normal to top up the oil level between two
services (or oil changes). It is recommended that
you check the level, and top up if necessary, every
3,000 miles (5,000 km).
In order to maintain the reliability of the
engine and emissions control system,
never use additives in the engine oil.
Page 183 of 244

181
In the event of a breakdown08
12 V battery/Accessory
batteries
Lead-acid starter batteries
These batteries contain harmful
substances (sulphuric acid and lead).
They must be disposed of in accordance
with regulations and must never under any
circumstances be discarded with household
waste.
Dispose of used batteries at a designated
collection point.
Protect your eyes and face before
handling the battery.
All operations on the battery must be carried
out in a well ventilated area and away from
naked flames and sources of sparks, to avoid
any risk of explosion or fire.
Wash your hands afterwards.
Electronic control units/LED technology
headlamps
Never connect the negative jump lead to the
metal part of the electronic control units or at
the back of the headlamps.
Risk of destroying the electronic control units
and/or headlamps!
Connect to the remote earth point provided for
this purpose.
Frozen battery
Never try to charge a frozen battery - risk
of explosion!
If the battery has frozen, have it checked by
a dealer or by a qualified workshop, who will
verify that the internal components have not
been damaged and that the case has not
cracked, which could lead to a risk of leakage
of toxic and corrosive acid.
Never try to start the engine by pushing
the vehicle.
Symbols
No sparks or naked flames, no smoking.
Always protect your eyes. Explosive gases
can cause blindness and injury.
Keep the vehicle's battery out of the reach
of children.
The vehicle's battery contains sulphuric
acid which can make you go blind or cause
severe burns.
For more information, refer to the
handbook.
Explosive gases can be present close to
the battery.
With petrol/Diesel engines
Procedure for starting the engine using another
battery or for charging a discharged battery.
Accessing the battery
The battery is located under the bonnet.
For access to the (+) terminal:
► Release the bonnet by pulling the internal
release lever, then the external safety catch.
► Raise the bonnet.
(+) Positive terminal with a quick-release
terminal.
(-) Negative terminal.
As the battery's negative terminal is not
accessible, a remote earth point is located near
the battery.
Starting using another battery
If the vehicle's battery is flat, the engine can be
started using a backup battery (either external or
from another vehicle) and jump leads or using a
battery booster.
Never start the engine by connecting a
battery charger.
Never use a 24 V or higher battery booster.
Page 186 of 244

184
In the event of a breakdown08
Jump-starting another vehicle
Do not start or jump-start another vehicle
using the vehicle’s accessory batteries.
Accessing the accessory batteries
Front
The front battery is located under the bonnet.
For access to the (+) terminal:
► Release the bonnet by pulling the internal
release lever, then the external safety catch.
► Raise the bonnet.
(+) Positive terminal with a quick-release
terminal.
(-) Negative terminal.
As the battery's negative terminal is not
accessible, a remote earth point is located near
the battery.
Rear
The rear battery is located in the boot.
To reach the battery:
► Lift the boot floor.
(+) Positive terminal, protected by a red plastic
cover (not accessible).
(-) Negative terminal with a black quick-release
connector.
Charging the front battery using a battery
charger
For optimum service life of the front battery, it
is essential to maintain an adequate state of
charge.
In some circumstances, it may be necessary to
charge the front battery:
–
When using the v
ehicle mainly for short
journeys.
–
If the v
ehicle is to be taken off the road for
several weeks.
Contact a dealer or a qualified workshop.
To charge the vehicle's front battery
yourself, use only a charger compatible
with lead-acid batteries with a nominal voltage
of 12 V.
Follow the instructions provided by the
manufacturer of the charger.
Never reverse polarities.
It is not necessary to disconnect the
battery.
► Switch the ignition off.
► Switch off all electrical consumers (audio
system, lighting, wipers, etc.).
Page 199 of 244
197DS IRIS SYSTEM - 12" touch screen Infotainment system10
connected service will be carried out remotely,
in particular using "Over the Air" technology.
To do this, a secure connection via radio
network is established between the vehicle
and the Manufacturer's device management
server each time the ignition is switched on,
when a mobile telephone network is available.
Depending on the vehicle's equipment,
the connection configuration must be set
to "Connected vehicle" to enable to the
connection to the radio network.
Irrespective of a valid subscription to a
connected service, the remote management
of devices relating to or connected with
the security of devices, and the updating of
software and firmware, will be carried out
when necessary in order to comply with a legal
requirement applicable to the Manufacturer
(e.g. the applicable law in terms of product
liability, the regulations governing e-call) or
when necessary to protect the respective
vital interests of the vehicle's users and
passengers.
The establishment of a secure connection via
radio network and the corresponding remote
updates are not affected by the privacy
settings and are intended to be carried out
after being initialised by the user in response
to a related notification.
The system can notify the receipt of an update
when it is connected to an exterior Wi-Fi network
or a mobile telephone network.Large updates are downloaded only via the Wi-Fi
network.
The availability of an update is notified on the
screen at the end of the journey with an option
of immediate installation or postponement of
installation.
The installation time is variable and can take
several minutes with a maximum of about 30
minutes. A notification will give an estimate of the
duration and a description of the update.
Update information is available through the
"Settings" application.
Press the "Settings" application.
In the list, select the "Updates" tab.
This button allows you to change the
authorisation for automatic downloading
of updates via an exterior Wi-Fi network.
For safety reasons and because it
requires sustained attention on the part
of the driver, the installation must be carried
out with the ignition on but without starting
the engine.
The installation cannot be carried out in the
following cases:
–
engine running.
–
emergenc
y call in progress.
–
insufficien
t battery level.
–
when charging for electric v
ehicles.
If an update has failed or has expired, contact a
dealer or a qualified workshop.
The Manufacturer does not charge for the
use of this service.
However, the use of Wi-Fi and/or mobile
telephone networks by your smartphone may
incur extra charges if you exceed the data
allowance included in your contract.
Any associated costs will be billed to you by
your mobile telephone operator.
Personalisation
Press and hold the screen from one of the
system's home pages.
Or
Press the "Settings" application.
In the list, select the "Customization" tab.
Press the "Displays" field.
A page divided into 2 parts is displayed.
Press the HOME button at any time to leave this
page.
Personalising the screen
Press the pencil in the "Customize
Touchscreen" part.
A representation of the organisation of the
different home page (HOME) Widgets is
displayed.
A Widget is a reduced window of an
application or service.