start stop button CITROEN DS7 CROSSBACK 2022 User Guide
[x] Cancel search | Manufacturer: CITROEN, Model Year: 2022, Model line: DS7 CROSSBACK, Model: CITROEN DS7 CROSSBACK 2022Pages: 244, PDF Size: 6.87 MB
Page 105 of 244

103
Driving06
to change modes, an alert message is displayed
on the instrument panel.
Only appropriate mode change instructions are
validated.
With the engine running and the brakes
released, if R, D or M is selected, the
vehicle moves off, even without pressing the
accelerator pedal.
Never press the accelerator and brake
pedals at the same time. Risk of
damaging the gearbox!
If the battery is flat, you must place the chocks
supplied with the vehicle tools against one of
the wheels to immobilise the vehicle.
Unlocking the gearbox
– From mode P: ► Fully depress the brake pedal.
► Press the Unlock button.
► While continuing to press the brake pedal
and the Unlock button, select another mode.
–
F
rom neutral N, at a speed below 3 mph
(5 km/h): ► Fully depress the brake pedal.
► While continuing to depress the brake pedal,
select another mode.
Engaging reverse gear
► Slow down until you come to a stop.
► Depress the brake pedal, then press the
Unlock button.
► While continuing to press, select mode R.
Permanent manual mode
Entering the mode:
► With mode D initially selected.
► Press button M; the green indicator lamp in
the button comes on.
Exiting the mode:
► Push forwards once to return to D.
or
► Press button M; the indicator lamp in the
button goes off.
Switching off the ignition
To switch off the ignition, the vehicle must be
stationary.
Free-wheeling
For more information on Free-wheeling, refer to
the corresponding section.
If you open the driver's door while mode N
is engaged, an audible signal will sound. It
will stop when you close the driver's door
again.
Special aspects of automatic mode
The gearbox selects the gear that provides
optimal performance based on ambient
temperature, road profile, vehicle loading and
driving style.
For maximum acceleration, press the accelerator
fully down (kick-down). The gearbox changes down automatically or holds the selected gear
until the maximum engine speed is reached.
Steering mounted controls allow the driver to
temporarily select a gear, if the vehicle speed and
engine speed conditions permit.
Special aspects of manual mode
The gearbox only changes from one gear to
another if the vehicle speed and engine speed
conditions permit.
Starting the vehicle
From mode P:
►
Fully depress the brake pedal.
► Start the engine.
► Maintaining pressure on the brake pedal,
press the Unlock button.
► Push once or twice rearwards to select
the automatic mode D, or forwards to engage
reverse R.
From neutral N:
► Fully depress the brake pedal.
► Start the engine.
► Maintaining pressure on the brake pedal,
push rearwards to select the automatic mode D,
or forwards, while pressing the Unlock button to
engage reverse R.
Then, from D or R:
► Release the brake pedal.
► Accelerate gradually to automatically release
the electric parking brake.
The vehicle moves off immediately.
Page 112 of 244

110
Driving06
– The outside temperature must be between 0°C
and 35°C.
Putting the engine into standby (STOP
mode)
The engine automatically enters standby mode
as soon as the driver indicates their intention to
stop:
–
With an automatic gearbo
x, at speeds below
12 mph (20 km/h) on BlueHDi versions, or below
2 mph (3 km/h) on PureTech 130, 180 and 225
versions, when you depress the brake pedal or
place the gear selector in mode N.
Time counter
A time counter adds up the time spent in standby
during the journey. It is reset to zero every time
the ignition is switched on.
Special cases:
The engine will not go into standby if the
conditions for operation are not met and in the
following cases:
–
St
eep slope (ascending or descending).
–
Needed t
o maintain a comfortable temperature
in the passenger compartment.
–
Demisting activ
e.
In these cases, this indicator lamp flashes
for a few seconds, then goes off.
After the engine has restarted, STOP
mode is not available until the vehicle has
reached a speed of 5 mph (8 km/h).
During parking manoeuvres, STOP mode is
not available for a few seconds after
coming out of reverse gear or turning the
steering wheel.
Restarting the engine (START mode)
The engine automatically restarts as soon as the
driver indicates the intention of moving off again:
–
With the select
or in mode D or M: with the
brake pedal released.
–
With the select
or in mode N and the brake
pedal released: with the selector at D or M.
–
With the select
or in mode P and the brake pedal
depressed: with the selector at R, N, D or M.
–
With re
verse gear engaged.
Special cases
The engine will restart automatically if the
conditions for operation are met again and in the
following cases:
–
V
ehicle speed exceeds 2.5 mph (4 km/h) with
PureTech 130, 180 and 225 versions, or 16 mph
(25 km/h) with BlueHDi versions.
In these cases, this indicator lamp flashes
for a few seconds, then goes off.
Malfunctions
In the event of a fault with the system, this
warning lamp flashes for a few moments
on the instrument panel, then remains on,
accompanied by the display of a message.
Have it checked by a dealer or a qualified
workshop.
The vehicle stalls in STOP mode
All of the instrument panel warning lamps come
on if there is a fault.
► Switch off the ignition then start the engine
again with the "START/STOP" button.
12 V battery
The Stop & Start system requires a
12 V battery of specific technology and
specification.
All work must be carried out only by a dealer or
a qualified workshop.
Tyre under-inflation
detection
This system alerts the driver if one or more tyres
suffer a drop in pressure.
The alert is raised when the vehicle is moving, not
when stationary.
It compares the information given by the wheel
speed sensors with reference values, which must
be reinitialised every time the tyre pressures are
adjusted or a wheel changed.
It takes into account the last values stored
during the reinitialisation request. It is therefore
essential that the tyre pressure is correct during
the operation. This operation is the driver’s
responsibility.
Page 115 of 244

113
Driving06
In the presence of areas in shade, or in
conditions of bright sunlight or inadequate
lighting, the image may be darkened and with
lower contrast.
Obstacles may appear further away than they
actually are.
Sensors
The operation of the sensors, as well as
any associated functions, may be disrupted by
noise pollution such as that emitted by noisy
vehicles and machinery (e.g. lorries, pneumatic
drills), by the accumulation of snow or dead
leaves on the road or in the event of damaged
bumpers and mirrors.
When reverse gear is engaged, an audible
signal (long beep) indicates that the sensors
may be dirty.
A front or rear impact to the vehicle can
upset the sensors’ settings, which is not
always detected by the system: distance
measurements may be distorted.
The sensors do not systematically detect
obstacles that are too low (pavements, studs)
or too thin (trees, posts, wire fences).
Certain obstacles located in the sensors’ blind
spots may not be detected or may no longer be
detected during the manoeuvre.
Certain materials (fabrics) absorb sound
waves: pedestrians may not be detected.
Maintenance
Clean the bumpers and door mirrors and
the field of vision of the cameras regularly.
When washing your vehicle at high pressure,
direct the spray from at least 30 cm away from
the radar, sensors and cameras.
Mats/Pedal trims
The use of mats or pedal trims not
approved by the Manufacturer may interfere
with the operation of the speed limiter or
cruise control.
To avoid any risk of jamming the pedals:
–
Ensure tha
t the mat is secured correctly.
–
Ne
ver fit one mat on top of another.
Units of speed
Ensure that the units of speed displayed
on the instrument panel (mph or km/h) are
those for the country you are driving in.
If this is not the case, when the vehicle is
stationary, set the display to the required
units of speed so that it complies with what is
authorised locally.
In case of doubt, contact a dealer or a qualified
workshop.
Shortcuts for driving aids
The full list of available driving aids can be found
in the Functions tab. Driving aids can be accessed directly to quickly
activate/deactivate them.
By default, driving aids are already stored in the
Shortcuts tab (e.g. Stop & Start, Lane keeping
assist).
Other driving aids can be added or deleted from
this tab.
It is configured in the ADAS>Functions
touch screen application.
►
Press the button corresponding to the
driving assistance concerned:
•
Full s
ymbol: the function is added to the
Shortcuts tab.
•
Empty s
ymbol: the function is deleted from
the Shortcuts tab.
► Check the modification in the Shortcuts tab.
► Press this button to access directly to the
Shortcuts tab.
Multiple deactivation
It is possible to deactivate several driver
assistance functions simultaneously.
This is done in two steps:
Page 116 of 244

114
Driving06
– First of all, the selection of all the functions
that you want to deactivate.
–
Sec
ondly, the simultaneous deactivation of all
these functions.
Selection of functions
► Press this button on the dashboard to
display the ADAS tabs.
► Select the Functions tab.
► Press this button to display the list of
available functions.
► Select the functions to deactivate (e.g. Stop
& Start, Lane Keeping Assist, Automatic Braking
System (Active Safety Brake)).
► Press this button to return to the
previous page.
The functions to deactivate are saved in the
system.
Deactivation of these functions
► Press and hold this button on
the dashboard.
All previously selected functions are deactivated
until the vehicle is next restarted (confirmed by an
audible signal).
Road signs recognition
For more information, refer to the General
recommendations on the use of driving
and manoeuvring aids.
This system displays the maximum speed
authorised locally on the instrument panel, using:
–
Speed limit signs det
ected by the camera.
–
Speed limit in
formation from the navigation
system’s mapping.
–
Signs indic
ating a shared traffic zone detected
by the camera.
Sign detected Suggested speed (calculated)
Entry into a shared traffic zoneExample:
Without DS IRIS SYSTEM
10 mph or 20 km/h (depending on
the units on the
instrument panel)
With DS IRIS SYSTEM Display of the speed
in force in the country you are driving in.
–
Some supplemen
tary traffic signs detected by
the camera.
Supplementary
traffic sign detected Display of the speed
associated with
the supplementary traffic sign
Speed limit when raining
Examples:
If the wiper control stalk is in the
"intermittent wipe"
or "automatic wipe" position (in order
to activate the rain sensor):
68 mph (110 km/h) (for example)
Speed limit when towing
If an approved towing device is fixed to the vehicle:
56 mph (90 km/h) (for example)
Speed limit
applicable over a certain distance Example:
43 mph (70 km/h) (for example)
Page 121 of 244

119
Driving06
Programmable cruise
control
For more information, refer to the General
recommendations on the use of driving
and manoeuvring aids and the Specific
recommendations on cruise control.
This system automatically maintains the
vehicle’s speed at the value programmed
by the driver (speed setting), without the use of
the accelerator pedal.
Cruise control is switched on manually.
It requires a minimum vehicle speed of 25 mph
(40 km/h).
With an automatic gearbox, mode D or second
gear or higher in mode M must be engaged.
Cruise control remains active after
changing gear on engines fitted with the
Stop & Start function.
Switching off the ignition cancels any
speed setting.
Steering-mounted control
1. ON (CRUISE position)/OFF
2. Activate cruise control at the current speed/
decrease speed setting
3. Activate cruise control at the current speed/
increase speed setting
4. Pause/resume cruise control with the speed
setting previously saved
5. Use the speed suggested by the Road signs
recognition function (MEM display)
For more information on the Road signs
recognition, refer to the corresponding section.
Information displayed on the
instrument panel
6. Cruise control pause/resume
7. Cruise control mode selection
8. Speed setting value
9. Speed suggested by the Road signs
recognition function
Switching on/pausing
► Turn thumbwheel 1 to the "CRUISE" position
to select cruise control mode; the function is
paused.
► Press button 2-SET- or 3-SET+ to activate
cruise control and save a speed setting when
the vehicle has reached the desired speed; the
vehicle’s current speed is saved as the speed
setting.
► Release the accelerator pedal.
► Pressing button 4-II temporarily pauses the
function (pause).
► Pressing button 4-II again resumes operation
of the cruise control (ON).
Page 139 of 244

137
Driving06
or other objects; they may hamper correct
operation of the system.
Parking sensors
For more information, refer to the General
recommendations on the use of driving
and manoeuvring aids.
This system detects and signals the proximity of
obstacles (e.g. pedestrian, vehicle, tree, barrier)
using sensors located in the bumper.
Rear parking sensors
► Engage reverse gear to start the system
(confirmed by an audible signal).
The system is switched off when reverse gear is
disengaged.
Audible assistance
The system signals the presence of obstacles
which are both within the sensors’ detection zone
and in the vehicle path defined by the direction of
the steering wheel.
Depending on version, in the example shown, only
the obstacles present in the shaded area will be
signalled by the audible assistance.
The proximity information is given by an
intermittent audible signal, the frequency of
which increases as the vehicle approaches the
obstacle.
When the distance between the vehicle and
the obstacle becomes less than about thirty
centimetres, the audible signal becomes
continuous.
The sound emitted by the speaker (right or
left) indicates the side on which the obstacle is
located.
Adjusting the audible signalPressing this button opens the
window for adjusting the volume of
the audible signal.
Visual assistance
This supplements the audible signal, without
taking account of the vehicle's trajectory, by
displaying bars on the screen whose location
represents the distance between the obstacle
and the vehicle (white: more distant, orange:
close, red: very close).
When the obstacle is very close, the "Danger"
symbol is displayed on the screen.
Front parking sensors
Supplementing the rear parking sensors, the front
parking sensors are triggered when an obstacle
is detected in front and the speed of the vehicle is
below 6 mph (10 km/h).
Front parking sensor operation is suspended if
the vehicle stops for more than three seconds in
forward gear, if an obstacle is no longer detected
or the vehicle speed exceeds 6 mph (10 km/h).
Page 168 of 244

166
Practical information07
Never store AdBlue® containers in your
vehicle.
Precautions for use
AdBlue® is a urea-based solution. This fluid is non-
flammable, colourless and odourless (when kept
in a cool place).
In the event of contact with the skin, wash the
affected area with soap and running water. In the
event of contact with the eyes, immediately rinse
the eyes with large amounts of water or with an
eye wash solution for at least 15 minutes. Seek
medical attention if you feel a persistent burning
sensation or irritation.
If swallowed, immediately wash out the mouth
with clean water and then drink plenty of water.
In certain conditions (high temperature, for
example), the risk of release of ammonia cannot
be excluded: do not inhale the fluid. Ammonia
vapours have an irritant effect on mucous
membranes (eyes, nose and throat).
Store AdBlue® out of the reach of children,
in its original container.
Procedure
Before starting the top-up procedure, ensure that
the vehicle is parked on a flat and level surface.
In wintry conditions, ensure that the temperature
of the vehicle is above -11°C. Otherwise the
AdBlue
® may be frozen and so cannot be poured
into the tank. Park the vehicle in a warmer area
for a few hours to allow the top-up to be carried
out.
Never pour the AdBlue® into the Diesel fuel
tank.
If any AdBlue® is splashed, or if there are
any spillages on the bodywork, rinse
immediately with cold water or wipe with a
damp cloth.
If the fluid has crystallised, clean it off using a
sponge and hot water.
Important: in the event of a top-up after an
AdBlue breakdown, you must wait about
5 minutes before switching on the ignition,
without opening the driver's door, unlocking
the vehicle or bringing the electronic key into
the passenger compartment.
Switch on the ignition, then wait for 10
seconds before starting the engine.
► Press the "START/STOP" button to switch off
the engine.
► Turn the blue cap of the AdBlue® tank anti-
clockwise and remove it.
► With a container of AdBlue®: after checking
the expiry date, read the instructions on the
label carefully before pouring the contents of the
container into the vehicle's AdBlue
® tank.
► With an AdBlue® pump: insert the nozzle and
fill the tank until the nozzle automatically cuts
out.
In order not to overfill the AdBlue® tank:
–
Add betw
een 10 and 13 litres using
AdBlue
® containers.
–
St
op after the nozzle’s first automatic cut-
out, if you are refilling at a service station.
The system only registers AdBlue
®
intermediate top-ups of 5 litres or more.
If the AdBlue® tank is completely empty
– which is confirmed by the message “Top
up AdBlue: Starting impossible” – it is essential
to add at least 10 litres.
Top-up detection may not be instantaneous
after addition. It may take a few minutes of
driving before the top-up detection is effective.
Free-wheeling
In certain situations, it is necessary to put the
vehicle into free-wheeling mode (e.g. towing, on
a rolling road, automatic car wash (Wash mode),
rail or sea transport).
The procedure varies according to the type of
gearbox and parking brake.
Page 176 of 244

174In the event of a breakdown08
► Move the switch to position "O".
► Disconnect the compressor's electric plug
from the vehicle's 12 V socket.
► Remove the kit.
► Refit the cap on the valve.
► Remove and store the bottle of sealant.
The sealant product is harmful if
swallowed and causes irritation to the
eyes.
Keep this product out of the reach of children.
The use-by date of the fluid is marked on the
bottle.
After use, do not discard the bottle into
the environment; take it to a dealer or an
authorised waste disposal site.
Do not forget to obtain a new bottle of
sealant, available from a dealer or a qualified
workshop.
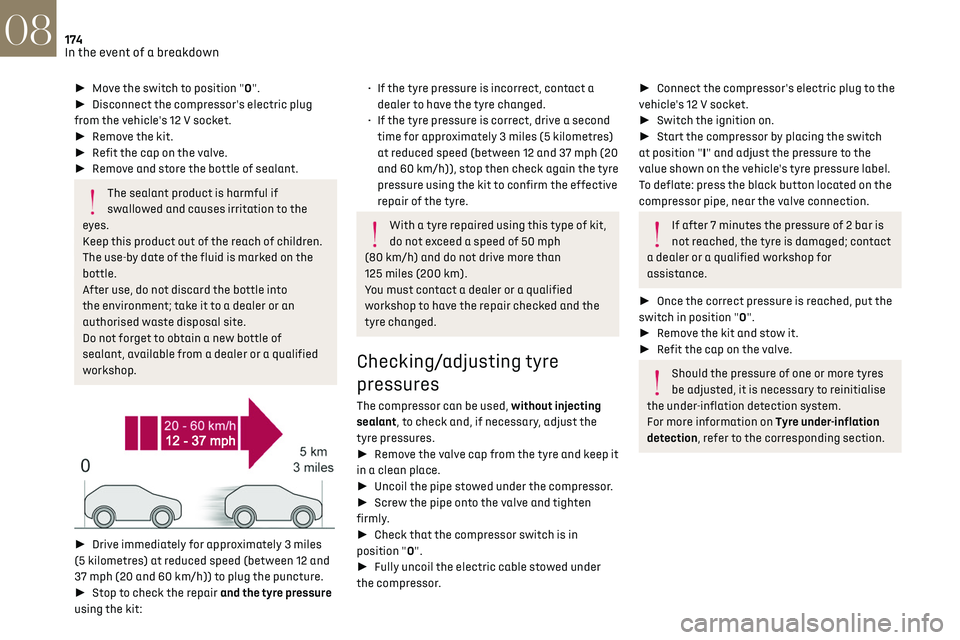
► Drive immediately for approximately 3 miles
(5 kilometres) at reduced speed (between 12 and
37 mph (20 and 60 km/h)) to plug the puncture.
► Stop to check the repair and the tyre pressure
using the kit:
• If the tyre pre ssure is incorrect, contact a
dealer to have the tyre changed.
•
If the tyre pre
ssure is correct, drive a second
time for approximately 3 miles (5 kilometres)
at reduced speed (between 12 and 37 mph (20
and 60 km/h)), stop then check again the tyre
pressure using the kit to confirm the effective
repair of the tyre.
With a tyre repaired using this type of kit,
do not exceed a speed of 50 mph
(80 km/h) and do not drive more than
125 miles (200 km).
You must contact a dealer or a qualified
workshop to have the repair checked and the
tyre changed.
Checking/adjusting tyre
pressures
The compressor can be used, without injecting
sealant, to check and, if necessary, adjust the
tyre pressures.
► Remove the valve cap from the tyre and keep it
in a clean place.
► Uncoil the pipe stowed under the compressor.
► Screw the pipe onto the valve and tighten
firmly.
► Check that the compressor switch is in
position "O".
► Fully uncoil the electric cable stowed under
the compressor.
► Connect the compressor's electric plug to the
vehicle's 12 V socket.
► Switch the ignition on.
► Start the compressor by placing the switch
at position "I" and adjust the pressure to the
value shown on the vehicle's tyre pressure label.
To deflate: press the black button located on the
compressor pipe, near the valve connection.
If after 7 minutes the pressure of 2 bar is
not reached, the tyre is damaged; contact
a dealer or a qualified workshop for
assistance.
► Once the correct pressure is reached, put the
switch in position "O".
► Remove the kit and stow it.
► Refit the cap on the valve.
Should the pressure of one or more tyres
be adjusted, it is necessary to reinitialise
the under-inflation detection system.
For more information on Tyre under-inflation
detection, refer to the corresponding section.