check engine Citroen GRAND C4 PICASSO RHD 2016 2.G User Guide
[x] Cancel search | Manufacturer: CITROEN, Model Year: 2016, Model line: GRAND C4 PICASSO RHD, Model: Citroen GRAND C4 PICASSO RHD 2016 2.GPages: 523, PDF Size: 13.63 MB
Page 124 of 523
122
When towing
Distribution of loads
F Distribute the load in the trailer so that the h
eaviest items are as close as possible to t
he axle and the nose weight approaches the
m
aximum permitted without exceeding it.
Air
density decreases with altitude, thus
r
educing engine per formance. Above
1 0
00 metres, the maximum towed load must
b
e reduced by 10 % for every 1 000 metres of
al
titude.
Side wind
F Take into account the increased sensitivity t
o side wind.
For
more information on Weights
, refer
to the corresponding section.
The rear parking sensors will be
d
eactivated automatically to avoid the
a
udible signal if a genuine CITROËN
t
owbar is used.
Cooling
Towing a trailer on a slope increases the temperature of the coolant.
As
the fan is electrically controlled, its cooling
c
apacity is not dependent on the engine speed.
F
T
o lower the engine speed, reduce your
s
peed.
The
maximum towed load on a long incline
d
epends on the gradient and the ambient
t
emperature.
In
all cases, keep a check on the coolant
t
emperature. F
I
f the warning lamp and the
S
TOP
warning lamp come on,
s
top the vehicle and switch off
t
he engine as soon as possible.
Braking
Towing a trailer increases the braking distance.
T o avoid overheating of the brakes, the use of
e
ngine braking is recommended.
Ty r e s
F Check the tyre pressures of the towing v
ehicle and of the trailer, observing the
re
commended
p
ressures.
Lighting
F Check the electrical lighting and signalling o
n the trailer and the headlamp beam
h
eight of your vehicle.
For
more information on Adjusting the
headlamp beam height , refer to the
corresponding
s
ection.
Driving
Page 132 of 523
130
Label on door panel
Before leaving the vehicle, check that the parking brake is applied: the
i
ndicator lamps in the instrument panel
a
nd the control lever must be on fixed,
n
ot
f
lashing.
If
the parking brake is not applied, there
i
s an audible signal and a message is
d
isplayed on opening the driver's door.
Never
leave a child alone inside the
v
ehicle with the ignition on, as they
c
ould release the parking brake.When
towing, parking on a steep slope, o
r if your vehicle is heavily laden,
t
urn the wheels towards the kerb and
e
ngage a gear (with a manual gearbox)
o
r place the gear selector at position P
with
an automatic gearbox.
For
towing, your vehicle is approved for
p
arking on slopes of up to 12%.
Manual operation
Application of the parking brake is confirmed by illumination of
t
he brake indicator lamp and
t
he P indicator lamp in the control
l
ever, accompanied by the display of
t
he
m
essage
"
Parking
b
rake
a
pplied".
Manual release
With the ignition on or the engine running, to release the parking brake:
F
p
ress the brake pedal,
F
w
hile maintaining pressure on the brake
p
edal, briefly push the control lever.
The
complete release of the parking brake
i
s confirmed by the brake indicator lamp and
t
he P indicator lamp in the control lever going
o
ff,
a
ccompanied
b
y
t
he
d
isplay
o
f
t
he
m
essage
"
Parking brake released".
If you push the control lever without
pressing
the brake pedal, the parking
b
rake will not be released and a
m
essage is displayed.
Manual application
With the vehicle stationary: briefly pull the control lever.
Confirmation of the command is signalled by flashing of the indicator lamp in the control
l
eve r.
Driving
Page 133 of 523
131
With the vehicle stationary, the parking brake is automatically applied when the engine
is switched off
by pressing the START/STOP
b
utton. Application
of the parking brake
i
s confirmed by illumination of
t
he brake indicator lamp and
t
he P indicator lamp in the control
l
ever, accompanied by the display of
t
he
m
essage
"
Parking
b
rake
a
pplied".
With
the engine stalled or in STOP
m
ode of Stop & Start, automatic
a
pplication does not take place.
In
automatic mode, you can manually
a
pply
o
r
r
elease
t
he
p
arking
b
rake
u
sing
t
he control lever.
Automatic operation
Automatic release
The complete release of the parking brake is confirmed by the brake
i
ndicator lamp and the P indicator
l
amp in the control lever going off,
a
ccompanied by the display of the
m
essage "Parking brake released".
When stationary with the engine running, do not depress the accelerator pedal unnecessarily, y
ou risk releasing the parking brake.
Ensure first that the engine is running and the driver's door is properly closed.
The
electric parking brake releases
automatically and progressively when you
press
the accelerator:
F
M
anual gearbox: fully depress the clutch
p
edal, engage 1
st or reverse gear; press t
he
accelerator
pedal and let up the clutch
ped
al.
F
A
utomatic
gearbox: select position D, M or
R
then
press
the
accelerator.
Automatic application
With an automatic gearbox, if the brake d oes not release automatically, check
t
hat the front doors are correctly closed.
4
Driving
Page 142 of 523
140
F Check that the symbol displayed in the i
nstrument panel agrees with the position
o
f the selector.
F
P
rogressively release the brake pedal.
F
I
f the parking brake is released, the vehicle
m
oves off.
I
f the parking brake is applied and
a
utomatic
ope
ration
i
s
a
ctivated,
a
ccelerate
a
way.
Never
press the accelerator and brake
p
edals at the same time. Braking and
a
cceleration should be done only with
t
he right foot. Pressing both pedals
t
ogether risks damaging the gearbox.
If
the brake does not release
a
utomatically, check that the front doors
a
re correctly closed. Never
leave children unsupervised in
t
he vehicle when the engine is running.
When
carrying out a maintenance
o
peration with the engine running,
a
pply
t
he parking brake and select position P. Never select position P or R unless the
vehicle
is at a complete stop with the
br
ake
a
pplied.
When
you want to engage reverse,
t
o avoid jolts, do not accelerate
i
mmediately after engaging R.
Changing
in
to
p
osition
R
is
accompanied
by an audible signal.
Never select position N
when driving.
I
f position N is engaged in error when
m
oving, allow the engine to idle, then
e
ngage position D to accelerate.
When
the engine is running at idle,
b
rakes released, if position R, D or M is
selected,
the vehicle will move even if
t
he accelerator is not pressed.
Driving
Page 144 of 523
142
Before switching off the engine, you can change to position P or N to be in neutral.
I
n either case, apply the parking brake to
i
mmobilise the vehicle, unless it is programmed
i
n automatic mode.
If the lever is not in position P ,
on opening the
d
river's door or approximately 45 seconds after
s
witching off the ignition there is an audible
s
ignal and a message appears:
F
m
ove the gear selector to position P; the
a
udible signal stops and the message
d
isappears.
Operating fault
Whenever parking, you must apply the parking brake to immobilise the vehicle, if automatic
o
peration has been deactivated.
Parking the vehicle
In all circumstances, ensure that the gear selector is in position P before
leaving
your vehicle. In the event of a fault with the
gearbox,
the service warning lamp
c
omes on in the instrument panel,
a
ccompanied by a message and an
a
udible
s
ignal.
In this case the gearbox goes into back-up
m
ode and stays in 3
rd gear. You may then feel a n
oticeable
jolt
when
going from P to R and from
N
to R .
This
jolt
does
not present any risk to the
g
earbox.
Do
not
exceed
60
mph (100 km/h) while also
o
bserving
legal
speed limits.
Have
it
checked
by
a
CITROËN dealer or a
q
ualified
w
orkshop.
In the event of a battery failure, use the
chock
to
immobilise
the
vehicle.
Driving
Page 148 of 523
146
Operating fault
Have it checked by a CITROËN dealer or a qualified w orkshop.
In
the event of a fault in STOP mode, the vehicle
m
ay stall.
All
of the instrument panel warning lamps come on.
Depending on version, an alert message may also be displayed, asking you to place the gear
s
elector lever at position N and put your foot on
t
he brake pedal.
It is then necessary to switch off the ignition and start the engine again using the "START/STOP" b
utton.
In the event of a fault with the system, this indicator lamp flashes for a few m
oments
t
hen
c
omes
o
n
c
ontinuously,
a
ccompanied by a message.
Opening the bonnet
Before
doing
anything
under
the
b
onnet,
deactivate
the
Stop
&
Start
s
ystem
to
avoid
the
risk
of
injury
related
t
o
an
automatic
change
to
START
m
ode.
Driving on flooded roads
Before
driving
through
a
flooded
road,
i
t
is
strongly
recommended
that
you
d
eactivate
the
Stop
&
Start
system.
For
more
information
on
Driving
advice ,
particularly
on
flooded
roads,
r
efer
to
the
corresponding
section. The
Stop & Start system requires a
b
attery of advanced technology and
sp
ecial
c
haracteristics.
All
work on this type of battery must
o
nly
be done by a CITROËN dealer
or
a
qualified workshop.
For
more information on the
12 V
batter y ,
refer to the corresponding
s
ection.
Driving
Page 191 of 523
189
Operation
Activating the function
With the engine running:
F I n the Driving menu, select the "Driving
assistance " tab, then "Panoramic visual
aid ".
With
this menu displayed, select one of the
t
hree views:
Deactivating the function
F Accelerate so as to exceed 18 mph
(30 km/h).
or
F
I
n the Driving
menu, select the "Driving
assistance " tab, then "Panoramic visual
aid ".
F
Sel
ect
"
Camera
O
ff".
Check
the cleanliness of the camera
l
enses
r
egularly.
High pressure jet wash
When
washing your vehicle, direct the
l
ance at least 30 cm away from the
c
amera.
"Front
camera".
"360°
camera".
"Rear
camera".
The
view
selected
is
displayed
in
the
in
strument
pan
el.
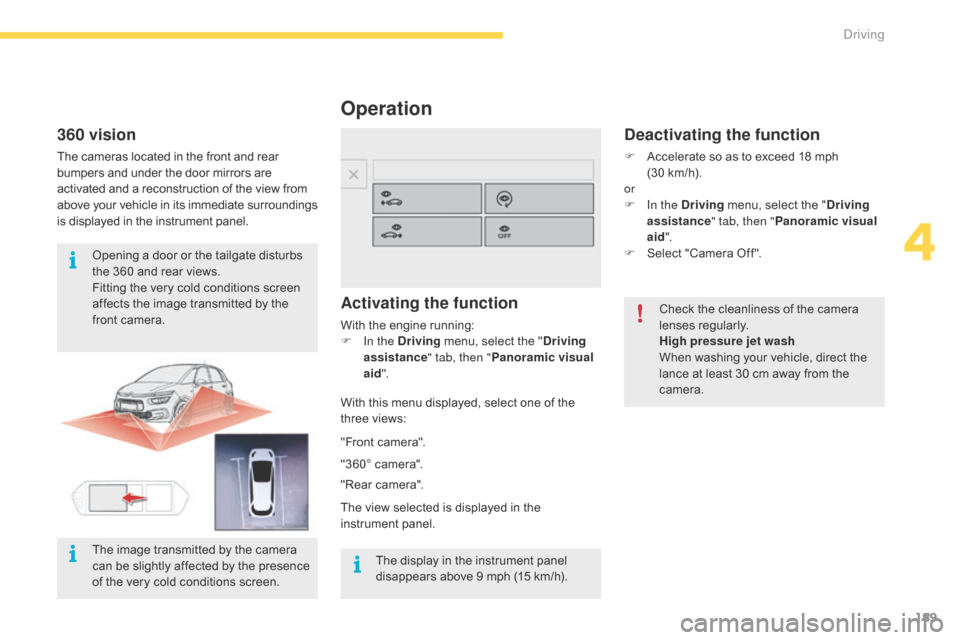
360 vision
The cameras located in the front and rear b umpers and under the door mirrors are a
ctivated and a reconstruction of the view from
a
bove
y
our
v
ehicle
i
n
i
ts
i
mmediate
s
urroundings
i
s displayed in the instrument panel.
Opening
a door or the tailgate disturbs
t
he 360 and rear views.
Fitting
the very cold conditions screen
a
ffects the image transmitted by the
f
ront camera.
The
display in the instrument panel
d
isappears above 9 mph (15 km/h).
The
image transmitted by the camera
c
an be slightly affected by the presence
o
f the very cold conditions screen.
4
Driving
Page 227 of 523
225
Anti-slip regulation (ASR)
Activation
This system is activated automatically each time the vehicle is started.
It
comes into operation in the event of a
p
roblem of grip.
Deactivation
In exceptional conditions (starting a vehicle which is bogged down, stuck in snow, on soft
g
round...), it may be advisable to deactivate
t
he DSC and ASR, so that the wheels can turn
f
reely and regain grip.
This
is
indicated
by
the
flashing
of
t
his
warning
lamp
in
the
instrument
pan
el. Reactivate
the systems as soon as the level of
g
rip permits.
F
I
n the Driving
menu, select the "Driving
assistance " tab, then "Anti-slip
regulation ".
This
indicator lamp comes on in the
in
strument
pan
el.
The
ASR system will no longer act
o
n the operation of the engine and
o
n the brakes in the event of an
i
nvoluntary change of trajectory.
After
an
impact,
have
the
system
checked
by
a
C
ITROËN
dealer
or
a
qualified
workshop.
Operating fault
Reactivation
The system is reactivated automatically every t
ime the ignition is switched back on or from 30
m
ph (50 km/h).
Below
30 mph (50 km/h), you can reactivate it
m
anually:
F
I
n the Driving
menu, select the "Driving
assistance " tab, then "Anti-slip
regulation ".
Illumination
of this warning lamp,
a
ccompanied by an audible signal
a
nd a message, indicate a fault with
t
he system.
Contact
a CITROËN dealer or a qualified
w
orkshop to have the system checked.
6
Safety
Page 258 of 523
256
The petrol or Diesel engine of your vehicle is fitted with a catalytic converter, a device which
h
elps to reduce the level of harmful emissions
i
n the exhaust gases.
For petrol engines, you must use unleaded fuel.The filler neck is narrower, allowing only unleaded petrol nozzles to be introduced.
If you have put in the wrong fuel
for your vehicle, you must have the
fuel tank drained and filled with
the correct fuel before star ting the
engine.
Fuel cut- of f
Your vehicle is equipped with a safety device w hich cuts off the fuel supply in the event of a
collision.
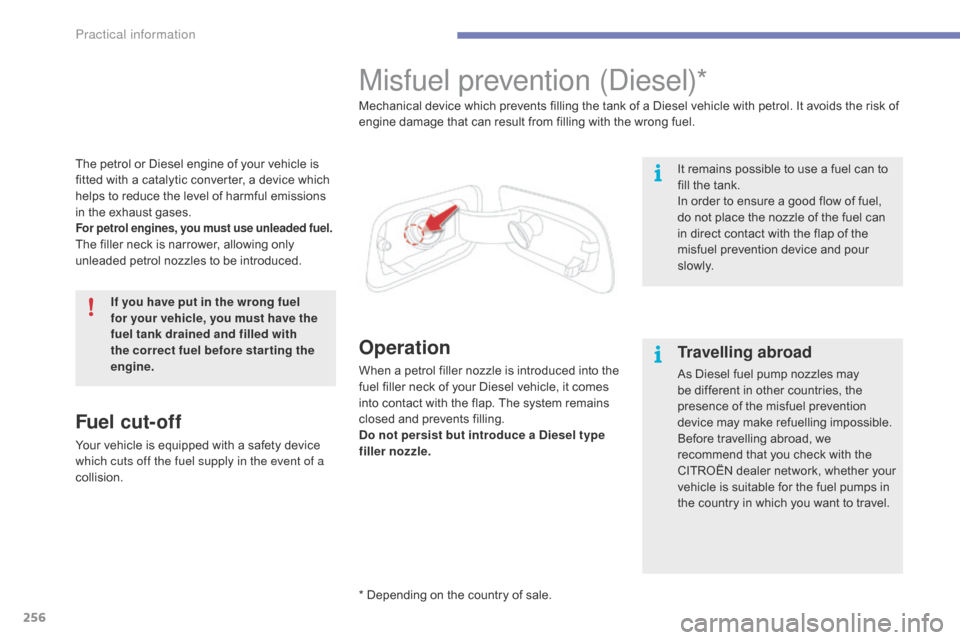
Misfuel prevention (Diesel)*
Operation
When a petrol filler nozzle is introduced into the f uel filler neck of your Diesel vehicle, it comes
i
nto contact with the flap. The system remains
c
losed and prevents filling.
Do not persist but introduce a Diesel type
filler nozzle. Mechanical device which prevents filling the tank of a Diesel vehicle with petrol. It avoids the risk of
e
ngine damage that can result from filling with the wrong fuel.
It remains possible to use a fuel can to
f
ill the tank.
In order to ensure a good flow of fuel,
d
o not place the nozzle of the fuel can
i
n direct contact with the flap of the
m
isfuel prevention device and pour
s
l ow l y.
Travelling abroad
As Diesel fuel pump nozzles may b
e different in other countries, the
p
resence of the misfuel prevention
d
evice may make refuelling impossible.
Before
travelling abroad, we
r
ecommend that you check with the
C
ITROËN dealer network, whether your
v
ehicle is suitable for the fuel pumps in
t
he country in which you want to travel.
* Depending
on
the
country
of
sale.
Practical information
Page 271 of 523
269
Bonnet
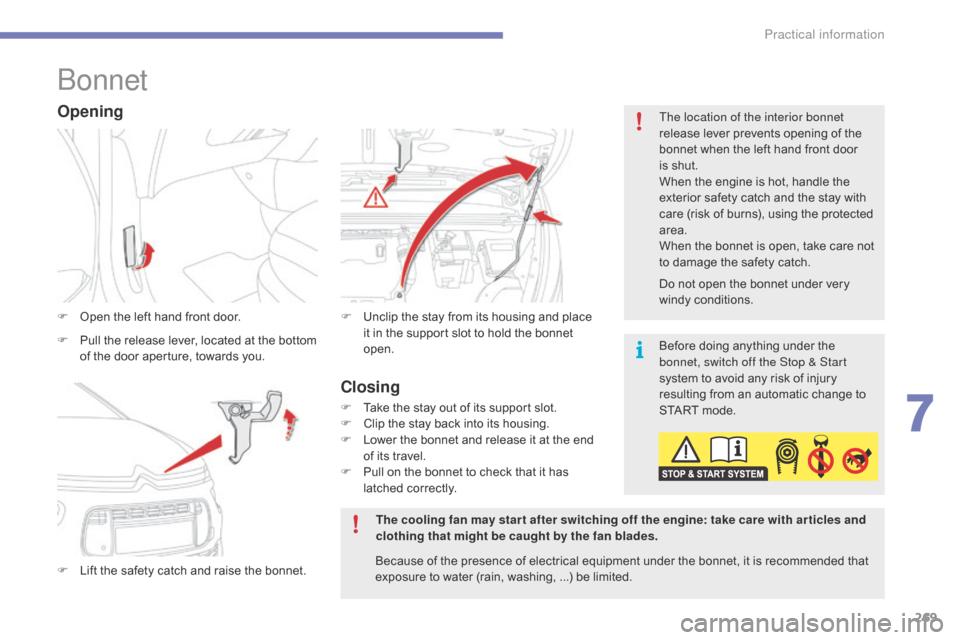
F Open the left hand front door.
F
L
ift the safety catch and raise the bonnet.F
U nclip the stay from its housing and place i
t in the support slot to hold the bonnet
ope
n.
Opening
F Pull the release lever, located at the bottom o
f the door aperture, towards you. Before
doing anything under the
b
onnet, switch off the Stop & Start
system
to avoid any risk of injury
r
esulting from an automatic change to
S
TART mode.
The cooling fan may star t after switching off the engine: take care with ar ticles and
clothing that might be caught by the fan blades. Do
not open the bonnet under very
wi
ndy
c
onditions.
The location of the interior bonnet
release lever prevents opening of the
b
onnet when the left hand front door
i
s shut.
When the engine is hot, handle the
e
xterior safety catch and the stay with
c
are (risk of burns), using the protected
a
rea.
When the bonnet is open, take care not
t
o damage the safety catch.
Because of the presence of electrical equipment under the bonnet, it is recommended that
e
xposure to water (rain, washing, ...) be limited.
Closing
F Take the stay out of its support slot.
F C lip the stay back into its housing.
F
L
ower the bonnet and release it at the end
o
f its travel.
F
P
ull on the bonnet to check that it has
l
atched correctly.
7
Practical information