window Citroen GRAND C4 PICASSO RHD 2016 2.G Owner's Manual
[x] Cancel search | Manufacturer: CITROEN, Model Year: 2016, Model line: GRAND C4 PICASSO RHD, Model: Citroen GRAND C4 PICASSO RHD 2016 2.GPages: 523, PDF Size: 13.63 MB
Page 4 of 523
Touch screen tablet 11
Instrument panels
1
7
Indicator
and warning lamps
2
1
Gauges
and indicators
3
7
Adjustment
buttons
4
5
Trip
computer
4
8
InstrumentsOver view
Electronic key - remote control 5
1
Keyless Entry and Starting
5
3
Central
locking
6
0
Doors
61
Boo
t
6
3
Motorised
tailgate
6
4
Hands-free
tailgate access
6
8
Alarm
7
0
Electric
windows
7
3
Access
Front seats 75
Rear seats
8
2
Seat
modularity
8
9
Steering
wheel adjustment
9
1
Ventilation
9
2
Heating
9
4
Dual-zone
m
anual
a
ir
c
onditioning
9
5
Dual-zone
automatic air conditioning
9
7
Front
demist - defrost
1
02
Rear
screen demist -
d
efrost
1
02
Scented
air freshener
1
03
Interior
fittings
1
05
Courtesy
lamps
1
19
Interior
mood lighting
1
20
Ease of use a nd c omfort
Driving recommendations 1 21
Starting-switching off the engine with
the
electronic key
1
23
Starting-switching
off the engine with
Keyless
Entry and Starting
1
25
Electric
parking brake
1
29
Hill
start assist
1
36
5 -speed
manual gearbox
1
37
6 -speed
manual gearbox
1
37
Automatic
gearbox
1
38
Gear
ef ficiency indicator
1
43
Stop & Start
1
44
Memorising
speeds
1
47
Speed
limit recognition
1
48
Speed
limiter
1
52
Cruise
control
1
55
Dynamic
cruise control
1
58
Dynamic
cruise control
with
Stop function
1
65
Collision
risk alert
1
74
Assisted
lane departure
warning
system
1
76
Blind
spot monitoring system
1
80
Fatigue
detection system
1
83
Parking
sensors
1
85
Reversing
camera
1
87
360
Vision
1
88
Park
Assist
1
90
Under-inflation
d
etection
1
98
Driving
Eco-driving
Contents
Page 6 of 523
4
Exterior
Fuel tank, misfuel
p revention 25 5-257
Wipers,
screenwash
2
16 -220
Changing a wiper blade
2
66
Exterior welcome lighting
2
12-213
Door mirror spotlamps
2
12
Cornering lighting
2
14
Directional
l
ighting
2
15
Adjusting the headlamp beam height 213
Changing bu
lbs 2
99-303
-
f
ront
lamps
-
fo
glamps
-
d
irection
indicator
repeaters
Very
cold
climate
screen(s)
2
59
Door
mirrors
2
01-202
Panoramic
sunroof
2
21
Roof
bars
2
67
Accessories
26
4-265
ESC:
ABS,
EBA,
ASR,
DSC
2
23 -225
Tyre
under-inflation
detection
1
98 -200
Tyre
pressures
3
29
Temporary
puncture
repair
kit
2
82-288
Changing
a
wheel
2
89 -298
-
t
ools
-
s
pare
wheel
-
r
emoving
/
refitting
Snow
chains
2
58
Changing
bu
lbs
3
03-307
-
r
ear
lamps
-
3
rd
brake
lamp
-
n
umber
plate
lamps
-
fo
glamps
Parking
sensors
1
85 -186
Reversing
camera
1
87
360
Vision
1
88 -189
Park
Assist
1
90 -197
Towbar
1
22,
262
Towing
(advice)
3
17-318
Towbar
with
quickly
detachable
tow
ball
2
60-261
Boot
6
3-69
-
o
pening
/
closing
- em
ergency r
elease
Motorised
tailgate
6
4- 67
Hands-free
tailgate
6
8 - 69
Electronic
key
/
"Keyless
Entry
and
S
tarting"
system
5
1-59
-
o
pening
/
closing
-
a
nti-theft
protection
-
b
ack-up
control
-
b
attery
Doors
61
- 62
-
o
pening
/
closing
-
em
ergency
c
ontrol
Central
locking
6
0
Alarm
7
0-72
Electric
windows
7
3 -74
Over view
Page 8 of 523
6
Instruments and controls
Touch screen tablet 11-16
Equipment se ttings 1 3-16
Ventilation
9
2-93
Heating
9
4
Dual-zone manual a ir c onditioning 95-96
Dual-zone
automatic
air
c
onditioning
9
7-101
Demisting
/
defrosting
1
02 Door
mirrors
2
01-202
Electric windows, deactivating
7
3 -74
5/6 -speed manual gearbox 1 37
Automatic gearbox
1
38 -142
Opening
the
bonnet
2
69 Courtesy lamps
1
19
Rear view mirror
2
02
Child surveillance mirror
2
03
Panoramic sunroof
2
21
Emergency or assistance
c
all
2
22, 330 -331
Instrument
panels
1
7-20
Gear
efficiency
indicator
1
43
Lighting
dimmer
4
6
Warning
lam
ps
2
1-36
I n di c ato r s
3
7- 4 5
-
s
ervice
indicator
-
o
il
level
indicator
-
r
ange
indicator
for
the
AdBlue
® fluid
E lectric parking brake
1
29 -135
Dashboard
fuses
3
08 -311
Over view
Page 11 of 523
9
Optimise the use of your gearbox
With a manual gearbox, move off gently and change up without waiting. During acceleration change up early.
With
an automatic gearbox, give preference to automatic mode and
a
void pressing the accelerator pedal heavily or suddenly.
Control the use of your electrical
equipment
Before moving off, if the passenger compartment is too warm, ventilate it by opening the windows and air vents before using the air
c
onditioning.
Above
30 mph (50 km/h), close the windows and leave the air vents
ope
n.
Remember
to make use of equipment that can help keep the temperature
i
n the passenger compartment down (sunroof and window blinds...).
Switch
off the air conditioning, unless it has automatic regulation, as
s
oon as the desired temperature is attained.
Switch
off the demisting and defrosting controls, if not automatic.
Switch
off the heated seat as soon as possible.
Switch
off the headlamps and front foglamps when the ambient light
l
evel does not require their use.
Avoid
running the engine before moving off, particularly in winter; your
v
ehicle will warm up much faster while driving.
As
a passenger, if you avoid connecting your multimedia devices
(
film, music, video game...), you will contribute towards limiting the
c
onsumption of electrical energy, and so of fuel.
Disconnect
your portable devices before leaving the vehicle.
Eco-driving
Eco-driving is a range of everyday practices that allow the motorist to optimise their fuel consumption and CO2 emissions.
Drive smoothly
Maintain a safe distance between vehicles, use engine braking rather than the brake pedal, and press the accelerator progressively. These
p
ractices contribute towards a reduction in fuel consumption and CO
2
emissions
and
also
help
reduce
the
background
traffic
noise.
If
your
vehicle
has
cruise
control,
make
use
of
the
system
at
speeds
a
bove
25
mph
(40
km/h)
when
the
traffic
is
flowing
well.
The
gear
efficiency
indicator
invites
you
to
engage
the
most
suitable
g
ear:
as
soon
as
the
indication
is
displayed
in
the
instrument
panel,
f
ollow
it
straight
away.
For
vehicles
fitted
with
an
automatic
gearbox,
this
indicator
appears
o
nly
in
manual
mode.
.
Eco-driving
Page 22 of 523
20
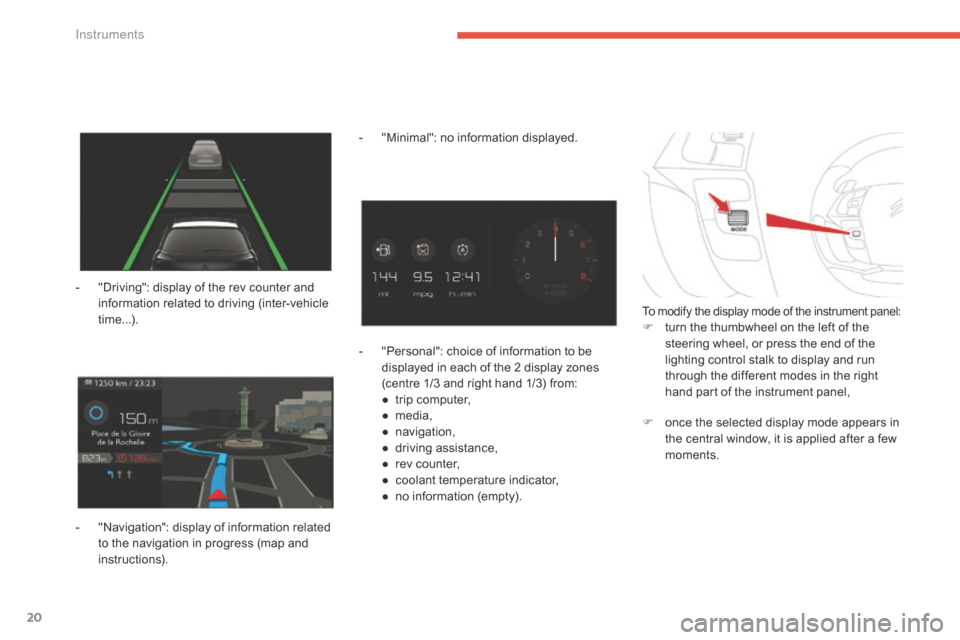
- "Driving": display of the rev counter and i
nformation related to driving (inter-vehicle
t
ime...).
-
"
Navigation": display of information related
t
o the navigation in progress (map and
i
nstructions). -
"
Minimal": no information displayed.
-
"
Personal": choice of information to be
d
isplayed in each of the 2 display zones
(
centre 1/3 and right hand 1/3) from:
●
t
rip computer,
●
m
edia,
●
n
avigation,
●
d
riving assistance,
●
r
ev counter,
●
c
oolant temperature indicator,
●
n
o information (empty).
To modify the display mode of the instrument panel:F turn the thumbwheel on the left of the s
teering wheel, or press the end of the
l
ighting control stalk to display and run
t
hrough the different modes in the right
h
and part of the instrument panel,
F
o
nce the selected display mode appears in
t
he central window, it is applied after a few
m
oments.
In
Page 50 of 523
48
Trip computer
T ype 1 instrument panel
System that gives you information on the journey in progress (range, fuel consumption…).
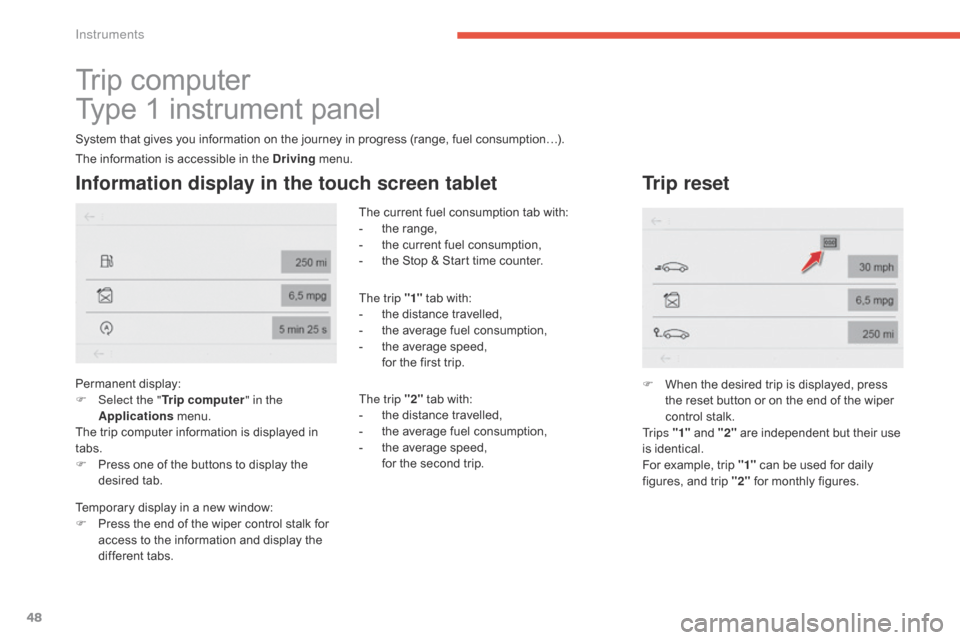
Information display in the touch screen tablet
Permanent display:
F Sel ect the " Trip computer " in the
Applications
menu.
The
trip computer information is displayed in
t
abs.
F
P
ress one of the buttons to display the
de
sired
t
ab. The
current fuel consumption tab with:
-
t
he range,
-
t
he current fuel consumption,
-
t
he Stop & Start time counter.
The trip "1"
tab with:
-
t
he distance travelled,
-
t
he average fuel consumption,
-
t
he average speed,
f
or the first trip.
The trip "2" tab with:
-
t
he distance travelled,
-
t
he average fuel consumption,
-
t
he average speed,
f
or the second trip.
Trip reset
F When the desired trip is displayed, press t
he reset button or on the end of the wiper
c
ontrol stalk.
Tr i p s "1"
and "2"
are independent but their use
i
s identical.
For
example, trip "1"
can be used for daily
f
igures, and trip "2"
for monthly figures.
The
information
is
accessible
in
the
Driving
menu.
Temporary
display
in
a
new
window:
F
P
ress
the
end
of
the
wiper
control
stalk
for
a
ccess
to
the
information
and
display
the
d
ifferent
tabs.
Instruments
Page 51 of 523
49
Trip computer
T ype 2 instrument panel
Information display in the instrument panel
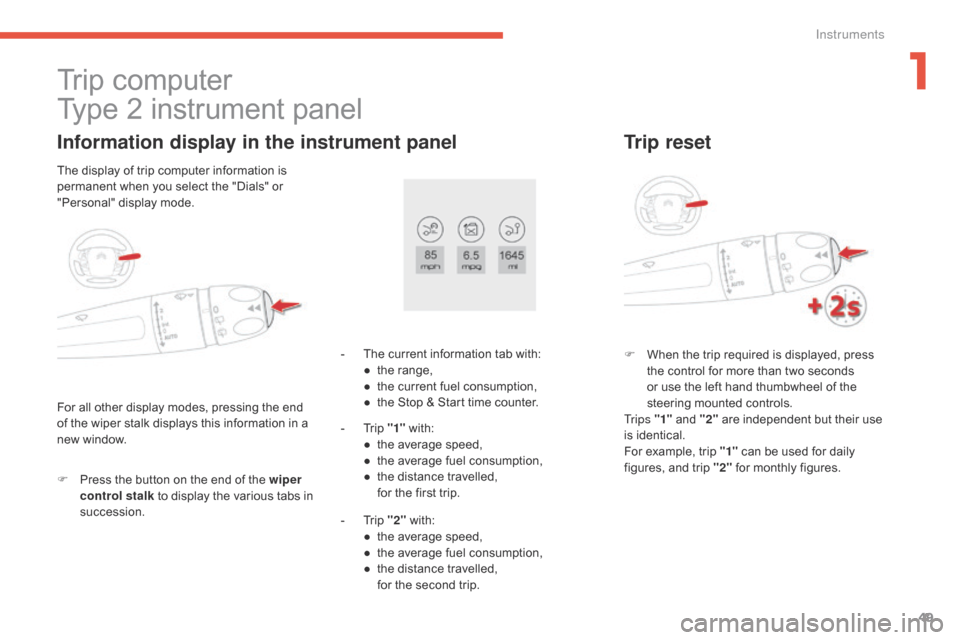
F Press the button on the end of the wiper
control stalk to display the various tabs in
s
uccession. -
T
he current information tab with:
●
t
he range,
●
t
he current fuel consumption,
●
t
he Stop & Start time counter.
-
T
rip "1"
w
ith:
●
t
he average speed,
●
t
he average fuel consumption,
● t he distance travelled, f
or the first trip.
-
T
rip "2"
w
ith:
●
t
he average speed,
●
t
he average fuel consumption,
●
t
he distance travelled,
f
or the second trip.
Trip reset
F When the trip required is displayed, press t
he control for more than two seconds
o
r use the left hand thumbwheel of the
s
teering mounted controls.
Tr i p s "1"
and "2"
are independent but their use
i
s identical.
For
example, trip "1"
can be used for daily
f
igures, and trip "2"
for monthly figures.
For
all
other
display
modes,
pressing
the
end
o
f
the
wiper
stalk
displays
this
information
in
a
n
ew
window.
The
display
of
trip
computer
information
is
p
ermanent
when
you
select
the
"Dials"
or
"
Personal"
display
mode.
1
Instruments
Page 54 of 523
52
Deadlocking renders the interior door controls i noperative.
It
also deactivates the manual central
l
ocking button.
Therefore,
never leave anyone inside
t
he vehicle when it is deadlocked.
Deadlocking
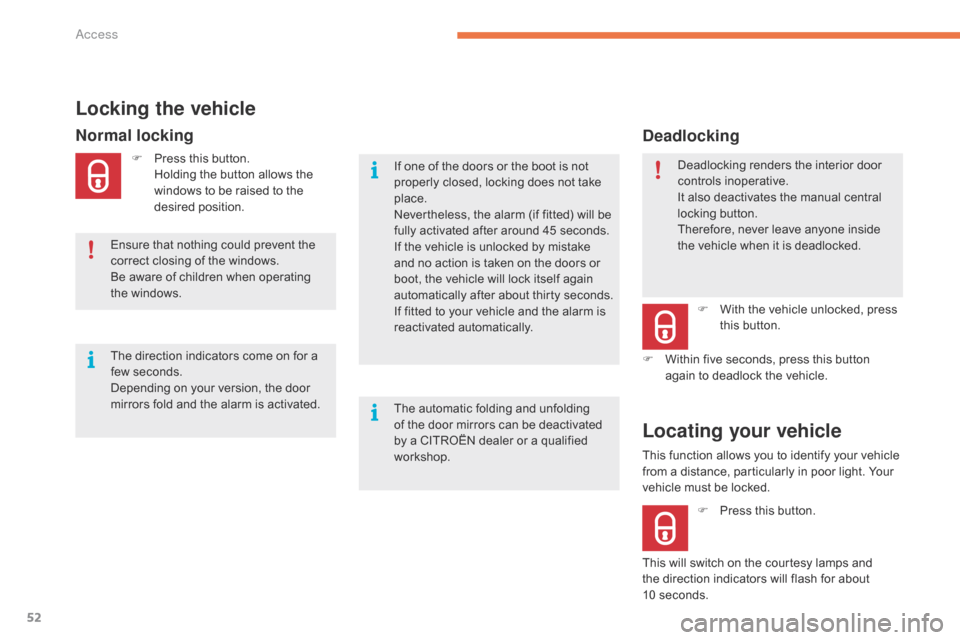
F With the vehicle unlocked, press t
his button.
F
W
ithin five seconds, press this button
a
gain
to deadlock the vehicle.
This
function allows you to identify your vehicle
f
rom
a
distance, particularly in poor light. Your
v
ehicle
must be locked.
Locating your vehicle
F Press this button.
This
will
switch on the courtesy lamps and
t
he
direction indicators will flash for about
1
0 seconds.
F
P
ress
this
button.
H
olding
the
button
allows
the
w
indows
to
be
raised
to
the
de
sired
p
osition.
Normal locking
If one of the doors or the boot is not p
roperly closed, locking does not take
p
lace.
Nevertheless,
the alarm (if fitted) will be
f
ully activated after around 45 seconds.
If
the vehicle is unlocked by mistake
a
nd no action is taken on the doors or
b
oot, the vehicle will lock itself again
a
utomatically after about thirty seconds.
If
fitted to your vehicle and the alarm is
r
eactivated
a
utomatically.
The
direction
indicators
come
on
for
a
f
ew
seconds.
Depending
on
your
version,
the
door
m
irrors
fold
and
the
alarm
is
activated.
Locking the vehicle
Ensure that nothing could prevent the c orrect closing of the windows.
Be
aware of children when operating
t
he
w
indows.
The
automatic folding and unfolding
o
f the door mirrors can be deactivated
b
y a CITROËN dealer or a qualified
w
orkshop.
Access
Page 56 of 523
54
Ensure that nothing could prevent the correct operation of the windows.
Be
aware of children when operating
t
he
w
indows.
Locking the vehicle
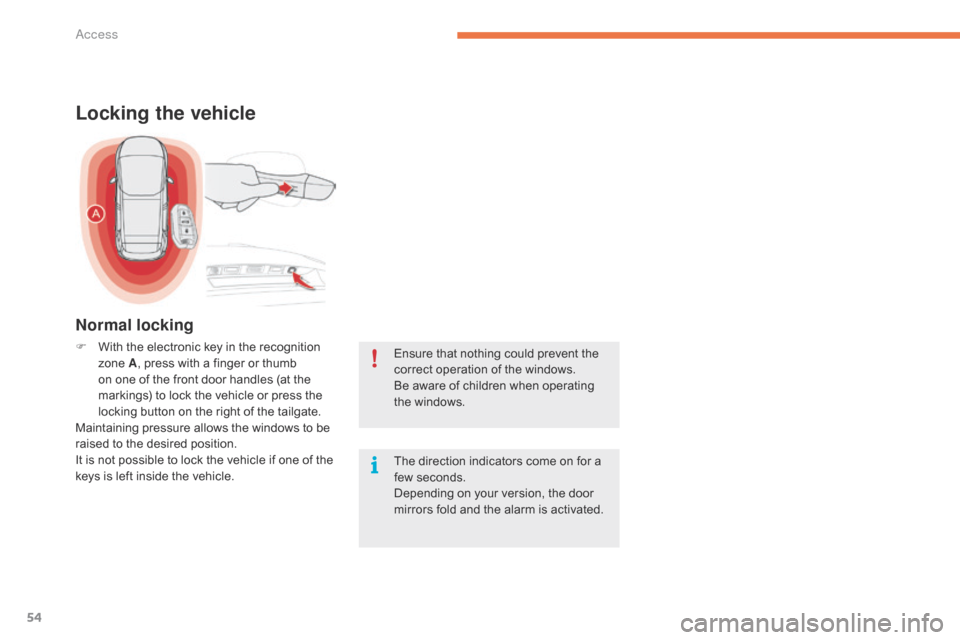
F With the electronic key in the recognition z
one A,
press with a finger or thumb
o
n one of the front door handles (at the
m
arkings) to lock the vehicle or press the
l
ocking button on the right of the tailgate.
Maintaining
pressure allows the windows to be
r
aised to the desired position.
It
is not possible to lock the vehicle if one of the
k
eys is left inside the vehicle. The
direction indicators come on for a
f
ew seconds.
Depending
on your version, the door
m
irrors fold and the alarm is activated.
Normal locking
Access
Page 73 of 523
71
OFF
Locking the vehicle with exterior perimeter
monitoring only
Deactivate the interior volumetric monitoring to avoid unwanted triggering of the alarm in
c
ertain cases such as:
-
l
eaving a window partially open,
-
w
ashing your vehicle,
-
c
hanging a wheel,
-
t
owing your vehicle,
-
t
ransport on a ferry.
Deactivating the volumetric
monitoring
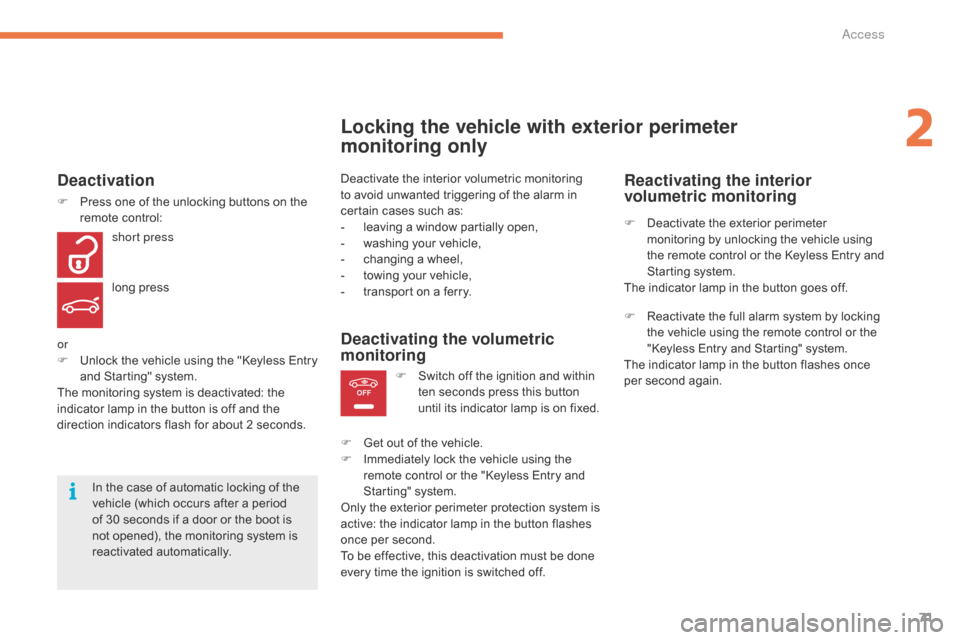
F Switch off the ignition and within t
en seconds press this button
u
ntil its indicator lamp is on fixed.
F
G
et
out of the vehicle.
F
I
mmediately lock the vehicle using the
r
emote control or the "Keyless Entry and
S
tarting" system.
Only
the
exterior perimeter protection system is
a
ctive:
the indicator lamp in the button flashes
o
nce
per
second.
To
be
effective, this deactivation must be done
e
very
time the ignition is switched off.
In
the
case
of
automatic
locking
of
the
v
ehicle
(which
occurs
after
a
period
o
f
30
seconds
if
a
door
or
the
boot
is
n
ot
opened),
the
monitoring
system
is
r
eactivated
a
utomatically.
Deactivation
F Press one of the unlocking buttons on the r
emote control:
short press
long
press
or
F
U
nlock the vehicle using the "Keyless Entry
a
nd Starting" system.
The
monitoring system is deactivated: the
i
ndicator lamp in the button is off and the
d
irection indicators flash for about 2 seconds.
Reactivating the interior
volumetric monitoring
F Deactivate the exterior perimeter m
onitoring by unlocking the vehicle using
t
he remote control or the Keyless Entry and
S
tarting system.
The
indicator lamp in the button goes off.
F
R
eactivate the full alarm system by locking
t
he vehicle using the remote control or the
"
Keyless Entry and Starting" system.
The
indicator lamp in the button flashes once
p
er second again.
2
Access