clock setting Citroen JUMPER 2008.5 2.G Owner's Manual
[x] Cancel search | Manufacturer: CITROEN, Model Year: 2008.5, Model line: JUMPER, Model: Citroen JUMPER 2008.5 2.GPages: 163, PDF Size: 2.57 MB
Page 51 of 163

54
Ventilation
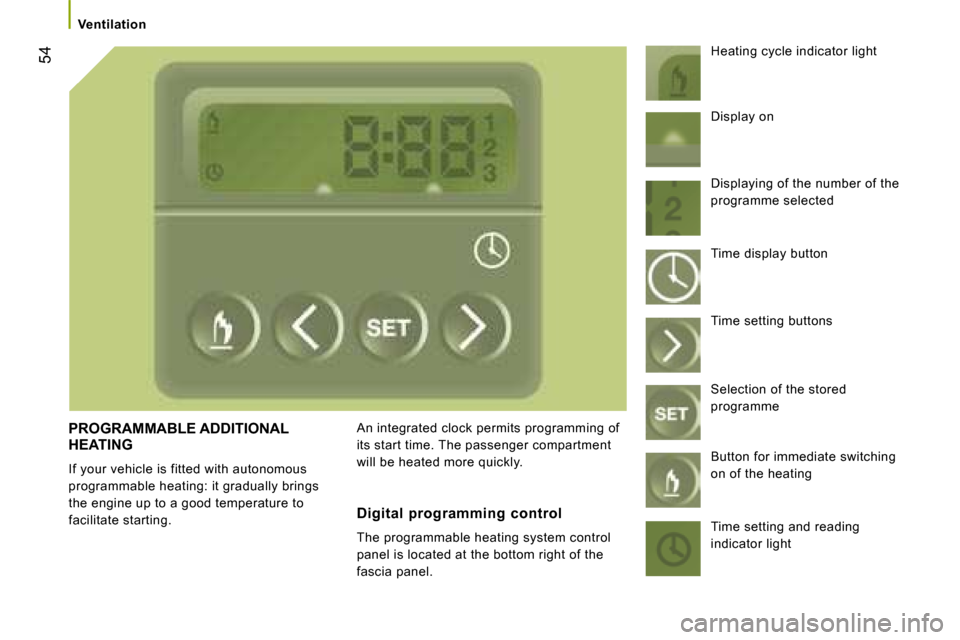
PROGRAMMABLE ADDITIONAL HEATING
If your vehicle is fitted with autonomous
programmable heating: it gradually brings
the engine up to a good temperature to
facilitate starting. An integrated clock permits programming of
its start time. The passenger compartment
will be heated more quickly. Heating cycle indicator light
Digital programming control
The programmable heating system control
panel is located at the bottom right of the
fascia panel. Display on
Displaying of the number of the
programme selected
Time display button
Time setting buttons
Selection of the stored
programme
Button for immediate switching
on of the heating
Time setting and reading
indicator light
Page 52 of 163

55
3
ERGONOMICS AND COMFORT
Ventilation
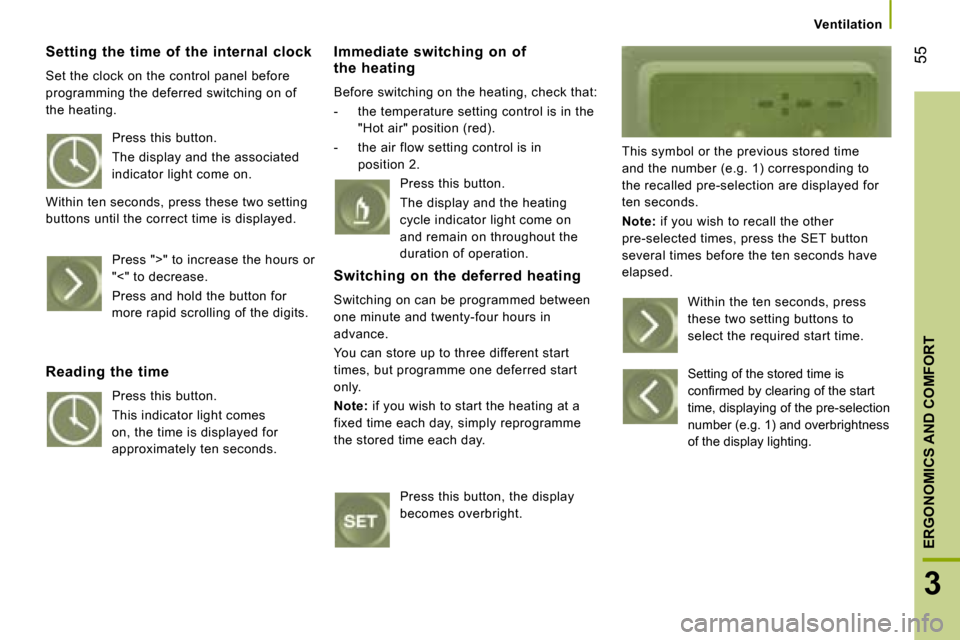
Setting the time of the internal clock
Set the clock on the control panel before
programming the deferred switching on of
the heating.
Immediate switching on of the heating
Before switching on the heating, check that:
- the temperature setting control is in the "Hot air" position (red).
- the air flow setting control is in position 2. This symbol or the previous stored time
and the number (e.g. 1) corresponding to
the recalled pre-selection are displayed for
ten seconds.
Note: if you wish to recall the other
pre-selected times, press the SET button
several times before the ten seconds have
elapsed.
Press this button.
The display and the associated
indicator light come on.
Within ten seconds, press these two setting
buttons until the correct time is displayed.
Press ">" to increase the hours or
"<" to decrease.
Press and hold the button for
more rapid scrolling of the digits.
Reading the time
Press this button.
This indicator light comes
on, the time is displayed for
approximately ten seconds. Press this button.
The display and the heating
cycle indicator light come on
and remain on throughout the
duration of operation.
Switching on the deferred heating
Switching on can be programmed between
one minute and twenty-four hours in
advance.
You can store up to three different start
times, but programme one deferred start
only.
Note
: if you wish to start the heating at a
fixed time each day, simply reprogramme
the stored time each day.
Press this button, the display
becomes overbright. Within the ten seconds, press
these two setting buttons to
select the required start time.
Setting of the stored time is
�c�o�n�fi� �r�m�e�d� �b�y� �c�l�e�a�r�i�n�g� �o�f� �t�h�e� �s�t�a�r�t�
time, displaying of the pre-selection
number (e.g. 1) and overbrightness
of the display lighting.
Page 70 of 163

73
4
IN-CAR TECHNOLOGY
Mode
Menu… Press... Sub-menu… Press... Select…
Confirm
and exit
Enables you to...
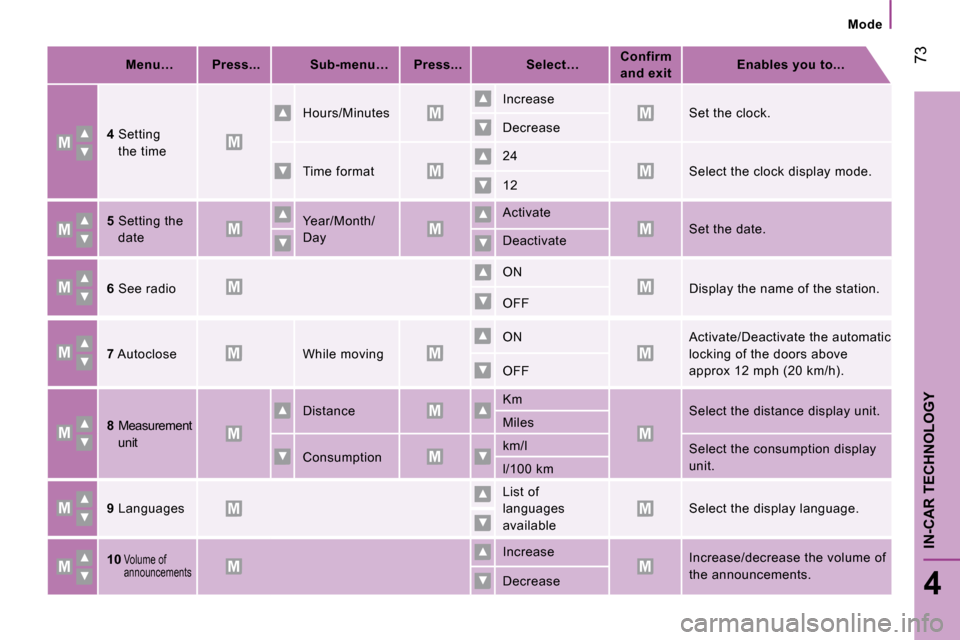
4 Setting
the time Hours/Minutes
Increase
Set the clock.
Decrease
Time format 24
Select the clock display mode.
12
5 Setting the
date Year/Month/
Day
Activate
Set the date.
Deactivate
6 See radio
ON
Display the name of the station.
OFF
7 Autoclose
While moving
ON
Activate/Deactivate the automatic
locking of the doors above
approx 12 mph (20 km/h).
OFF
8 Measurement
unit Distance
Km
Select the distance display unit.
Miles
Consumption km/l
Select the consumption display
unit.
l/100 km
9 Languages
List of
languages
available
Select the display language.
10
Volume of
announcements Increase
Increase/decrease the volume of
the announcements.
Decrease