height Citroen JUMPER DAG 2008.5 2.G Owner's Manual
[x] Cancel search | Manufacturer: CITROEN, Model Year: 2008.5, Model line: JUMPER DAG, Model: Citroen JUMPER DAG 2008.5 2.GPages: 163, PDF Size: 2.56 MB
Page 5 of 163
8
Familiarisation
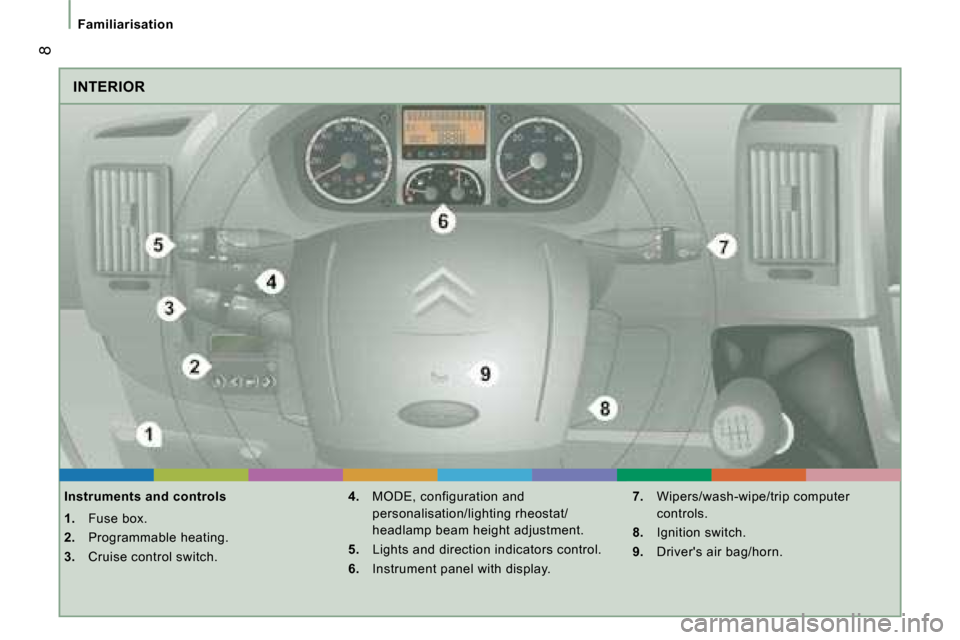
INTERIOR
Instruments and controls
1. Fuse box.
2. Programmable heating.
3. Cruise control switch.
4. MODE, configuration and
personalisation/lighting rheostat/
headlamp beam height adjustment.
5. Lights and direction indicators control.
6. Instrument panel with display.
7. Wipers/wash-wipe/trip computer
controls.
8. Ignition switch.
9. Driver's air bag/horn.
Page 7 of 163
2
10
Familiarisation
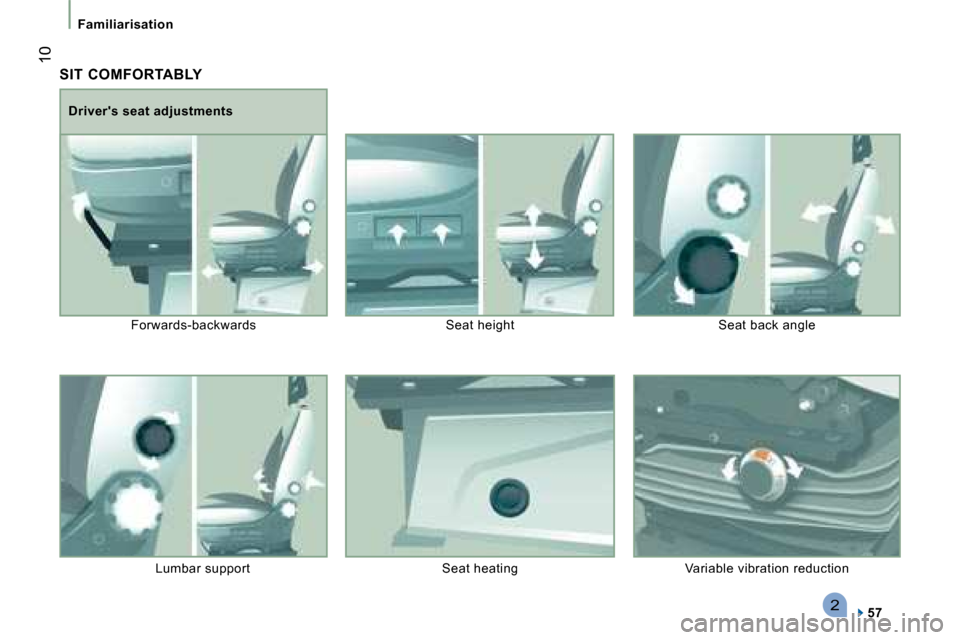
SIT COMFORTABLY
57
Driver's seat adjustments
Forwards-backwards Seat height Seat back angle
Lumbar support Seat heating Variable vibration reduction
Page 8 of 163
523
5
1
FAMILIARISATION
11
Familiarisation
SIT COMFORTABLY
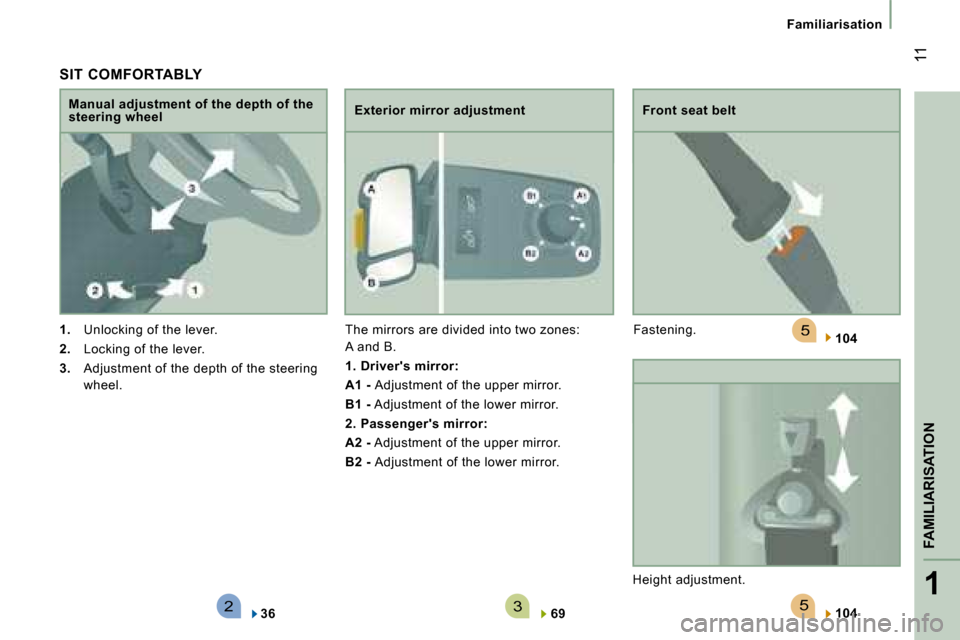
1. Unlocking of the lever.
2. Locking of the lever.
3. Adjustment of the depth of the steering
wheel.
Manual adjustment of the depth of the steering wheel Exterior mirror adjustment
The mirrors are divided into two zones:
A and B.
1. Driver's mirror:
A1 - Adjustment of the upper mirror.
B1 - Adjustment of the lower mirror.
2. Passenger's mirror:
A2 - Adjustment of the upper mirror.
B2 - Adjustment of the lower mirror.
36 69
Front seat belt
Fastening.
Height adjustment.
104
104
Page 14 of 163
4321
FAMILIARISATION
17
Familiarisation
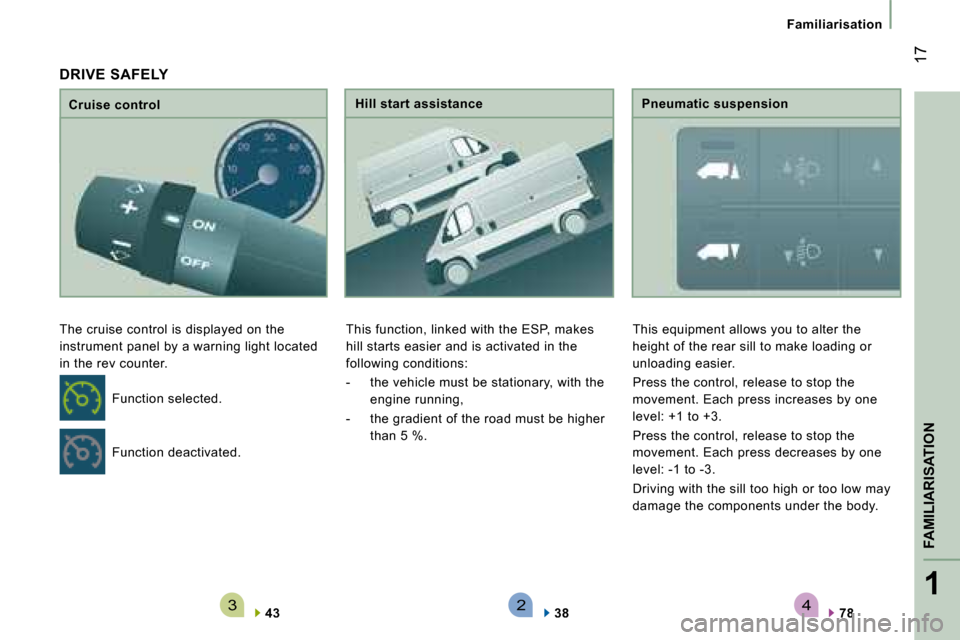
Cruise control
The cruise control is displayed on the
instrument panel by a warning light located
in the rev counter.
43
Hill start assistance
This function, linked with the ESP, makes
hill starts easier and is activated in the
following conditions:
- the vehicle must be stationary, with the
engine running,
- the gradient of the road must be higher
than 5 %.
38
Pneumatic suspension
This equipment allows you to alter the
height of the rear sill to make loading or
unloading easier.
Press the control, release to stop the
movement. Each press increases by one
level: +1 to +3.
Press the control, release to stop the
movement. Each press decreases by one
level: -1 to -3.
Driving with the sill too high or too low may
damage the components under the body.
78
Function deactivated.
Function selected.
DRIVE SAFELY
Page 23 of 163
26
Instruments and controls
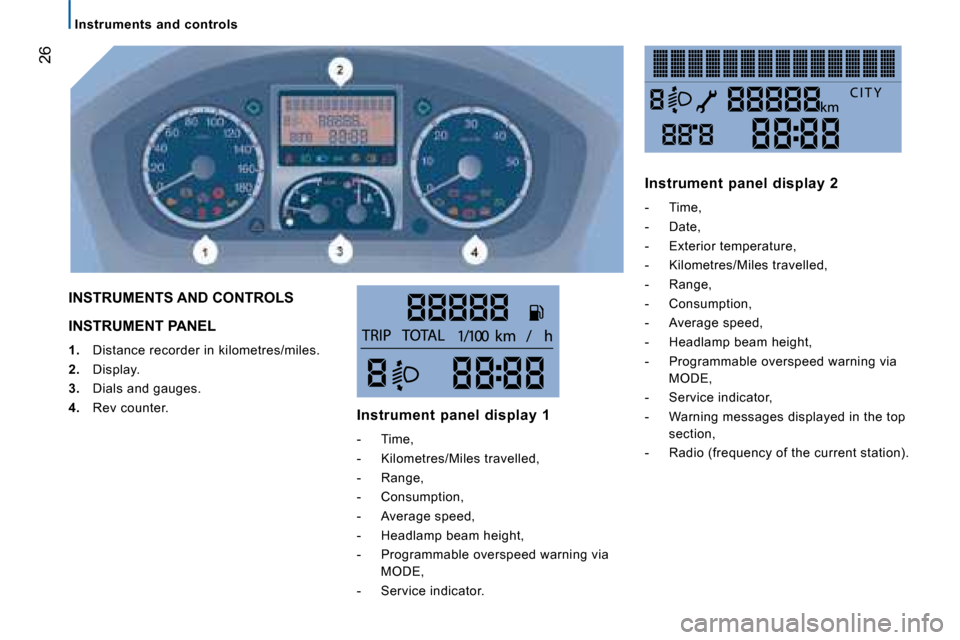
INSTRUMENT PANEL
1. Distance recorder in kilometres/miles.
2. Display.
3. Dials and gauges.
4. Rev counter.
INSTRUMENTS AND CONTROLS
Instrument panel display 1
- Time,
- Kilometres/Miles travelled,
- Range,
- Consumption,
- Average speed,
- Headlamp beam height,
- Programmable overspeed warning via MODE,
- Service indicator. Instrument panel display 2
- Time,
- Date,
- Exterior temperature,
- Kilometres/Miles travelled,
- Range,
- Consumption,
- Average speed,
- Headlamp beam height,
- Programmable overspeed warning via
MODE,
- Service indicator,
- Warning messages displayed in the top section,
- Radio (frequency of the current station).
Page 30 of 163
33
2
READY TO SET OFF
Instruments and controls
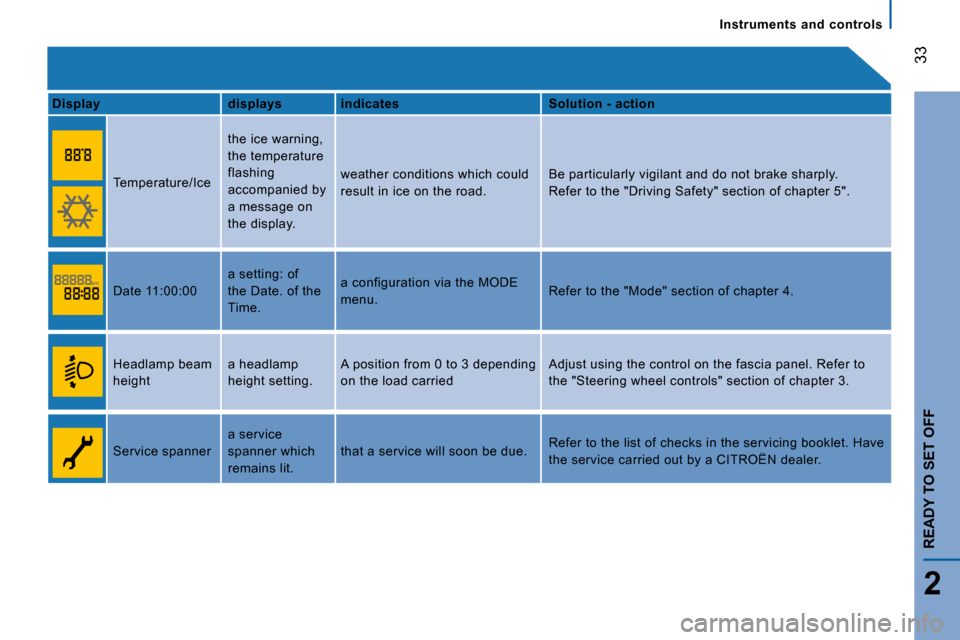
Display displays indicates Solution - action
Temperature/Ice
the ice warning,
the temperature
flashing
accompanied by
a message on
the display. weather conditions which could
result in ice on the road.
Be particularly vigilant and do not brake sharply.
Refer to the "Driving Safety" section of chapter 5" .
Date 11:00:00 a setting: of
the Date. of the
Time. a configuration via the MODE
menu.
Refer to the "Mode" section of chapter 4.
Headlamp beam
height a headlamp
height setting. A position from 0 to 3 depending
on the load carried Adjust using the control on the fascia panel. Refe
r to
the "Steering wheel controls" section of chapter 3.
Service spanner a service
spanner which
remains lit. that a service will soon be due.
Refer to the list of checks in the servicing boo
klet. Have
the service carried out by a CITROËN dealer.
Page 38 of 163
41
3
ERGONOMICS AND COMFORT
Steering wheel controls
AUTOMATIC LIGHTING
If your vehicle is fitted with this function,
the side lights and dipped headlamps are
switched on automatically if the light is
poor and when continuous operation of the
windscreen wipers is detected.
In fog or snow, the brightness sensor may
detect sufficient light. Therefore, the lights
will not be switched on automatically. If
necessary, you must switch on the dipped
headlamps manually.
They are switched off when the light returns
to a sufficient level or after the windscreen
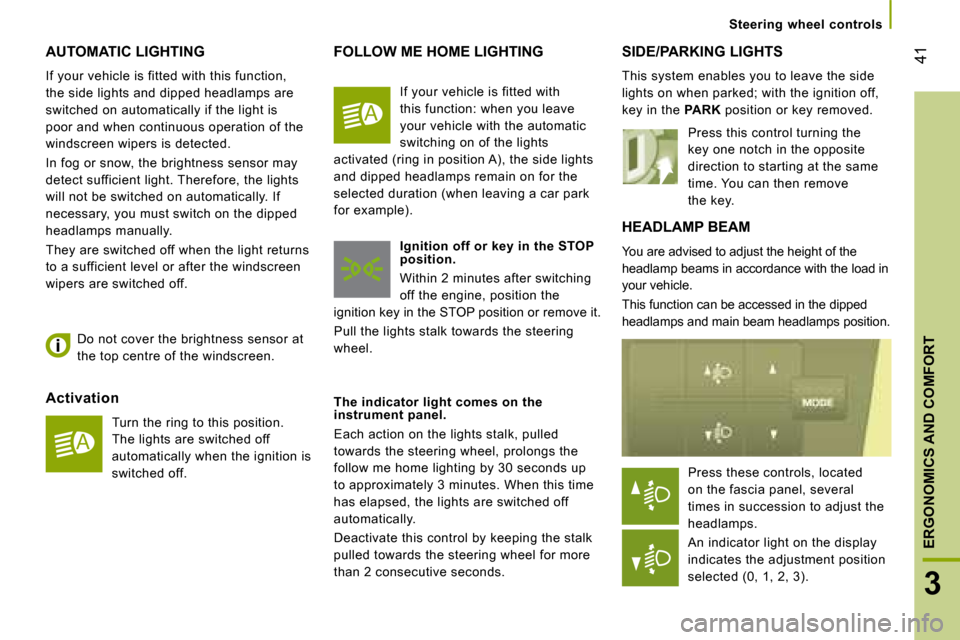
wipers are switched off. HEADLAMP BEAM
You are advised to adjust the height of the
headlamp beams in accordance with the load in
your vehicle.
This function can be accessed in the dipped
headlamps and main beam headlamps position.
SIDE/PARKING LIGHTS
This system enables you to leave the side
lights on when parked; with the ignition off,
key in the
PARK position or key removed.
Activation
Turn the ring to this position.
The lights are switched off
automatically when the ignition is
switched off.
Do not cover the brightness sensor at
the top centre of the windscreen.
FOLLOW ME HOME LIGHTING
Ignition off or key in the STOP
position.
Within 2 minutes after switching
off the engine, position the
ignition key in the STOP position or remove it.
Pull the lights stalk towards the steering
wheel.
The indicator light comes on the
instrument panel.
Each action on the lights stalk, pulled
towards the steering wheel, prolongs the
follow me home lighting by 30 seconds up
to approximately 3 minutes. When this time
has elapsed, the lights are switched off
automatically.
Deactivate this control by keeping the stalk
pulled towards the steering wheel for more
than 2 consecutive seconds. Press this control turning the
key one notch in the opposite
direction to starting at the same
time. You can then remove
the key.
If your vehicle is fitted with
this function: when you leave
your vehicle with the automatic
switching on of the lights
activated (ring in position A), the side lights
and dipped headlamps remain on for the
selected duration (when leaving a car park
for example).
Press these controls, located
on the fascia panel, several
times in succession to adjust the
headlamps.
An indicator light on the display
indicates the adjustment position
selected (0, 1, 2, 3).
Page 54 of 163
3
ERGONOMICS AND COMFORT
Seats
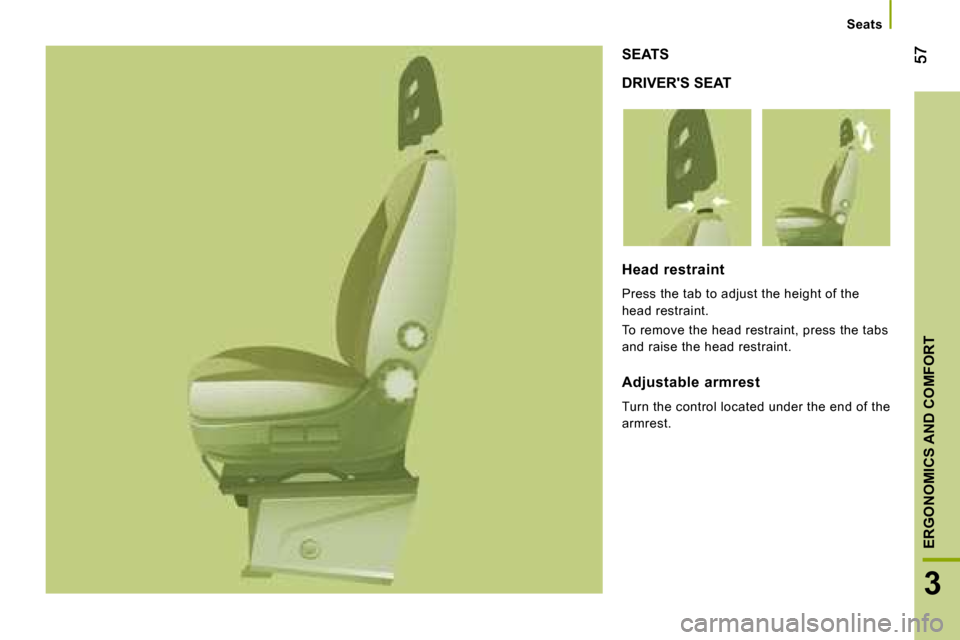
DRIVER'S SEAT
SEATS
Head restraint
Press the tab to adjust the height of the
head restraint.
To remove the head restraint, press the tabs
and raise the head restraint.
Adjustable armrest
Turn the control located under the end of the
armrest.
Page 65 of 163
68
Practical information
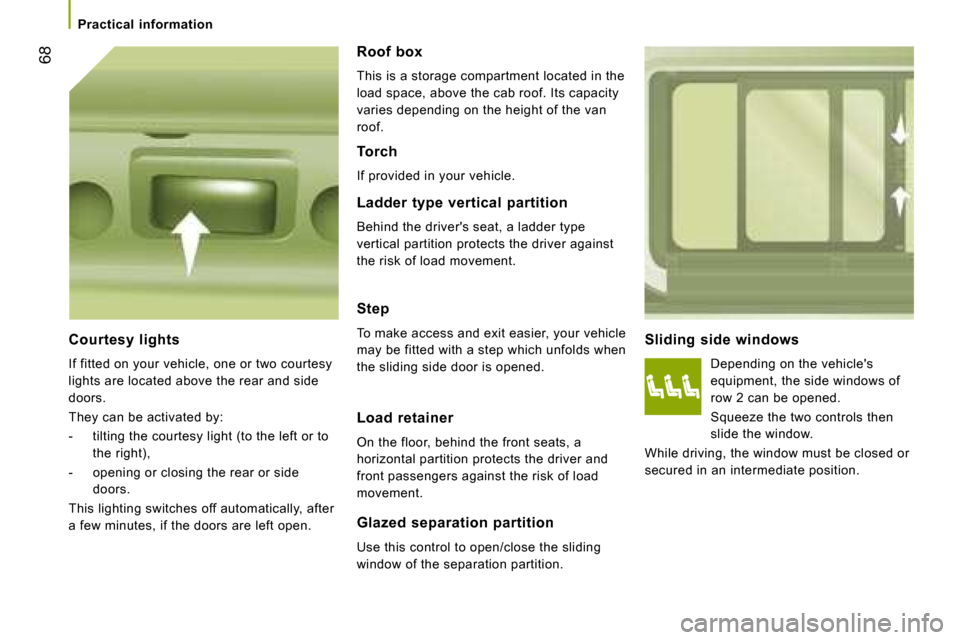
Sliding side windows Depending on the vehicle's
equipment, the side windows of
row 2 can be opened.
Squeeze the two controls then
slide the window.
While driving, the window must be closed or
secured in an intermediate position.
Step
To make access and exit easier, your vehicle
may be fitted with a step which unfolds when
the sliding side door is opened.
Courtesy lights
If fitted on your vehicle, one or two courtesy
lights are located above the rear and side
doors.
They can be activated by:
- tilting the courtesy light (to the left or to
the right),
- opening or closing the rear or side doors.
This lighting switches off automatically, after
a few minutes, if the doors are left open. Roof box
This is a storage compartment located in the
load space, above the cab roof. Its capacity
varies depending on the height of the van
roof.
Torch
If provided in your vehicle.
Ladder type vertical partition
Behind the driver's seat, a ladder type
vertical partition protects the driver against
the risk of load movement.
Load retainer
On the floor, behind the front seats, a
horizontal partition protects the driver and
front passengers against the risk of load
movement.
Glazed separation partition
Use this control to open/close the sliding
window of the separation partition.
Page 75 of 163
78
Pneumatic suspension
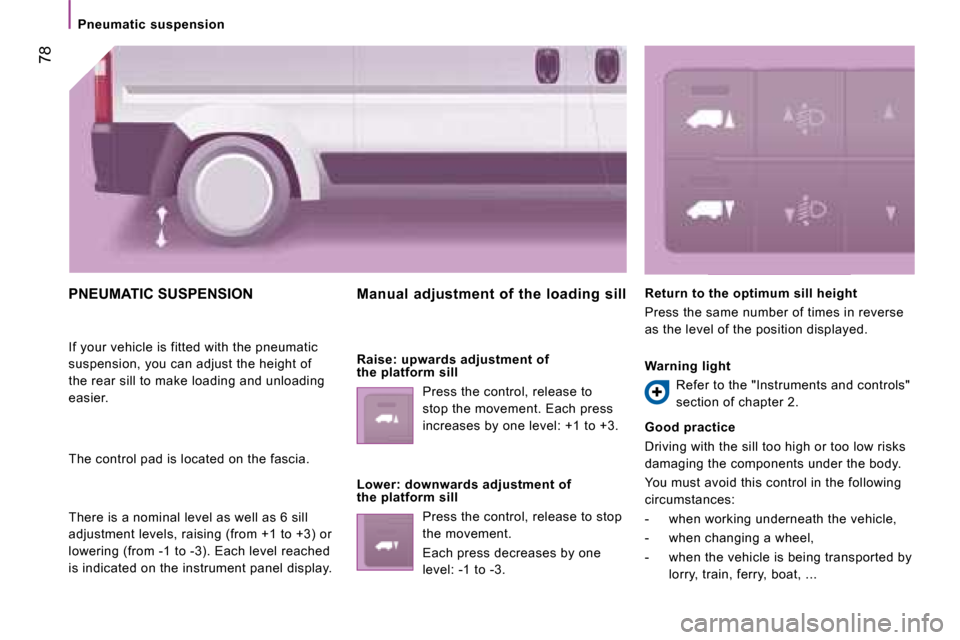
PNEUMATIC SUSPENSION
If your vehicle is fitted with the pneumatic
suspension, you can adjust the height of
the rear sill to make loading and unloading
easier.
The control pad is located on the fascia.
There is a nominal level as well as 6 sill
adjustment levels, raising (from +1 to +3) or
lowering (from -1 to -3). Each level reached
is indicated on the instrument panel display. Manual adjustment of the loading sill
Raise: upwards adjustment of
the platform sill
Press the control, release to
stop the movement. Each press
increases by one level: +1 to +3.
Lower: downwards adjustment of
the platform sill Press the control, release to stop
the movement.
Each press decreases by one
level: -1 to -3. Return to the optimum sill height
Press the same number of times in reverse
as the level of the position displayed.
Warning light
Refer to the "Instruments and controls"
section of chapter 2.
Good practice
Driving with the sill too high or too low risks
damaging the components under the body.
You must avoid this control in the following
circumstances:
- when working underneath the vehicle,
- when changing a wheel,
- when the vehicle is being transported by lorry, train, ferry, boat, ...