jack CITROEN JUMPY 2007 Owners Manual
[x] Cancel search | Manufacturer: CITROEN, Model Year: 2007, Model line: JUMPY, Model: CITROEN JUMPY 2007Pages: 252, PDF Size: 12.15 MB
Page 124 of 252
122
Repairing a wheel
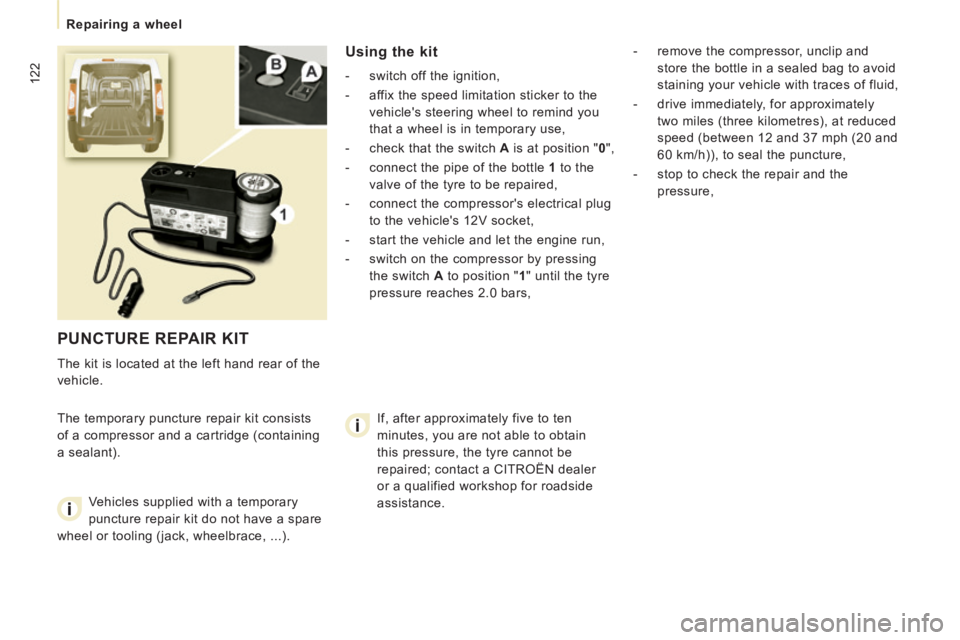
PUNCTURE REPAIR KIT
The kit is located at the left hand rear of the
vehicle.
The temporary puncture repair kit consists
of a compressor and a cartridge (containing
a sealant).
Using the kit
- switch off the ignition,
- affix the speed limitation sticker to the vehicle's steering wheel to remind you
that a wheel is in temporary use,
- check that the switch A is at position " 0 ",
- connect the pipe of the bottle 1 to the
valve of the tyre to be repaired,
- connect the compressor's electrical plug to the vehicle's 12V socket,
- start the vehicle and let the engine run,
- switch on the compressor by pressing the switch A to position " 1 " until the tyre
pressure reaches 2.0 bars, - remove the compressor, unclip and
store the bottle in a sealed bag to avoid
staining your vehicle with traces of fluid,
- drive immediately, for approximately two miles (three kilometres), at reduced
speed (between 12 and 37 mph (20 and
60 km/h)), to seal the puncture,
- stop to check the repair and the pressure,
Vehicles supplied with a temporary
puncture repair kit do not have a spare
wheel or tooling (jack, wheelbrace, ...). If, after approximately five to ten
minutes, you are not able to obtain
this pressure, the tyre cannot be
repaired; contact a CITROËN dealer
or a qualified workshop for roadside
assistance.
Page 126 of 252
124
Changing a wheel
CHANGING A WHEEL
If your vehicle is equipped with a spare
wheel located underneath the vehicle, follow
these instructions.
1. PARKING THE VEHICLE
- You must ensure that the occupants get out of the vehicle and wait in a safe
location.
- If possible, park the vehicle on level, stable and non-slippery ground.
- Apply the parking brake, switch off the ignition and engage first or reverse gear.
- If available, place a chock under the wheel diagonally opposite the one to be
changed.
On certain types of ground and/or if heavy
loads are being transported, the vehicle
must be raised in order to disengage
the spare wheel from the carrier. Call a
CITROËN dealer or a qualified workshop. If your vehicle is fitted with suspension
with pneumatic height correction,
please deactivate the system. Refer to the
"Rear suspension" section of chapter 3.
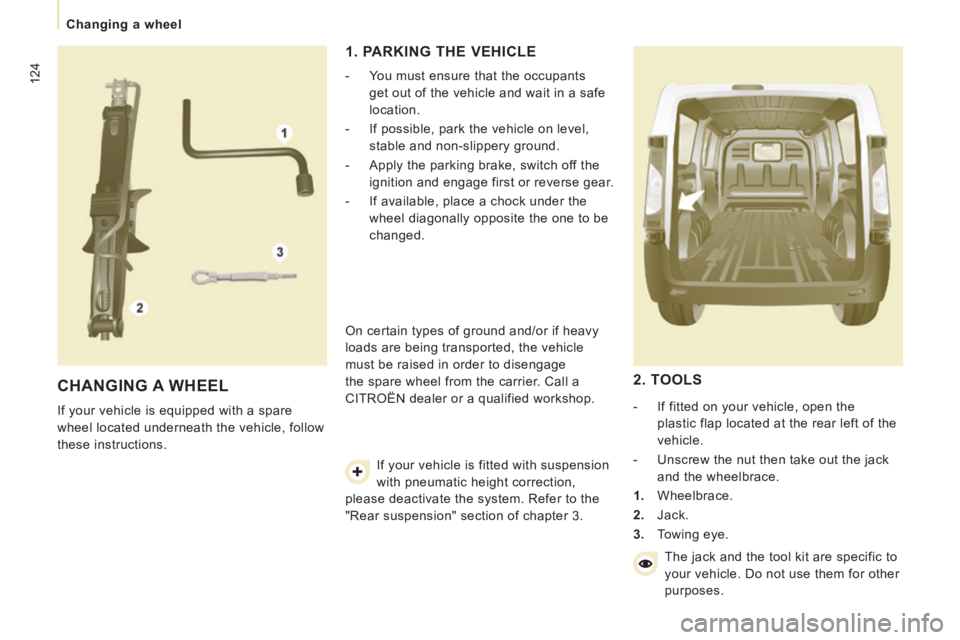
2. TOOLS
- If fitted on your vehicle, open the plastic flap located at the rear left of the
vehicle.
- Unscrew the nut then take out the jack and the wheelbrace.
1. Wheelbrace.
2. Jack.
3. Towing eye.
The jack and the tool kit are specific to
your vehicle. Do not use them for other
purposes.
Page 128 of 252
126
Changing a wheel
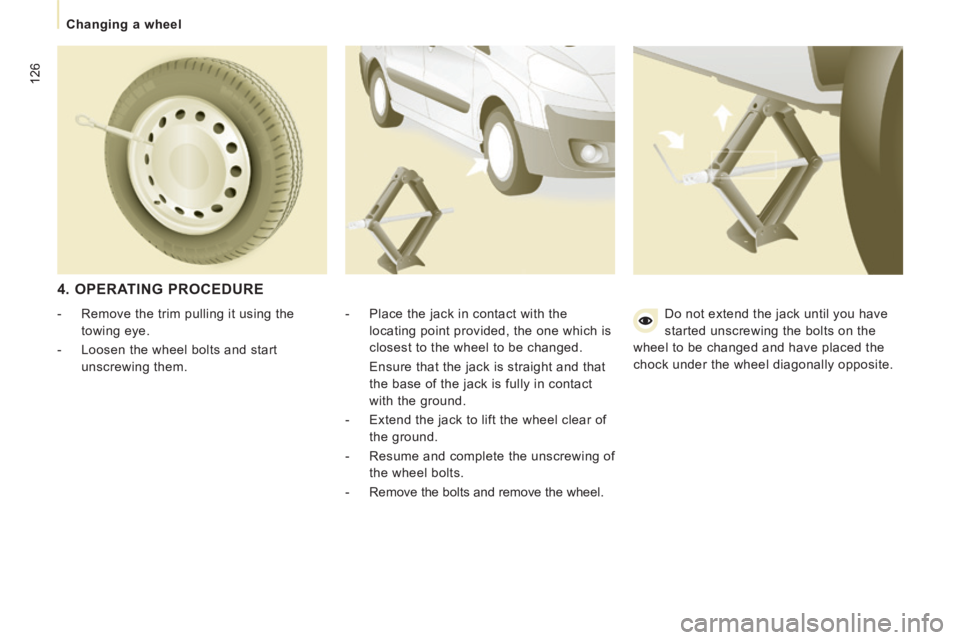
4. OPERATING PROCEDURE
- Place the jack in contact with the locating point provided, the one which is
closest to the wheel to be changed.
Ensure that the jack is straight and that the base of the jack is fully in contact
with the ground.
- Extend the jack to lift the wheel clear of the ground.
- Resume and complete the unscrewing of the wheel bolts.
- Remove the bolts and remove the wheel.
- Remove the trim pulling it using the
towing eye.
- Loosen the wheel bolts and start unscrewing them. Do not extend the jack until you have
started unscrewing the bolts on the
wheel to be changed and have placed the
chock under the wheel diagonally opposite.
Page 129 of 252
127
Changing a wheel
QUICK HELP
7
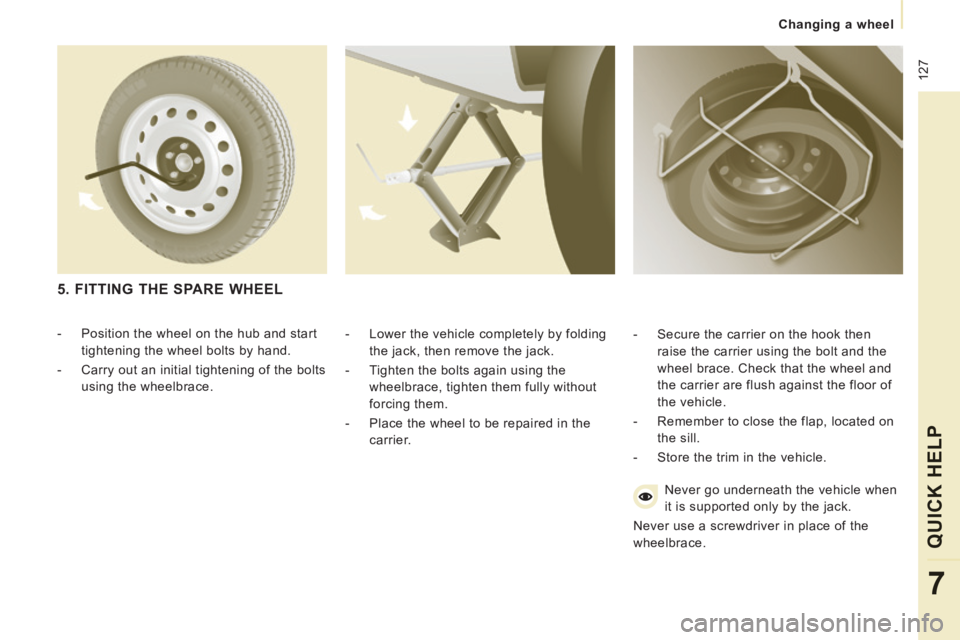
- Lower the vehicle completely by folding the jack, then remove the jack.
- Tighten the bolts again using the wheelbrace, tighten them fully without
forcing them.
- Place the wheel to be repaired in the carrier. - Secure the carrier on the hook then
raise the carrier using the bolt and the
wheel brace. Check that the wheel and
the carrier are flush against the floor of
the vehicle.
- Remember to close the flap, located on the sill.
- Store the trim in the vehicle.
Never go underneath the vehicle when
it is supported only by the jack.
Never use a screwdriver in place of the
wheelbrace.
5. FITTING THE SPARE WHEEL
- Position the wheel on the hub and start tightening the wheel bolts by hand.
- Carry out an initial tightening of the bolts using the wheelbrace.
Page 197 of 252
9.43
09 MUSIC MEDIA PLAYERS
CD, MP3 CD / USB PLAYER
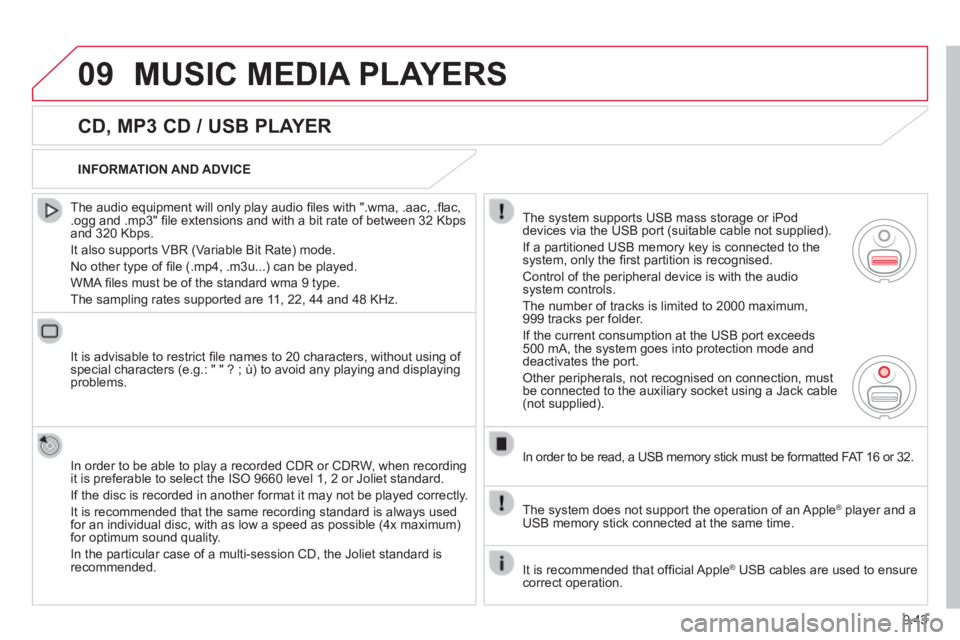
The audio equipment will only play audio fi les with ".wma, .aac, .fl ac, .ogg and .mp3" fi le extensions and with a bit rate of between 32 Kbps and 320 Kbps.
It also supports VBR (Variable Bit Rate) mode.
No other type of fi le (.mp4, .m3u...) can be played.
WMA fi les must be of the standard wma 9 type.
The sampling rates supported are 11, 22, 44 and 48 KHz.
It is advisable to restrict fi le names to 20 characters, without using of special characters (e.g.: " " ? ; ù) to avoid any playing and displ\
aying problems.
In order to be able to play a recorded CDR or CDRW, when recording it is preferable to select the ISO 9660 level 1, 2 or Joliet standard.
If the disc is recorded in another format it may not be played correctly\
.
It is recommended that the same recording standard is always used for an individual disc, with as low a speed as possible (4x maximum) for optimum sound quality.
In the particular case of a multi-session CD, the Joliet standard is recommended.
INFORMATION AND ADVICE
The system supports USB mass storage or iPod devices via the USB port (suitable cable not supplied).
If a partitioned USB memory key is connected to the system, only the fi rst partition is recognised.
Control of the peripheral device is with the audio system controls.
The number of tracks is limited to 2000 maximum, 999 tracks per folder.
If the current consumption at the USB port exceeds 500 mA, the system goes into protection mode and deactivates the port.
Other peripherals, not recognised on connection, must be connected to the auxiliary socket using a Jack cable (not supplied).
In order to be read, a USB memory stick must be formatted FAT 16 or 32.
The system does not support the operation of an Apple ® player and a ® player and a ®
USB memory stick connected at the same time.
It is recommended that offi cial Apple ® USB cables are used to ensure ® USB cables are used to ensure ®
correct operation.
Page 201 of 252
9.47
09 MUSIC MEDIA PLAYERS
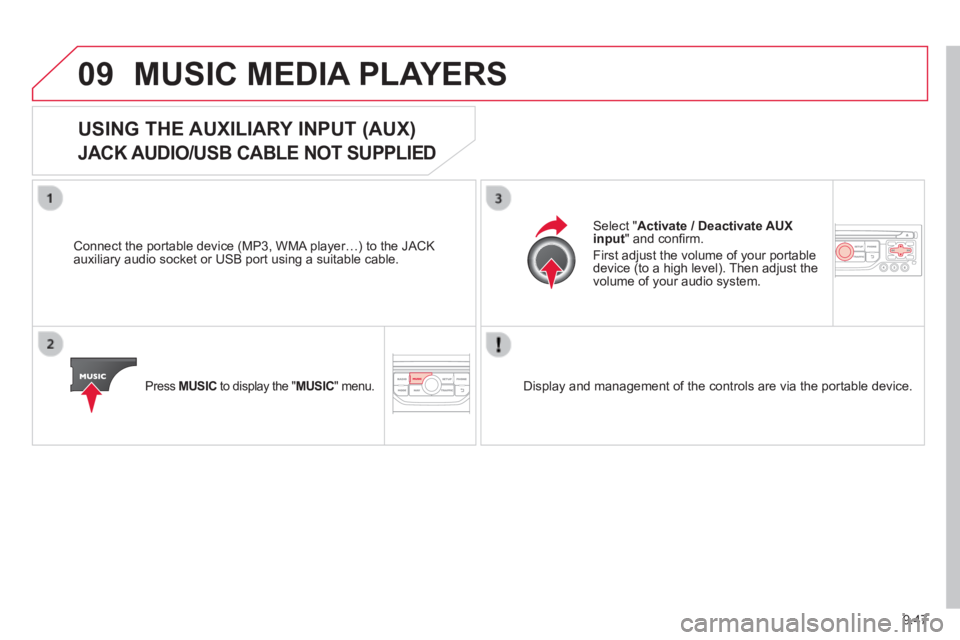
USING THE AUXILIARY INPUT (AUX)
JACK AUDIO/USB CABLE NOT SUPPLIED
Connect the portable device (MP3, WMA player…) to the JACK auxiliary audio socket or USB port using a suitable cable.
Press MUSIC to display the " MUSIC " menu.
Select " Activate / Deactivate AUX input " and confi rm.
First adjust the volume of your portable device (to a high level). Then adjust the volume of your audio system.
Display and management of the controls are via the portable device.
Page 218 of 252
9.64
01 FIRST STEPS
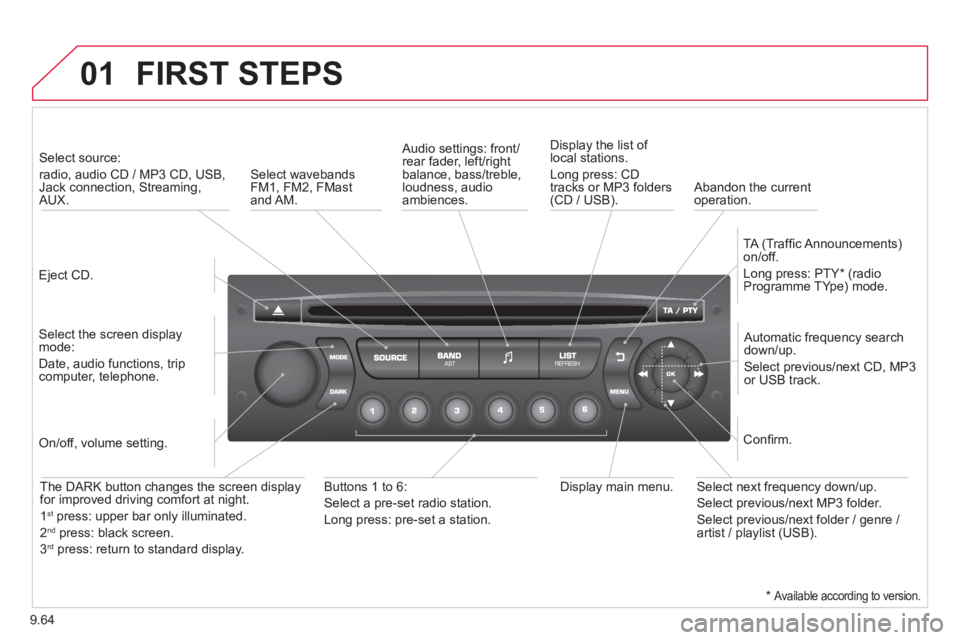
Eject CD.
Select source:
radio, audio CD / MP3 CD, USB, Jack connection, Streaming, AUX.
Select the screen display mode:
Date, audio functions, trip computer, telephone.
Automatic frequency search down/up.
Select previous/next CD, MP3 or USB track.
Audio settings: front/rear fader, left/right balance, bass/treble, loudness, audio ambiences.
Display the list of local stations.
Long press: CD tracks or MP3 folders (CD / USB).
TA (Traffi c Announcements) on/off.
Long press: PTY * (radio Programme TYpe) mode.
Display main menu. The DARK button changes the screen display for improved driving comfort at night.
1 st press: upper bar only illuminated.
2 nd press: black screen.
3 rd press: return to standard display.
On/off, volume setting.
Buttons 1 to 6:
Select a pre-set radio station.
Long press: pre-set a station.
Select next frequency down/up.
Select previous/next MP3 folder.
Select previous/next folder / genre / artist / playlist (USB).
Confi rm.
Select wavebands FM1, FM2, FMast and AM. Abandon the current operation.
* Available according to version.
Page 224 of 252
9.70
05 USB BOX
The system puts together playlists (temporary memory) created over a period which depends on the capacity of the USB device.
The other sources are available during this time.
The playlists are updated each time the ignition is switched off or each time a USB memory stick is connected.
When connecting for the fi rst time, the classifi cation suggested is by folder. When you reconnect, the classifi cation selected previously is retained.
Connect the memory stick to the port, directly or using a lead. If the audio equipment is switched on, the USB source is detected as soon as it is connected. Play begins automatically after a delay which depends on the capacity of the USB memory stick.
The fi le formats supported are .mp3 (mpeg1 layer 3 only) and .wma (standard 9 only, 128 kbits/sec compression).
Certain playlist formats are supported (.m3u, ...)
On reconnection of the previous memory stick used, play is resumed automatically with the last track played.
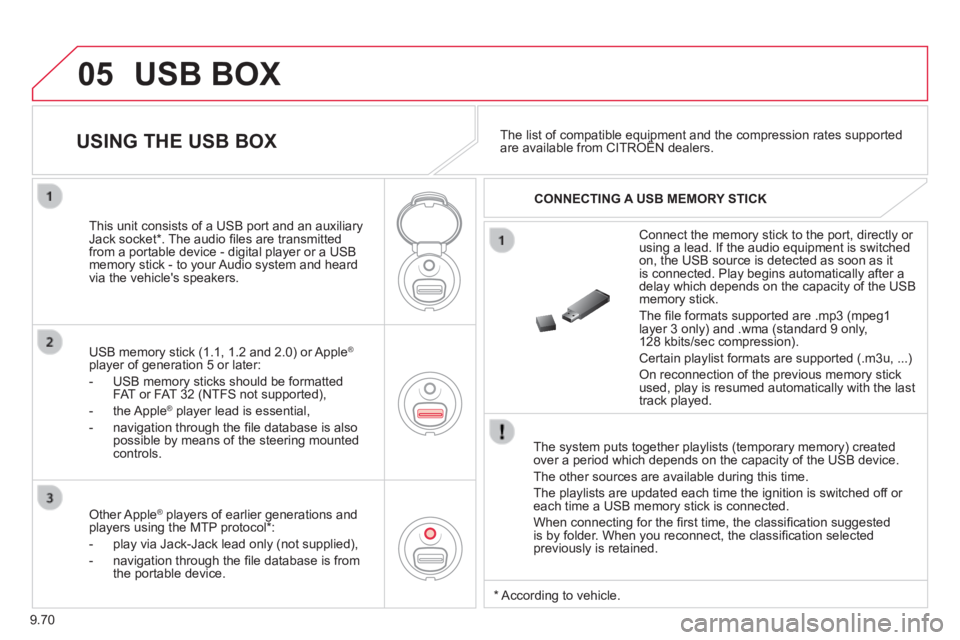
This unit consists of a USB port and an auxiliary Jack socket * . The audio fi les are transmitted from a portable device - digital player or a USB memory stick - to your Audio system and heard via the vehicle's speakers.
USB memory stick (1.1, 1.2 and 2.0) or Apple ®
player of generation 5 or later:
- USB memory sticks should be formatted FAT or FAT 32 (NTFS not supported),
- the Apple ® player lead is essential, ® player lead is essential, ®
- navigation through the fi le database is also possible by means of the steering mounted controls.
The list of compatible equipment and the compression rates supported are available from CITROËN dealers. The list of compatible equipment and the compression rates supported are available from CITROËN dealers. The list of compatible equipment and the compression rates supported USING THE USB BOX
CONNECTING A USB MEMORY STICK
Other Apple ® players of earlier generations and ® players of earlier generations and ®
players using the MTP protocol * :
- play via Jack-Jack lead only (not supplied),
- navigation through the fi le database is from the portable device.
* According to vehicle.
Page 226 of 252
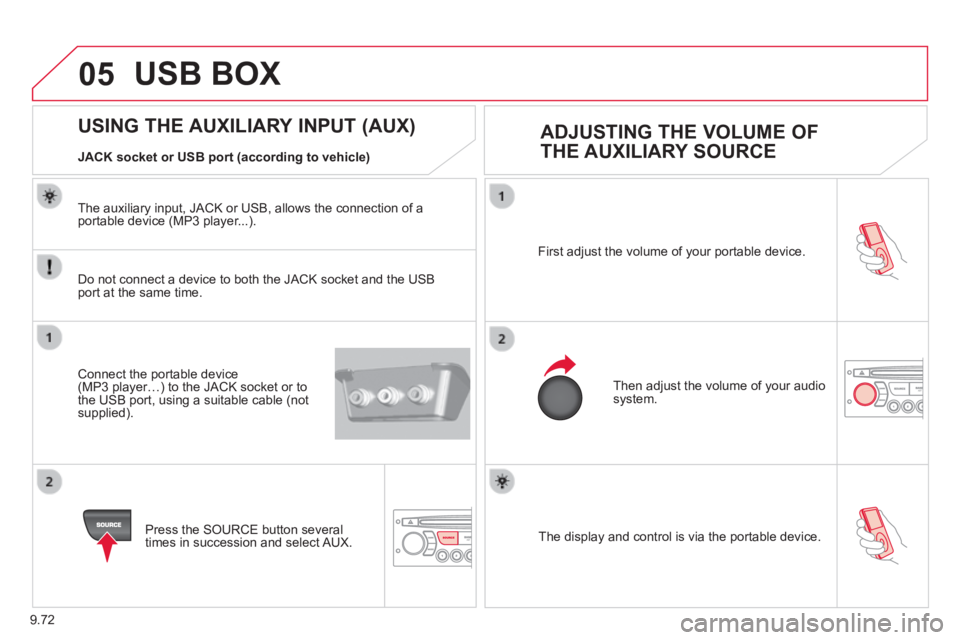
9.72
05
The display and control is via the portable device.
First adjust the volume of your portable device.
Then adjust the volume of your audio system.
USING THE AUXILIARY INPUT (AUX) ADJUSTING THE VOLUME OF
THE AUXILIARY SOURCE JACK socket or USB port (according to vehicle)
USB BOX
Do not connect a device to both the JACK socket and the USB port at the same time.
Connect the portable device (MP3 player…) to the JACK socket or to the USB port, using a suitable cable (not supplied).
Press the SOURCE button several times in succession and select AUX.
The auxiliary input, JACK or USB, allows the connection of a portable device (MP3 player...).
Page 239 of 252
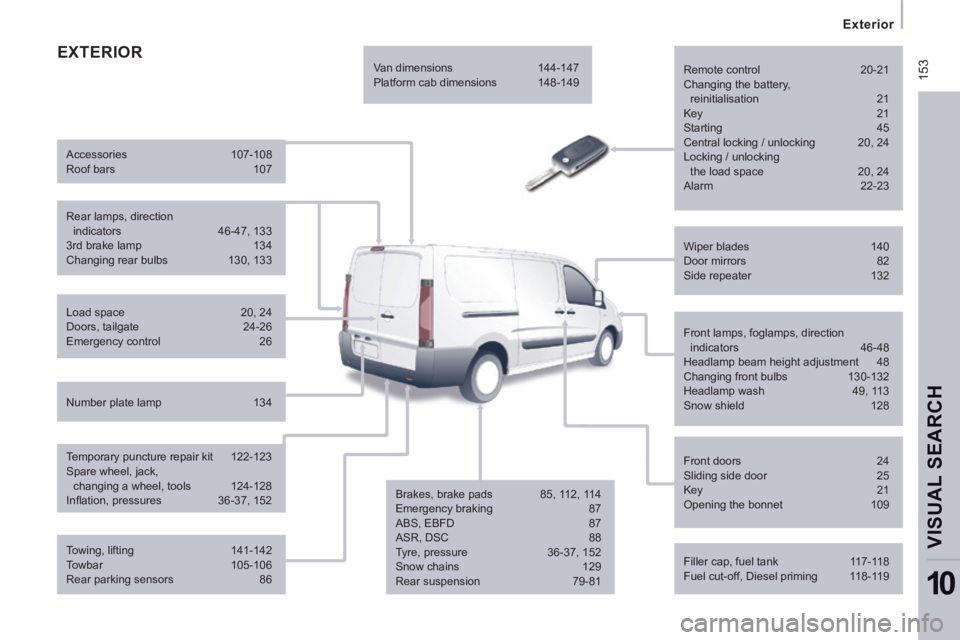
153
Exterior
VISUAL SEARCH
10
EXTERIOR Remote control 20-21
Changing the battery,
reinitialisation 21 Key 21
Starting 45
Central locking / unlocking 20, 24
Locking / unlocking the load space 20, 24
Alarm 22-23
Filler cap, fuel tank 117-118
Fuel cut-off, Diesel priming 118-119 Wiper blades 140
Door mirrors 82
Side repeater 132
Front lamps, foglamps, direction indicators 46-48
Headlamp beam height adjustment 48
Changing front bulbs 130-132
Headlamp wash 49, 113
Snow shield 128
Front doors 24
Sliding side door 25
Key 21
Opening the bonnet 109
Towing, lifting 141-142
Towbar 105-106
Rear parking sensors 86
Load space
20, 24
Doors, tailgate 24-26
Emergency control 26
Temporary puncture repair kit 122-123
Spare wheel, jack, changing a wheel, tools 124-128
Infl ation, pressures 36-37, 152 Rear lamps, direction indicators 46-47, 133
3rd brake lamp 134
Changing rear bulbs 130, 133
Accessories
107-108
Roof bars 107
Number plate lamp 134 Van dimensions
144-147
Platform cab dimensions 148-149
Brakes, brake pads 85, 112, 114
Emergency braking 87
ABS, EBFD 87
ASR, DSC 88
Tyre, pressure 36-37, 152
Snow chains 129
Rear suspension 79-81