Set time Citroen JUMPY 2014 2.G Owner's Manual
[x] Cancel search | Manufacturer: CITROEN, Model Year: 2014, Model line: JUMPY, Model: Citroen JUMPY 2014 2.GPages: 252, PDF Size: 12.23 MB
Page 24 of 252

22
Access
JUMPY-VU_EN_CHAP02_PRET A PARTIR_ED01-2014
ALARM
If fitted on your vehicle, this provides two
types of protection:
- exterior protection: it sounds if a front/rear door or the bonnet is opened.
- interior protection: it sounds if the volume inside the passenger
compartment changes (breaking of
a window or a movement inside the
vehicle).
Good practice
Do not make any modifications to the
electronic immobiliser system.
Operating the remote control, even when it
is in your pocket, may result in involuntary
unlocking of the doors.
The simultaneous use of other high
frequency equipment (mobile telephones,
domestic alarms…), may interfere with the
operation of the remote control temporarily.
The remote control does not operate while
the key is in the ignition, even if the ignition
is off.
If your vehicle is fitted with a separation
partition, the interior protection is not active
in the load space.
Locking the vehicle with complete
alarm
Setting the alarm
- Switch off the ignition and get out of the vehicle.
When purchasing a second-hand vehicle:
- have the keys memorised by a CITROËN dealer to ensure that the keys
in your possession are the only ones
which can start the vehicle. - Set the alarm within five minutes of
getting out of the vehicle, by locking or
deadlocking using the remote control.
The red LED, located on the centre
console, flashes once per second.
Disarming
- Unlock the vehicle with the remote control or switch on the ignition, the red
LED goes off.
Locking the vehicle with exterior
protection only
If, while you are away from the vehicle, you
wish to leave a window partially open or a
pet inside the vehicle, you should choose
exterior protection only.
- Switch off the ignition.
- In the next ten seconds, press this button, located on the
centre console, until the red
LED is on continuously.
- Get out of the vehicle.
- Within the next five minutes, set the alarm by locking or deadlocking using
the remote control (the red LED flashes
once a second).
When leaving the vehicle,
check that the lamps are
off and nothing of value is
visible.
As a safety precaution (with
children on board), remove
the key from the ignition
when leaving the vehicle,
even for a short time.
Page 25 of 252

23
Access
READY TO GO
2
JUMPY-VU_EN_CHAP02_PRET A PARTIR_ED01-2014
Triggering
The siren sounds, the direction indicators
flash for approximately 30 seconds and the
red LED flashes rapidly.
- To switch it off, insert the key and switch on the ignition.
When the alarm has been triggered ten
times in succession (when triggered for the
eleventh time) it is deactivated. Repeat the
rules for setting the alarm.
Malfunction
When the ignition is switched on, if the
red LED remains on for ten seconds, this
indicates a malfunction with the siren
connection.
Have the system checked by a CITROËN
dealer or a qualified workshop.
Locking the vehicle without alarm
- Insert the key in the lock on the driver's door and lock it.
Do not set the alarm when washing your
vehicle.
Failure of the remote control
When the alarm is set but the remote control
does not operate:
- Unlock the doors with the key and open the door. The alarm is triggered.
- Switch on the ignition in the next ten seconds. The alarm is disarmed.
Automatic setting of the alarm
Depending on the country in which the
vehicle is sold, the alarm is set automatically
approximately 2 minutes after the last door
is closed.
To prevent triggering of the alarm when a
door is opened, it is imperative to press the
remote control unlocking button again.
Do not make any modifications to
the alarm system as this could cause
faults.
Page 40 of 252
38
Instruments and controls
JUMPY-VU_EN_CHAP02_PRET A PARTIR_ED01-2014
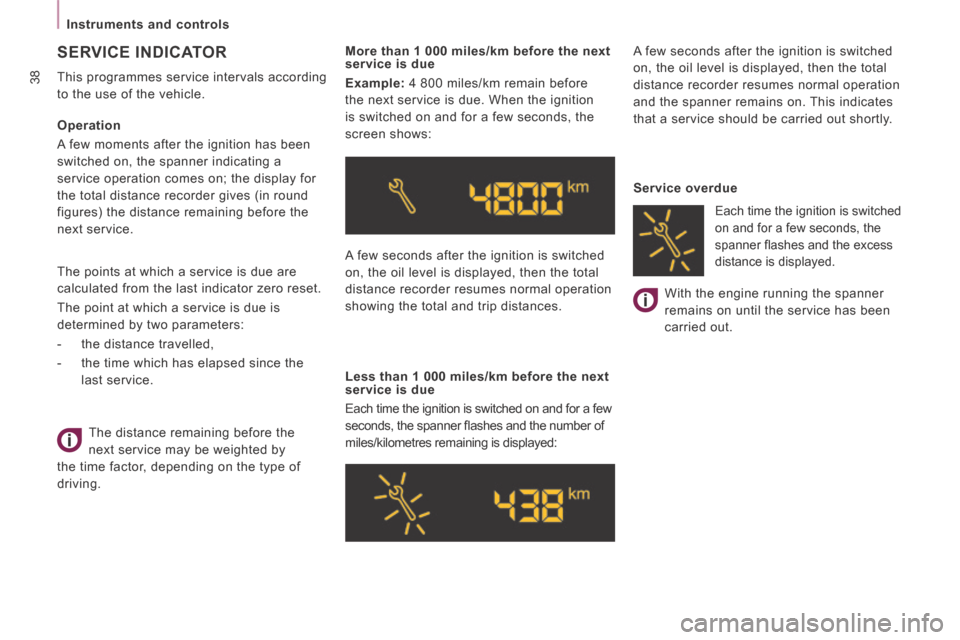
Service overdue With the engine running the spanner
remains on until the service has been
carried out.
Each time the ignition is switched
on and for a few seconds, the
spanner fl ashes and the excess
distance is displayed.
Operation
A few moments after the ignition has been
switched on, the spanner indicating a
service operation comes on; the display for
the total distance recorder gives (in round
figures) the distance remaining before the
next service. A few seconds after the ignition is switched
on, the oil level is displayed, then the total
distance recorder resumes normal operation
showing the total and trip distances.
Less than 1 000 miles/km before the next
service is due
Each time the ignition is switched on and for a few
seconds, the spanner fl ashes and the number of
miles/kilometres remaining is displayed: A few seconds after the ignition is switched
on, the oil level is displayed, then the total
distance recorder resumes normal operation
and the spanner remains on. This indicates
that a service should be carried out shortly.
The distance remaining before the
next service may be weighted by
the time factor, depending on the type of
driving. More than 1 000 miles/km before the next
service is due
Example: 4 800 miles/km remain before
the next service is due. When the ignition
is switched on and for a few seconds, the
screen shows:
SERVICE INDICATOR
This programmes service intervals according
to the use of the vehicle.
The points at which a service is due are
calculated from the last indicator zero reset.
The point at which a service is due is
determined by two parameters:
- the distance travelled,
- the time which has elapsed since the
last service.
Page 50 of 252

48
Steering mounted controls
JUMPY-VU_EN_CHAP03_ERGONOMIE ET CONFORT_ED01-2014
Automatic illumination of headlamps Activation
Turn the ring to the AUTO position. The
activation of this function is accompanied by
a message in the screen.
If the sunshine sensor does not
function correctly , the lighting comes on
accompanied by the service warning lamp,
an audible signal and a message in the
screen.
Contact a CITROËN dealer or a qualified
workshop.
HEADLAMP BEAM
Depending on the load in your vehicle, the
beam setting must be adjusted.
0 - No load.
1 - Partial load.
2 - Average load.
3 - Maximum authorised load.
Do not cover the sunshine sensor
located on the windscreen, behind
the mirror. It is used for the automatic
illumination of headlamps and for the
automatic rain sensitive wipers. The sidelamps and dipped
beam headlamps switch
on automatically if the light
is poor, or during operation
of the windscreen wipers. They switch off as
soon as the light becomes bright enough or
the windscreen wipers stop.
This function is not compatible with the
daytime running lamps. Deactivation
Turn the ring forwards or rearwards. The
deactivation of this function is accompanied
by a message in the screen.
The function is deactivated temporarily when
you use the manual lighting control stalk.
Initial setting is position 0.
In foggy weather or in snow, the
sunshine sensor may detect sufficient
light. As a consequence, the lighting will not
come on automatically. If necessary, you
must switch on the dipped beam headlamps
manually.
Travelling abroad
If using your vehicle in a country
that drives on the other side of the road,
the headlamps must be adjusted to avoid
dazzling on-coming drivers.
Contact a CITROËN dealer or a qualified
workshop.
Page 62 of 252

60
Ventilation
JUMPY-VU_EN_CHAP03_ERGONOMIE ET CONFORT_ED01-2014
Driver or passenger side comfort value
The value indicated on the display
corresponds to a level of comfort and
not a temperature in degrees Celsius or
Fahrenheit. Automatic operation Do not cover the sunshine sensor,
located on the windscreen behind the
mirror, it is used for regulation of the air
conditioning.
AUTO comfort programme
This is the normal air conditioning system
operating mode.
Press this button, the
AUTO symbol is
displayed.
Depending on the comfort value selected,
the system controls the distribution,
the fl ow and the intake of air to guarantee comfort
and a suffi cient circulation of air in the passenger
compartment. No further action on your part is required.
When the engine is cold, to prevent an
excessive diffusion of cold air, the ventilation
will reach its optimum level gradually.
For your comfort, the settings are stored
when the ignition is switched off and are
reinstated the next time the vehicle is
started, if the temperature in the passenger
compartment has not changed significantly;
otherwise, operation resumes in automatic
mode. Turn this control to the left or to
the right to decrease or increase
the value. A setting around the
value 21 provides optimum
comfort. However, depending on your
requirements, a setting between 18 and 24
is usual.
Page 63 of 252

61
Ventilation
EASE OF USE
and
COMFORT
3
JUMPY-VU_EN_CHAP03_ERGONOMIE ET CONFORT_ED01-2014
Air flow
Press the small fan button to
reduce the flow or the large fan
button to increase the flow.
On the display, the blades of the fan darken
when the flow is increased. Manual operation
You can, according to your requirements,
make a different selection from that offered
by the system by changing a setting.
The other functions will still be controlled
automatically. Pressing the AUTO button
restores fully automatic operation. Intake of exterior air /
Recirculation of interior air
Press this button to recirculate
the interior air. The recirculation
symbol is displayed.
Recirculation prevents exterior odours
and smoke from entering the passenger
compartment. Avoid prolonged operation
in interior air recirculation mode (risk of
condensation, odour and humidity).
Pressing this button again activates the
intake of exterior air.
Air distribution
Pressing this button several times
in succession directs the air flow
towards:
- the windscreen,
- the windscreen and footwells,
- the footwells,
- the side vents, central vents and footwells,
- the side vents and central vents. Deactivating the system
Press the air flow
small fan
button until the fan symbol
disappears.
This action deactivates all of the system's
functions, with the exception of the air
recirculation and rear screen demisting
(if fitted on your vehicle). Your comfort
setting is no longer maintained and is
switched off.
For your comfort, do not
deactivate the system for long
periods. Pressing the large
fan button or the AUTO button
reactivates the system with
the values set before it was
deactivated. Switching the air conditioning
On / Off
Press this button, the
A/C
symbol is displayed and the air
conditioning is activated.
Pressing this button again switches off the
air cooling.
Page 71 of 252
69
Seats
EASE OF USE
and
COMFORT
3
JUMPY-VU_EN_CHAP03_ERGONOMIE ET CONFORT_ED01-2014
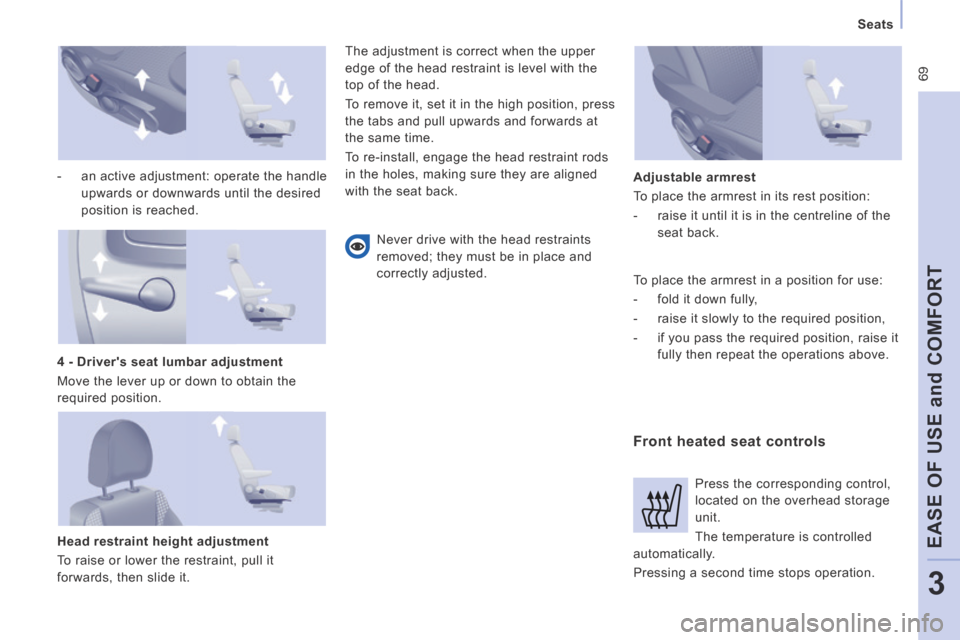
- an active adjustment: operate the handle upwards or downwards until the desired
position is reached.
Head restraint height adjustment
To raise or lower the restraint, pull it
forwards, then slide it. The adjustment is correct when the upper
edge of the head restraint is level with the
top of the head.
To remove it, set it in the high position, press
the tabs and pull upwards and forwards at
the same time.
To re-install, engage the head restraint rods
in the holes, making sure they are aligned
with the seat back.
Never drive with the head restraints
removed; they must be in place and
correctly adjusted.
Front heated seat controls
Adjustable armrest
To place the armrest in its rest position:
- raise it until it is in the centreline of the seat back.
4 - Driver's seat lumbar adjustment
Move the lever up or down to obtain the
required position. Press the corresponding control,
located on the overhead storage
unit.
The temperature is controlled
automatically.
Pressing a second time stops operation. To place the armrest in a position for use:
- fold it down fully,
- raise it slowly to the required position,
- if you pass the required position, raise it fully then repeat the operations above.
Page 157 of 252
9.3
JUMPY-VU_EN_CHAP09B_RT6-2-7_ED01-2014
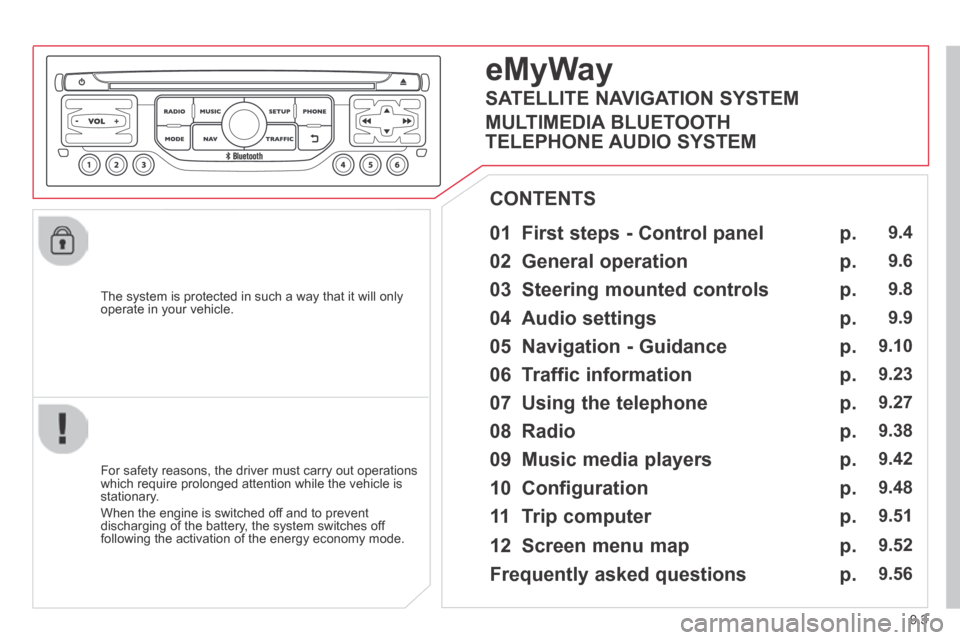
The system is protected in such a way that it will only operate in your vehicle.
01 First steps - Control panel
For safety reasons, the driver must carry out operations which require prolonged attention while the vehicle is stationary.
When the engine is switched off and to prevent discharging of the battery, the system switches off following the activation of the energy economy mode.
CONTENTS
02 General operation
03 Steering mounted controls
04 Audio settings
05 Navigation - Guidance
06 Traffic information
07 Using the telephone
08 Radio
09 Music media players
10 Configuration
11 Trip computer
p.
p.
p.
p.
p.
p.
p.
p.
p.
p.
p.
9.4
9.6
9.8
9.9
9.10
9.23
9.27
9.38
9.42
9.48
9.51
eMyWay
12 Screen menu map p. 9.52
Frequently asked questions p. 9.56
SATELLITE NAVIGATION SYSTEM
MULTIMEDIA BLUETOOTH
TELEPHONE AUDIO SYSTEM
Page 160 of 252
9.6
02
JUMPY-VU_EN_CHAP09B_RT6-2-7_ED01-2014
For a detailed global view of the menus available, refer to the "Screen menu map" section. For cleaning the screen, the use of a soft, non-abrasive cloth (spectacles cloth) is recommended, with no additional product.
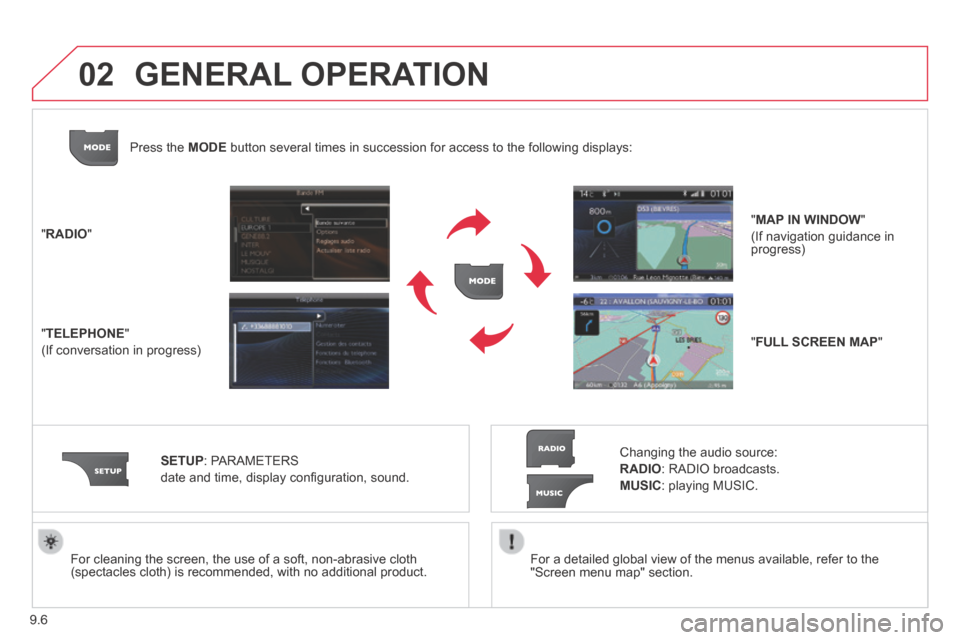
" RADIO "
" TELEPHONE "
(If conversation in progress)
SETUP : PARAMETERS
date and time, display confi guration, sound.
Changing the audio source:
RADIO : RADIO broadcasts.
MUSIC : playing MUSIC.
Press the MODE button several times in succession for access to the following displays\
:
GENERAL OPERATION
" FULL SCREEN MAP "
" MAP IN WINDOW "
(If navigation guidance in progress)
Page 165 of 252
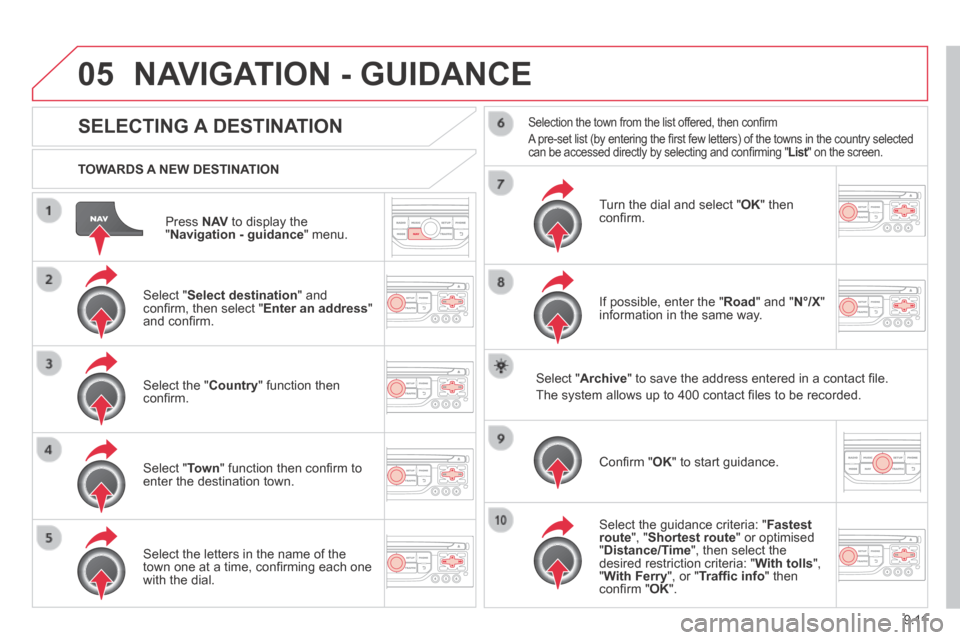
9.11
05
JUMPY-VU_EN_CHAP09B_RT6-2-7_ED01-2014
Press N AV to display the " Navigation - guidance " menu.
TOWARDS A NEW DESTINATION
NAVIGATION - GUIDANCE
SELECTING A DESTINATION
Select " Select destination " and confi rm, then select " Enter an address " and confi rm.
Select the " Country " function then confi rm.
Select " Town " function then confi rm to enter the destination town.
Select the letters in the name of the town one at a time, confi rming each one with the dial.
Selection the town from the list offered, then confi rm
A pre-set list (by entering the fi rst few letters) of the towns in the country selected can be accessed directly by selecting and confi rming " List " on the screen. List " on the screen. List
Turn the dial and select " OK " then confi rm.
If possible, enter the " Road " and " N°/X " information in the same way.
Select " Archive " to save the address entered in a contact fi le.
The system allows up to 400 contact fi les to be recorded.
Confi rm " OK " to start guidance.
Select the guidance criteria: " Fastest route ", " Shortest route " or optimised " Distance/Time ", then select the desired restriction criteria: " With tolls ", " With Ferry ", or " Traffi c info " then confi rm " OK ".