ESP Citroen JUMPY 2016 2.G Owner's Manual
[x] Cancel search | Manufacturer: CITROEN, Model Year: 2016, Model line: JUMPY, Model: Citroen JUMPY 2016 2.GPages: 595, PDF Size: 12.47 MB
Page 315 of 595
313
Jumpy _en_Chap08_En-cas-de-panne_ed01-2016
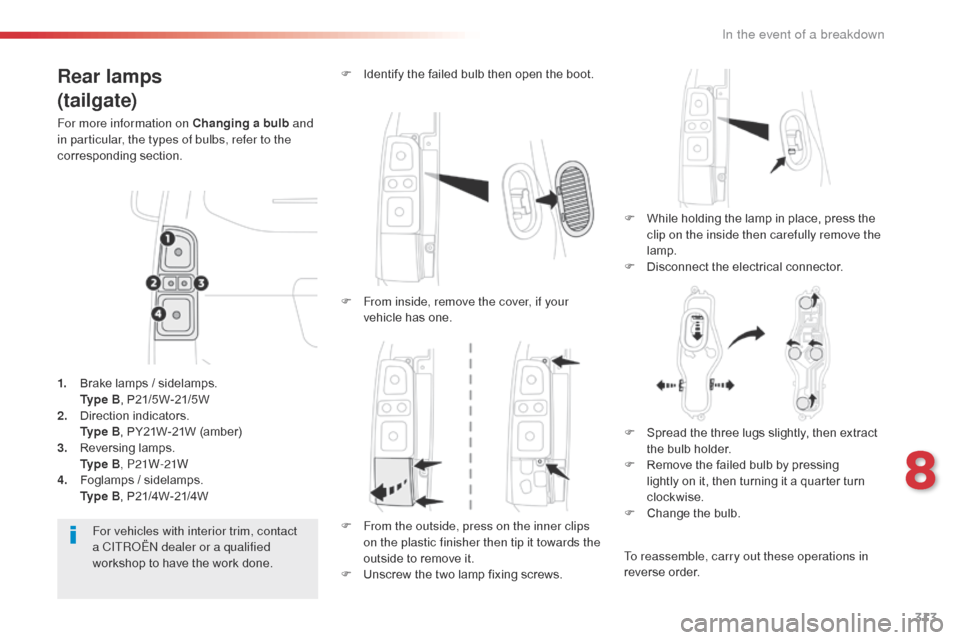
Rear lamps
(tailgate)
For more information on Changing a bulb and
in particular, the types of bulbs, refer to the
corresponding section.
F
W
hile holding the lamp in place, press the
clip on the inside then carefully remove the
lamp.
F
D
isconnect the electrical connector.
F
I
dentify the failed bulb then open the boot.
For vehicles with interior trim, contact
a CITROËN dealer or a qualified
workshop to have the work done.
1.
B
rake lamps / sidelamps.
Ty
p e B, P21/5W-21/5W
2.
D
irection indicators.
Ty
p e B, PY21W-21W (amber)
3.
R
eversing lamps.
Ty
p e B, P21W-21W
4.
F
oglamps / sidelamps.
Ty
p e B, P21/4W-21/4W F
F
rom inside, remove the cover, if your
vehicle has one.
F
F
rom the outside, press on the inner clips
on the plastic finisher then tip it towards the
outside to remove it.
F
U
nscrew the two lamp fixing screws.F
S
pread the three lugs slightly, then extract
the bulb holder.
F
R
emove the failed bulb by pressing
lightly on it, then turning it a quarter turn
clockwise.
F
C
hange the bulb.
To reassemble, carry out these operations in
reverse order.
8
In the event of a breakdown
Page 317 of 595

315
Jumpy _en_Chap08_En-cas-de-panne_ed01-2016
Courtesy lamps
(front and rear)
For the replacement of this type of LED lamp
and light guide, contact a CITROËN dealer or a
qualified workshop.
A replacement kit for the LEDs is available from
CITROËN dealers.Rear lamps
For more information on Changing a bulb and
in particular, the types of bulbs, refer to the
corresponding section.
Platform cab
F Identify the failed bulb.
F R emove the four screws securing the lens.
F
P
ull the lens towards you.
F
R
emove the failed bulb by pressing lightly
on it and then turning it a quarter turn
clockwise.
F
C
hange the bulb.
1.
D
irection indicators.
Ty
p e B , P21W-21W
2.
B
rake lamps.
Ty
p e B , P21W-21W
3.
S
idelamps.
Ty
p e B , R10W-10W
4.
R
eversing lamps.
Ty
p e B , P21W-21W
5.
F
oglamps.
Ty
p e B , P21W-21W To reassemble, carry out these operations in
reverse order.
8
In the event of a breakdown
Page 319 of 595
317
Jumpy _en_Chap08_En-cas-de-panne_ed01-2016
CITROËN will not accept responsibility
for the cost incurred in repairing your
vehicle or for rectifying malfunctions
resulting from the installation of
accessories not supplied and not
recommended by CITROËN and
not installed in accordance with its
instructions, in particular when the
combined consumption of all of the
additional equipment connected
exceeds 10 milliamperes.
Installing electrical
accessories
Your vehicle's electrical system is
designed to operate with standard or
optional equipment.
Before installing other electrical
equipment or accessories on your
vehicle, contact a CITROËN dealer or a
qualified workshop.
For more information on installing a
towbar or equipment of the TA XI type,
contact a CITROËN dealer.
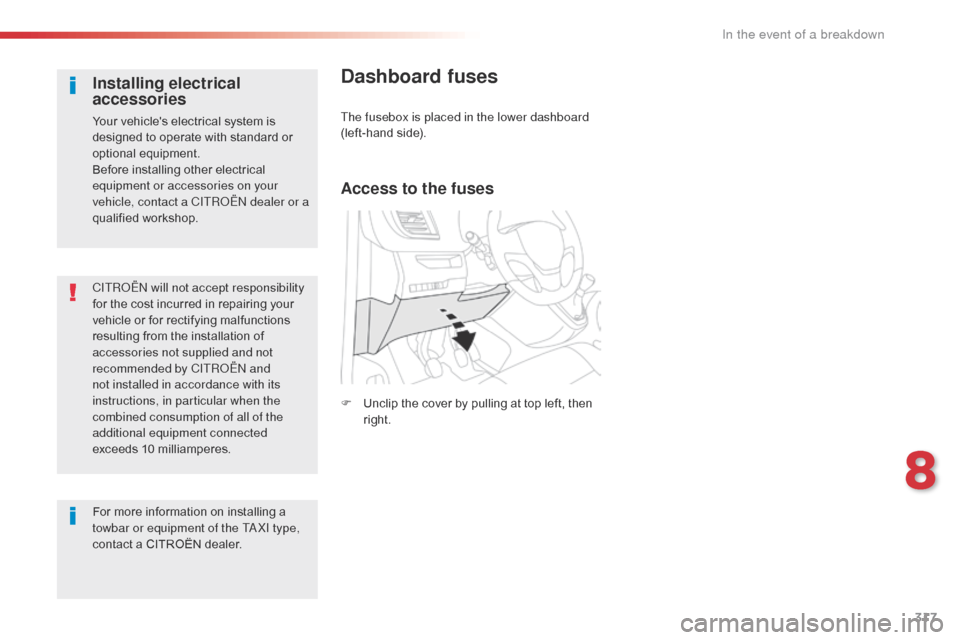
Dashboard fuses
The fusebox is placed in the lower dashboard
(left-hand side).
Access to the fuses
F Unclip the cover by pulling at top left, then right.
8
In the event of a breakdown
Page 323 of 595
321
Jumpy _en_Chap08_En-cas-de-panne_ed01-2016
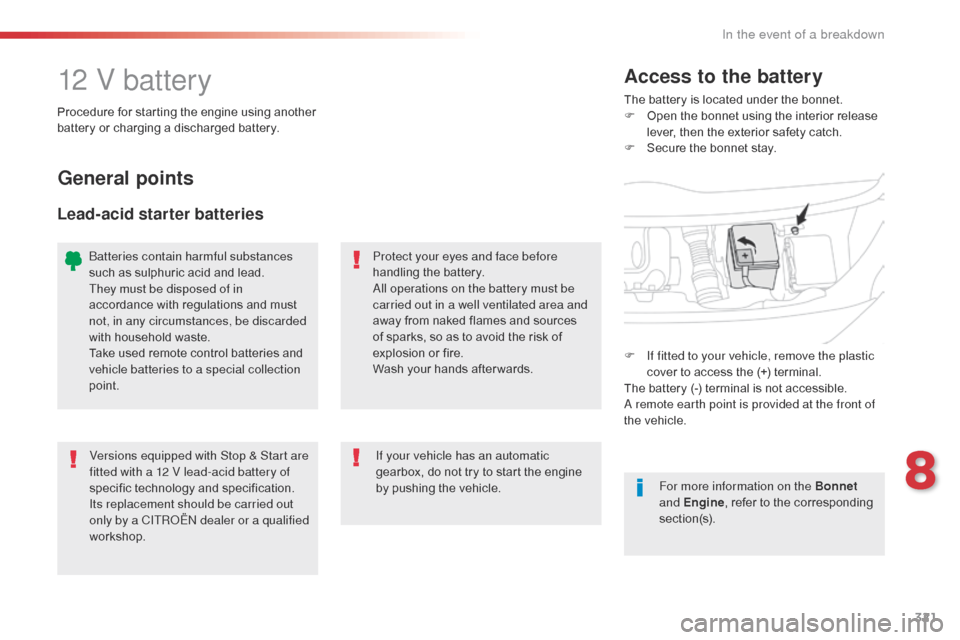
12 V batteryThe battery is located under the bonnet.
F O pen the bonnet using the interior release
lever, then the exterior safety catch.
F
S
ecure the bonnet stay.
Access to the battery
Procedure for starting the engine using another
battery or charging a discharged battery.
General points
Lead-acid starter batteries
Protect your eyes and face before
handling the battery.
All operations on the battery must be
carried out in a well ventilated area and
away from naked flames and sources
of sparks, so as to avoid the risk of
explosion or fire.
Wash your hands after wards.
Versions equipped with Stop & Start are
fitted with a 12 V lead-acid battery of
specific technology and specification.
Its replacement should be carried out
only by a CITROËN dealer or a qualified
workshop. If your vehicle has an automatic
gearbox, do not try to start the engine
by pushing the vehicle.
Batteries contain harmful substances
such as sulphuric acid and lead.
They must be disposed of in
accordance with regulations and must
not, in any circumstances, be discarded
with household waste.
Take used remote control batteries and
vehicle batteries to a special collection
point.
For more information on the Bonnet
and Engine , refer to the corresponding
section(s).
F
I
f fitted to your vehicle, remove the plastic
cover to access the (+) terminal.
The battery (-) terminal is not accessible.
A remote earth point is provided at the front of
the vehicle.
8
In the event of a breakdown
Page 326 of 595
324
Jumpy _en_Chap08_En-cas-de-panne_ed01-2016
Do not force the lever as locking will
not be possible if the clamp is not
positioned correctly; start the procedure
again.
Disconnecting the battery
In order to maintain an adequate state
of charge for starting the engine, it is
recommended that the battery be disconnected
if the vehicle is taken out of service for a long
period.
Wait 2 minutes after switching off the ignition
before disconnecting the battery.
F
c
lose the windows and the doors before
disconnecting the battery,
F
s
witch off all electrical consumers
(audio system, wipers, lighting, ...),
F
s
witch off the ignition and wait for
four
m
inutes.
Having exposed the battery, it is only
necessary to disconnect the (+) terminal.
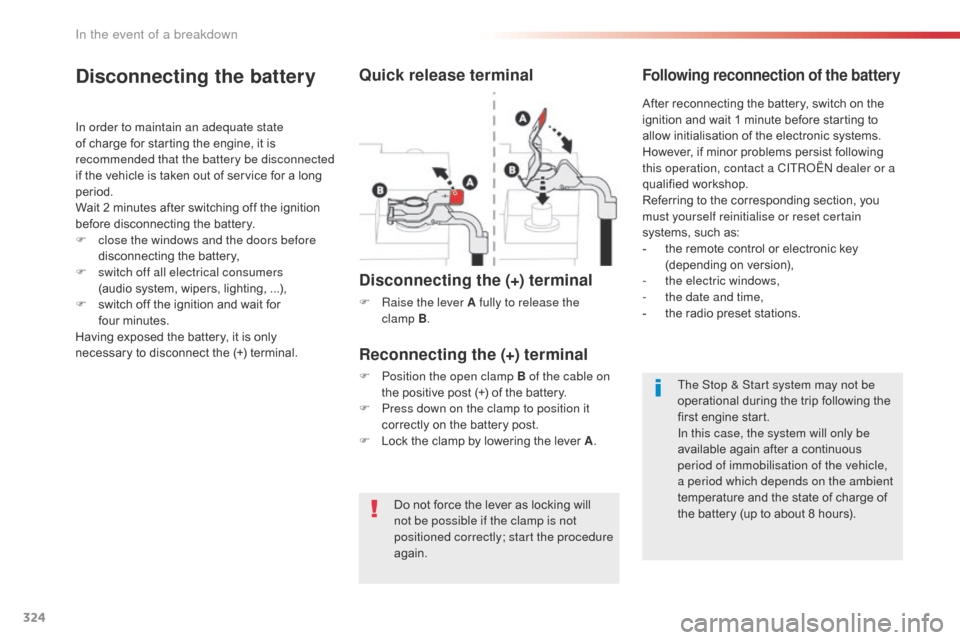
Quick release terminal
Disconnecting the (+) terminal
F Raise the lever A fully to release the clamp B.
Following reconnection of the battery
Reconnecting the (+) terminal
F Position the open clamp B of the cable on
the positive post (+) of the battery.
F
P
ress down on the clamp to position it
correctly on the battery post.
F
L
ock the clamp by lowering the lever A .After reconnecting the battery, switch on the
ignition and wait 1 minute before starting to
allow initialisation of the electronic systems.
However, if minor problems persist following
this operation, contact a CITROËN dealer or a
qualified workshop.
Referring to the corresponding section, you
must yourself reinitialise or reset certain
systems, such as:
-
t
he remote control or electronic key
(depending on version),
-
t
he electric windows,
-
t
he date and time,
-
t
he radio preset stations.
The Stop & Start system may not be
operational during the trip following the
first engine start.
In this case, the system will only be
available again after a continuous
period of immobilisation of the vehicle,
a period which depends on the ambient
temperature and the state of charge of
the battery (up to about 8 hours).
In the event of a breakdown
Page 327 of 595
325
Jumpy _en_Chap08_En-cas-de-panne_ed01-2016
Battery capacity
Vehicle lengthRating in Ah
(Ampere hours)
C o m p a c t ( L1) 480
Standard (L2) 640
Long (L3) 720 / 800
Always replace the battery by one of
equivalent specification.
To w i n g
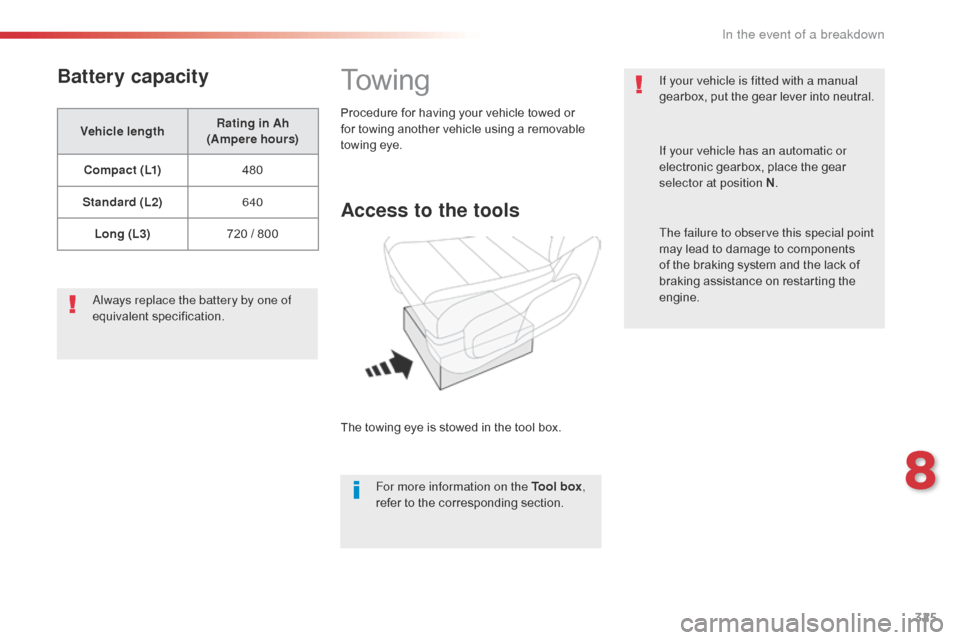
Access to the tools
The towing eye is stowed in the tool box. For more information on the Tool box ,
refer to the corresponding section.
Procedure for having your vehicle towed or
for towing another vehicle using a removable
towing eye.
If your vehicle is fitted with a manual
gearbox, put the gear lever into neutral.
If your vehicle has an automatic or
electronic gearbox, place the gear
selector at position N
.
The failure to observe this special point
may lead to damage to components
of the braking system and the lack of
braking assistance on restarting the
engine.
8
In the event of a breakdown
Page 329 of 595
327
Jumpy _en_Chap08_En-cas-de-panne_ed01-2016
On vehicles fitted with Diesel engines, the fuel
system must be primed if you run out of fuel.
For all versions other than BlueHDi, refer to the
corresponding engine compartment view.
Running out of fuel (Diesel)
For more information on Diesel misfuel
prevention, refer to the corresponding
section. F
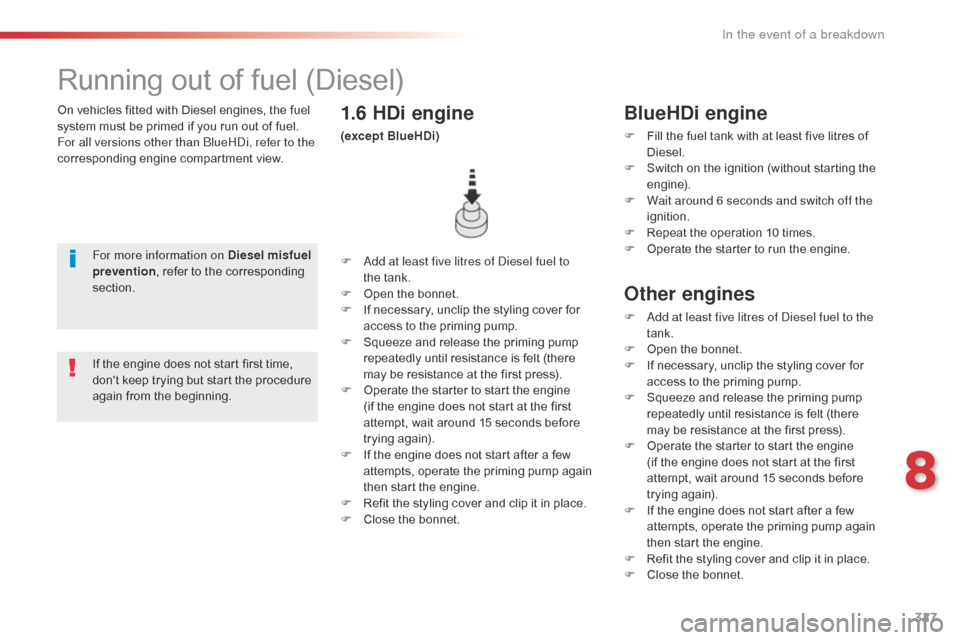
A dd at least five litres of Diesel fuel to
the
tank.
F
O
pen the bonnet.
F
I
f necessary, unclip the styling cover for
access to the priming pump.
F
S
queeze and release the priming pump
repeatedly until resistance is felt (there
may be resistance at the first press).
F
O
perate the starter to start the engine
(if the engine does not start at the first
attempt, wait around 15 seconds before
trying again).
F
I
f the engine does not start after a few
attempts, operate the priming pump again
then start the engine.
F
R
efit the styling cover and clip it in place.
F
C
lose the bonnet.
1.6 HDi engine
(except BlueHDi)
If the engine does not start first time,
don't keep trying but start the procedure
again from the beginning.
BlueHDi engine
F Fill the fuel tank with at least five litres of Diesel.
F
S
witch on the ignition (without starting the
engine).
F
W
ait around 6 seconds and switch off the
ignition.
F
R
epeat the operation 10 times.
F
O
perate the starter to run the engine.
Other engines
F Add at least five litres of Diesel fuel to the tank.
F
O
pen the bonnet.
F
I
f necessary, unclip the styling cover for
access to the priming pump.
F
S
queeze and release the priming pump
repeatedly until resistance is felt (there
may be resistance at the first press).
F
O
perate the starter to start the engine
(if the engine does not start at the first
attempt, wait around 15 seconds before
trying again).
F
I
f the engine does not start after a few
attempts, operate the priming pump again
then start the engine.
F
R
efit the styling cover and clip it in place.
F
C
lose the bonnet.
8
In the event of a breakdown
Page 334 of 595
332
Jumpy _en_Chap09_caracteristiques-techniques_ed01-2016
Engines
Engine characteristics
The engine characteristics (capacity,
maximum power, maximum power speed, fuel,
CO
2 emissions...) for your vehicle are given in
t
he registration document, as well as in sales
brochures.
These characteristics correspond to the
values type-approved on a test bed, under
conditions defined in European legislation
(Directive
1
999/99/EC).
For more information, contact a CITROËN
dealer or a qualified workshop.
Weights
The kerb weight is equal to the unladen
weight + driver (75 kg).
The GTW and towed load values indicated
apply up to a maximum altitude of
1
000 metres; the towed load mentioned
must be reduced by 10 % for every additional
1
000 metres.
The weight of the braked trailer can be
increased, within the GTW limit, on condition
that the GV W of the towing vehicle is reduced
by the same amount.
The recommended nose weight is the vertical
load on the towbar ball (removable with or
without tools). High ambient temperatures may result
in a reduction in the per formance of
the vehicle to protect the engine; when
the ambient temperature is higher than
37
°C, limit the towed weight.
If the ambient temperature is high, it
is recommended that the engine be
allowed to idle for 1 to 2 minutes after
the vehicle comes to a stop, to facilitate
its cooling. Towing with a lightly loaded vehicle can
adversely affect roadholding.
Braking distances are increased when
towing a trailer.
Never exceed 60 mph (100 km/h) when
towing (comply with the legislation in
force in your country).
GV W:
g
ross vehicle weight, the maximum
authorised vehicle weight.
GT W:
g
ross train weight, the maximum
authorised weight of vehicle plus trailer.
Weights and towed
loads
The maximum weights and towed loads for your
vehicle are given are given in the registration
document, as well as in sales brochures.
These values are also present on the
manufacturer's plate or label.
For more information, contact a CITROËN
dealer or a qualified workshop.
Technical data
Page 343 of 595
341
Jumpy_en_Chap10b_NAC-1_ed01-2016
CITROËN Connect Nav
GPS satellite navigation - Connectivity - Multimedia audio - Bluetooth® telephone
Contents
First steps
3 42
Steering mounted controls
3
44
Menus
3
45
Voice commands
3
46
Navigation
3
52
Connected navigation
3
68
Connectivity
3
78
Radio Media
3
88
Telephone
400
Settings
4
12
Frequently asked questions
4
22
The system is protected in such a way that it will only operate in
your vehicle.
The link below gives access to OSS (Open Source Software)
codes for the system.
http://www.psa-peugeot-citroen.com/oss As a safety measure and because it requires sustained attention
by the driver, the pairing of a Bluetooth mobile telephone with
the Bluetooth hands-free system of your audio system must be
done with the vehicle stationary
and the ignition on.
The display of the energy economy mode message signals that
a change to standby is imminent. For more information on the
Energy economy mode refer to the corresponding section.
.
Audio and Telematics
Page 396 of 595
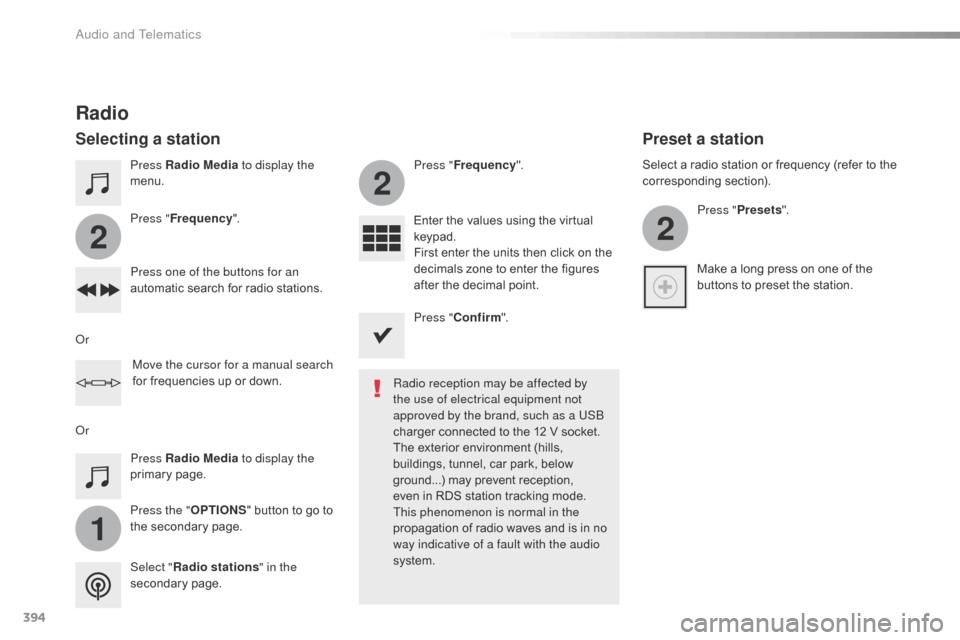
394
1
2
2
2
Jumpy_en_Chap10b_NAC-1_ed01-2016
Press Radio Media to display the
menu.
Press the " OPTIONS" button to go to
the secondary page. Press " Frequency ". Press "
Frequency ".
Enter the values using the virtual
keypad.
First enter the units then click on the
decimals zone to enter the figures
after the decimal point.
Press one of the buttons for an
automatic search for radio stations.
Press Radio Media
to display the
primary page.
Radio
Selecting a station
Radio reception may be affected by
the use of electrical equipment not
approved by the brand, such as a USB
charger connected to the 12 V socket.
The exterior environment (hills,
buildings, tunnel, car park, below
ground...) may prevent reception,
even in RDS station tracking mode.
This phenomenon is normal in the
propagation of radio waves and is in no
way indicative of a fault with the audio
system.
Select " Radio stations " in the
secondary page.
Or
Or
Move the cursor for a manual search
for frequencies up or down. Select a radio station or frequency (refer to the
corresponding section).
Press "Presets ".
Make a long press on one of the
buttons to preset the station.
Preset a station
Press " Confirm ".
Audio and Telematics