ELECTRIC Citroen JUMPY MULTISPACE 2013 2.G Owner's Manual
[x] Cancel search | Manufacturer: CITROEN, Model Year: 2013, Model line: JUMPY MULTISPACE, Model: Citroen JUMPY MULTISPACE 2013 2.GPages: 260, PDF Size: 8.79 MB
Page 3 of 260
Your vehicle is fitted with only some of the
equipment described in this document,
depending on the trim level, version and the
specifications for the country in which it is sold.
The fitting of electrical equipment or accessories
which are not recommended by CITROËN may
result in a failure of your vehicle's electronic
system. Please note this specific warning and
contact a CITROËN dealer to be shown the
recommended equipment and accessories.
CITROËN has a presence on every continent,
a complete product range,
bringing together technology and a permanent spirit of innovation,
for a modern and creative approach to mobility.
We thank you and congratulate you on your choice.
Happy motoring!
We draw your attention to the following...
At the wheel of your new vehicle,
getting to know each system,
each control, each setting,
makes your trips, your journeys
more comfortable and more enjoyable.
For any work on your vehicle, use a qualified
workshop that has the technical information,
competence and equipment required, which a
CITROËN dealer is able to provide.
Page 4 of 260
2
Contents
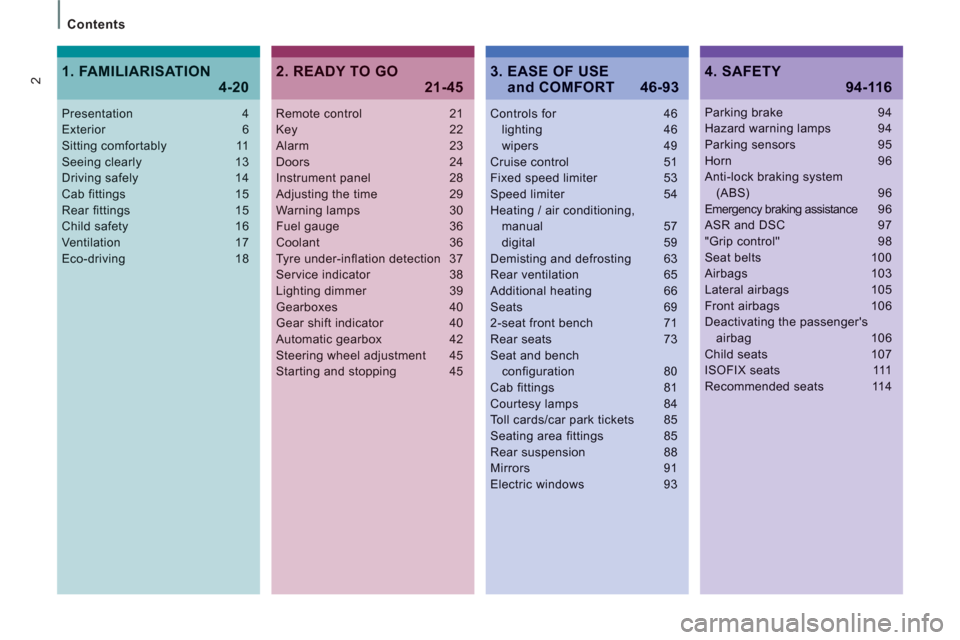
Remote control 21Key 22Alarm 23Doors 24Instrument panel 28Adjusting the time 29Warning lamps 30Fuel gauge 36Coolant 36Tyre under-inflation detection 37Service indicator 38Lighting dimmer 39Gearboxes 40Gear shift indicator 40Automatic gearbox 42Steering wheel adjustment 45Starting and stopping 45
Controls for 46lighting 46wipers 49Cruise control 51Fixed speed limiter 53Speed limiter 54Heating / air conditioning,manual 57digital 59Demisting and defrosting 63Rear ventilation 65Additional heating 66Seats 692-seat front bench 71Rear seats 73Seat and bench configuration 80Cab fittings 81Courtesy lamps 84Toll cards/car park tickets 85
Seating area fittings 85Rear suspension 88Mirrors 91Electric windows 93
Presentation 4Exterior 6Sitting comfortably 11Seeing clearly 13Driving safely 14Cab fittings 15Rear fittings 15Child safety 16Ventilation 17Eco-driving 18
Parking brake 94Hazard warning lamps 94Parking sensors 95Horn 96Anti-lock braking system(ABS) 96Emergency braking assistance96ASR and DSC 97"Grip control" 98Seat belts 100Airbags 103Lateral airbags 105Front airbags 106Deactivating the passenger'sairbag 106Child seats 107ISOFIX seats 111Recommended seats 114
2. READY TO GO
21-45
4. SAFETY
94-116
1. FAMILIARISATION
4-203. EASE OF USE and COMFORT 46-93
Page 12 of 260
Interior
10
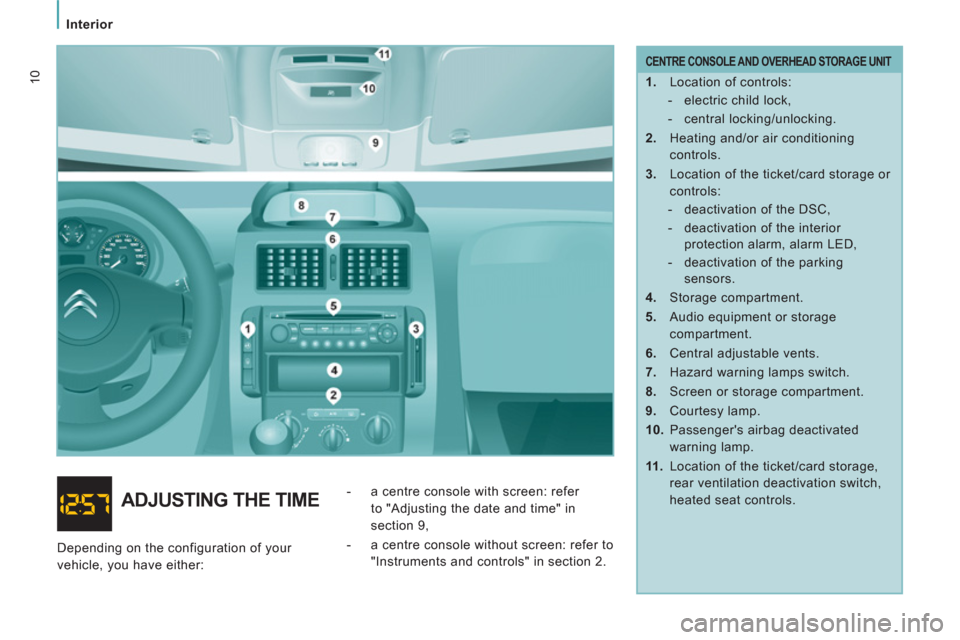
CENTRE CONSOLE AND OVERHEAD STORAGE UNIT
1.
Location of controls:
- electric child lock,
- central locking/unlocking.
2.
Heating and/or air conditioning
controls.
3.
Location of the ticket/card storage or
controls:
- deactivation of the DSC,
- deactivation of the interior
protection alarm, alarm LED,
- deactivation of the parking
sensors.
4.
Storage compartment.
5.
Audio equipment or storage
compartment.
6.
Central adjustable vents.
7.
Hazard warning lamps switch.
8.
Screen or storage compartment.
9.
Courtesy lamp.
10.
Passenger's airbag deactivated
warning lamp.
11 .
Location of the ticket/card storage,
rear ventilation deactivation switch,
heated seat controls.
ADJUSTING THE TIME
- a centre console with screen: refer
to "Adjusting the date and time" in
section 9,
- a centre console without screen: refer to
"Instruments and controls" in section 2.
Depending on the configuration of your
vehicle, you have either:
Page 14 of 260
2
4
3
3
12
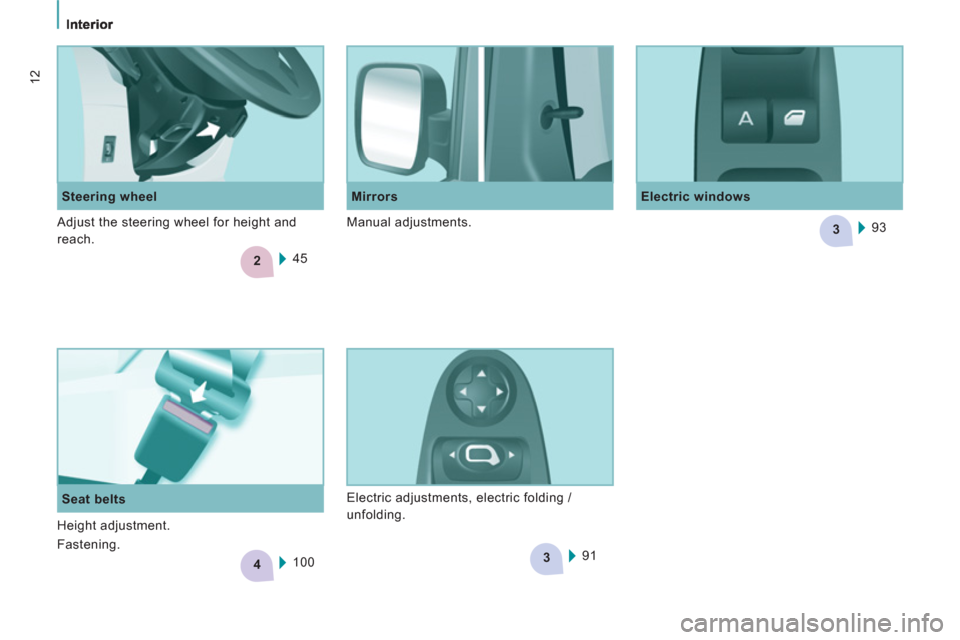
Steering wheel
Electric windows
Mirrors
45
Seat belts
100 93
91 Adjust the steering wheel for height and
reach. Manual adjustments.
Electric adjustments, electric folding /
unfolding.
Height adjustment.
Fastening.
Page 18 of 260
3
33
23
4
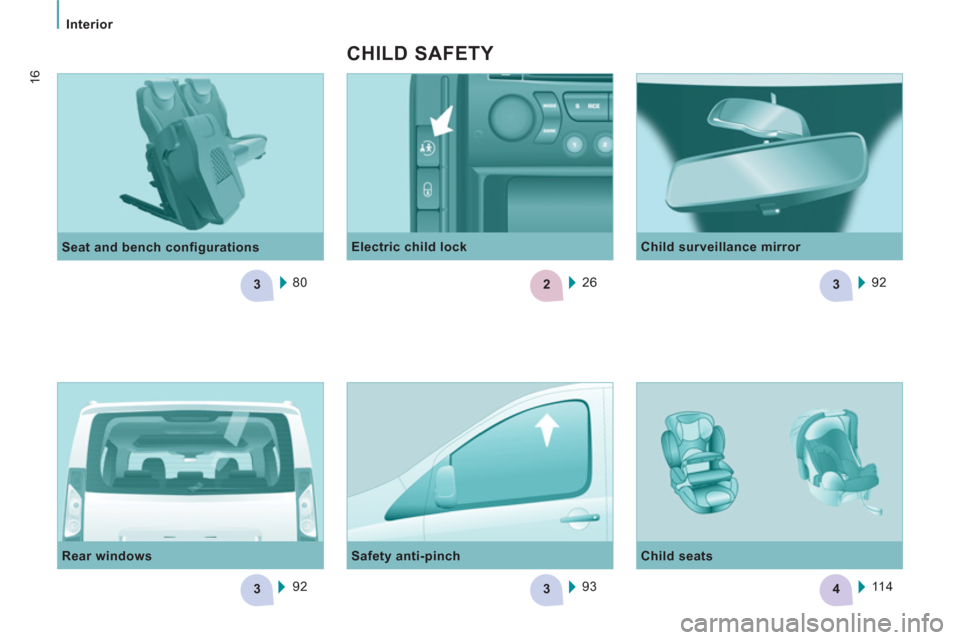
Interior
16
80
Seat and bench configurations
92
Rear windows
Safety anti-pinch
93
Electric child lock
26
CHILD SAFETY
Child surveillance mirror
92
Child seats
11 4
Page 20 of 260
Interior
18ECO-DRIVING
Eco-driving is a range of everyday practices that allow the motorist to optimise their fuel
consumption and CO
2 emissions.
Optimise the use of your
gearbox
With a manual gearbox, move off gently,
change up without waiting and drive by
changing up quite soon. If your vehicle has
the system, the gear shift indicator invites
you to change up; it is displayed in the
instrument panel, follow its instructions.
With an automatic or electronic gearbox,
stay in Drive "D"
or Auto "A"
, according to
the type of gearbox, without pressing the
accelerator pedal heavily or suddenly.
Control the use of your
electrical equipment
Before moving off, if the passenger
compartment is too warm, ventilate it by
opening the windows and air vents before
using the air conditioning.
Above 30 mph (50 km/h), close the windows
and leave the air vents open.
Switch off the headlamps and front
foglamps when the level of light does not
require their use.
Avoid running the engine before moving
off, particularly in winter; your vehicle will
warm up much faster while driving.
Drive smoothly
Maintain a safe distance between vehicles,
use engine braking rather than the
brake pedal, and press the accelerator
progressively. These practices contribute
towards a reduction in fuel consumption and
CO
2 emissions and also helps reduce the
background traffic noise.
If your vehicle has cruise control, make
use of the system at speeds above 25 mph
(40 km/h) when the traffic is flowing well.
As a passenger, if you avoid connecting
your multimedia devices (film, music,
video game...), you will contribute towards
limiting the consumption of electrical
energy, and so of fuel.
Disconnect your portable devices before
leaving the vehicle.
Remember to make use of equipment
that can help keep the temperature in the
passenger compartment down (sunroof
and window blinds...).
Switch off the air conditioning, unless it
has automatic digital regulation, as soon
as the desired temperature is attained.
Switch off the demisting and defrosting
controls, if not automatic.
Switch off the heated seat as soon as
possible.
Page 28 of 260
26
Access
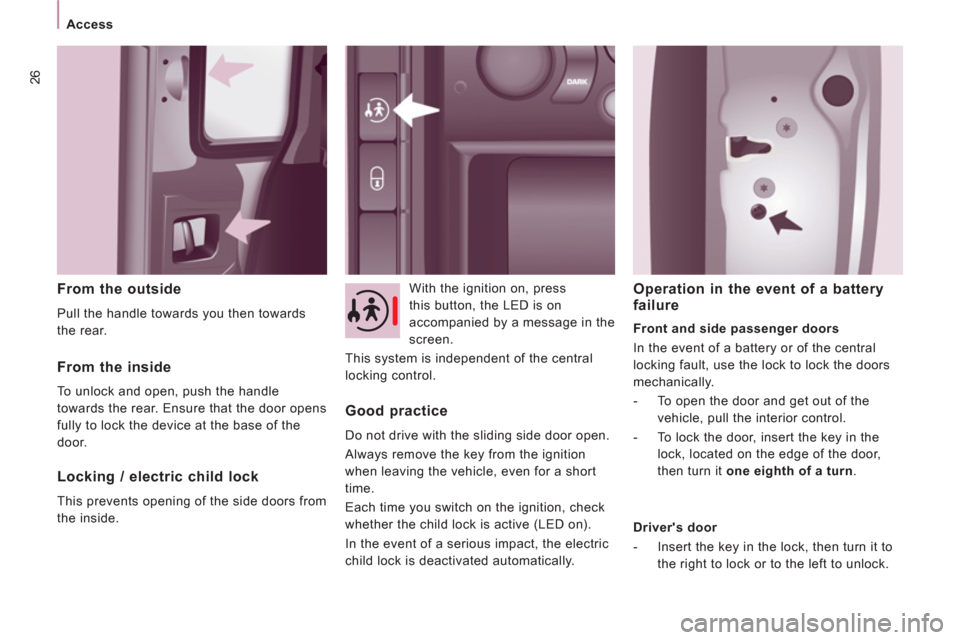
From the outside
Pull the handle towards you then towards
the rear. With the ignition on, press
this button, the LED is on
accompanied by a message in the
screen.
This system is independent of the central
locking control.
From the inside
To unlock and open, push the handle
towards the rear. Ensure that the door opens
fully to lock the device at the base of the
door.
Locking / electric child lock
This prevents opening of the side doors from
the inside.
Good practice
Do not drive with the sliding side door open.
Always remove the key from the ignition
when leaving the vehicle, even for a short
time.
Each time you switch on the ignition, check
whether the child lock is active (LED on).
In the event of a serious impact, the electric
child lock is deactivated automatically.
Operation in the event of a battery
failure
Front and side passenger doors
In the event of a battery or of the central
locking fault, use the lock to lock the doors
mechanically.
- To open the door and get out of the
vehicle, pull the interior control.
- To lock the door, insert the key in the
lock, located on the edge of the door,
then turn it one eighth of a turn
.
Driver's door
- Insert the key in the lock, then turn it to
the right to lock or to the left to unlock.
Page 66 of 260

64
Ventilation
Pressing this button, with the engine
running, activates the rapid demisting -
defrosting of the rear screen and/or electric
mirrors.
This function switches off:
- when the button is pressed,
- when the engine is switched off,
- automatically to prevent excessive
energy consumption.
Demisting the rear screen and/or mirrors
Automatic air conditioning: visibility
programme
The comfort programme (AUTO) may not
be sufficient to quickly demist or defrost the
windows (humidity, several passengers, ice).
In this case, select the visibility programme.
The visibility programme indicator lamp
comes on.
It activates the air conditioning, the air
flow, the defrosting of the rear screen
and provides optimum distribution of the
ventilation to the windscreen and side
windows.
It deactivates the air recirculation.
Page 93 of 260

91
Mirrors and windows
EASE OF USE and COMFOR
T
3
MIRRORS
If fitted on your vehicle, the mirror is
supplemented by a 2nd lower mirror. This
mirror is convex to broaden the field of side
vision. Objects observed are, in reality,
closer than they appear. Therefore, take this
into account in order to judge the distance
correctly.
MIRRORS AND WINDOWS
Electric folding
If your vehicle is fitted with this function,
the mirrors can be folded electrically from
the inside, with the vehicle parked and the
ignition on:
- Place switch A
in the centre position.
- Pull switch A
rearwards.
Heated mirrors
If your vehicle is fitted with this function,
press the rear screen demisting button. The folding / unfolding on locking / unlocking
can be deactivated.
Contact a CITROËN dealer or a qualified
workshop.
Electric door mirrors
- Move switch A
to the right or to the left
to select the corresponding mirror.
- Move knob B
in all four directions to
adjust.
- Return switch A
to the centre position. From the outside, lock the vehicle using the
remote control or the key.
Electric unfolding
The electric unfolding of the mirrors is
possible with the remote control or the key
on unlocking the vehicle, unless folding
was selected using switch A
. In this case,
pull the switch rearwards from the centre
position again.
Manual door mirrors
Move the lever in all four directions to
adjust.
When the vehicle is parked, the door mirrors
can be folded back manually.
If the mirror casing has come out of its
initial location, with the vehicle stationary,
reposition the mirror casing manually or use
the electric folding switch.
There is no risk of breakage even in the
presence of ice.
Page 95 of 260

93
Mirrors and windows
EASE OF USE and COMFOR
T
3
ELECTRIC WINDOWS
1.
Driver's electric window control
2.
Passenger electric window control The electrical functions of the electric
windows are deactivated:
- approximately 45 seconds after the
ignition is switched off,
- after one of the front doors is opened, if
the ignition is off.
Reinitialisation
Following reconnection of the battery,
the safety anti-pinch function must be
reinitialised.
Lower the window fully, then raise it, it will
rise in steps of a few centimetres each time
the control is pressed. Repeat the operation
until the window is fully closed.
Continue to press the control for at least one
second after the window closed position has
been reached.
The safety anti-pinch does not operate
during these operations.
There are two operating modes:
Manual mode
Press or pull the control, without passing the
point of resistance. The window stops when
you release the control.
Automatic mode
Press or pull the control, beyond the point
of resistance. The window opens or closes
fully when the control is released. Pressing
the control again stops the movement of the
window.
Safety anti-pinch
If your vehicle is fitted with the safety anti-
pinch function, when the window rises and
meets an obstacle, it stops and partially
lowers.
In the event of unwanted opening of the
window on closing, press the control until
the window is fully open. Within the next
4 seconds, pull the control until the window
is fully closed.
The safety auto-reverse does not operate
during these operations.
Good practice
If the electric windows meet an obstacle
during operation, you must reverse the
movement of the window. To do this, press
the control concerned.
When the driver operates the passenger
electric window controls, he must ensure
that no one is preventing correct closing of
the windows.
The driver must ensure that the passengers
use the electric windows correctly.
Be aware of children when operating the
windows.