seat adjustment Citroen JUMPY MULTISPACE 2013 2.G Owner's Manual
[x] Cancel search | Manufacturer: CITROEN, Model Year: 2013, Model line: JUMPY MULTISPACE, Model: Citroen JUMPY MULTISPACE 2013 2.GPages: 260, PDF Size: 8.79 MB
Page 4 of 260
2
Contents
Remote control 21Key 22Alarm 23Doors 24Instrument panel 28Adjusting the time 29Warning lamps 30Fuel gauge 36Coolant 36Tyre under-inflation detection 37Service indicator 38Lighting dimmer 39Gearboxes 40Gear shift indicator 40Automatic gearbox 42Steering wheel adjustment 45Starting and stopping 45
Controls for 46lighting 46wipers 49Cruise control 51Fixed speed limiter 53Speed limiter 54Heating / air conditioning,manual 57digital 59Demisting and defrosting 63Rear ventilation 65Additional heating 66Seats 692-seat front bench 71Rear seats 73Seat and bench configuration 80Cab fittings 81Courtesy lamps 84Toll cards/car park tickets 85
Seating area fittings 85Rear suspension 88Mirrors 91Electric windows 93
Presentation 4Exterior 6Sitting comfortably 11Seeing clearly 13Driving safely 14Cab fittings 15Rear fittings 15Child safety 16Ventilation 17Eco-driving 18
Parking brake 94Hazard warning lamps 94Parking sensors 95Horn 96Anti-lock braking system(ABS) 96Emergency braking assistance96ASR and DSC 97"Grip control" 98Seat belts 100Airbags 103Lateral airbags 105Front airbags 106Deactivating the passenger'sairbag 106Child seats 107ISOFIX seats 111Recommended seats 114
2. READY TO GO
21-45
4. SAFETY
94-116
1. FAMILIARISATION
4-203. EASE OF USE and COMFORT 46-93
Page 13 of 260
3
11
Interior
FAMILIARISATIO
N
1
Driver's seat
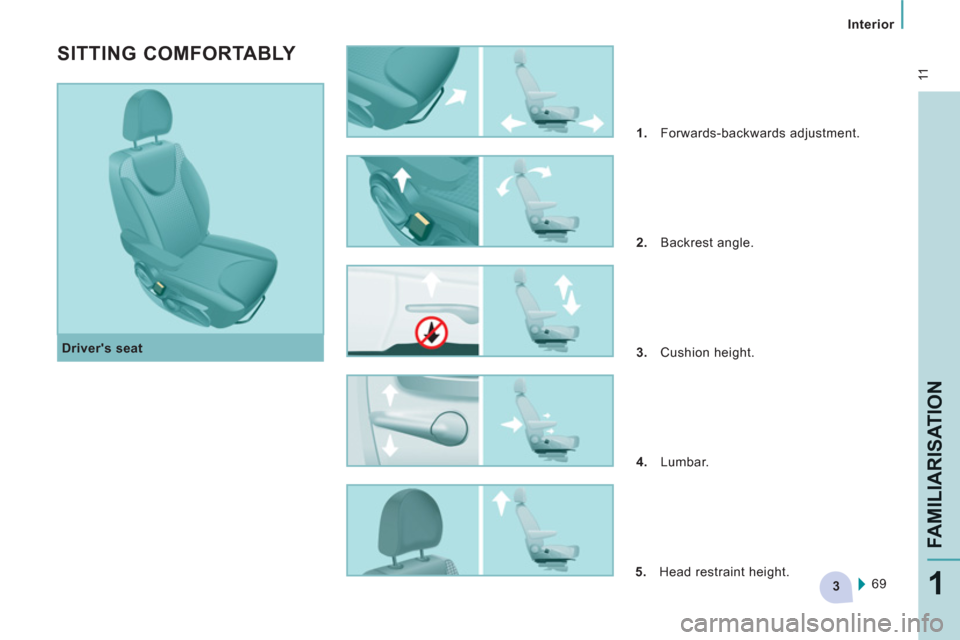
SITTING COMFORTABLY
1.
Forwards-backwards adjustment.
2.
Backrest angle.
3.
Cushion height.
4.
Lumbar.
5.
Head restraint height.
69
Page 14 of 260
2
4
3
3
12
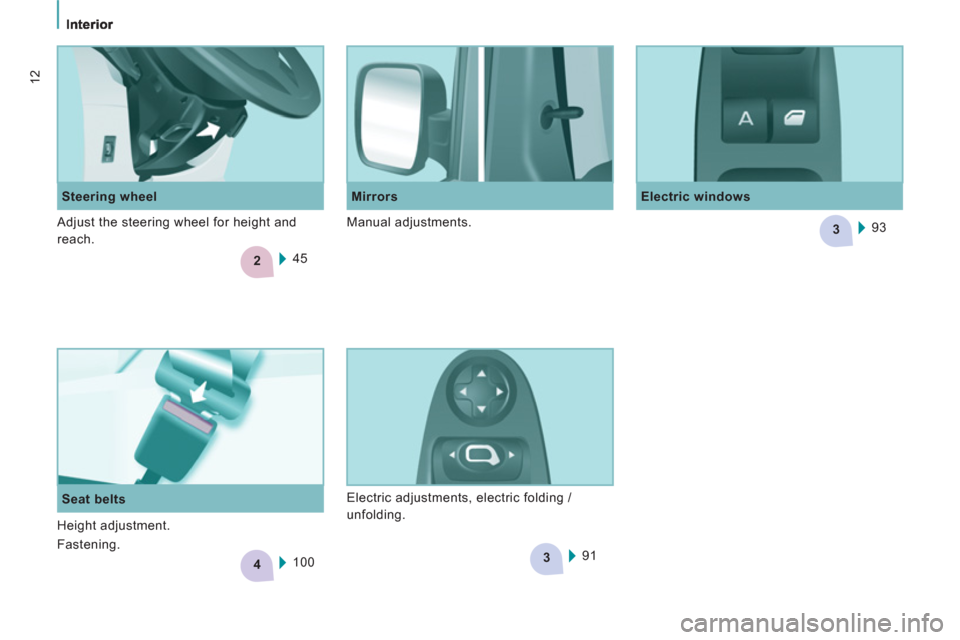
Steering wheel
Electric windows
Mirrors
45
Seat belts
100 93
91 Adjust the steering wheel for height and
reach. Manual adjustments.
Electric adjustments, electric folding /
unfolding.
Height adjustment.
Fastening.
Page 67 of 260

65
Ventilation
EASE OF USE and COMFOR
T
3
REAR VENTILATION
If your vehicle is fitted with an additional air
conditioning unit, located in the rear of the
vehicle. The distribution duct located in the
roof and the 6 individual vents provide a
perfect air distribution.
The warm air diffused at the floor, from the
front heating and air conditioning unit, is
distributed at the feet of the rear passengers
of the 2nd row.
A warm air diffusion vent, located on the
specific unit, completes the installation
for the feet of the rear passengers of the
3rd row.
Temperature adjustment
Control positioned:
- on the blue, produces cool air,
- on the red, produces heating.
Activation / Deactivation
Air flow
The fan speed for the air via the
vents, varies from 1 to the fastest 4.
To obtain the desired comfort
level, remember to adjust this
control.
To stop the fan, place the control in position 0. This button, located on the
overhead storage unit, enables
you to activate or deactivate the
operation of the rear controls
from the driver's seat or the front passenger
seat.
The first press activates (green LED on).
A second press deactivates (LED off).
Page 71 of 260

69
Seats
EASE OF USE and COMFOR
T
3
FRONT SEATS
Depending on the version and configuration
of your vehicle, different front seats are
fitted, either:
- a driver's seat and a passenger seat,
- an individual driver's seat and a two-
seat passenger bench.
3 - Driver's seat height adjustment
Depending on the version and configuration
of your vehicle, you have either:
- a passive adjustment: pull the handle
upwards then take your weight off the
seat to raise, or push on the seat to
lower,
2 - Seat back angle adjustment
Pull the lever upwards and set the required
angle.
1 - Forwards/backwards adjustment
Lift the bar and slide the seat forwards or
backwards. Depending on the models, the following
adjustments are available:
Page 72 of 260

70
Seats
- an active adjustment: operate the handle
upwards or downwards until the desired
position is reached.
Head restraint height adjustment
To raise or lower the restraint, pull it
forwards, then slide it. The adjustment is correct when the upper
edge of the head restraint is level with the
top of the head.
Never drive with the head restraints
removed; they must be in place and
correctly adjusted.
Front heated seat controls
Adjustable armrest
To place the armrest in its rest position:
- raise it until it is in the centreline of the
seat back.
4 - Driver's seat lumbar adjustment
Move the lever up or down to obtain the
required position. To remove it, set it in the high position, press
the tabs and pull upwards and forwards at
the same time.
To re-install, engage the head restraint rods
in the holes, making sure they are aligned
with the seat back.
To place the armrest in a position for use:
- fold it down fully,
- raise it slowly to the required position,
- if you pass the required position, raise it
fully then repeat the operations above.
Press the corresponding control,
located on the overhead storage
unit.
The temperature is controlled
automatically.
Pressing a second time stops operation.
Page 73 of 260

71
Seats
EASE OF USE and COMFOR
T
3
2-SEAT FRONT BENCH
If your vehicle is fitted with this bench seat,
it is fixed and has a 3rd seat belt.
Head restraint
Press the tab to adjust the height of the
head restraint.
To remove the head restraint, press the tabs
and raise the head restraint.
The adjustment is correct when the upper
edge of the head restraint is level with the
top of the head.
Never drive with the head restraints
removed; they must be in place and
adjusted correctly.
Seat back pockets
If your vehicle is fitted with these, they are
located on the backs of the front seats.
Page 94 of 260

92
Mirrors and windows
Manual rear view mirror
The rear view mirror has two positions:
- day (normal),
- night (anti-dazzle).
To change from one to the other, push or
pull the lever on the lower edge of the mirror.
SURVEILLANCE MIRROR
This mirror, placed on top of the central
mirror, enables the driver or front passenger
to observe all the rear seats.
Fitted on its own ball joint, it's manual
adjustment is simple and provides a view of
the rear interior of the vehicle.
It can also be adjusted for improved visibility
during manoeuvres or when overtaking.
REAR WINDOWS
2nd row side windows
If fitted on your vehicle, the 2nd row side
windows can be opened.
Squeeze the two controls then move the
window sideways. 4 notches are available.
While driving, the window must be closed or
secured on one of the 4 notches.
3rd row rear quarter lights
These are fixed.
Page 102 of 260
100
Seat belts
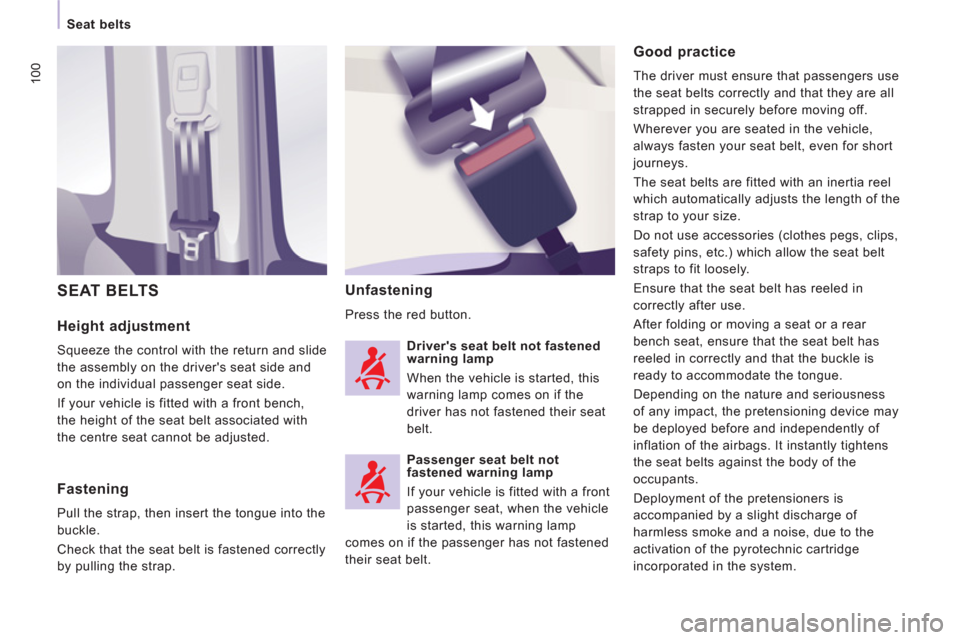
Height adjustment
Squeeze the control with the return and slide
the assembly on the driver's seat side and
on the individual passenger seat side.
If your vehicle is fitted with a front bench,
the height of the seat belt associated with
the centre seat cannot be adjusted.
Unfastening
Press the red button.
SEAT BELTS
Good practice
The driver must ensure that passengers use
the seat belts correctly and that they are all
strapped in securely before moving off.
Wherever you are seated in the vehicle,
always fasten your seat belt, even for short
journeys.
The seat belts are fitted with an inertia reel
which automatically adjusts the length of the
strap to your size.
Do not use accessories (clothes pegs, clips,
safety pins, etc.) which allow the seat belt
straps to fit loosely.
Ensure that the seat belt has reeled in
correctly after use.
After folding or moving a seat or a rear
bench seat, ensure that the seat belt has
reeled in correctly and that the buckle is
ready to accommodate the tongue.
Depending on the nature and seriousness
of any impact, the pretensioning device may
be deployed before and independently of
inflation of the airbags. It instantly tightens
the seat belts against the body of the
occupants.
Deployment of the pretensioners is
accompanied by a slight discharge of
harmless smoke and a noise, due to the
activation of the pyrotechnic cartridge
incorporated in the system.
Fastening
Pull the strap, then insert the tongue into the
buckle.
Check that the seat belt is fastened correctly
by pulling the strap.
Driver's seat belt not fastened
warning lamp
When the vehicle is started, this
warning lamp comes on if the
driver has not fastened their seat
belt.
Passenger seat belt not
fastened warning lamp
If your vehicle is fitted with a front
passenger seat, when the vehicle
is started, this warning lamp
comes on if the passenger has not fastened
their seat belt.
Page 249 of 260
16
3
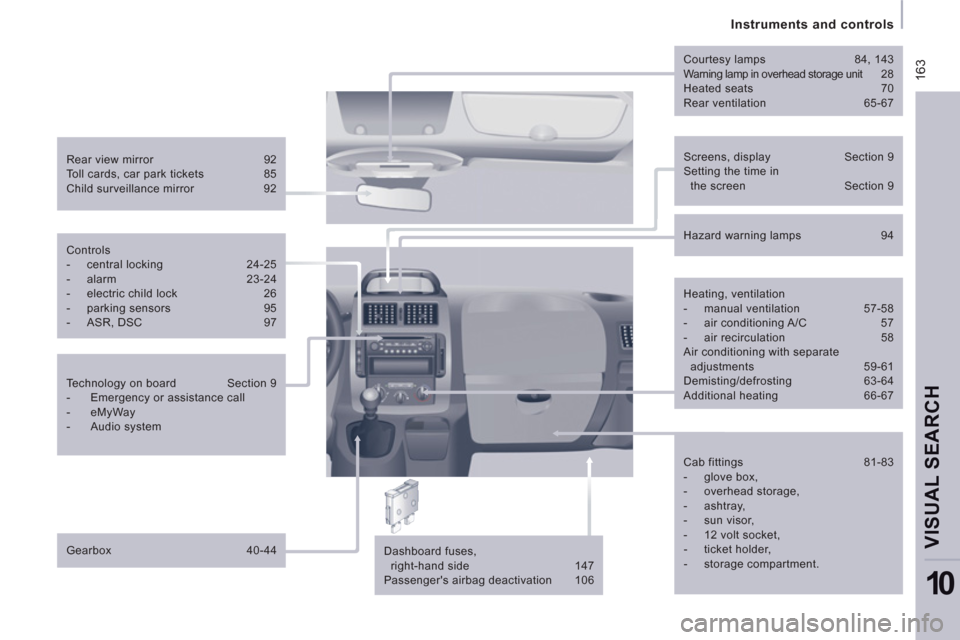
Instruments and controls
VISUAL SEARCH
10
Screens, display Section 9
Setting the time in
the screen Section 9
Rear view mirror 92
Toll cards, car park tickets 85
Child surveillance mirror 92
Courtesy lamps 84, 143
Warning lamp in overhead storage unit 2 8
Heated seats 70
Rear ventilation 65-67
Dashboard fuses,
right-hand side 147
Passenger's airbag deactivation 106
Controls
- central locking 24-25
- alarm 23-24
- electric child lock 26
- parking sensors 95
- ASR, DSC 97
Technology on board Section 9
- Emergency or assistance call
- eMyWay
- Audio system
Gearbox 40-44
Hazard warning lamps 94
Heating, ventilation
- manual ventilation 57-58
- air conditioning A/C 57
- air recirculation 58
Air conditioning with separate
adjustments 59-61
Demisting/defrosting 63-64
Additional heating 66-67
Cab fittings 81-83
- glove box,
- overhead storage,
- ashtray,
- sun visor,
- 12 volt socket,
- ticket holder,
- storage compartment.