Seat Citroen JUMPY MULTISPACE RHD 2012 2.G User Guide
[x] Cancel search | Manufacturer: CITROEN, Model Year: 2012, Model line: JUMPY MULTISPACE RHD, Model: Citroen JUMPY MULTISPACE RHD 2012 2.GPages: 278, PDF Size: 10.34 MB
Page 30 of 278
28
Instruments and controls
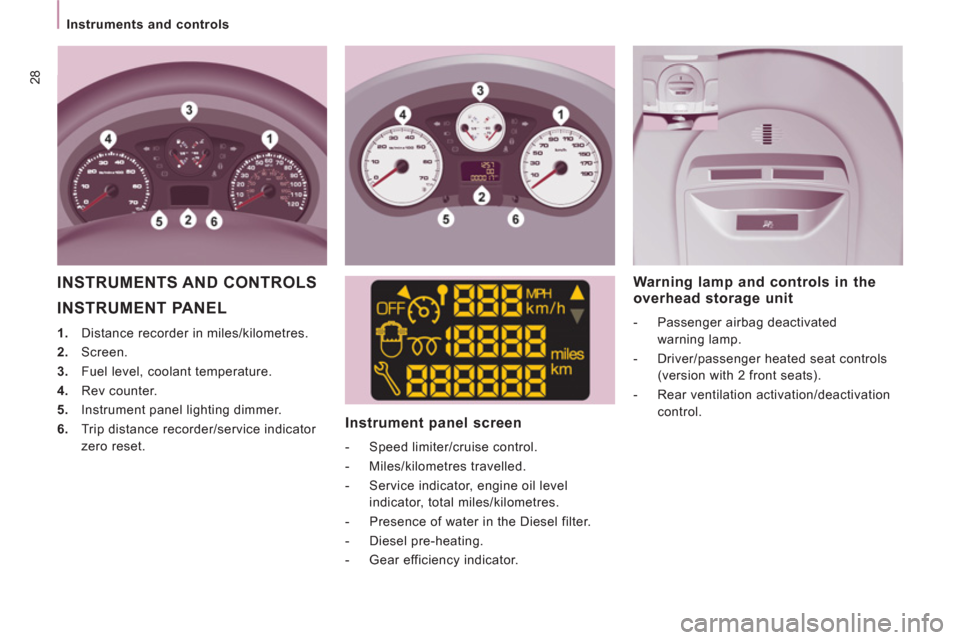
INSTRUMENT PANEL
1.
Distance recorder in miles/kilometres.
2.
Screen.
3.
Fuel level, coolant temperature.
4.
Rev counter.
5.
Instrument panel lighting dimmer.
6.
Trip distance recorder/service indicator
zero reset.
Instrument panel screen
- Speed limiter/cruise control.
- Miles/kilometres travelled.
- Service indicator, engine oil level
indicator, total miles/kilometres.
- Presence of water in the Diesel filter.
- Diesel pre-heating.
- Gear efficiency indicator.
Warning lamp and controls in the
overhead storage unit
- Passenger airbag deactivated
warning lamp.
- Driver/passenger heated seat controls
(version with 2 front seats).
- Rear ventilation activation/deactivation
control.
INSTRUMENTS AND CONTROLS
Page 33 of 278

31
Instruments and controls
READY TO GO
2
Warning lamp
is
indicates
Solution-action
Coolant
temperature
and level on with needle in
the red zone. abnormal increase in
temperature. Park and switch off the ignition then allow to cool.
Visually check the level.
flashing. drop in coolant level. Chapter 6, "Levels" section. Contact a CITROËN dealer
or a qualified workshop.
Service on temporarily. minor faults or warnings. Consult the warnings log in the display or on the screen.
See chapter 9, "Trip computer" section then "Warnings
log".
Depending on the seriousness of the fault, contact a
CITROËN dealer or a qualified workshop. remains on. major faults.
Row 1 seat belt
not fastened lit then flashing. the driver or a front passenger
has not fastened his seat belt. Pull the strap then insert the tongue in the buckle.
accompanied by
an audible signal
then remains on. the vehicle is moving with the
driver or front passenger seat
belt not fastened. Check that the seat belt is fastened by pulling the strap.
Chapter 4, "Seat belts" section.
The driver must ensure that all passengers have
fastened their seat belt and use it correctly.
Page 34 of 278
32
Instruments and controls
Warning lamp
is
indicates
Solution-action
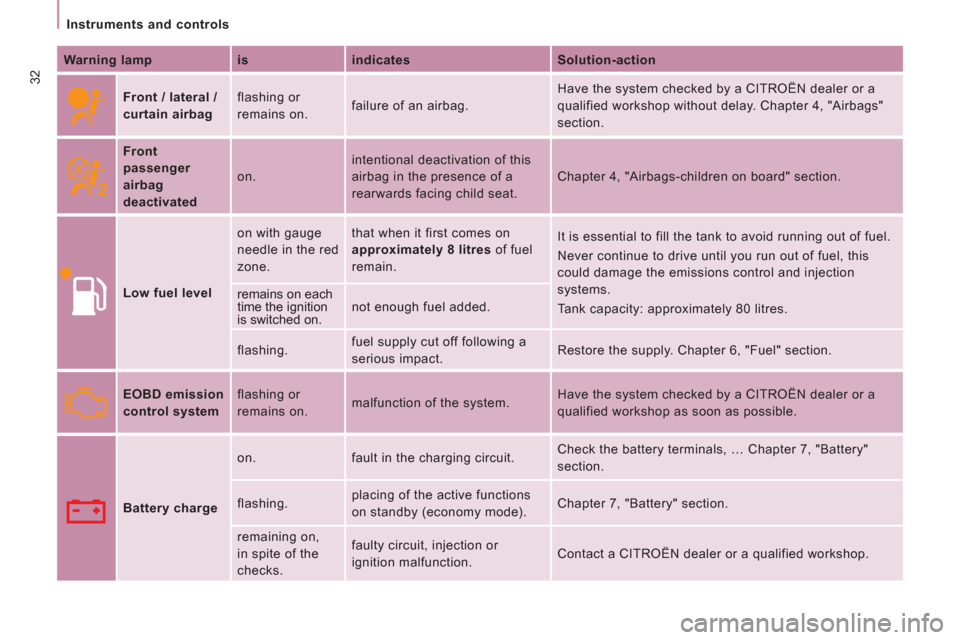
Front / lateral /
curtain airbag flashing or
remains on. failure of an airbag. Have the system checked by a CITROËN dealer or a
qualified workshop without delay. Chapter 4, "Airbags"
section.
Front
passenger
airbag
deactivated on. intentional deactivation of this
airbag in the presence of a
rearwards facing child seat. Chapter 4, "Airbags-children on board" section.
Low fuel level on with gauge
needle in the red
zone. that when it first comes on
approximately 8 litres
of fuel
remain. It is essential to fill the tank to avoid running out of fuel.
Never continue to drive until you run out of fuel, this
could damage the emissions control and injection
systems.
Tank capacity: approximately 80 litres. remains on each
time the ignition
is switched on. not enough fuel added.
flashing. fuel supply cut off following a
serious impact. Restore the supply. Chapter 6, "Fuel" section.
EOBD emission
control system flashing or
remains on. malfunction of the system. Have the system checked by a CITROËN dealer or a
qualified workshop as soon as possible.
Battery charge on. fault in the charging circuit. Check the battery terminals, … Chapter 7, "Battery"
section.
flashing. placing of the active functions
on standby (economy mode). Chapter 7, "Battery" section.
remaining on,
in spite of the
checks. faulty circuit, injection or
ignition malfunction. Contact a CITROËN dealer or a qualified workshop.
Page 49 of 278
47
Steering mounted controls
EASE OF USE and COMFOR
T
3
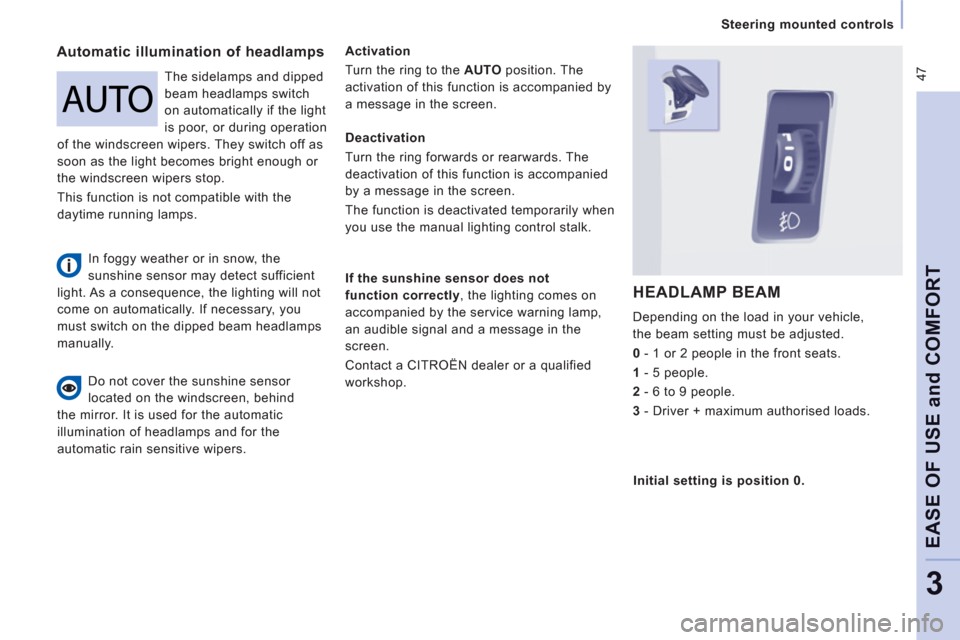
Automatic illumination of headlamps
Activation
Turn the ring to the AUTO
position. The
activation of this function is accompanied by
a message in the screen.
If the sunshine sensor does not
function correctly
, the lighting comes on
accompanied by the service warning lamp,
an audible signal and a message in the
screen.
Contact a CITROËN dealer or a qualified
workshop.
HEADLAMP BEAM
Depending on the load in your vehicle,
the beam setting must be adjusted.
0
- 1 or 2 people in the front seats.
1
- 5 people.
2
- 6 to 9 people.
3
- Driver + maximum authorised loads. Do not cover the sunshine sensor
located on the windscreen, behind
the mirror. It is used for the automatic
illumination of headlamps and for the
automatic rain sensitive wipers. The sidelamps and dipped
beam headlamps switch
on automatically if the light
is poor, or during operation
of the windscreen wipers. They switch off as
soon as the light becomes bright enough or
the windscreen wipers stop.
This function is not compatible with the
daytime running lamps.
Deactivation
Turn the ring forwards or rearwards. The
deactivation of this function is accompanied
by a message in the screen.
The function is deactivated temporarily when
you use the manual lighting control stalk.
Initial setting is position 0. In foggy weather or in snow, the
sunshine sensor may detect sufficient
light. As a consequence, the lighting will not
come on automatically. If necessary, you
must switch on the dipped beam headlamps
manually.
Page 66 of 278

64
Ventilation
REAR VENTILATION
If your vehicle is fitted with an additional air
conditioning unit, located in the rear of the
vehicle. The distribution duct located in the
roof and the 6 individual vents provide a
perfect air distribution.
The warm air diffused at the floor, from the
front heating and air conditioning unit, is
distributed at the feet of the rear passengers
of the 2nd row.
A warm air diffusion vent, located on the
specific unit, completes the installation for
the feet of the rear passengers of the 3rd
row.
Temperature adjustment
Control positioned:
- on the blue, produces cool air,
- on the red, produces heating.
Activation/Deactivation
Air flow
The fan speed for the air via the
vents, varies from 1 to the fastest 4.
To obtain the desired comfort
level, remember to adjust this
control.
To stop the fan, place the control in position 0. This button, located on the
overhead storage unit, enables
you to activate or deactivate the
operation of the rear controls
from the driver's seat or the front passenger
seat.
The first press activates (green LED on).
A second press deactivates (LED off).
Page 70 of 278
68
Seats
FRONT SEATS
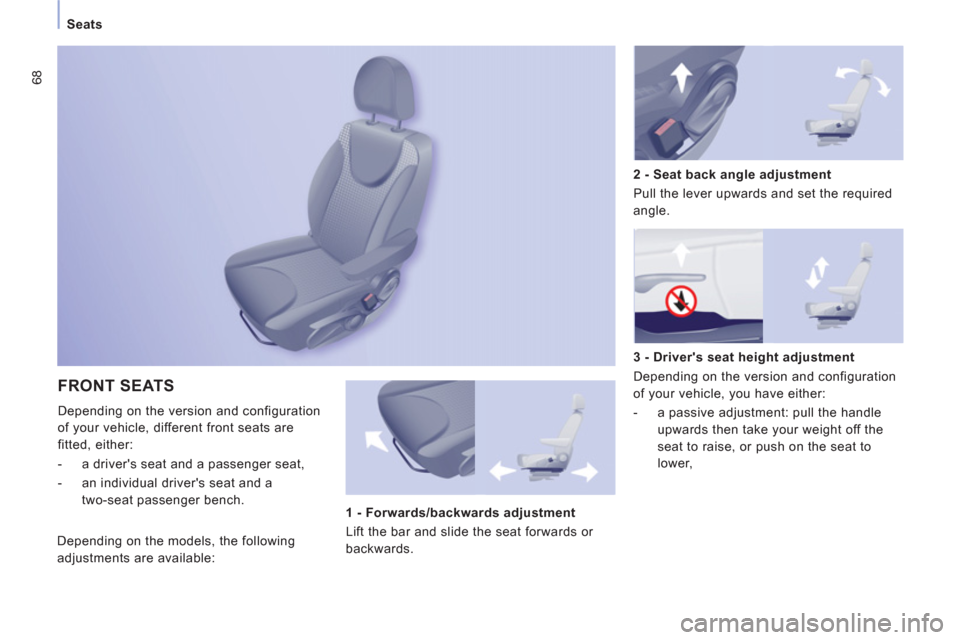
Depending on the version and configuration
of your vehicle, different front seats are
fitted, either:
- a driver's seat and a passenger seat,
- an individual driver's seat and a
two-seat passenger bench.
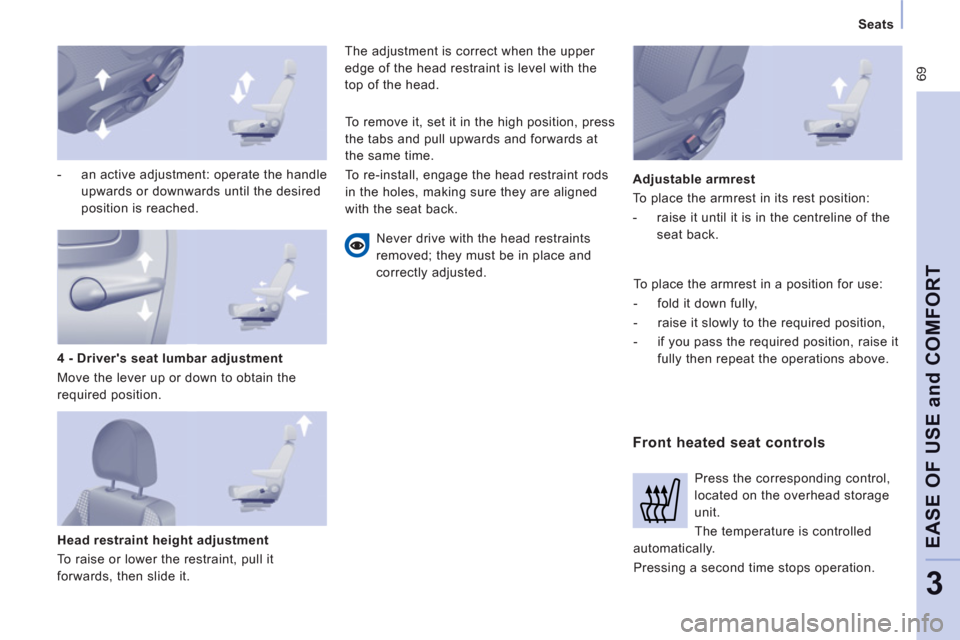
3 - Driver's seat height adjustment
Depending on the version and configuration
of your vehicle, you have either:
- a passive adjustment: pull the handle
upwards then take your weight off the
seat to raise, or push on the seat to
lower,
2 - Seat back angle adjustment
Pull the lever upwards and set the required
angle.
1 - Forwards/backwards adjustment
Lift the bar and slide the seat forwards or
backwards. Depending on the models, the following
adjustments are available:
Page 71 of 278
69
Seats
EASE OF USE and COMFOR
T
3
- an active adjustment: operate the handle
upwards or downwards until the desired
position is reached.
Head restraint height adjustment
To raise or lower the restraint, pull it
forwards, then slide it. The adjustment is correct when the upper
edge of the head restraint is level with the
top of the head.
Never drive with the head restraints
removed; they must be in place and
correctly adjusted.
Front heated seat controls
Adjustable armrest
To place the armrest in its rest position:
- raise it until it is in the centreline of the
seat back.
4 - Driver's seat lumbar adjustment
Move the lever up or down to obtain the
required position. To remove it, set it in the high position, press
the tabs and pull upwards and forwards at
the same time.
To re-install, engage the head restraint rods
in the holes, making sure they are aligned
with the seat back.
To place the armrest in a position for use:
- fold it down fully,
- raise it slowly to the required position,
- if you pass the required position, raise it
fully then repeat the operations above.
Press the corresponding control,
located on the overhead storage
unit.
The temperature is controlled
automatically.
Pressing a second time stops operation.
Page 72 of 278
70
Seats
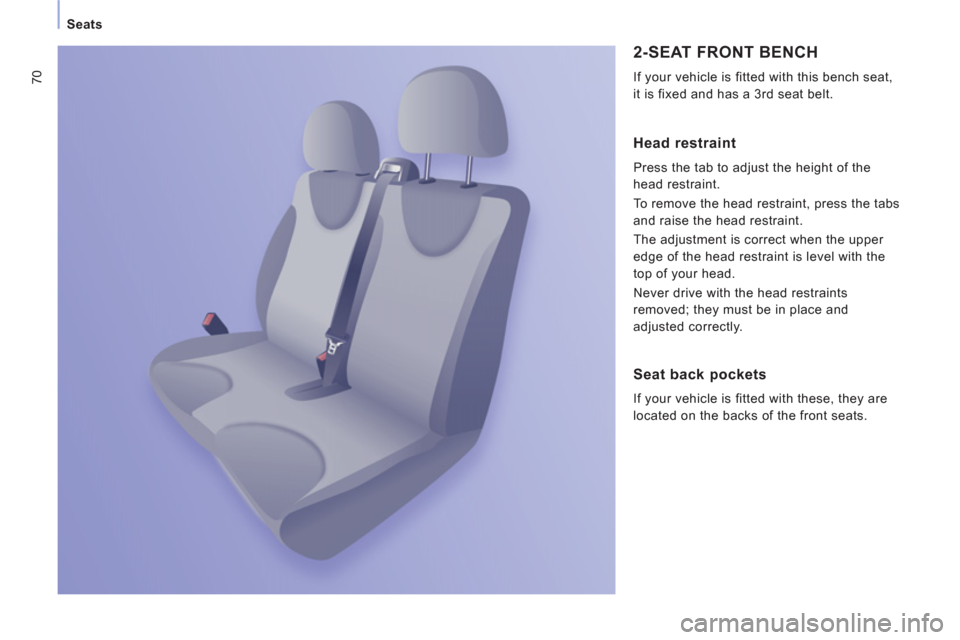
2-SEAT FRONT BENCH
If your vehicle is fitted with this bench seat,
it is fixed and has a 3rd seat belt.
Head restraint
Press the tab to adjust the height of the
head restraint.
To remove the head restraint, press the tabs
and raise the head restraint.
The adjustment is correct when the upper
edge of the head restraint is level with the
top of your head.
Never drive with the head restraints
removed; they must be in place and
adjusted correctly.
Seat back pockets
If your vehicle is fitted with these, they are
located on the backs of the front seats.
Page 74 of 278
72
Seats
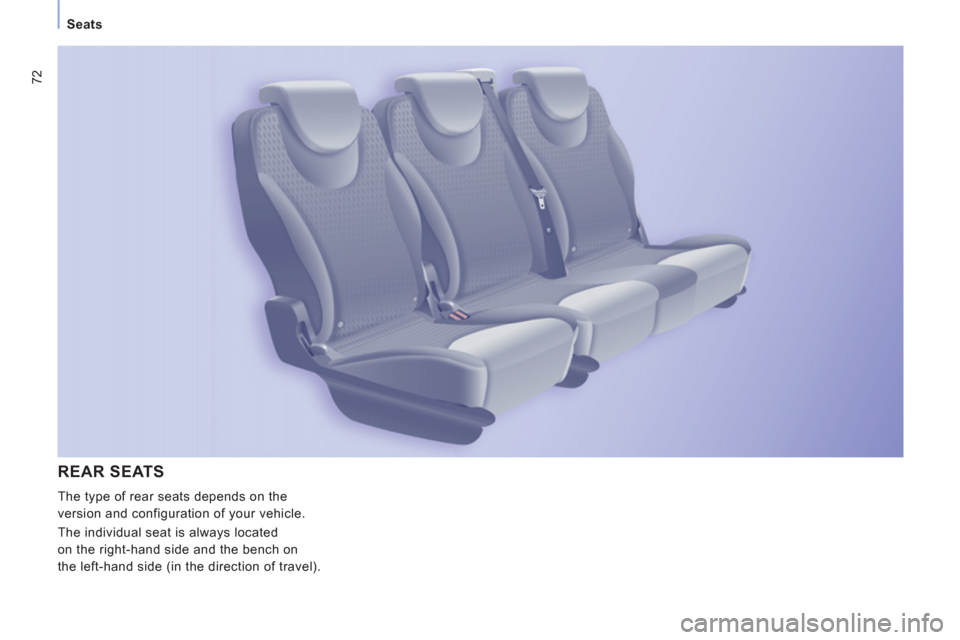
REAR SEATS
The type of rear seats depends on the
version and configuration of your vehicle.
The individual seat is always located
on the right-hand side and the bench on
the left-hand side (in the direction of travel).
Page 75 of 278
Seats
EASE OF USE and COMFOR
T
3
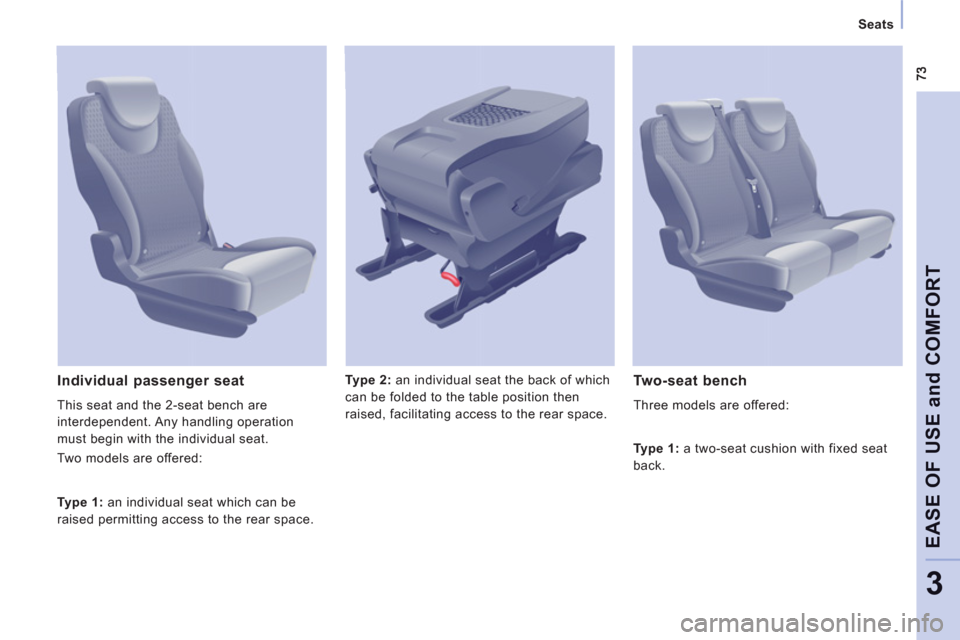
Type 2:
an individual seat the back of which
can be folded to the table position then
raised, facilitating access to the rear space.
Individual passenger seat
This seat and the 2-seat bench are
interdependent. Any handling operation
must begin with the individual seat.
Two models are offered:
Two-seat bench
Three models are offered:
Type 1:
an individual seat which can be
raised permitting access to the rear space.
Type 1:
a two-seat cushion with fixed seat
back.