Seat Citroen JUMPY MULTISPACE RHD 2012 2.G Service Manual
[x] Cancel search | Manufacturer: CITROEN, Model Year: 2012, Model line: JUMPY MULTISPACE RHD, Model: Citroen JUMPY MULTISPACE RHD 2012 2.GPages: 278, PDF Size: 10.34 MB
Page 112 of 278

11 0
Child safety
IUF:
Seat suitable for the installation of an
ISOFIX child seat of the universal category.
"Forward facing" ISOFIX child seat fitted
with an upper strap secured to the upper
ring of the vehicle seats equipped with
ISOFIX mountings.
LOCATIONS FOR ISOFIX CHILD SEATS
This table indicates the options for the installation of ISOFIX child seats on the vehicle seats fitted with ISOFIX mountings.
In the case of the universal and semi-universal ISOFIX child seats, the child seat's ISOFIX size category, determined by a letter from A
to G
,
is indicated on the child seat next to the ISOFIX logo.
IL-SU:
Seat suitable for the installation of a
semi-universal ISOFIX child seat. "Forward
facing" ISOFIX child seat fitted with a stay.
"Rear facing" ISOFIX child seat or infant car
seat, fitted with an upper strap or a stay.
X:
No restraining system for children.
Weight of the child
/indicative age
Less than
10 kg
(group 0)
Up to
6 months
approx
Less than 10 kg
(group 0)
Less than 13 kg
(group 0+)
Up to 1 year approx
From 9 to 18 kg
(group 1)
From 1 to 3 years approx
Type of ISOFIX child seat
Infant car
seat
"rear facing"
"rear facing"
"forward facing"
ISOFIX size category
F
G
C
D
E
C
D
A
B
B1
Row 2
outer
rear
seats
with individual seats in Row 1
IL-SU
IL-SU
IL-SU
IUF, IL-SU
Row 2
outer
rear
seats
with 2-seat bench in Row 1
IL-SU
X
IL-SU
X
IL-SU
IUF, IL-SU
Rear seats in Row 3
IL-SU
X
IL-SU
X
IL-SU
IUF, IL-SU
Infant car seat:
this is fixed to the lower
rings of a seat equipped with ISOFIX
mountings and occupies two rear seats.
Page 113 of 278

111
Child safety
SAFETY
4
CHILD SEATS RECOMMENDED BY CITROËN
CITROËN offers a complete range of recommended child seats which are secured using a three point seat belt
:
Group 0+: from birth to 13 kg
L1
"ROMER Baby-Safe Plus"
Installed in the rear-facing position
Groups 2 and 3: from 15 to 36 kg
L3
"RECARO Start''
L4
"KLIPPAN Optima"
From the age of 6 years
(approximately 22 kg), the booster is used
on its own.
L5
"RÖMER KIDFIX"
Can be fixed on the vehicle's ISOFIX mountings.
The child is restrained by the seat belt.
Page 114 of 278

11 2
Child safety
Row 2
Outer seats
U
U
U
U
Centre seat
U
U
U
U
Row 3
Outer seats
U
U
U
U
Centre seat
U
U
U
U
(a): Group 0: from birth to 13 kg. Infant car seats and "car cots" cannot be installed on the front passenger seat.
(b): consult the legislation in force in your country before installing your child on this seat.
U: seat suitable for the installation of a child seat secured using a seat belt and universally approved, "rear facing" and/or "forward facing".
INSTALLING CHILD SEATS ATTACHED USING THE SEAT BELT
This table indicates the options for installing child seats secured using a seat belt and universally approved in accordance with the weight of
the child and the seat in the vehicle.
Seat
Weight of the child and indicative age
Under 13 kg
(groups 0 (a)
and 0+)
Up to approx 1 year
From 9 to 18 kg
(group 1)
1 to 3 years approx
From 15 to 25 kg
(group 2)
3 to 6 years approx
From 22 to 36 kg
(group 3)
6 to 10 years
approx
Row 1 (b)
Individual seat
U
U
U
U
Bench, outer seat
U
U
U
U
Bench,
centre seat
L1
-
L3, L4, L5
L3, L4, L5
Page 115 of 278
11 3
Child safety
SAFETY
4
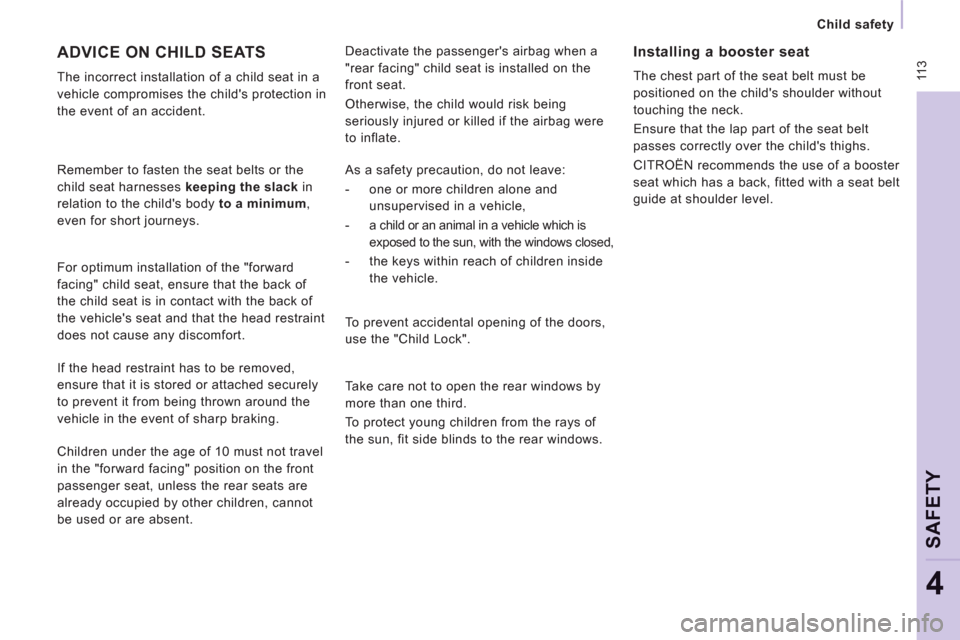
Deactivate the passenger's airbag when a
"rear facing" child seat is installed on the
front seat.
Otherwise, the child would risk being
seriously injured or killed if the airbag were
to inflate. Installing a booster seat
The chest part of the seat belt must be
positioned on the child's shoulder without
touching the neck.
Ensure that the lap part of the seat belt
passes correctly over the child's thighs.
CITROËN recommends the use of a booster
seat which has a back, fitted with a seat belt
guide at shoulder level.
ADVICE ON CHILD SEATS
The incorrect installation of a child seat in a
vehicle compromises the child's protection in
the event of an accident.
Remember to fasten the seat belts or the
child seat harnesses keeping the slack
in
relation to the child's body to a minimum
,
even for short journeys.
For optimum installation of the "forward
facing" child seat, ensure that the back of
the child seat is in contact with the back of
the vehicle's seat and that the head restraint
does not cause any discomfort.
If the head restraint has to be removed,
ensure that it is stored or attached securely
to prevent it from being thrown around the
vehicle in the event of sharp braking.
Children under the age of 10 must not travel
in the "forward facing" position on the front
passenger seat, unless the rear seats are
already occupied by other children, cannot
be used or are absent.
As a safety precaution, do not leave:
- one or more children alone and
unsupervised in a vehicle,
-
a child or an animal in a vehicle which is
exposed to the sun, with the windows closed,
- the keys within reach of children inside
the vehicle.
To prevent accidental opening of the doors,
use the "Child Lock".
Take care not to open the rear windows by
more than one third.
To protect young children from the rays of
the sun, fit side blinds to the rear windows.
Page 118 of 278
11 6
Equipment
OTHER ACCESSORIES
For any work on your vehicle, use
a qualified workshop that has the
technical information, competence and
equipment required, which a CITROËN
dealer is able to provide.
Installation of radiocommunication
transmitters
Before installing accessory
radiocommunication transmitters with an
external aerial on your vehicle, you are
advised to contact a representative of the
CITROËN marque.
The CITROËN Network will inform you of the
specifications (frequency band, maximum
output power, aerial position, specific
installation conditions) of the transmitters
which can be fitted, in accordance with the
Motor Vehicle Electromagnetic Compatibility
Directive (2004/104/CE).
This range is also available, structured
around comfort, leisure and maintenance: Trims (except for 163 hp engine), front mud
flaps, rear mud flaps, spoilers, sill, ... Audio equipment, hands-free kit, speakers,
CD changer, navigation, ...
Regardless of the audio and telematic
equipment offered on the market, the
technical constraints linked with the
fitting of equipment of these families of
products mean that the special features
of the equipment and its compatibility with
the capacities of your vehicle's standard
equipment must be taken into account.
Please contact a dealer for information
before fitting such equipment.
Front seat covers compatible with airbags,
benches, rubber mats, carpet mats, boot
tray, roof bars, side blinds, snow chains.
To prevent the mat from becoming caught
under the pedals:
- ensure that the mat and its fixings are
positioned correctly,
- never fit one mat on top of another. Screenwash, replacement fuses,
wiper blades, interior and exterior cleaning
and maintenance products, replacement
bulbs, ...
The fitting of electrical equipment
or accessories which are not
recommended by CITROËN may result in a
failure of your vehicle's electronic system.
Please note this specific warning. You
are advised to contact a representative
of the Marque to be shown the range of
recommended equipment and accessories.
Depending on the country in which the
vehicle is sold or operated, it is compulsory
to have a high visibility safety vest, warning
triangle and replacement bulbs available in
the vehicle. Anti-theft alarm, window engraving, first aid
kit, high visibility safety vest, rear parking
sensors, warning triangle, ...
Page 119 of 278

11 7
Opening the bonnet
CHECK
S
6
OPENING THE BONNET
From inside:
- lift the cover located at the foot of the
front left seat.
- pull the release lever upwards.
To close
Lower the bonnet and release it at the end of its
travel. Check that the bonnet is properly latched.
From outside:
partially open the bonnet, lift
the safety catch and raise the bonnet.
Bonnet stay
Secure the stay in one of the two notches,
according to the height required, to hold the
bonnet open.
Before closing the bonnet, replace the stay
in its housing.
"Bonnet open" warning
This warning is linked to the alarm option
only.
With the engine running or the
vehicle moving, a warning lamp
and a diagram in the screen,
accompanied by an audible
signal, warn you that the bonnet
is not properly closed.
Page 130 of 278

128
Battery
BATTERY
This is housed in a compartment located
underneath the fl oor, in front of the front right seat.
Before disconnecting the battery, you must
wait for 2 minutes after switching off the
ignition.
Never disconnect a terminal when the
engine is running.
Never charge a battery without first
disconnecting the terminals.
After every reconnection of the battery,
switch on the ignition and wait 1 minute
before starting to allow the electronic
systems to be initialised. If some problems
persist after this operation, please contact a
CITROËN dealer or a qualified workshop.
It is advisable to disconnect the battery
if the vehicle is not to be used for a
period of more than one month. charger
- Disconnect the battery,
- Follow the instructions for use given by
the battery charger manufacturer,
- Reconnect starting with the negative (-)
terminal,
- Check that the terminals and connectors
are clean. If they are covered with
sulphate (white or greenish deposit),
disconnect them and clean them.
To start the vehicle from another battery
- Connect the red cable to the positive (+)
terminals of the two batteries,
- Connect one end of the green or black
cable to the negative (-) terminal of the
slave battery,
- Connect the other end of the green or
black cable to an earth point on the
broken down vehicle as far as possible
from the battery,
- Operate the starter, let the engine run,
- Wait for the engine to return to idle, then
disconnect the cables.
The presence of this label indicates
the use of a 12 V lead-acid battery
with special technology and specification, for
which the involvement of a CITROËN dealer
or qualified workshop is required when
replacing or disconnecting the battery.
Failure to observe this recommendation may
cause premature ageing of the battery.
Page 146 of 278
144
Changing a fuse
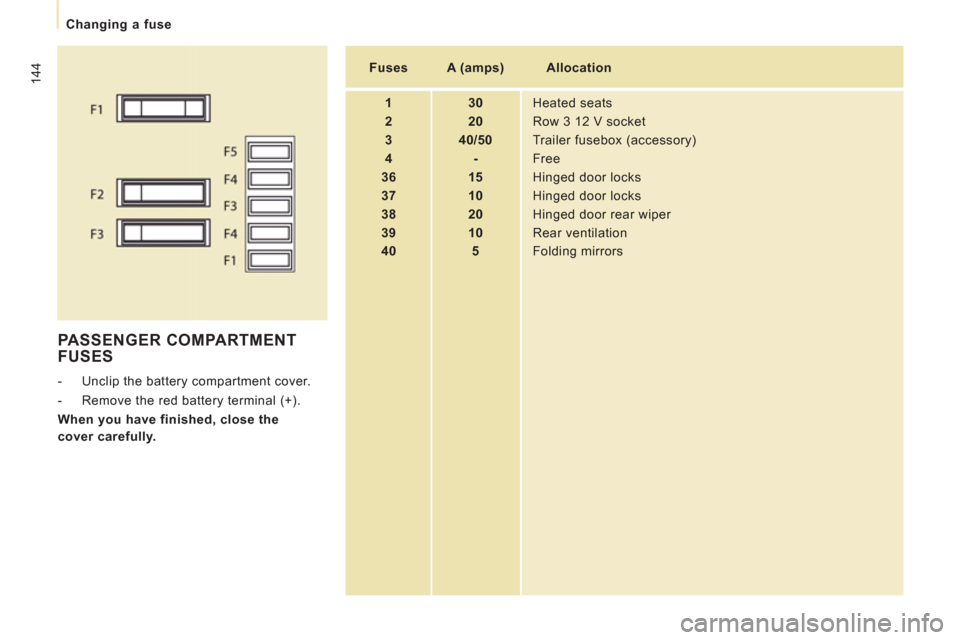
PASSENGER COMPARTMENT
FUSES
- Unclip the battery compartment cover.
- Remove the red battery terminal (+).
When you have finished, close the
cover carefully.
Fuses
A (amps)
Allocation
1
30
Heated seats
2
20
Row 3 12 V socket
3
40/50
Trailer fusebox (accessory)
4
-
Free
36
15
Hinged door locks
37
10
Hinged door locks
38
20
Hinged door rear wiper
39
10
Rear ventilation
40
5
Folding mirrors
Page 269 of 278
Instruments and controls
VISUAL SEARCH
10
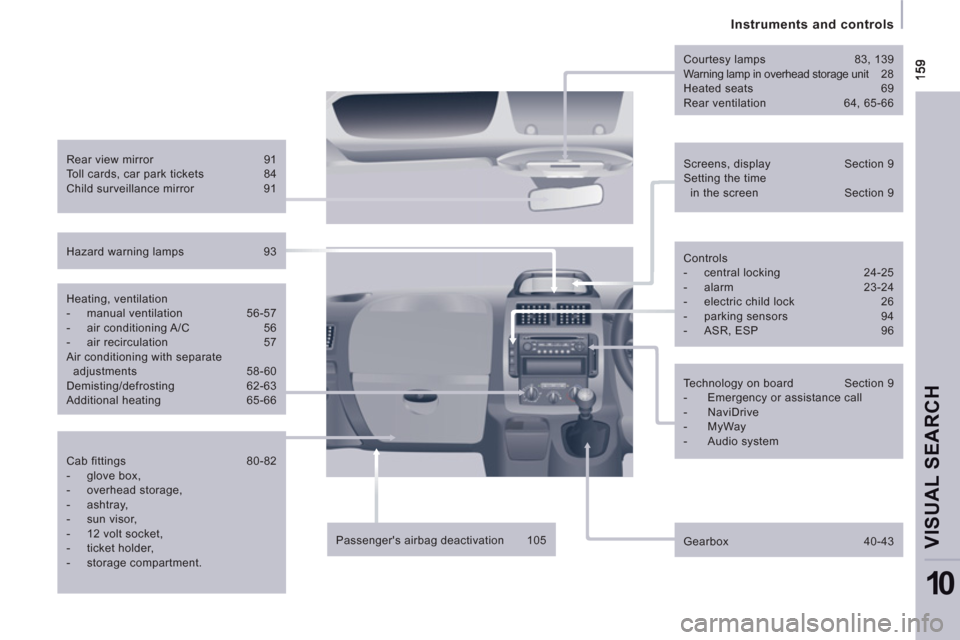
Screens, display Section 9
Setting the time
in the screen Section 9
Rear view mirror 91
Toll cards, car park tickets 84
Child surveillance mirror 91
Courtesy lamps 83, 139
Warning lamp in overhead storage unit 28
Heated seats 69
Rear ventilation 64, 65-66
Controls
- central locking 24-25
- alarm 23-24
- electric child lock 26
- parking sensors 94
- ASR, ESP 96
Technology on board Section 9
- Emergency or assistance call
- NaviDrive
- MyWay
- Audio system
Gearbox 40-43
Hazard warning lamps 93
Heating, ventilation
- manual ventilation 56-57
- air conditioning A/C 56
- air recirculation 57
Air conditioning with separate
adjustments 58-60
Demisting/defrosting 62-63
Additional heating 65-66
Cab fittings 80-82
- glove box,
- overhead storage,
- ashtray,
- sun visor,
- 12 volt socket,
- ticket holder,
- storage compartment.
Passenger's airbag deactivation 105
Page 270 of 278
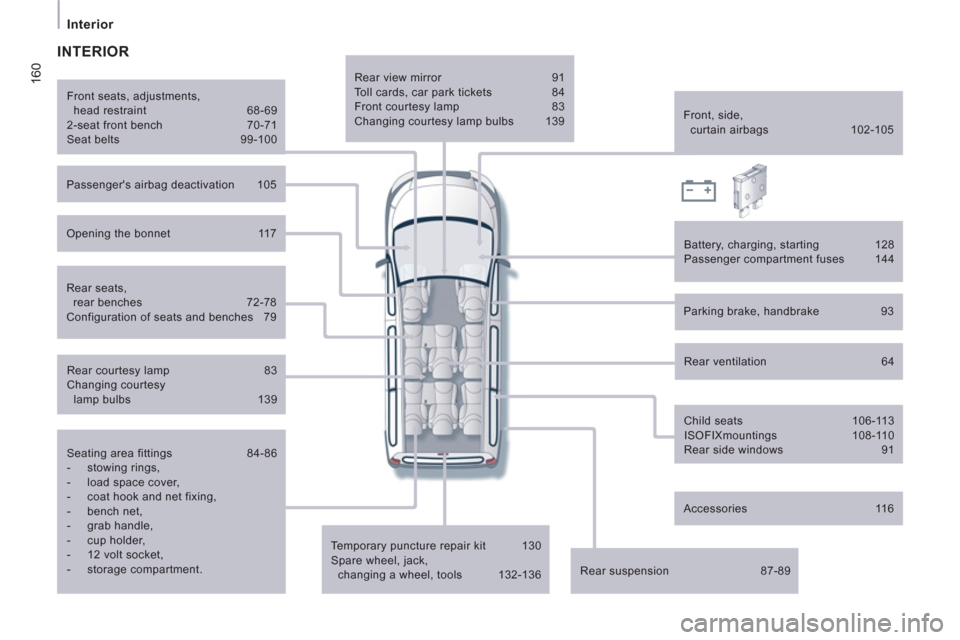
160
Interior
Seating area fittings 84-86
- stowing rings,
- load space cover,
- coat hook and net fixing,
- bench net,
- grab handle,
- cup holder,
- 12 volt socket,
- storage compartment.
Temporary puncture repair kit 130
Spare wheel, jack,
changing a wheel, tools 132-136
Rear suspension 87-89
Front, side,
curtain airbags 102-105
Parking brake, handbrake 93
Battery, charging, starting 128
Passenger compartment fuses 144
Front seats, adjustments,
head restraint 68-69
2-seat front bench 70-71
Seat belts 99-100
Rear ventilation 64
Child seats 106-113
ISOFIXmountings 108-110
Rear side windows 91
INTERIOR
Rear seats,
rear benches 72-78
Configuration of seats and benches 79
Rear courtesy lamp 83
Changing courtesy
lamp bulbs 139
Accessories 116
Rear view mirror 91
Toll cards, car park tickets 84
Front courtesy lamp 83
Changing courtesy lamp bulbs 139
Passenger's airbag deactivation 105
Opening the bonnet 117