change time Citroen JUMPY RHD 2016 2.G User Guide
[x] Cancel search | Manufacturer: CITROEN, Model Year: 2016, Model line: JUMPY RHD, Model: Citroen JUMPY RHD 2016 2.GPages: 520, PDF Size: 10.54 MB
Page 280 of 520

278
Checking levels
Take care when working under the bonnet, as certain areas of the engine may be extremely hot (risk of burns) and the cooling fan could start at
any time (even with the ignition off).
Engine oil level
The check is carried out either when
the ignition is switched on using the
oil level indicator in the instrument
panel for vehicles so equipped, or
using the dipstick.Checking using the dipstick
The location of the dipstick is shown in the
corresponding underbonnet layout view.
F
T
ake the dipstick by its coloured grip and
remove it completely.
F
W
ipe the end of the dipstick using a clean
non-fluffy cloth.
F
R
efit the dipstick and push fully down, then
pull it out again to make the visual check:
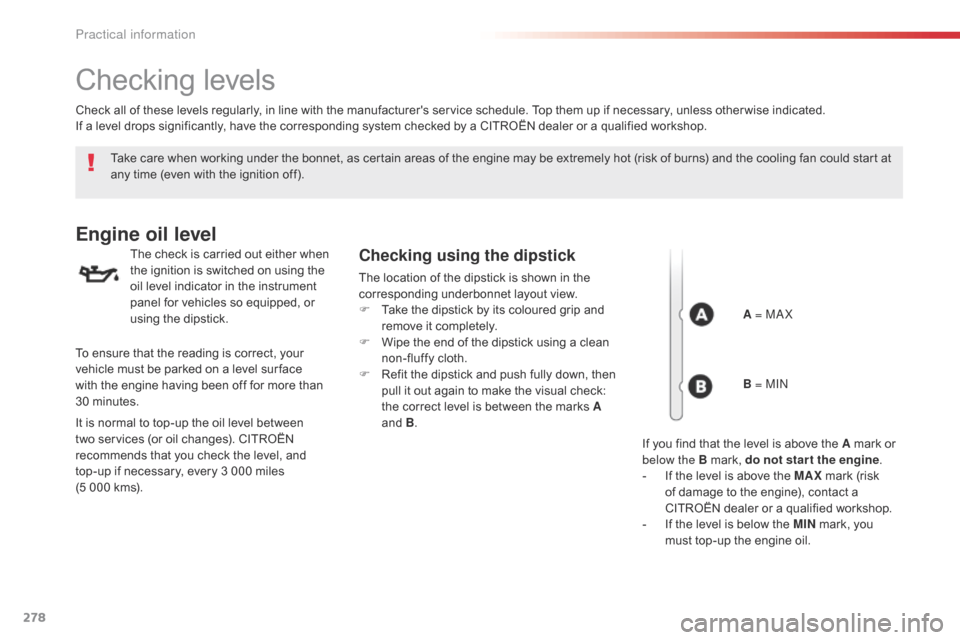
the correct level is between the marks A
and B .
Check all of these levels regularly, in line with the manufacturer's service schedule. Top them up if necessary, unless other wise indicated.
If a level drops significantly, have the corresponding system checked by a CITROËN dealer or a qualified workshop.
A = MA X
To ensure that the reading is correct, your
vehicle must be parked on a level sur face
with
the engine having been off for more than
30 minutes.
It is normal to top-up the oil level between
two services (or oil changes). CITROËN
recommends that you check the level, and
top-up if necessary, every 3 000 miles
(5 000 kms). B = MIN
If you find that the level is above the A mark or
below the B mark, do not star t the engine .
-
I
f the level is above the MAX mark (risk
of damage to the engine), contact a
CITROËN dealer or a qualified workshop.
-
I
f the level is below the MIN mark, you
must top-up the engine oil.
Practical information
Page 283 of 520

281
Checks
12 V battery
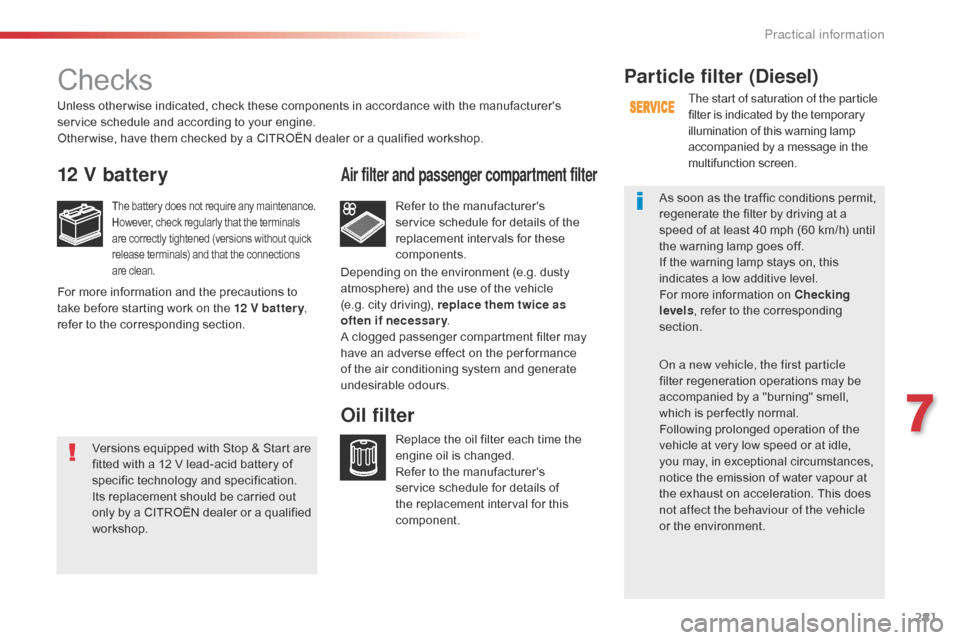
The battery does not require any maintenance.
However, check regularly that the terminals
are correctly tightened (versions without quick
release terminals) and that the connections
are clean.Refer to the manufacturer's
service schedule for details of the
replacement intervals for these
components.
Air filter and passenger compartment filter
Replace the oil filter each time the
engine oil is changed.
Refer to the manufacturer's
service schedule for details of
the replacement interval for this
component.
Oil filterParticle filter (Diesel)
The start of saturation of the particle
filter is indicated by the temporary
illumination of this warning lamp
accompanied by a message in the
multifunction screen.
As soon as the traffic conditions permit,
regenerate the filter by driving at a
speed of at least 40 mph (60 km/h) until
the warning lamp goes off.
If the warning lamp stays on, this
indicates a low additive level.
For more information on Checking
levels , refer to the corresponding
section.
On a new vehicle, the first particle
filter regeneration operations may be
accompanied by a "burning" smell,
which is per fectly normal.
Following prolonged operation of the
vehicle at very low speed or at idle,
you may, in exceptional circumstances,
notice the emission of water vapour at
the exhaust on acceleration. This does
not affect the behaviour of the vehicle
or the environment.
Unless other wise indicated, check these components in accordance with the manufacturer's
service schedule and according to your engine.
Other wise, have them checked by a CITROËN dealer or a qualified workshop.
For more information and the precautions to
take before starting work on the 12 V batter y
,
refer to the corresponding section. Depending on the environment (e.g. dusty
atmosphere) and the use of the vehicle
(e.g. city driving), replace them twice as
often if necessar y
.
A clogged passenger compartment filter may
have an adverse effect on the per formance
of the air conditioning system and generate
undesirable odours.
Versions equipped with Stop & Start are
fitted with a 12 V lead-acid battery of
specific technology and specification.
Its replacement should be carried out
only by a CITROËN dealer or a qualified
workshop.
7
Practical information
Page 308 of 520

306
When refitting the connector and bulb
in the lamp, push the assembly into its
housing until it clicks into place.
Dipped beam headlamps
(halogen headamps)
Ty p e C, H7-55W
Daytime running lamps
(halogen headlamps)
Ty p e A , W21W LL-21W
Sidelamps
(halogen headlamps)
Ty p e A, W5W
F
P
ress the upper clip on the cover then tip it
rear wards to remove it.
F
P
ress the lower clip on the electrical
connector and remove the assembly of
connector and bulb.
F
P
ull the bulb out and change it.
To refit, carry out these operations in reverse
o r d e r. F
P
ress the upper clip on the cover then tip it
rear wards to remove it.
F
P
ress the two side clips on the electrical
connector and remove the assembly of
connector and bulb.
F
P
ull out the bulb and change it.
To refit, carry out these operations in reverse
o r d e r. F
P
ress the upper clip on the cover then tip it
rear wards to remove it.
F
P
ress the two side clips on the electrical
connector and remove the assembly of
connector and bulb.
F
P
ull the bulb out and change it.
To refit, carry out these operations in reverse
o r d e r.
In the event of a breakdown
Page 310 of 520

308
Dipped beam headlamps
(xenon headlamps)
Ty p e E, D8S 25W
F
P
ress the upper clip on the cover then tip it
rear wards to remove it.
F
T
urn the bulb holder a quarter turn
anti-clockwise.
F
C
hange the failed bulb.
To refit, carry out these operations in reverse
o r d e r.
Replacement of D8S xenon bulbs must
be done by a CITROËN dealer or a
qualified workshop as there is a risk of
electrocution.
It is recommended that both D8S bulbs
be replaced at the same time, in the
event of the failure of one of them.
Main beam headlamps
(xenon headlamps)
Ty p e C
, H1-55W
When refitting the connector and bulb
in the lamp, push the assembly into its
housing until it clicks into place. Faster flashing of a direction indicator
warning lamp (left or right) indicates a
failed bulb on that side.
Direction indicators
(xenon headlamps)
Ty p e B
, PY21W-21W (amber)
F
P
ress the upper clip on the cover then tip it
rear wards to remove it.
F
P
ress the lower clip on the electrical
connector and remove the assembly of
connector and bulb.
F
P
ull the bulb out and change it.
To refit, carry out these operations in reverse
o r d e r.
In the event of a breakdown
Page 343 of 520

341
CITROËN Connect Nav
GPS satellite navigation - Connectivity - Multimedia audio - Bluetooth® telephone
Contents
First steps
3 42
Steering mounted controls
3
44
Menus
3
45
Voice commands
3
46
Navigation
3
52
Connected navigation
3
68
Connectivity
3
78
Radio Media
3
88
Telephone
4
00
Settings
4
12
Frequently asked questions
4
22
The system is protected in such a way that it will only operate in
your vehicle.
The link below gives access to OSS (Open Source Software)
codes for the system.
http://www.psa-peugeot-citroen.com/oss As a safety measure and because it requires sustained attention
by the driver, the pairing of a Bluetooth mobile telephone with
the Bluetooth hands-free system of your audio system must be
done with the vehicle stationary
and the ignition on.
The display of the energy economy mode message signals that
a change to standby is imminent. For more information on the
Energy economy mode refer to the corresponding section.
.
Audio and Telematics
Page 346 of 520

344
Steering mounted controls
Media (short press): change the
multimedia source.
Telephone (short press): call.
Call in progress (short press):
access to telephone menu.
Telephone (long press): reject an
incoming call, end call, access to
telephone menu. Decrease volume.
Voice commands
:
Short press, system voice
commands.
Long press, smartphone voice
commands via the system. Mute / Restore the sound.Radio
(rotate): automatic search for
the previous / next station.
Media (rotate): previous / next track,
move in a list.
Short press : Confirm a selection.
Other than selection, access to
presets.
Radio : display the list of stations.
Media : display the list of tracks.
Radio, press and hold : update the
list of stations received.
Increase volume.
Audio and Telematics
Page 373 of 520

371
7
28
27
26
29
30
Level 1Level 2 Level 3 Comments
Navigation Select the orientation of the map; north up,
vehicle direction up or perspective.
Navigation
TOMTOM TR AFFIC On connection of the system to a network,
"TOMTOM TR AFFIC" is displayed instead of
"TMC", for use of all of the options available, in
real time.
Navigation Weather
Select the options.
The map display the route chosen, depending on
options.
Stations
Car park
Tr a f f i c
Danger area
Map color
Select the display mode for the map.
POI on map Commercial
Select the POIs available.
Geographic
Leisure
Public
Travel
Confirm
Save the options.
View map Modify citySelect or change a city.
Zoom out.
Zoom in.
.
Audio and Telematics
Page 399 of 520

397
1
10
3
Select the audio source. Press Radio Media to display the
primary page.
Press " Band" to select the " DAB"
waveband. Press Radio Media
to display the
primary page.
Press the " OPTIONS" button to go to
the secondary page.
DAB / FM auto tracking
Digital radio
"DAB" does not cover 100% of the
te r r i to r y.
When the digital radio signal is poor,
"DAB/FM auto tracking" allows you to
continue listening to the same station,
by automatically switching to the
corresponding "FM" analogue station
(if there is one). If "DAB
/ FM auto tracking" is activated,
there is a difference of a few seconds
when the system switches to "FM"
analogue radio with sometimes a
variation in volume.
Once the digital signal is restored,
the system automatically changes back
to "DAB".
Digital radio provides higher quality
reception.
The different multiplexes offer a
choice of radio stations arranged in
alphabetical order.
If the "DAB" station being listened to
is not available on "FM" ("DAB/FM"
option greyed out), or "DAB/FM auto
tracking" is not activated, the sound
will cut out while the digital signal is too
weak.
Select " Radio settings ".
Select " General".
Activate / Deactivate " Station
follow ".
Press " Confirm ".
.
Audio and Telematics
Page 422 of 520

420
111
10
11
12
8
91
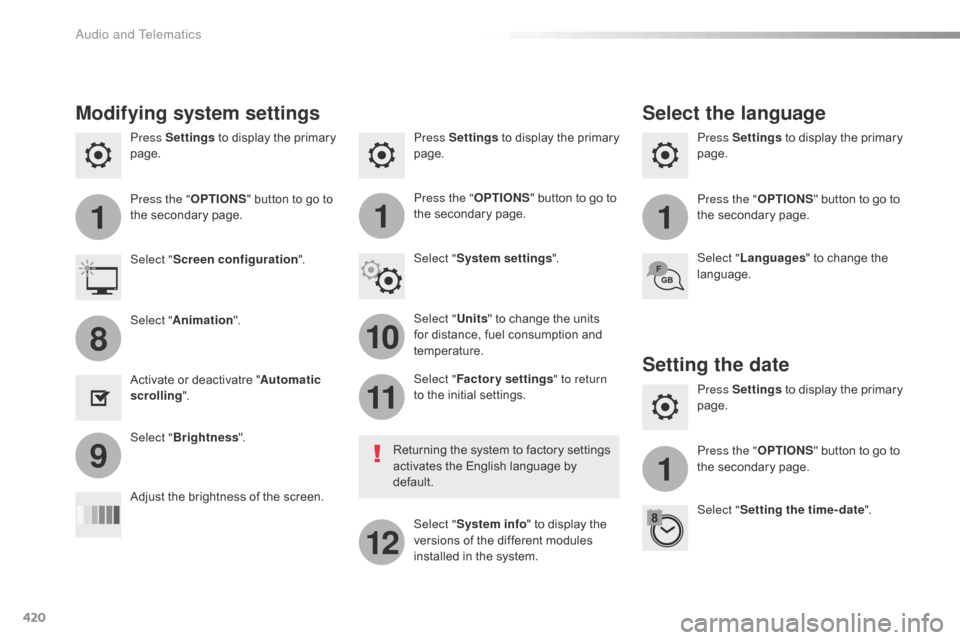
Press Settings to display the primary
page. Press Settings
to display the primary
page.
Press Settings
to display the primary
page.
Press the "OPTIONS" button to go to
the secondary page. Press the "
OPTIONS" button to go to
the secondary page.
Press the "
OPTIONS" button to go to
the secondary page.
Select "System settings ".
Select " Screen configuration ".
Select "Units" to change the units
for distance, fuel consumption and
temperature. Select "
Languages " to change the
language.
Activate or deactivatre " Automatic
scrolling ".
Adjust the brightness of the screen. Select "
Factory settings " to return
to the initial settings.
Select " System info " to display the
versions of the different modules
installed in the system.
Modifying system settings
Returning the system to factory settings
activates the English language by
default.
Select "
Animation ".
Select " Brightness ".
Select the language
Press Settings to display the primary
page.
Press the " OPTIONS" button to go to
the secondary page.
Select " Setting the time- date ".
Setting the date
Audio and Telematics
Page 423 of 520

421
1
17
18
Press Settings to display the primary
page.
Press the " OPTIONS" button to go to
the secondary page.
Select "
Date".
Select "Time".
Select "
Setting the time- date ".
Adjustment of the time and date is only
available if synchronisation with GPS is
deactivated.
The change between winter and
summer time is done by changing the
time zone. The system does not automatically
manage the change between winter
and summer time (depending on
c ountr y).
Setting the time
Press this button to define the date.
Press this button to adjust the time
using the virtual keypad.
Press "
Confirm ". Press "
Confirm ".
Press " Confirm ".
Press this button to define the time
zone.
Select the display format of the date.
Select the display format for the
time
(12h / 24h).
Activate or deactivate
synchronisation with GPS (UTC).
.
Audio and Telematics