display Citroen JUMPY RHD 2016 2.G Owner's Guide
[x] Cancel search | Manufacturer: CITROEN, Model Year: 2016, Model line: JUMPY RHD, Model: Citroen JUMPY RHD 2016 2.GPages: 520, PDF Size: 10.54 MB
Page 47 of 520
45
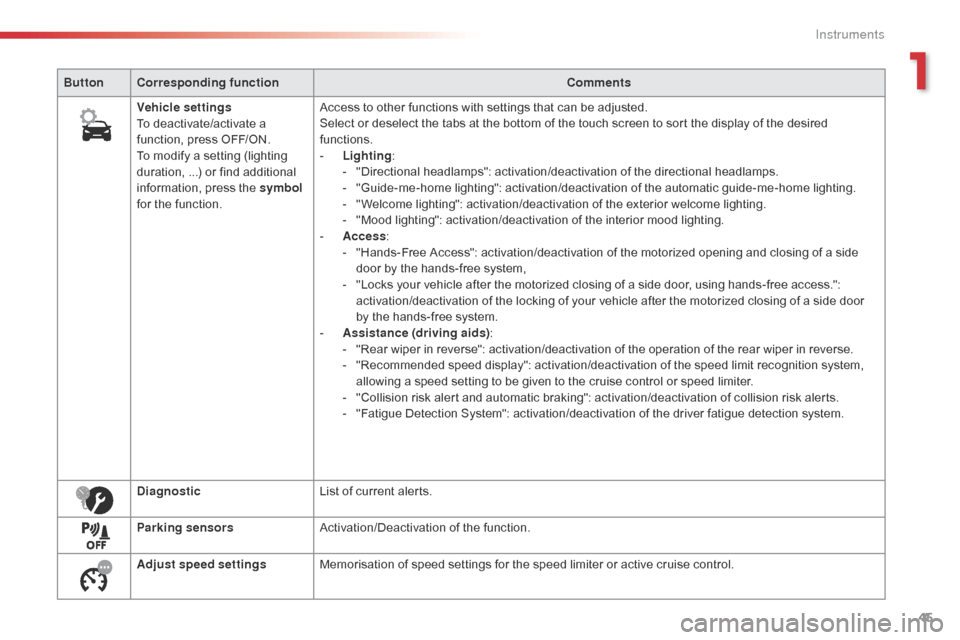
ButtonCorresponding function Comments
Vehicle settings
To deactivate/activate a
function, press OFF/ON.
To modify a setting (lighting
duration, ...) or find additional
information, press the symbol
for the function. Access to other functions with settings that can be adjusted.
Select or deselect the tabs at the bottom of the touch screen to sort the display of the desired
functions.
-
L
ighting:
-
"
Directional headlamps": activation/deactivation of the directional headlamps.
-
"
Guide-me-home lighting": activation/deactivation of the automatic guide-me-home lighting.
-
"
Welcome lighting": activation/deactivation of the exterior welcome lighting.
-
"
Mood lighting": activation/deactivation of the interior mood lighting.
-
A
ccess:
-
"
Hands-Free Access": activation/deactivation of the motorized opening and closing of a side
door by the hands-free system,
-
"
Locks your vehicle after the motorized closing of a side door, using hands-free access.":
activation/deactivation of the locking of your vehicle after the motorized closing of a side door
by the hands-free system.
-
A
ssistance (driving aids):
-
"
Rear wiper in reverse": activation/deactivation of the operation of the rear wiper in reverse.
-
"
Recommended speed display": activation/deactivation of the speed limit recognition system,
allowing a speed setting to be given to the cruise control or speed limiter.
-
"
Collision risk alert and automatic braking": activation/deactivation of collision risk alerts.
-
"
Fatigue Detection System": activation/deactivation of the driver fatigue detection system.
Diagnostic List of current alerts.
Parking sensors Activation/Deactivation of the function.
Adjust speed settings Memorisation of speed settings for the speed limiter or active cruise control.
1
Instruments
Page 48 of 520

46
With the touch screenSetting the time and date
F Select "Setting the time- date ".
F
P
ress on Settings
for acces to
the different menus.
F
M
odify the settings in the associated
" Date " or "Time " fields then press on
" Confirm ".
F
P
ress on " Confirm" to save and
quit.
F
Sel
ect "
OPTIONS ".
F
Sel
ect the " Date" or "Time " tab.
You can choose to synchronise the
time and date with the GPS navigation
system (if fitted to your vehicle) so
that these settings are adjusted
automatically.
With the audio system
F Press the MENU button for access to the
main menu .
F
P
ress the " 7" or " 8" button to select the
Personalisation-configuration menu,
then confirm by pressing the " OK" button.
F
P
ress the " 5" or " 6" and " 7" or " 8" buttons
to set the date and time, then confirm by
pressing the " OK" button.
F
P
ress the " 5" or " 6" button to select the
Display configuration menu then confirm
by pressing the " OK" button.
Without audio system
F Press this button to display the following
settings in turn:
-
h
ours,
-
m
inutes,
-
1
2 or 24 hour format.
Instruments
Page 50 of 520

48
F To activate this selectivity between cab and loading
area , switch the ignition on and
press this button for more than
2
seconds.
Its indicator lamp comes on.
The modification is confirmed by an audible
signal and, depending on equipment, the
display of a message. F
T
o deactivate this selectivity and
return to total unlocking, switch
the ignition on and press this
button for more than 2
seconds.
Its indicator lamp goes off.
By default, selectivity between cab and
loading area is activated.
Total unlocking
Using the remote control
F Press one of these buttons
(depending on equipment) to
unlock the vehicle. Unlocking is signalled by the rapid
flashing of the direction indicators for
about two seconds.
Depending on version, the door mirrors
unfold at the same time.If fitted to your vehicle, pressing
and holding this button allows the
windows to be opened. The window
stops when you release the button.
Using the key
Using the remote control
with electric sliding
side door(s)
F To totally unlock the
vehicle and open the
side door, press and
hold this button until the
door has opened.
F
To
totally unlock the vehicle
without opening the side door,
press this button.
Programming
F To totally unlock the vehicle, turn the key
towards the front of the vehicle.
F
T
hen to open the door, pull the handle.
If your vehicle has an alarm, this is not
deactivated. Opening a door will trigger the
alarm, which can then be stopped by switching
the ignition on. Cab
and loading area selectivity
deactivated.
Access
Page 57 of 520

55
"Keyless
Entry and Starting"
It allows the central locking or unlocking of the
vehicle from a distance.
It is also used to locate and start the vehicle, as
well as providing protection against theft.
Remote control
This separation of cab and loading
area locking provides security in use.
It allows you to prevent access to the
part of the vehicle where you are not
present.
What is the point
of total or selective
unlocking?
Total unlocking allows all of the vehicle's doors
(front, side and rear) to be unlocked.
Selective unlocking allows either the cab
doors, or the loading area doors (side and
rear) to be unlocked. F
T
o activate this selectivity
between cab and loading
area , switch the ignition on and
press this button for more than
2
seconds.
Its indicator lamp comes on.
The modification is confirmed by an audible
signal and, depending on equipment, the
display of a message. F
T
o deactivate this selectivity and
return to total unlocking, switch
the ignition on and press this
button for more than 2
seconds.
Its indicator lamp goes off.
By default, selectivity between cab and
loading area is activated.
Programming
2
Access
Page 123 of 520
121
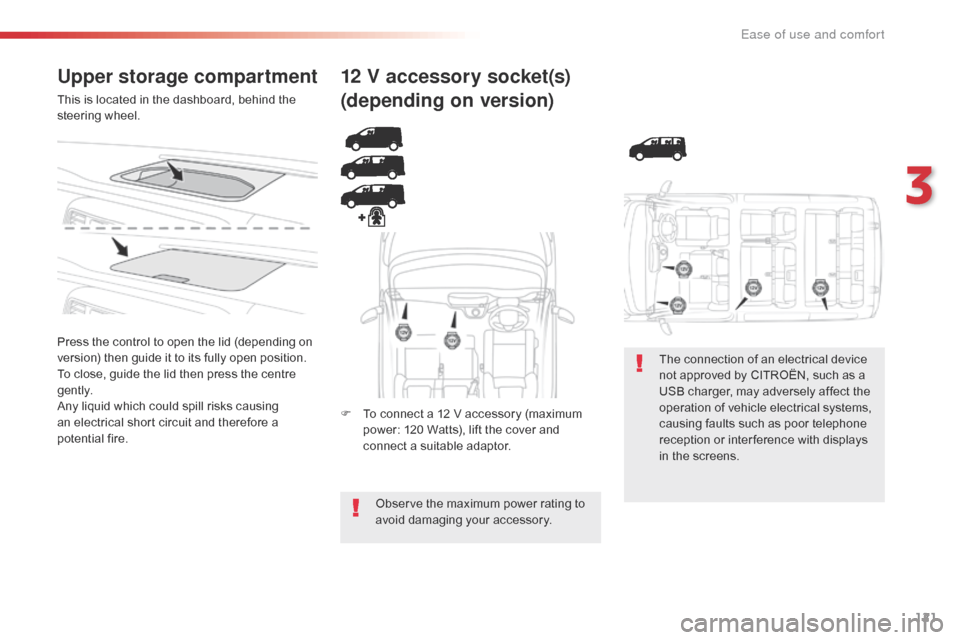
Upper storage compartment
This is located in the dashboard, behind the
steering wheel.
Press the control to open the lid (depending on
version) then guide it to its fully open position.
To close, guide the lid then press the centre
g e nt l y.
Any liquid which could spill risks causing
an electrical short circuit and therefore a
potential fire.
12 V accessory socket(s)
(depending on version)
F To connect a 12 V accessory (maximum power: 120 Watts), lift the cover and
connect a suitable adaptor.
Observe the maximum power rating to
avoid damaging your accessory. The connection of an electrical device
not approved by CITROËN, such as a
USB charger, may adversely affect the
operation of vehicle electrical systems,
causing faults such as poor telephone
reception or inter ference with displays
in the screens.
3
Ease of use and comfort
Page 124 of 520
122
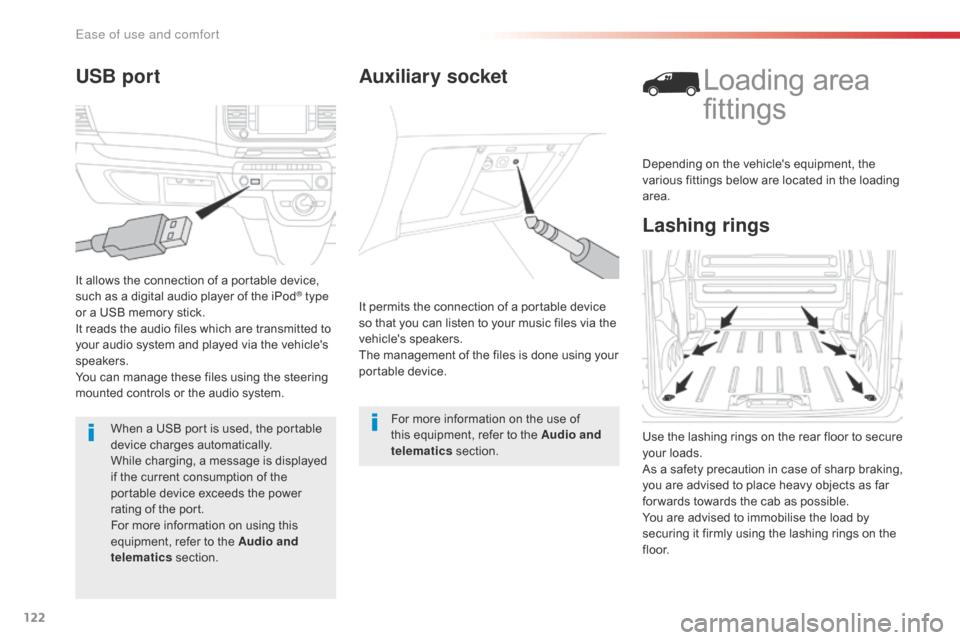
Auxiliary socket
It permits the connection of a portable device
so that you can listen to your music files via the
vehicle's speakers.
The management of the files is done using your
portable device.For more information on the use of
this equipment, refer to the Audio and
telematics section.
Lashing rings
Loading area
fittings
Use the lashing rings on the rear floor to secure
your loads.
As a safety precaution in case of sharp braking,
you are advised to place heavy objects as far
for wards towards the cab as possible.
You are advised to immobilise the load by
securing it firmly using the lashing rings on the
f l o o r.Depending on the vehicle's equipment, the
various fittings below are located in the loading
area.
USB port
It allows the connection of a portable device,
such as a digital audio player of the iPod® type
or a USB memory stick.
It reads the audio files which are transmitted to
your audio system and played via the vehicle's
speakers.
You can manage these files using the steering
mounted controls or the audio system.
When a USB port is used, the portable
device charges automatically.
While charging, a message is displayed
if the current consumption of the
portable device exceeds the power
rating of the port.
For more information on using this
equipment, refer to the Audio and
telematics section.
Ease of use and comfort
Page 130 of 520

128
A setting around 21 enables you to
obtain an optimum level of comfort.
Depending on your requirements, a
setting between 18 and 24 is usual.
In addition, it is recommended that you
avoid a left /right setting difference of
more than 3.
Dual-zone automatic air conditioning
Offers the best compromise between
a comfortable temperature and quiet
operation.
Provides soft and quiet operation by
limiting air flow. Provides strong and effective air flow.
F
P
ress the "
AUTO" button
repeatedly.
Automatic comfort mode TemperatureF Push the button down to
reduce the value or up to
increase it.
When the engine is cold, the air flow will
only reach its optimum level gradually
to prevent too great a distribution of
cold air.
In cold weather, it favours the
distribution of warm air to the
windscreen, the side windows and the
footwells only.
The active mode appears in the display screen,
as described below:
If desired, you can choose settings different
to those offered by the system, by adjusting a
setting manually. The other functions are still
managed automatically.
The "AUTO " symbol disappears if you modify
a setting.
Manual mode
The driver and front passenger can each set
the temperature to suit their requirements.
The value indicated in the screen corresponds
to a level of comfort and not to a temperature in
degrees Celsius or Fahrenheit.
Ease of use and comfort
Page 131 of 520

129
Visibility programme
F Press the "visibility" button for
faster demisting or defrosting
of the windscreen and side
windows.
F
P
ress the " visibility" button
again to stop the programme.
The system automatically manages the
air conditioning, air flow and air intake and
distributes the flow of air to the windscreen and
side windows to the best effect.
For maximum cooling or heating of
the passenger compartment, you can
exceed the minimum value of 14 or the
maximum value of 28. F
P
ush the button down
until "LO" is displayed
or up until "HI" is
displayed.
On entering the vehicle, if the interior
temperature is much colder or warmer
than the comfort value, there is no need
to alter the value displayed in order to
obtain the required level of comfort.
The system corrects the temperature
difference automatically and as quickly
as possible.
"Mono" function
The comfort setting for the passenger side
can be indexed to the driver's comfort setting
(mono-zone).
The function is deactivated automatically if a
passenger uses the temperature control.
Or
F
P
ress the "AUTO" button to
return to the automatic comfort
programme.
F
P
ress this button to activate /
deactivate the "Mono" function.
The indicator lamp in the button is on
when the function is activated.
3
Ease of use and comfort
Page 151 of 520
149
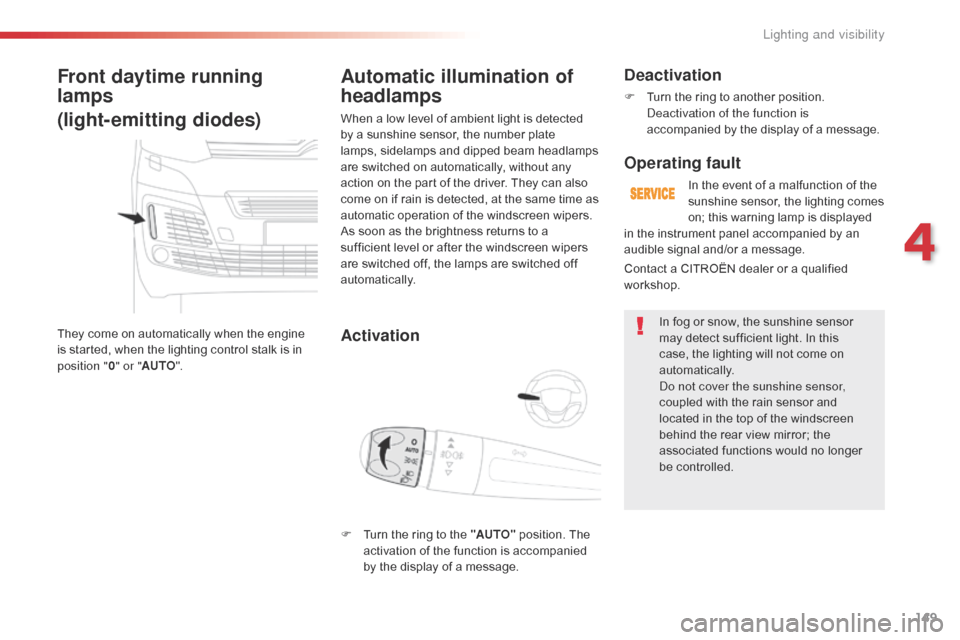
Front daytime running
lamps
(light-emitting diodes)
They come on automatically when the engine
is started, when the lighting control stalk is in
position "0" or " AUTO ".
Automatic illumination of
headlamps
Activation
When a low level of ambient light is detected
by a sunshine sensor, the number plate
lamps,
sidelamps and dipped beam headlamps
are switched on automatically, without any
action on the part of the driver. They can also
come on if rain is detected, at the same time as
automatic operation of the windscreen wipers.
As soon as the brightness returns to a
sufficient level or after the windscreen wipers
are switched off, the lamps are switched off
automatically.
Deactivation
F Turn the ring to another position. Deactivation of the function is
accompanied by the display of a message.
Operating fault
In the event of a malfunction of the
sunshine sensor, the lighting comes
on; this warning lamp is displayed
Contact a CITROËN dealer or a qualified
workshop. in the instrument panel accompanied by an
audible signal and/or a message.
In fog or snow, the sunshine sensor
may detect sufficient light. In this
case, the lighting will not come on
automatically.
Do not cover the sunshine sensor,
coupled with the rain sensor and
located in the top of the windscreen
behind the rear view mirror; the
associated functions would no longer
be controlled.
F
T
urn the ring to the "AUTO" position. The
activation of the function is accompanied
by the display of a message.
4
Lighting and visibility
Page 159 of 520
157
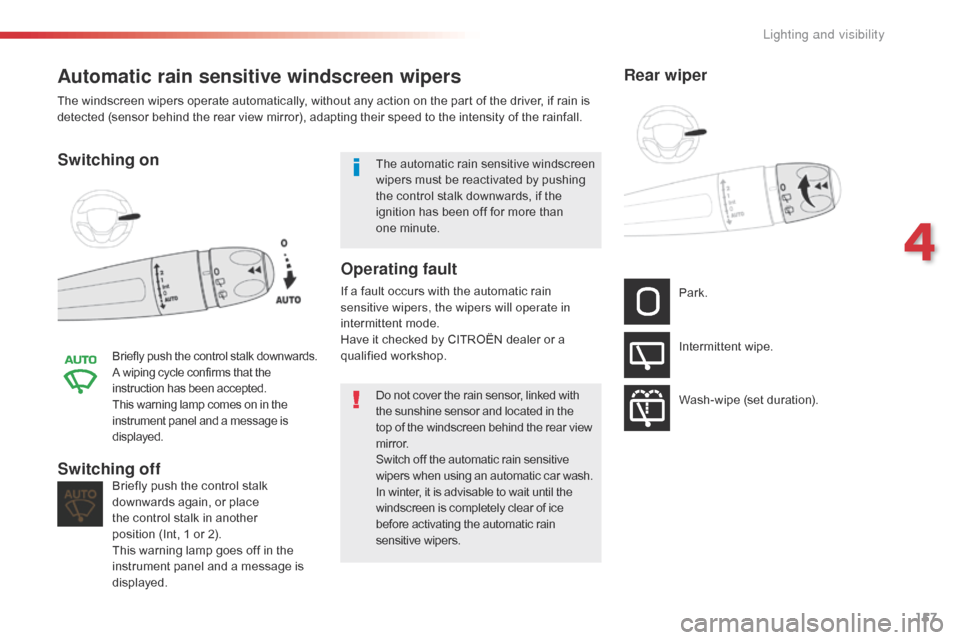
Automatic rain sensitive windscreen wipers
Switching on
Briefly push the control stalk downwards.
A wiping cycle confirms that the
instruction has been accepted.
This warning lamp comes on in the
instrument panel and a message is
displayed.
Briefly push the control stalk
downwards again, or place
the control stalk in another
position (Int, 1 or 2).
This warning lamp goes off in the
instrument panel and a message is
displayed.Switching off
The automatic rain sensitive windscreen
wipers must be reactivated by pushing
the control stalk downwards, if the
ignition has been off for more than
one
minute.
The windscreen wipers operate automatically, without any action on the part of the driver, if rain is
detected (sensor behind the rear view mirror), adapting their speed to the intensity of the rainfall.
Do not cover the rain sensor, linked with
the sunshine sensor and located in the
top of the windscreen behind the rear view
m i r r o r.
Switch off the automatic rain sensitive
wipers when using an automatic car wash.
In winter, it is advisable to wait until the
windscreen is completely clear of ice
before activating the automatic rain
sensitive wipers.
Operating fault
If a fault occurs with the automatic rain
sensitive wipers, the wipers will operate in
intermittent mode.
Have it checked by CITROËN dealer or a
qualified workshop. Park.
Intermittent wipe.
Wash-wipe (set duration).
Rear wiper
4
Lighting and visibility