spec Citroen JUMPY RHD 2016 2.G Owner's Guide
[x] Cancel search | Manufacturer: CITROEN, Model Year: 2016, Model line: JUMPY RHD, Model: Citroen JUMPY RHD 2016 2.GPages: 520, PDF Size: 10.54 MB
Page 292 of 520

290
This kit is stowed in the tool box. This kit consists of a compressor and a sealant
cartridge.
It allows the temporary repair of a tyre.
You are then able to go to the nearest garage.
It is designed to repair most punctures which
could affect the tyre, located on the tyre tread
or shoulder.
Its compressor can be used to check and
adjust the pressure of the tyre.
Temporary puncture repair kit
Access to the kit
1. 12 V compressor. T o temporarily repair a tyre using an
integral sealant cartridge and adjust the
tyre pressure.
2.
T
owing eye. The tyre inflation pressures are given on this
label.
The vehicle's electric system allows the
connection of the compressor for long
enough to inflate a tyre after a puncture
repair.
Use only the two 12 V sockets
located at the front to connect your
compressor.
For more information on To w i n g
, refer
to the corresponding section.
List of tools
These tools are specific to your vehicle and can
vary according to equipment. Do not use them
for other purposes.
For more information on the Tool box ,
refer to the corresponding section.
In the event of a breakdown
Page 296 of 520

294
F Connect the compressor's electric plug to the vehicle's 12 V socket.
F
S
tart the vehicle again and leave the
engine running. F
A djust the pressure using the compressor
(to inflate: switch B in position "I" ; to
deflate: switch B in position "O" and press
button C ), in accordance with the vehicle's
tyre pressure label (located on the left-
hand door aperture).
A l
oss of pressure indicates that the
puncture has not been fully plugged;
contact a CITROËN dealer or qualified
workshop for assistance.
F
R
emove and stow the kit.
F
D
rive at reduced speed (50 mph [80 km/h]
max) limiting the distance travelled to
approximately 120 miles (200 km).
As soon as possible, go to a CITROËN
dealer or a qualified workshop.
You must inform the technician that you
have used this kit. After inspection, the
technician will advise you on whether
the tyre can be repaired or if it must be
replaced.
Removing the cartridge
F Stow the black pipe.
F
D etach the angled base from the white pipe.
F
S
upport the compressor vertically.
Beware of discharges of fluid.
The expiry date of the fluid is indicated
on the cartridge.
The sealant cartridge is designed for
single use; even if only partly used, it
must be replaced.
After use, do not discard the cartridge
into the environment, take it to an
authorised waste disposal site or a
CITROËN dealer.
Do not forget to obtain a new sealant
cartridge, available from CITROËN
dealers or from a qualified workshop.
F
U
nscrew the cartridge from the bottom.
In the event of a breakdown
Page 298 of 520

296
Changing a wheel
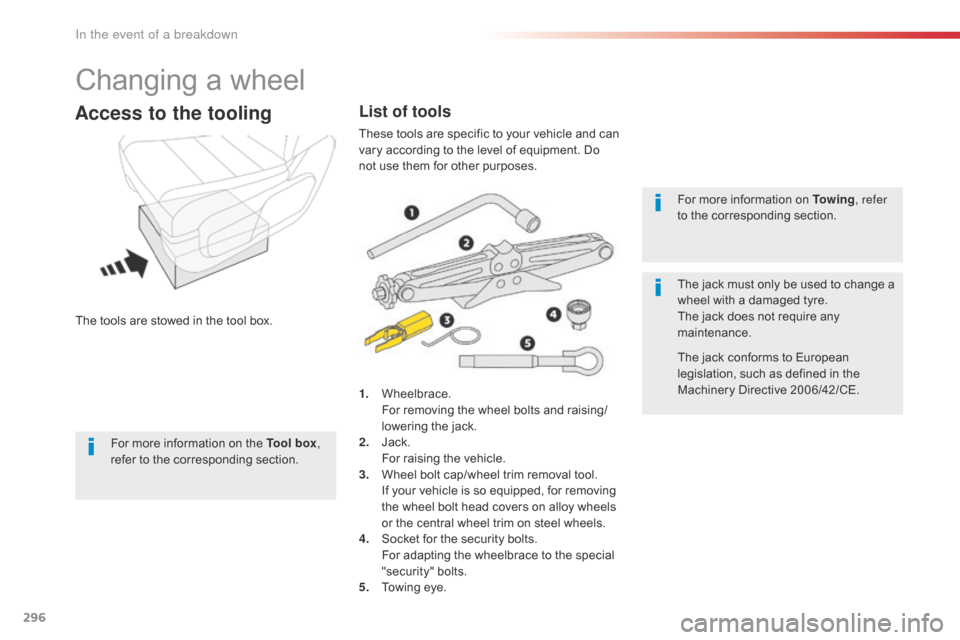
The tools are stowed in the tool box.
Access to the tooling
1. Wheelbrace. For removing the wheel bolts and raising/
lowering the jack.
2.
J
ack.
F
or raising the vehicle.
3.
W
heel bolt cap/wheel trim removal tool.
I
f your vehicle is so equipped, for removing
the wheel bolt head covers on alloy wheels
or the central wheel trim on steel wheels.
4.
S
ocket for the security bolts.
F
or adapting the wheelbrace to the special
"security" bolts.
5.
T
owing eye. For more information on To w i n g
, refer
to the corresponding section.
The jack must only be used to change a
wheel with a damaged tyre.
The jack does not require any
maintenance.
The jack conforms to European
legislation, such as defined in the
Machinery Directive 2006/42/CE.
List of tools
These tools are specific to your vehicle and can
vary according to the level of equipment. Do
not use them for other purposes.
For more information on the Tool box ,
refer to the corresponding section.
In the event of a breakdown
Page 307 of 520

305
Direction indicator side
repeater
Ty p e A, W Y5W-5W (amber)
Daytime running lamps / sidelamps
If fitted to your vehicle, contact a CITROËN
dealer or a qualified workshop for the
replacement of this type of LED lamp and light
guide.
A replacement kit for the LEDs is available from
CITROËN dealers. The headlamps have polycarbonate
lenses with a protective coating:
F
d
o not clean them using a dr y
or abrasive cloth, nor with a
detergent or solvent product,
F
u
se a sponge and soapy water or a
pH neutral product,
F
w
hen using a high pressure washer
on persistent marks, do not keep
the lance directed towards the
lamps or their edges for too long,
so as not to damage their protective
coating and seals.
Changing a bulb should only be done
after the headlamp has been switched
off for several minutes (risk of serious
burns).
F
D
o not touch the bulb directly with
your fingers, use a lint-free cloth.
It is imperative to use only anti-
ultraviolet (UV) type bulbs to avoid
damaging the headlamp.
Always replace a failed bulb with a
new bulb with the same type and
specification.
-
P
ush the repeater towards the rear and
disengage it.
-
W
hen refitting, engage the repeater towards
the front and then bring it towards the rear.
Amber coloured bulbs (direction indicators and
side repeaters) must be replaced with bulbs of
identical specification and colour.
8
In the event of a breakdown
Page 318 of 520

316
F Unclip the cover to the left of the glove box.
F D isengage the cover completely. Good
Failed
Tw e e z e r
Access to the tools
F Take the tweezer from its housing. The extraction tweezer is installed behind the
fusebox cover. Before changing a fuse:
F
t
he cause of the failure must be identified
and rectified,
F
a
ll electrical consumers must be
switched off,
F
t
he vehicle must be immobilised with the
ignition off,
F
i
dentify the failed fuse using the tables and
layout drawings in the following pages.
Changing a fuse
To replace a fuse, you must:
F u se the special tweezer to extract the fuse
from its housing and check the condition of
its filament.
F
a
lways replace the failed fuse with a fuse
of the same rating (same colour); using
a different rating could cause faults (risk
of
fire).
If the fuse fails again soon after replacement,
have the vehicle's electrical system checked by
a CITROËN dealer or a qualified workshop. The replacement of a fuse not shown in
the tables below may cause a serious
malfunction of your vehicle. Contact
a CITROËN dealer or a qualified
workshop.
Changing a fuse
In the event of a breakdown
Page 323 of 520

321
12 V batteryThe battery is located under the bonnet.
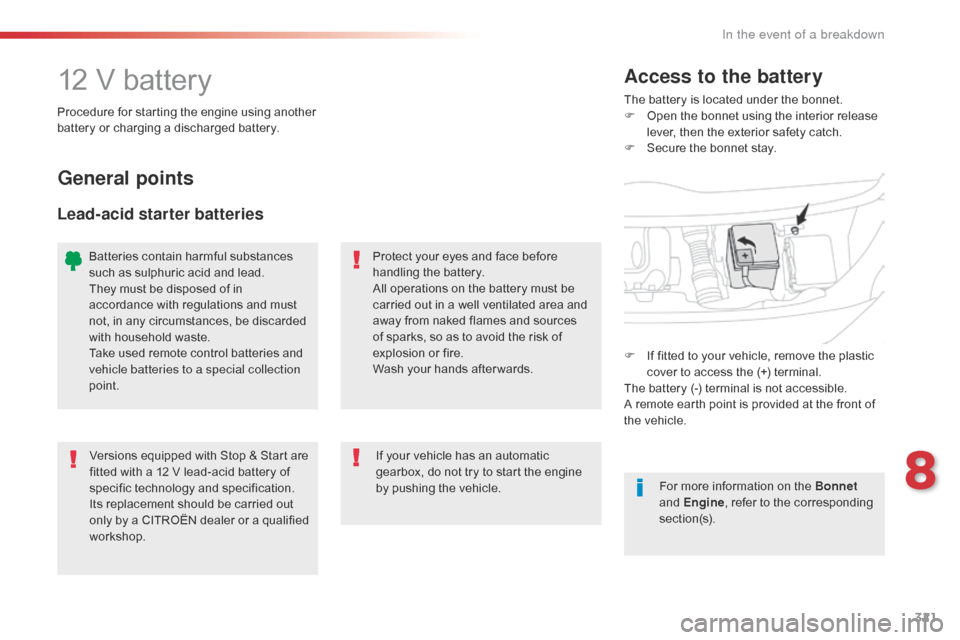
F O pen the bonnet using the interior release
lever, then the exterior safety catch.
F
S
ecure the bonnet stay.
Access to the battery
Procedure for starting the engine using another
battery or charging a discharged battery.
General points
Lead-acid starter batteries
Protect your eyes and face before
handling the battery.
All operations on the battery must be
carried out in a well ventilated area and
away from naked flames and sources
of sparks, so as to avoid the risk of
explosion or fire.
Wash your hands after wards.
Versions equipped with Stop & Start are
fitted with a 12 V lead-acid battery of
specific technology and specification.
Its replacement should be carried out
only by a CITROËN dealer or a qualified
workshop. If your vehicle has an automatic
gearbox, do not try to start the engine
by pushing the vehicle.
Batteries contain harmful substances
such as sulphuric acid and lead.
They must be disposed of in
accordance with regulations and must
not, in any circumstances, be discarded
with household waste.
Take used remote control batteries and
vehicle batteries to a special collection
point.
For more information on the Bonnet
and Engine , refer to the corresponding
section(s).
F
I
f fitted to your vehicle, remove the plastic
cover to access the (+) terminal.
The battery (-) terminal is not accessible.
A remote earth point is provided at the front of
the vehicle.
8
In the event of a breakdown
Page 327 of 520

325
Battery capacity
Vehicle lengthRating in Ah
(Ampere hours)
C o m p a c t ( L1) 480
Standard (L2) 640
Long (L3) 720 / 800
Always replace the battery by one of
equivalent specification.
To w i n g
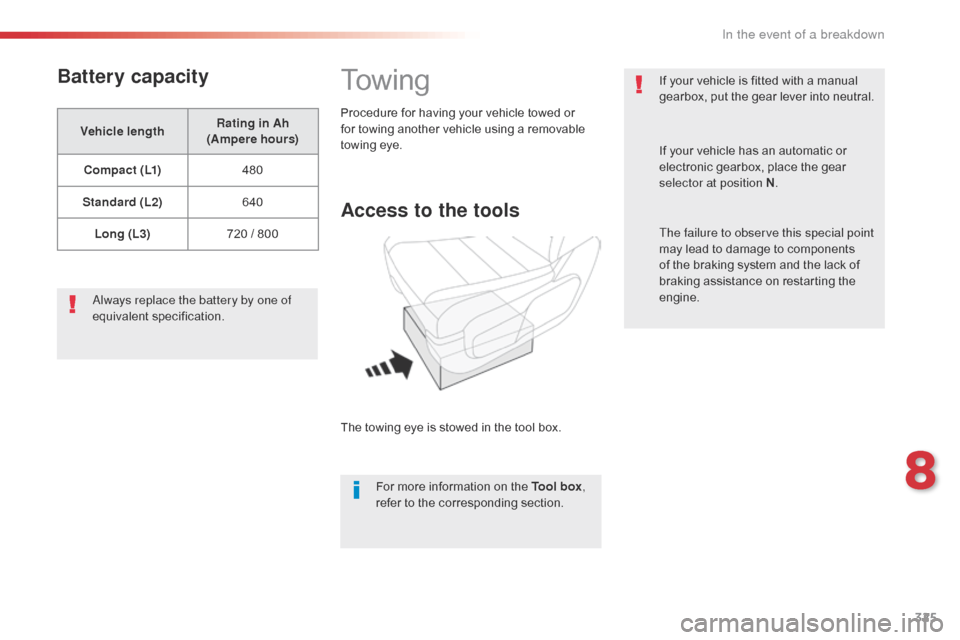
Access to the tools
The towing eye is stowed in the tool box. For more information on the Tool box ,
refer to the corresponding section.
Procedure for having your vehicle towed or
for towing another vehicle using a removable
towing eye.
If your vehicle is fitted with a manual
gearbox, put the gear lever into neutral.
If your vehicle has an automatic or
electronic gearbox, place the gear
selector at position N
.
The failure to observe this special point
may lead to damage to components
of the braking system and the lack of
braking assistance on restarting the
engine.
8
In the event of a breakdown
Page 344 of 520

342
FM/87.5 MHz
87.5MHz12:13
23 °C 87.5 MHz
First steps
With the engine running, a press
mutes the sound.
With the ignition off, a press turns the
system on.
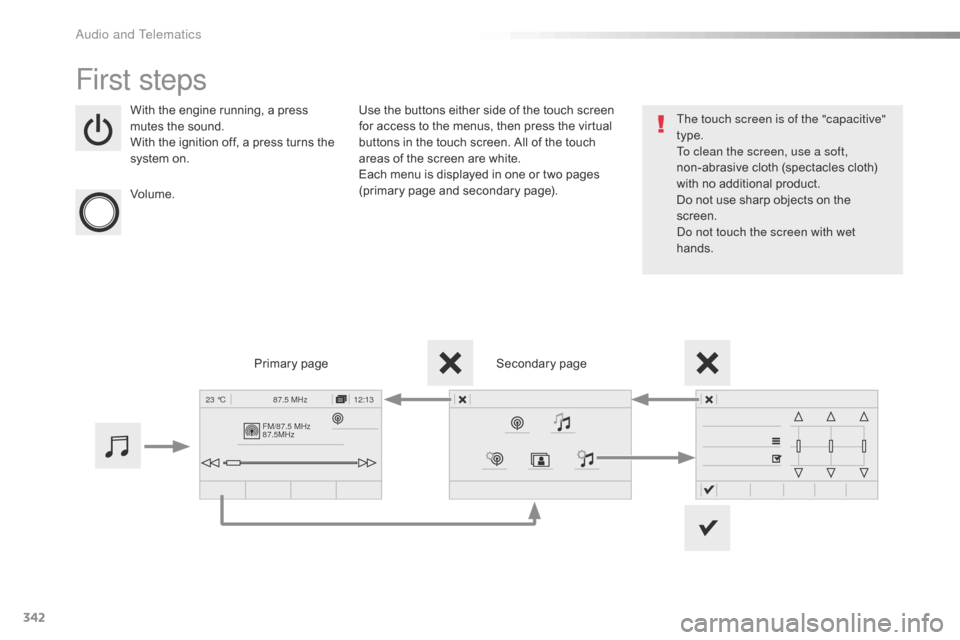
Volume. Use the buttons either side of the touch screen
for access to the menus, then press the virtual
buttons in the touch screen. All of the touch
areas of the screen are white.
Each menu is displayed in one or two pages
(primary page and secondary page).
Secondary page
Primary page The touch screen is of the "capacitive"
type.
To clean the screen, use a soft,
non-abrasive cloth (spectacles cloth)
with no additional product.
Do not use sharp objects on the
screen.
Do not touch the screen with wet
hands.
Audio and Telematics
Page 350 of 520

348
"Navigation" voice commands
These commands can be issued from any screen page after pressing the voice command or telephone button on the steering wheel, as long as
there is no telephone call in progress.
Depending on the country, give the destination instructions (address) in the language used by the system."Voice command"
Help message
Navigate home To start guidance or add a stopover, say "navigate to" and then the address or contact
name.
For example, "navigate to address 11 Regent Street, London", or "navigate to contact,
John Miller".
You can specify if it's a preferred or recent destination. For example, "navigate to preferred
address, Tennis club", "navigate to recent destination, 11 Regent Street, London".
Other wise, just say, "navigate home". To see points of interest on a map, you can say
things like "show hotels in Banbury" or "show nearby petrol station".
For more information you can ask for "help with route guidance".
Navigate to work
Navigate to preferred address <...>
Navigate to contact <...>
Navigate to address <...>
Show nearby POI <...>
Remaining distance
To get information about your current route, you can say "tell me the remaining time",
"distance" or "arrival time".
Try saying "help with navigation" to learn more commands.
Remaining time
Arrival time
Stop route guidance
Audio and Telematics
Page 355 of 520

353
Level 1Level 2 Level 3 Comments
Navigation Select the orientation of the map; north up,
vehicle direction up or perspective.
Navigation Display the traffic information available.
Navigation World map
Manually locate an area on the world map or
enter the latitude and longitude coordinates.
Around the vehicle Display the location criteria selected.
Around home
Around the destination
2D mode Switch to a 2D map.
Zoom out.
Zoom in.
Start navigation to the current address.
Save the current address.
Zoom out.
Zoom in.
.
Audio and Telematics