change wheel Citroen JUMPY RHD 2016 2.G Owner's Manual
[x] Cancel search | Manufacturer: CITROEN, Model Year: 2016, Model line: JUMPY RHD, Model: Citroen JUMPY RHD 2016 2.GPages: 520, PDF Size: 10.54 MB
Page 15 of 520
13
Limit the causes of excess
consumption
Spread loads throughout the vehicle; place the
heaviest items in the bottom of the boot, as
close as possible to the rear seats.
Limit the loads carried in the vehicle and reduce
wind resistance (roof bars, roof rack, bicycle
carrier, trailer...). Use a roof box in preference.
Remove roof bars and roof racks after use.
At the end of winter, remove snow tyres and refit
your summer tyres.
Observe the recommendations
on maintenance
Check the tyre pressures regularly, when cold,
referring to the label in the door aperture,
driver's side.
Carry out this check in particular:
-
b
efore a long journey,
-
a
t each change of season,
-
a
fter a long period out of use.
Don't forget the spare wheel and the tyres on
any trailer or caravan.
Have your vehicle serviced regularly (engine
oil, oil filter, air filter, passenger compartment
filter...) and observe the schedule of operations
recommended in the manufacturer's service
schedule.
With a BlueHDi Diesel engine, if the SCR
system is faulty your vehicle becomes polluting;
go to a CITROËN dealer or a qualified
workshop without delay to have the emissions
of nitrogen oxides brought back to the legal
level. When refuelling, do not continue after the third
cut-off of the nozzle to avoid any over flow.
At the wheel of your new vehicle, it is only after
the first 1 800 miles (3 000 kilometres) that you
will see the fuel consumption settle down to a
consistent average.
.
Eco-driving
Page 24 of 520
22
Warning / indicator lampStateCause Action / Observations
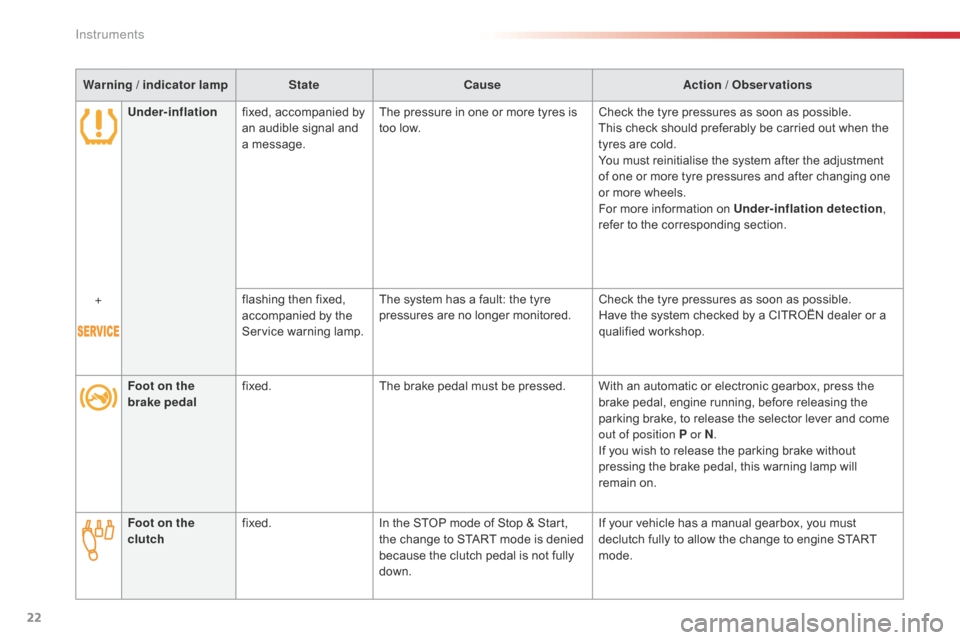
Under-inflation fixed, accompanied by
an audible signal and
a message. The pressure in one or more tyres is
too low.
Check the tyre pressures as soon as possible.
This check should preferably be carried out when the
tyres are cold.
You must reinitialise the system after the adjustment
of one or more tyre pressures and after changing one
or more wheels.
For more information on Under-inflation detection
,
refer to the corresponding section.
+ flashing then fixed,
accompanied by the
Service warning lamp.The system has a fault: the tyre
pressures are no longer monitored.
Check the tyre pressures as soon as possible.
Have the system checked by a CITROËN dealer or a
qualified workshop.
Foot on the
brake pedal fixed.
The brake pedal must be pressed. With an automatic or electronic gearbox, press the
brake pedal, engine running, before releasing the
parking brake, to release the selector lever and come
out of position P or N.
If you wish to release the parking brake without
pressing the brake pedal, this warning lamp will
remain on.
Foot on the
clutch fixed.
In the STOP mode of Stop & Start,
the change to START mode is denied
because the clutch pedal is not fully
down. If your vehicle has a manual gearbox, you must
declutch fully to allow the change to engine START
mode.
Instruments
Page 92 of 520

90
Ensure that no person or object could
prevent the correct opening or closing
of the doors.
Be aware of children when operating
the doors.
If "
Hands-free access self-locking " is
selected in the vehicle menu and after
closing the door, check that your vehicle
has locked correctly.
This is because locking will not take
place:
-
i
f the ignition is on,
-
i
f one of the doors or the tailgate is
open,
-
i
f a "Keyless Entry and Starting"
remote control is inside the vehicle.
If a number of gestures with your foot
have no effect, wait a few seconds
before starting again.
The system is automatically deactivated
in heavy rain or with accumulations of
snow.
If the system fails to work, check that
the remote control is not exposed to a
source of electromagnetic inter ference
(smar tphone, ...).
Operation may be affected if using a
prosthetic leg.
This system may not work correctly if
your vehicle is fitted with a towbar. The sliding door may open or close
erratically if:
-
y
our vehicle is fitted with a towbar,
-
y
ou attach or detach a trailer,
-
y
ou fit or remove a bicycle carrier,
-
y
ou load or unload bicycles on a
bicycle carrier,
-
y
ou remove or raise something
behind the vehicle,
-
a
n animal approaches the bumper,
-
y
ou wash your vehicle,
-
a s
ervice is being carried out on
your vehicle,
-
y
ou change a wheel.
To avoid unwanted operation, keep the
key away or deactivate the function in
the vehicle configuration menu.
Access
Page 199 of 520
197
To assure the durability of your vehicle and
your safety, remember that certain precautions,
described hereafter, should be taken when
driving your vehicle:
Load the vehicle correctly
With a load carried, the vehicle must remain
within the maximum authorised weight, the
Gross Vehicle Weight.
To avoid upsetting the balance of the vehicle,
the load should be centred and the heaviest
part placed on the floor in front of the rear
wheels.
Manoeuve cautiously, at
low speed
The dimensions of your vehicle differ from
those of a light vehicle, in width, in height, as
well as in length, and some obstacles will be
more difficult to notice.
Manoeuvre slowly.
Before turning, check that there are no
obstacles at mid-height along the sides.
Before reversing, check that there are no
obstacles, particularly at high level behind the
vehicle.
Be aware of the external dimensions, if ladders
are fitted.It is inadvisable to place heavy loads on a
roof
rack.
Loading the roof rack also requires you not
to exceed the maximum load on the roof rack
anchorages. Observe the maximum authorised
weight, available from CITROËN dealers.
Loads must be securely lashed down.
Cargo that is not properly secured inside the
vehicle can adversely affect the handling of the
vehicle and create the risk of accident.
If your vehicle is fitted with a drop-side back,
the height and width of the load must remain
within the overall dimensions of the vehicle.
Drive the vehicle in a
prudent and efficient way
Take corners gently.
Anticipate the need to brake as the stopping
distance is increased, particularly on wet or icy
roads.
Be aware of the effect of side winds on the
vehicle.
Effective eco-driving saves fuel; accelerate
progressively, anticipate the need to slow down
and adapt your speed to suit the situation.
Indicate changes of direction well in advance
so that you are seen by other road users.
Take care
The tyres must be inflated to at least the
pressures indicated on the label, even over-
inflated by 0.2 to 0.3 bar for long journeys.
After ensuring that no obstacle might prevent
closing, guide the movement of the door at the
right speed until it closes.
6
Driving
Page 237 of 520
235
Exceeding the programmed
speed
If the programmed speed is exceeded, the
displayed speed flashes.
Once the vehicle returns to the programmed
speed, the display becomes steady again.
Switching off
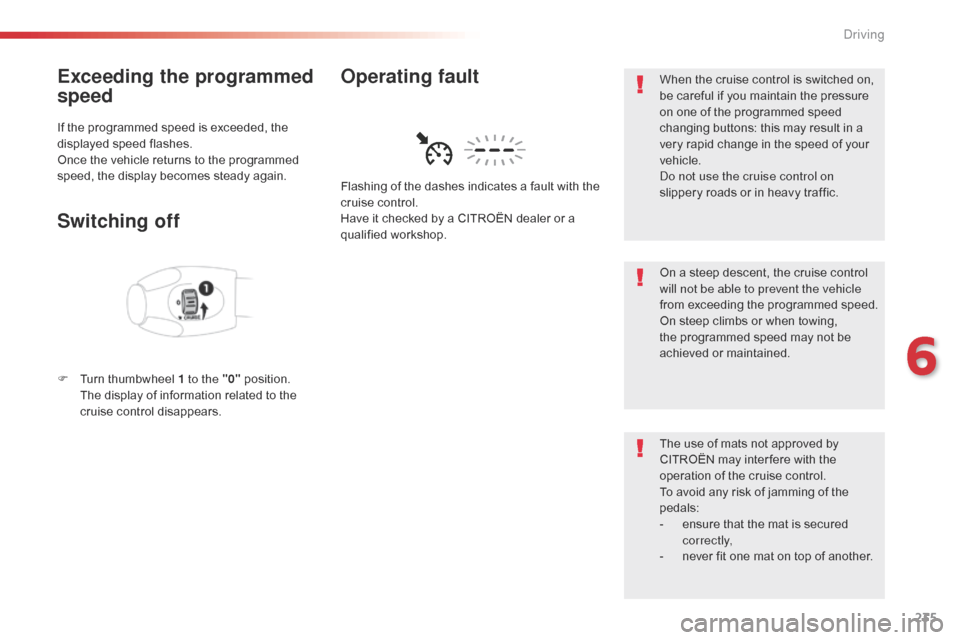
F Turn thumbwheel 1 to the "0" position. T
he display of information related to the
cruise control disappears. Flashing of the dashes indicates a fault with the
cruise control.
Have it checked by a CITROËN dealer or a
qualified workshop.
Operating faultWhen the cruise control is switched on,
be careful if you maintain the pressure
on one of the programmed speed
changing buttons: this may result in a
very rapid change in the speed of your
vehicle.
Do not use the cruise control on
slippery roads or in heavy traffic.
On a steep descent, the cruise control
will not be able to prevent the vehicle
from exceeding the programmed speed.
On steep climbs or when towing,
the programmed speed may not be
achieved or maintained.
The use of mats not approved by
CITROËN may inter fere with the
operation of the cruise control.
To avoid any risk of jamming of the
pedals:
-
e
nsure that the mat is secured
c o r r e c t l y,
-
n
ever fit one mat on top of another.
6
Driving
Page 262 of 520

260
"Standard view""180° view"
"Zoom view" (reconstructed)
The camera records the surroundings during a
manoeuvre in order to create a reconstruction
of the view from above the rear of the vehicle in
its close surroundings, allowing the vehicle to
be manoeuvred among the obstacles nearby.
This view is available with AUTO view or by
selecting of the view in the change view menu.
180° view makes it possible to reverse out of
a parking space while being able to see the
arrival of vehicles, pedestrians or cyclists.
This view is not recommended for carrying out
a complete manoeuvre.
It is made up of the following:
The area to the rear of your vehicle is displayed
in the screen.
The blue outline represents the width of your
vehicle (with mirrors): its orientation depends
on the position of the steering wheel.
The red line represents a distance of 30
cm
from the rear bumper and the two blue lines,
1
m and 2 m respectively.
Rear views
Engage reverse gear to activate the camera,
located on the tailgate or rear door.
The rear parking sensors also
provide information on the vehicle's
surroundings.
Obstacles may appear further away
than they are in reality.
It is important to check the side views
using the mirrors during the manoeuvre.
Driving
Page 264 of 520

262
Under-inflation detection
The system monitors the pressures in the four
tyres, once the vehicle is moving.
It compares the information given by the four
wheel speed sensors with reference values,
which must be reinitialised ever y time the
tyre pressures are adjusted or a wheel
changed.
The system triggers an alert as soon as it
detects a drop in the inflation pressure of one
or more tyres. The under-inflation detection system
does not replace the need for vigilance
on the part of the driver.
This system does not avoid the need to
check the tyre pressures (including the
spare wheel) every month as well as
before a long journey.
Driving with under-inflated tyres impairs
road holding, extends braking distances
and causes premature tyre wear,
particularly under arduous conditions
(high loading, high speed, long journey).
System which automatically checks the pressures of the tyres while driving.
The inflation pressures defined for
your vehicle can be found on the tyre
pressure label.
For more information on the
Identification markings, refer to the
corresponding section.
Tyre pressures should be checked
when the tyres are "cold" (vehicle
stopped for 1 hour or after a journey of
less than 6 miles (10 km) at moderate
speeds).
Other wise (when hot), add 0.3 bar to
the pressures shown on the label.
Driving with under-inflated tyres
increases fuel consumption.
Snow chains
The system does not have to be
reinitialised after fitting or removing
snow chains.
Spare wheel
The steel spare wheel does not have an
under-inflation detection sensor.
Driving
Page 298 of 520
296
Changing a wheel
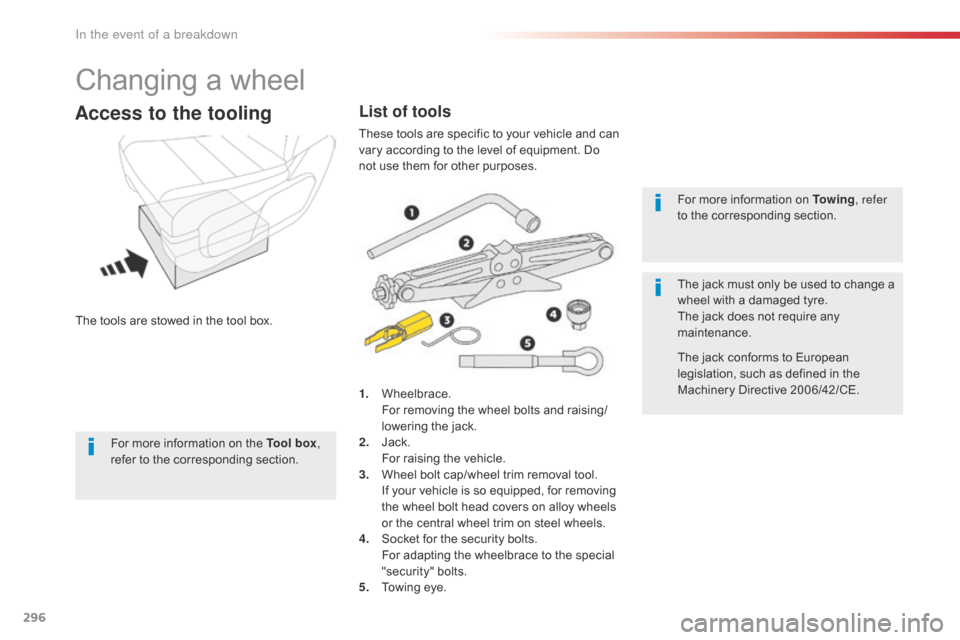
The tools are stowed in the tool box.
Access to the tooling
1. Wheelbrace. For removing the wheel bolts and raising/
lowering the jack.
2.
J
ack.
F
or raising the vehicle.
3.
W
heel bolt cap/wheel trim removal tool.
I
f your vehicle is so equipped, for removing
the wheel bolt head covers on alloy wheels
or the central wheel trim on steel wheels.
4.
S
ocket for the security bolts.
F
or adapting the wheelbrace to the special
"security" bolts.
5.
T
owing eye. For more information on To w i n g
, refer
to the corresponding section.
The jack must only be used to change a
wheel with a damaged tyre.
The jack does not require any
maintenance.
The jack conforms to European
legislation, such as defined in the
Machinery Directive 2006/42/CE.
List of tools
These tools are specific to your vehicle and can
vary according to the level of equipment. Do
not use them for other purposes.
For more information on the Tool box ,
refer to the corresponding section.
In the event of a breakdown
Page 300 of 520

298
F Release the carrier from the hook, take the spare wheel and place it next to the wheel
to be changed.
Refitting
F Position the wheel facing the carrier.
F P rogressively return the wheel to the
basket by pushing alternately at left and
right until it is clear of the hook fixing area.
F
E
ngage the carrier on the hook, then
tighten the bolt using the wheelbrace until
the basket is fully home.
I
Page 301 of 520

299
F If your vehicle has steel wheels, remove the wheel trim using tool 3 .
F
I
f your vehicle has alloy wheels, remove
the cap from each wheel bolt using tool 3 .
F
I
f your vehicle has security wheel bolts,
fit the security bolt socket 4 to the
wheelbrace
1 to slacken the security bolt.
F
S
lacken (without removing) the other
wheel bolts using just the wheelbrace 1 .F
P osition the foot of the jack on the ground,
ensuring that it is directly below the
vehicle's jacking point A or B , the one
closest to the wheel to be changed.
Removing a wheel
Parking the vehicle
Immobilise the vehicle where it does not
block traffic: the ground must be level,
stable and not slippery.
Do not use:
-
t
he jack for any other purpose than
lifting the vehicle,
-
a j
ack other than the one supplied
by the manufacturer.
If your vehicle has a manual gearbox,
engage first gear then switch off the
ignition to block the wheels.
If your vehicle has an automatic
gearbox, place the gear selector at
position P then switch off the ignition to
block the wheels.
If your vehicle has an electronic
gearbox, place the gear selector at
position A then switch off the ignition to
block the wheels.
Apply the parking brake and check that
the warning lamp is on in the instrument
panel.
The occupants must get out of the
vehicle and wait where they are safe.
Never go underneath a vehicle raised
using a jack; use an axle stand.
8
In the event of a breakdown