lights Citroen NEMO 2010.5 1.G Owner's Manual
[x] Cancel search | Manufacturer: CITROEN, Model Year: 2010.5, Model line: NEMO, Model: Citroen NEMO 2010.5 1.GPages: 166, PDF Size: 4.22 MB
Page 47 of 166

40
Steering mounted controls Headlamp beam
You are advised to adjust the height of the
headlamp beams in accordance with the
load in your vehicle.
This function can only be accessed in
the main beam headlamps and dipped
headlamps position.
Press these controls, located
on the fascia panel, several
times in succession to adjust the
headlamps.
Fog lamps
The controls are located on the fascia panel
control pad.
Front and rear fog lamps
The fog lamps should only be used in
fog or when snow is falling.
In clear weather or in rain, both day and
night, lit rear fog lamps dazzle and are
prohibited.
Do not forget to switch them off when they
are no longer necessary. Guide-me-home lighting
The temporary maintaining of the dipped
headlamps, after switching off the vehicle's
ignition, makes the driver's exit easier when
the light is poor and lights the space in front
of the vehicle.
Activation
With the ignition key in the STOP position
or removed, pull the lighting stalk towards
the steering wheel within 2 minutes after
switching off the engine.
Each time the control is operated, the
duration for which the lamps will remain
on is extended by 30 seconds, up to a
maximum of 210 seconds. Once this period
of time has elapsed, the lamps switch off
automatically.
Deactivation
Pull the lighting stalk towards the steering
wheel for more than 2 seconds.
The front fog lamps operate with
the side lights and the dipped
headlamps.
The rear fog lamps operate with
the dipped headlamps.
Press one of these controls to switch on the
lights. The warning lamp comes on,
accompanied by a message
on the display, the first time
the control is operated and
remains on until the function is deactivated
automatically. An indicator light on the display
indicates the adjustment position
selected (0, 1, 2, 3).
Page 48 of 166

40
Steering mounted controls Headlamp beam
You are advised to adjust the height of the
headlamp beams in accordance with the
load in your vehicle.
This function can only be accessed in
the main beam headlamps and dipped
headlamps position.
Press these controls, located
on the fascia panel, several
times in succession to adjust the
headlamps.
Fog lamps
The controls are located on the fascia panel
control pad.
Front and rear fog lamps
The fog lamps should only be used in
fog or when snow is falling.
In clear weather or in rain, both day and
night, lit rear fog lamps dazzle and are
prohibited.
Do not forget to switch them off when they
are no longer necessary. Guide-me-home lighting
The temporary maintaining of the dipped
headlamps, after switching off the vehicle's
ignition, makes the driver's exit easier when
the light is poor and lights the space in front
of the vehicle.
Activation
With the ignition key in the STOP position
or removed, pull the lighting stalk towards
the steering wheel within 2 minutes after
switching off the engine.
Each time the control is operated, the
duration for which the lamps will remain
on is extended by 30 seconds, up to a
maximum of 210 seconds. Once this period
of time has elapsed, the lamps switch off
automatically.
Deactivation
Pull the lighting stalk towards the steering
wheel for more than 2 seconds.
The front fog lamps operate with
the side lights and the dipped
headlamps.
The rear fog lamps operate with
the dipped headlamps.
Press one of these controls to switch on the
lights. The warning lamp comes on,
accompanied by a message
on the display, the first time
the control is operated and
remains on until the function is deactivated
automatically. An indicator light on the display
indicates the adjustment position
selected (0, 1, 2, 3).
Page 58 of 166

50
Gearbox and steering wheel Stopping the vehicle
Before switching off the engine, with your
foot on the brake pedal, you should:
- select first gear or reverse.
- apply the parking brake to immobilise the vehicle.
Temporarily changing gear
You can also request a gear change using
the gear lever.
This action does not deactivate the
automated mode, but allows temporary
use of the sequential mode functions (for
example: for overtaking another vehicle...).
"AUTO" remains displayed in the instrument
panel screen.
"ECO" economy programme
This programme works with the automated
mode to reduce fuel consumption.
Press button E to activate the programme. Sequential mode
After using the automated mode, you can
return to the sequential mode by selecting
position
A
/M again.
"E" appears in the instrument
panel screen, next to "AUTO"
and the gear selected by the
gearbox.
The gearbox then selects the best gear for
the speed of the vehicle, the engine speed
and the accelerator pedal position to reduce
fuel consumption.
"AUTO" disappears and the
gears engaged appear in
succession in the instrument
panel screen.
t is not necessary to take your foot off the
accelerator pedal to change the gear.
The gear change requests are only carried
out if the engine speed permits it. The
system gives an audible signal if a gear
change is not possible.
At low speeds, when approaching a stop
or traffic lights for example, the gearbox
changes down to first gear automatically. Release the brake pedal after the display
of the gear engaged has disappeared
from the instrument panel screen.
Never leave the vehicle with the
gearbox in neutral (position
N ). In this
case, there is an audible signal on switching
off the ignition (ignition key in the STOP
position).
Page 61 of 166

53
1
READY TO GO
Gearbox and steering wheel
- with a manual gearbox , with the vehicle
stationary, put the gear lever into neutral,
then release the clutch pedal,
- with an electronic gearbox , with the
vehicle stationary, hold the brake pedal
down or put the gear lever into position N . Special cases: STOP mode unavailable
The STOP mode is not invoked when:
- the driver's door is open,
- the driver's seat belt is not fastened,
- the heated rear screen is on,
- the windscreen wiper is on fast wipe,
- reverse gear is engaged,
- some special conditions (battery
charge, engine temperature, particle
filter regeneration, braking assistance,
ambient temperature...) where the engine
is needed to assure control of a system.
In this case, a message appears
in the instrument panel screen,
accompanied by the "S" warning
lamp, which flashes for a few
seconds, then goes off.
This operation is perfectly normal.
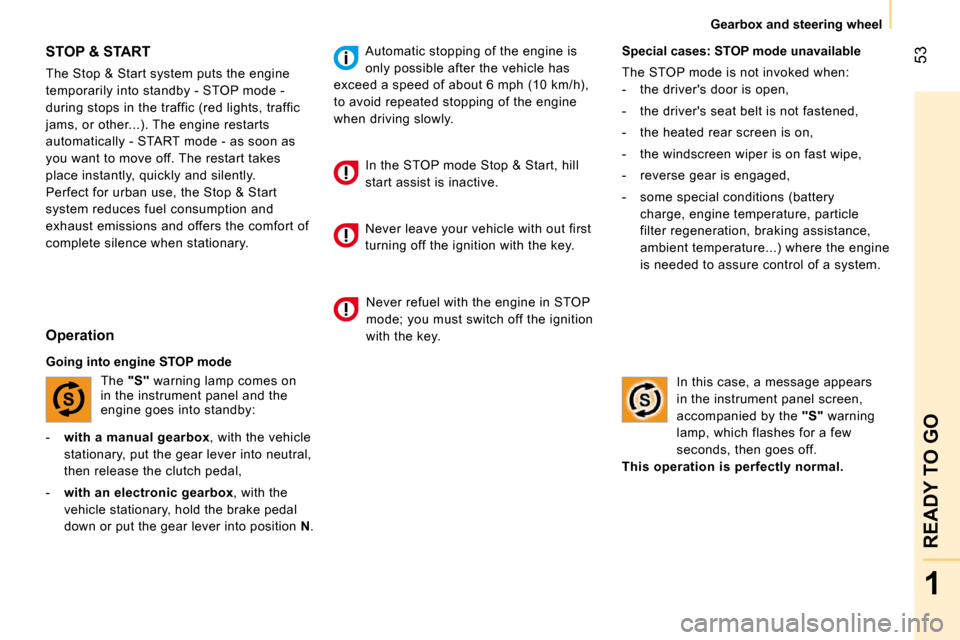
STOP & START
The Stop & Start system puts the engine
temporarily into standby - STOP mode -
during stops in the traffic (red lights, traffic
jams, or other...). The engine restarts
automatically - START mode - as soon as
you want to move off. The restart takes
place instantly, quickly and silently.
Perfect for urban use, the Stop & Start
system reduces fuel consumption and
exhaust emissions and offers the comfort of
complete silence when stationary.
Operation
Going into engine STOP mode
The "S" warning lamp comes on
in the instrument panel and the
engine goes into standby: Automatic stopping of the engine is
only possible after the vehicle has
exceed a speed of about 6 mph (10 km/h),
to avoid repeated stopping of the engine
when driving slowly.
In the STOP mode Stop & Start, hill
start assist is inactive.
Never leave your vehicle with out first
turning off the ignition with the key.
Never refuel with the engine in STOP
mode; you must switch off the ignition
with the key.
Page 95 of 166

87
4
EASE OF USE and COMFORT
Ventilation
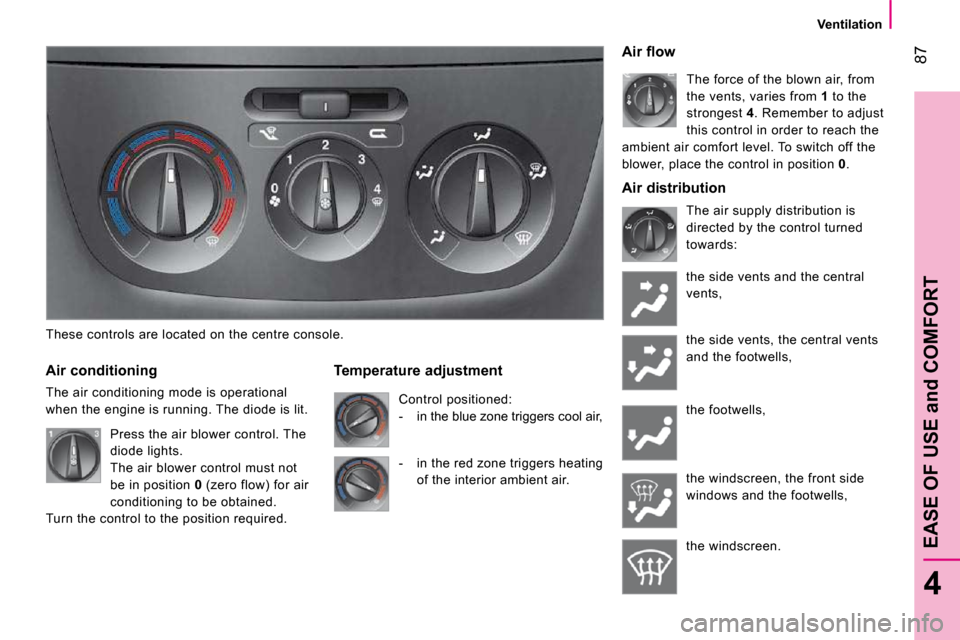
These controls are located on the centre console.
Air conditioning
The air conditioning mode is operational
when the engine is running. The diode is lit.
Temperature adjustment Control positioned:
- in the blue zone triggers cool air,
Air flow
The force of the blown air, from
the vents, varies from 1 to the
strongest 4 . Remember to adjust
this control in order to reach the
ambient air comfort level. To switch off the
blower, place the control in position 0 .
The air supply distribution is
directed by the control turned
towards:
the side vents and the central
vents,
the side vents, the central vents
and the footwells,
the footwells,
the windscreen, the front side
windows and the footwells,
the windscreen.
Press the air blower control. The
diode lights.
The air blower control must not
be in position 0 (zero flow) for air
conditioning to be obtained.
Turn the control to the position required.
- in the red zone triggers heating
of the interior ambient air.
Air distribution
Page 103 of 166

95
4
EASE OF USE and COMFORT
Practical information
INTERIOR LIGHTING
Front courtesy lamp
This is located in the centre of the roof.
It can be activated by:
- tilting the lens,
- opening or closing a door,
- locking or unlocking the vehicle.
It switches off automatically, after a few
minutes, if the doors remain open, or when
the ignition is switched on.
The courtesy lamp may be fitted with an
alarm sensor, a microphone for the hands-
free kit and reading lights.
The reading lampshave right-hand and left-
hand switches. Rear courtesy lamp
This is located on the upper part of the rear
right side.
Press the side of the courtesy lamp lens to
switch it on or off.
It comes on automatically when a door is
opened.
Good practice
It switches off automatically:
- if the switch is not pressed down,
- in all cases within approximately
15 minutes if the doors remain open,
- when the ignition is switched on,
- when the vehicle is locked. Boot lamp
This is located in the centre of the torch
base.
The lamp operates in accordance with
the three positions of the switch below.
Permanently on.
In this "AUTO" position, it comes
on gradually when the vehicle is
unlocked and when a rear door or
the tailgate is opened.
It switches off automatically, after a few
minutes, if a rear door or the tailgate remains
open, or when the ignition is switched on.
Permanently off.
Page 104 of 166

96
Driving safely
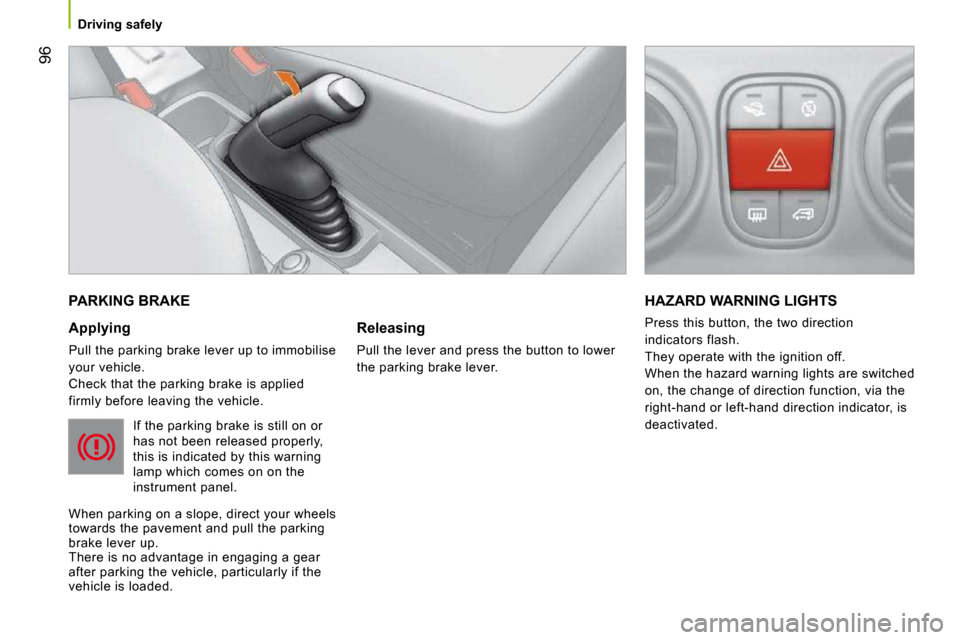
PARKING BRAKE
Applying
Pull the parking brake lever up to immobilise
your vehicle.
Check that the parking brake is applied
firmly before leaving the vehicle. If the parking brake is still on or
has not been released properly,
this is indicated by this warning
lamp which comes on on the
instrument panel.
When parking on a slope, direct your wheels
towards the pavement and pull the parking
brake lever up.
There is no advantage in engaging a gear
after parking the vehicle, particularly if the
vehicle is loaded. Releasing
Pull the lever and press the button to lower
the parking brake lever.
HAZARD WARNING LIGHTS
Press this button, the two direction
indicators flash.
They operate with the ignition off.
When the hazard warning lights are switched
on, the change of direction function, via the
right-hand or left-hand direction indicator, is
deactivated.
Page 117 of 166

105
5
SAFETY
Airbags
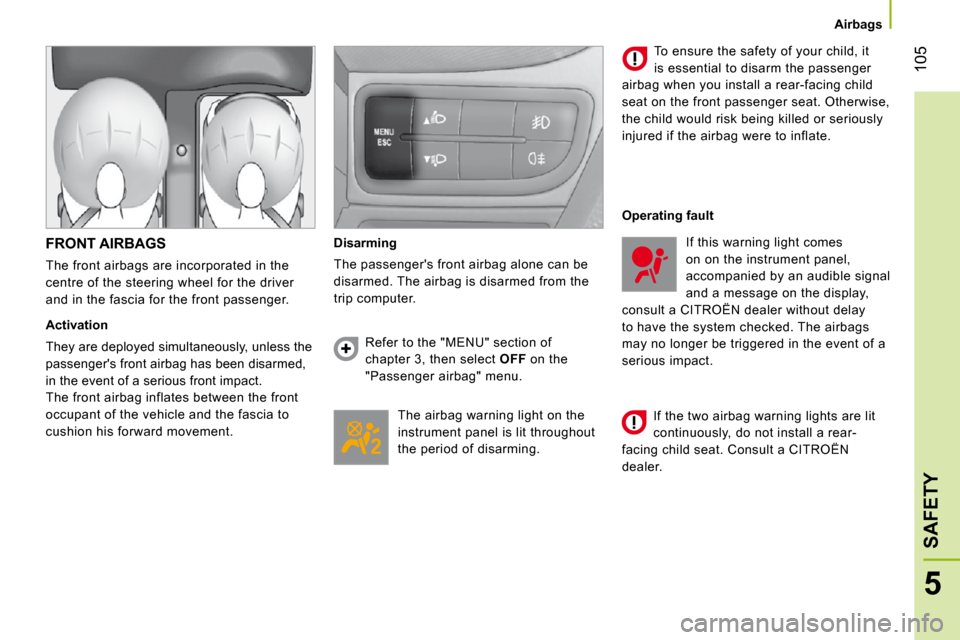
FRONT AIRBAGS
The front airbags are incorporated in the
centre of the steering wheel for the driver
and in the fascia for the front passenger.
Activation
They are deployed simultaneously, unless the
passenger's front airbag has been disarmed,
in the event of a serious front impact.
The front airbag inflates between the front
occupant of the vehicle and the fascia to
cushion his forward movement. Disarming
The passenger's front airbag alone can be
disarmed. The airbag is disarmed from the
trip computer.
The airbag warning light on the
instrument panel is lit throughout
the period of disarming. To ensure the safety of your child, it
is essential to disarm the passenger
airbag when you install a rear-facing child
seat on the front passenger seat. Otherwise,
the child would risk being killed or seriously
injured if the airbag were to inflate.
Refer to the "MENU" section of
chapter 3, then select OFF on the
"Passenger airbag" menu. Operating fault
If the two airbag warning lights are lit
continuously, do not install a rear-
facing child seat. Consult a CITROËN
dealer . If this warning light comes
on on the instrument panel,
accompanied by an audible signal
and a message on the display,
consult a CITROËN dealer without delay
to have the system checked. The airbags
may no longer be triggered in the event of a
serious impact.
Page 157 of 166

139
7
QUICK HELP
Fuel
FILLING WITH FUEL
Capacity of the fuel tank: approximately
45 litres .
Low fuel level
When the minimum fuel tank level
is reached, this warning lamp
comes on. When it first comes on,
you have approximately 6
litres
of fuel remaining. Refuel without delay to
avoid running out of fuel. Refuelling must be done
with the engine off.
- Open the fuel filler flap.
- Hold the filler cap with one hand.
- With the other hand, insert the key, then turn it a third of a turn.
� � �-� � �R�e�m�o�v�e� �t�h�e� �fi� �l�l�e�r� �c�a�p� �a�n�d� �h�a�n�g� �i�t� �o�n� �t�h�e� �h�o�o�k�,� �l�o�c�a�t�e�d� �o�n� �t�h�e� �i�n�s�i�d�e� �o�f� �t�h�e� �fi� �l�l�e�r� �fl� �a�p�.� �
FUEL CIRCUIT DEACTIVATED
In the event of a serious collision, a device
automatically cuts off the fuel supply to the
engine and the vehicle's electrical supply.
It also triggers the automatic unlocking of
the doors and switching on of the courtesy
lights. A message appears on the instrument
panel display according to version.
Turn the key to the STOP position to prevent
discharging of the battery.
Check that there is no smell or leak of fuel
outside the vehicle.
With Stop & Start, never refuel with the
system in STOP mode; you must switch
off the ignition with the key. When the fuel filler flap is open, a
safety system prevents sliding of the
side door.
A label affixed to the inside of the flap
reminds you of the type of fuel to be used.
Opening the filler cap may cause a noise
resulting from the inrush of air. This vacuum
is quite normal and results from the sealing
of the fuel system.
When filling the fuel tank, do not continue
after the 3rd cut-off of the nozzle; this could
cause malfunctions.
After filling the fuel tank, lock the filler cap
and close the flap.
Page 158 of 166

139
7
QUICK HELP
Fuel
FILLING WITH FUEL
Capacity of the fuel tank: approximately
45 litres .
Low fuel level
When the minimum fuel tank level
is reached, this warning lamp
comes on. When it first comes on,
you have approximately 6
litres
of fuel remaining. Refuel without delay to
avoid running out of fuel. Refuelling must be done
with the engine off.
- Open the fuel filler flap.
- Hold the filler cap with one hand.
- With the other hand, insert the key, then turn it a third of a turn.
� � �-� � �R�e�m�o�v�e� �t�h�e� �fi� �l�l�e�r� �c�a�p� �a�n�d� �h�a�n�g� �i�t� �o�n� �t�h�e� �h�o�o�k�,� �l�o�c�a�t�e�d� �o�n� �t�h�e� �i�n�s�i�d�e� �o�f� �t�h�e� �fi� �l�l�e�r� �fl� �a�p�.� �
FUEL CIRCUIT DEACTIVATED
In the event of a serious collision, a device
automatically cuts off the fuel supply to the
engine and the vehicle's electrical supply.
It also triggers the automatic unlocking of
the doors and switching on of the courtesy
lights. A message appears on the instrument
panel display according to version.
Turn the key to the STOP position to prevent
discharging of the battery.
Check that there is no smell or leak of fuel
outside the vehicle.
With Stop & Start, never refuel with the
system in STOP mode; you must switch
off the ignition with the key. When the fuel filler flap is open, a
safety system prevents sliding of the
side door.
A label affixed to the inside of the flap
reminds you of the type of fuel to be used.
Opening the filler cap may cause a noise
resulting from the inrush of air. This vacuum
is quite normal and results from the sealing
of the fuel system.
When filling the fuel tank, do not continue
after the 3rd cut-off of the nozzle; this could
cause malfunctions.
After filling the fuel tank, lock the filler cap
and close the flap.