brake light Citroen NEMO 2015 1.G Owner's Manual
[x] Cancel search | Manufacturer: CITROEN, Model Year: 2015, Model line: NEMO, Model: Citroen NEMO 2015 1.GPages: 192, PDF Size: 7.84 MB
Page 4 of 192
2
nemo_en_Chap00a_sommaire_ed02-2014
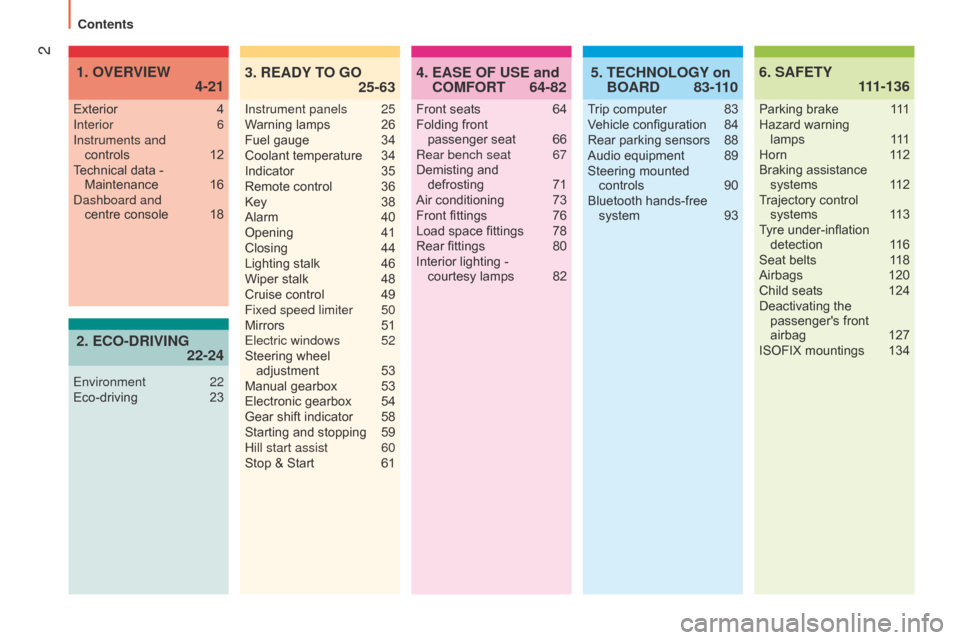
4. 64-82
EASE OF USE and
COMFORT 6.
111-136
SAFETY
Front seats 64
Folding front passenger
seat
66
Rear bench seat
67
Demisting and
defrosting
71
Air conditioning
73
Front fittings
76
Load space fittings
78
Rear fittings
80
Interior lighting - courtesy
lamps
82
Exterior
4
Interior
6
Instruments and controls
12
T
echnical data - Maintenance
16d
ashboard and centre
console
18
1. 4-21
OVERVIEW
Parking brake 1
11
Hazard warning
lamps
1
11
Horn
1
12
Braking assistance systems
1
12
Trajectory control systems
1
13
Tyre under-inflation detection
1
16
Seat belts
1
18
Airbags
120
Child seats
124
Deactivating the passenger's front
airbag
127
ISOFIX mountings
134
5. 83-1 10
TECHNOLOGY on
BOARD
Trip computer 83
V ehicle configuration 84
Rear parking sensors
88
Audio equipment
89
Steering mounted
controls
90
Bluetooth hands-free system
93
3. 25-63
READY TO GO
Instrument panels 25
W arning lamps 26
Fuel gauge
34
Coolant temperature
34
Indicator
35
Remote control
36
Key
38
Alarm
40
Opening
41
Closing
44
Lighting stalk
46
Wiper stalk
48
Cruise control
49
Fixed speed limiter
50
Mirrors
51
Electric windows
52
Steering wheel
adjustment
53
Manual gearbox
53
Electronic gearbox
54
Gear shift indicator
58
Starting and stopping
59
Hill start assist
60
Stop & Start
61
2. 22-24
ECO-DRIVING
Environment 22
Eco-driving 23
Contents
Page 6 of 192
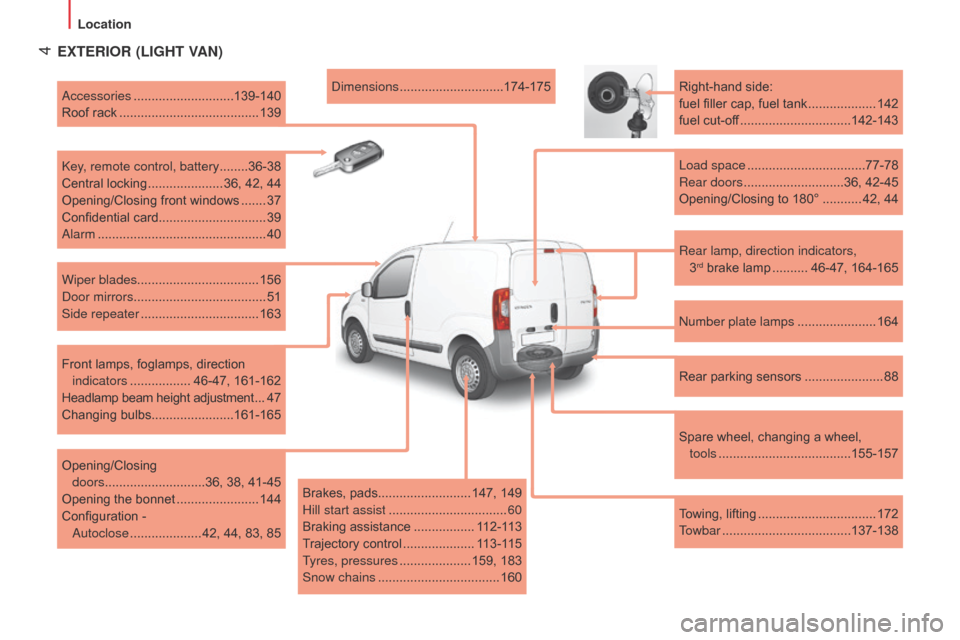
4EXTERIOR (LIGHT VAN)
Rear lamp, direction indicators, 3rd brake lamp ..........46-47, 164-165
Right-hand side:
fuel filler cap, fuel tank
...................
142
fuel cut-off ...............................
142-143
Load space
.................................
77-78
Rear doors
............................
36, 42-45
Opening/Closing to 180°
...........
42, 44
n
umber plate lamps
......................164
Rear parking sensors
......................88
Spare wheel, changing a wheel,
tools
..................................... 155-157
Towing, lifting
................................. 172
T
owbar
.................................... 137-13
8
d
imensions
.............................
174-175
a
ccessories
............................
139-140
Roof rack
.......................................
139
k
ey, remote control, battery
........
36-38
Central locking
.....................
36, 42, 44
Opening/Closing front windows
....... 37
Confidential card .............................. 39
a
larm
...............................................
40
Wiper blades.................................. 156
d
oor mirrors
..................................... 51
Side repeater
................................. 163
Front lamps, foglamps, direction indicators
................. 46-47, 161-162
Headlamp beam height adjustment
... 47
Changing bulbs .......................161-165
Opening/Closing
doors
........
.................... 36, 38, 41-45
Opening the bonnet
....................... 144
Configuration -
a
utoclose
.................... 42, 44, 83, 85 Brakes, pads
.......................... 147, 149
Hill start assist
................................. 60
Braking assistance
................. 112-113
Trajectory control
.................... 113-115
Tyres, pressures
.................... 159, 183
Snow chains
.................................. 160
Location
Page 8 of 192
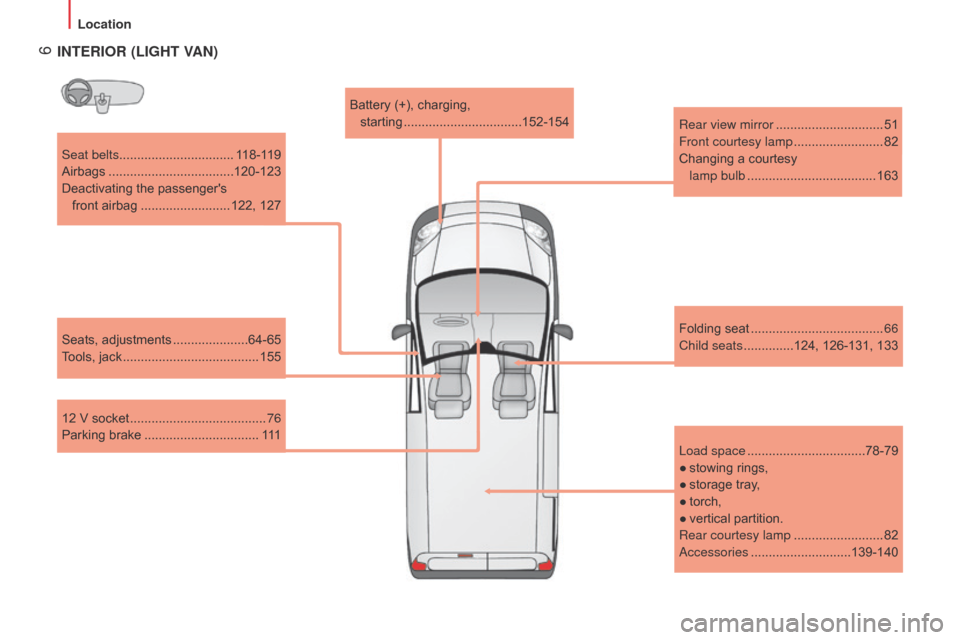
6
Seat belts................................118-119
Airbags
................................... 120-123
Deactivating the passenger's
front airbag
......................... 122, 127
Seats, adjustments
.....................64-65
T
ools, jack ...................................... 155 Folding seat
.....................................66
Child seats
..............124, 126-131, 133
12 V socket
...................................... 76
Parking brake
................................ 111Battery (+), charging,
starting .................................
152-154
INTERIOR (LIGHT VAN)
Load space ................................. 78-79
●
stowing
rings,
●
storage tray
,
●
torch,
●
vertical partition.
Rear courtesy lamp
.........................82
a
ccessories
............................ 139-140
Rear view mirror
..............................
51
Front courtesy lamp
.........................
82
Changing a courtesy
lamp bulb
....................................
163
Location
Page 9 of 192
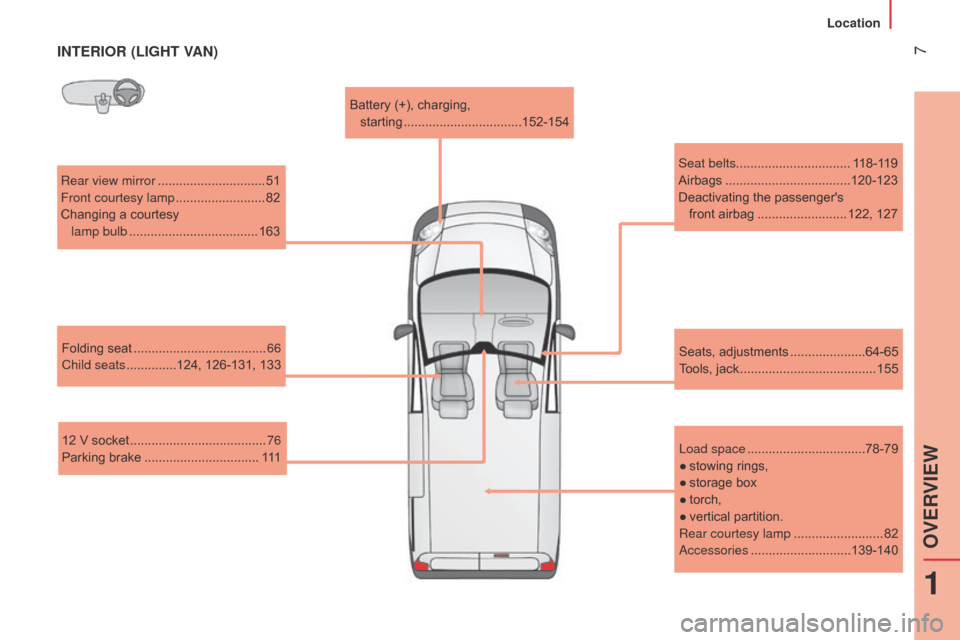
7INTERIOR (LIGHT VAN)
Rear view mirror ..............................51
Front courtesy lamp .........................82
Changing a courtesy
lamp bulb
.................................... 163
Folding seat
..................................... 66
Child seats
..............124, 126-131, 133
12 V socket
...................................... 76
Parking brake
................................ 111Battery (+), charging,
starting .................................
152-154
Seat belts................................ 118-119
Airbags ...................................
120-123
Deactivating the passenger's
front airbag
.........................122, 127
Seats, adjustments
.....................64-65
T
ools, jack ......................................155
Load space
.................................78-79
●
stowing
rings,
●
storage box
●
torch,
●
vertical partition.
Rear courtesy lamp
.........................82
a
ccessories
............................139-140
1
OVERVIEW
Location
Page 18 of 192
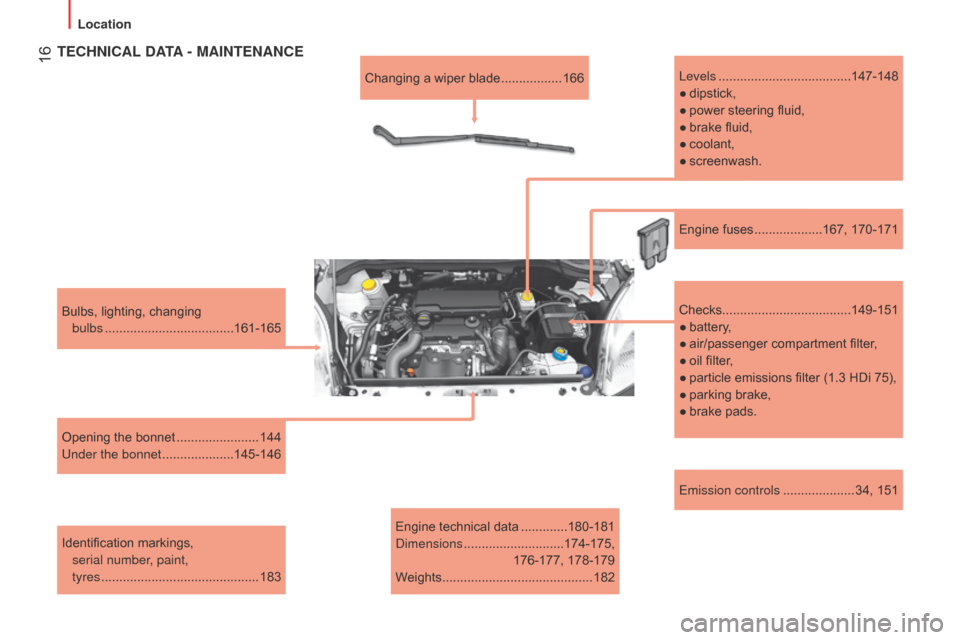
16
Emission controls ....................34, 151
Bulbs, lighting, changing
bulbs
.......
.............................
161-165
Opening the bonnet
....................... 144
Under the bonnet
....................
145-146
Identification markings,
serial number, paint,
tyres
............................................ 183Changing a wiper blade
.................
166
Engine technical data
.............180-181
d
imensions
............................ 174-175,
176-177, 178-179
Weights
.......................................... 182
TECHNICAL DATA - MAINTENANCE
Levels .....................................147-14 8
●
dipstick,
●
power steering fluid,
●
brake fluid,
●
coolant,
●
screenw
ash.
Checks.................................... 149-151
●
battery
,
●
air/passenger compartment filter
,
●
oil filter
,
●
particle emissions filter (1.3 HDi 75),
●
parking brake,
●
brake pads.
Engine fuses
...................167, 170-171
Location
Page 20 of 192
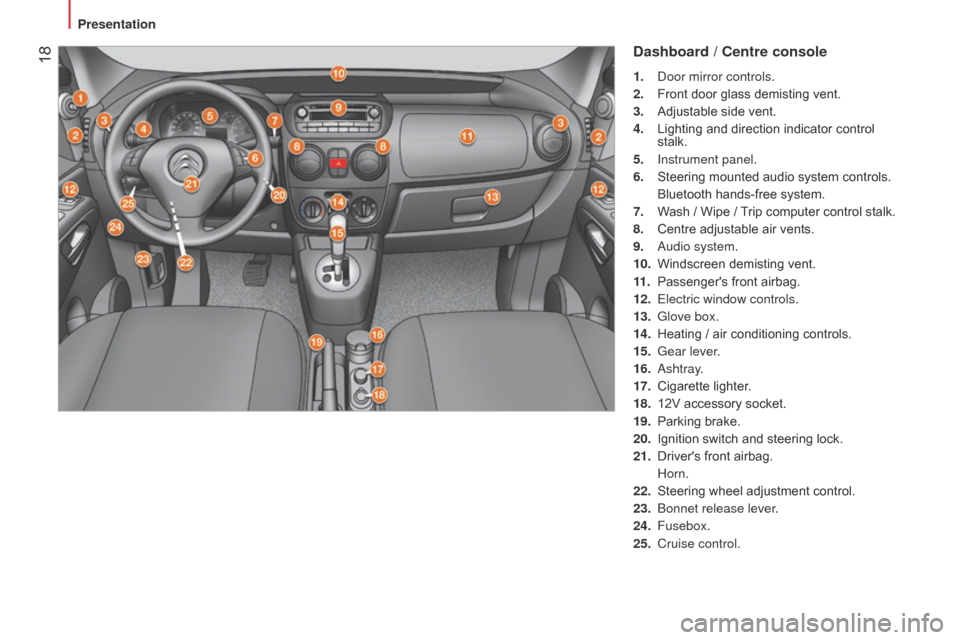
18Dashboard / Centre console
1. door mirror controls.
2.
Front door glass demisting vent.
3.
Adjustable side vent.
4.
Lighting and direction indicator control
stalk.
5.
Instrument panel.
6.
Steering mounted audio system controls.
Bluetooth hands-free system.
7.
W
ash / Wipe / Trip computer control stalk.
8.
Centre adjustable air vents.
9.
a udio system.
10.
Windscreen demisting vent.
11
.
Passenger's front airbag.
12.
Electric window controls.
13.
Glove box.
14.
Heating / air conditioning controls.
15.
Gear lever
.
16.
a shtray.
17.
Cigarette lighter
.
18.
12V accessory socket.
19.
Parking brake.
20.
Ignition switch and steering lock.
21.
Driver's front airbag.
Horn.
22.
Steering wheel adjustment control.
23.
b onnet release lever.
24.
Fusebox.
25.
Cruise control.
Presentation
Page 22 of 192
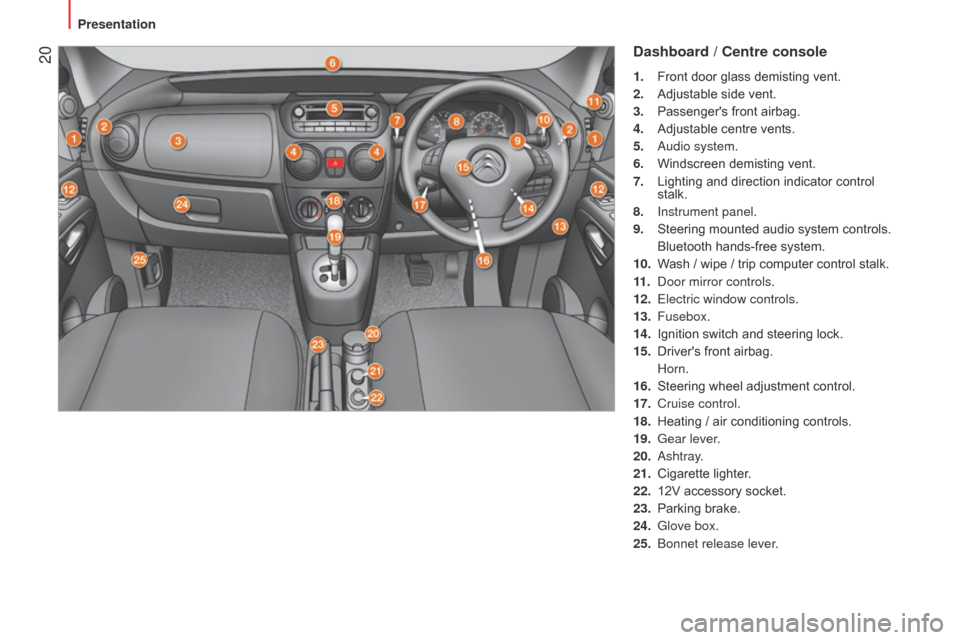
20Dashboard / Centre console
1. Front door glass demisting vent.
2.
Adjustable side vent.
3.
Passenger's front airbag.
4.
Adjustable centre vents.
5.
a udio system.
6.
Windscreen demisting vent.
7.
Lighting and direction indicator control
stalk.
8.
Instrument panel.
9.
Steering mounted audio system controls.
Bluetooth hands-free system.
10.
W
ash / wipe / trip computer control stalk.
11 .
d oor mirror controls.
12.
Electric window controls.
13.
Fusebox.
14.
Ignition switch and steering lock.
15.
Driver's front airbag.
Horn.
16.
Steering wheel adjustment control.
17.
Cruise control.
18.
Heating / air conditioning controls.
19.
Gear lever
.
20.
a shtray.
21.
Cigarette lighter
.
22.
12V accessory socket.
23.
Parking brake.
24.
Glove box.
25.
b onnet release lever.
Presentation
Page 25 of 192
23ECO-DRIVING
Eco-driving is a range of everyday practices that allow the motorist to optimise their fuel consumption and CO2 emissions.
Optimise the use of your gearbox
With a manual gearbox, move off gently and change up without
waiting. During acceleration change up early.
With an automatic or electronic gearbox, give preference to automatic
mode and avoid pressing the accelerator pedal heavily or suddenly.
The gear shift indicator invites you engage the most suitable gear: as
soon as the indication is displayed in the instrument panel, follow it
straight away.
For vehicles fitted with an electronic or automatic gearbox, this
indicator appears only in manual mode.
Drive smoothly
Maintain a safe distance between vehicles, use engine braking rather
than the brake pedal, and press the accelerator progressively. These
practices contribute towards a reduction in fuel consumption and C o
2
emissions and also helps reduce the background traffic noise.
If your vehicle has cruise control, make use of the system at speeds
above 25 mph (40 km/h) when the traffic is flowing well.
Control the use of your electrical equipment
Before moving off, if the passenger compartment is too warm, ventilate it
by opening the windows and air vents before using the air conditioning.
Above 30 mph (50 km/h), close the windows and leave the air vents
open.
Remember to make use of equipment that can help keep the
temperature in the passenger compartment down (sunroof and window
blinds...).
Switch off the air conditioning, unless it has automatic regulation, as
soon as the desired temperature is attained.
Switch off the demisting and defrosting controls, if not automatic.
Switch off the heated seat as soon as possible.
Switch off the headlamps and front foglamps when the level of light
does not require their use.
Avoid running the engine before moving off, particularly in winter; your
vehicle will warm up much faster while driving.
As a passenger, if you avoid connecting your multimedia devices
(film, music, video game...), you will contribute towards limiting the
consumption of electrical energy, and so of fuel.
Disconnect your portable devices before leaving the vehicle.
2
ECO-DRIVING
Motoring & Environment
Page 58 of 192
56Stopping the vehicle
To switch off the engine, with your foot on
the brake pedal, you should:
-
select first gear or reverse.
-
apply the parking brake to immobilise the
vehicle.
-
switch of
f the ignition.
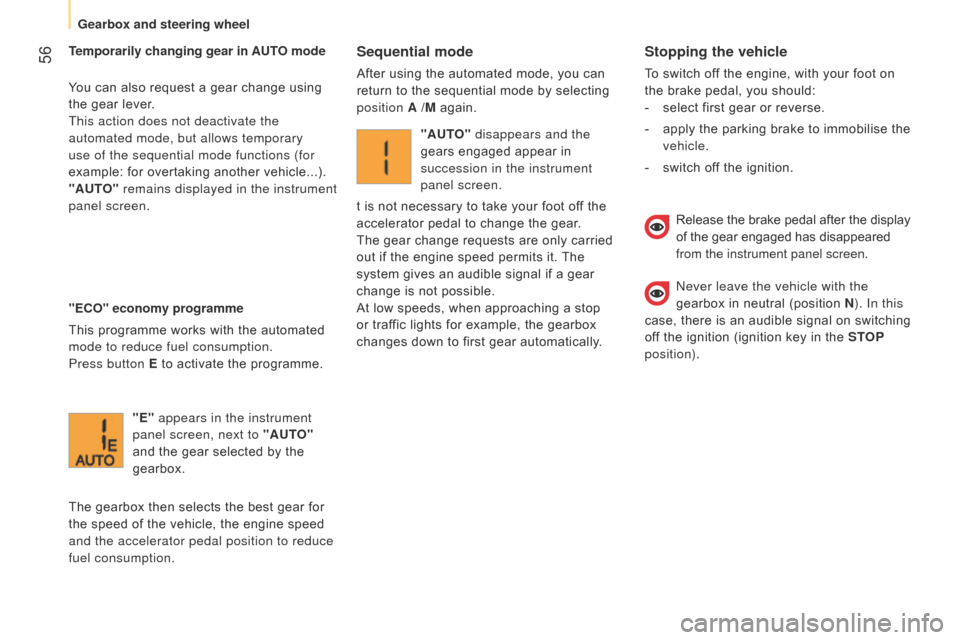
Temporarily changing gear in AUTO mode
You can also request a gear change using
the gear lever.
This action does not deactivate the
automated mode, but allows temporary
use of the sequential mode functions (for
example: for overtaking another vehicle...).
"AUTO" remains displayed in the instrument
panel screen.
"ECO" economy programme
This programme works with the automated
mode to reduce fuel consumption.
Press button E
to activate the programme.
Sequential mode
After using the automated mode, you can
return to the sequential mode by selecting
position A /M again.
"E" appears in the instrument
panel screen, next to "AUTO"
and the gear selected by the
gearbox.
The gearbox then selects the best gear for
the speed of the vehicle, the engine speed
and the accelerator pedal position to reduce
fuel consumption. "AUTO" disappears and the
gears engaged appear in
succession in the instrument
panel screen.
t is not necessary to take your foot off the
accelerator pedal to change the gear.
The gear change requests are only carried
out if the engine speed permits it. The
system gives an audible signal if a gear
change is not possible.
At low speeds, when approaching a stop
or traffic lights for example, the gearbox
changes down to first gear automatically.
Release the brake pedal after the display
of the gear engaged has disappeared
from the instrument panel screen.
n
ever leave the vehicle with the
gearbox in neutral (position N ). In this
case, there is an audible signal on switching
off the ignition (ignition key in the STOP
position).
Gearbox and steering wheel
Page 63 of 192
61
- with a manual gearbox, with the vehicle
stationary, put the gear lever into neutral,
then release the clutch pedal,
-
with an electronic gearbox
, with the
vehicle stationary, hold the brake pedal
down. Special cases: STOP mode unavailable
The STOP mode is not invoked when:
-
the driver's door is open,
-
the driver's seat belt is not fastened,
-
reverse gear is engaged,
-
some special conditions (battery
charge, engine temperature, particle
filter regeneration, braking assistance,
ambient temperature...) where the engine
is needed to assure control of a system.
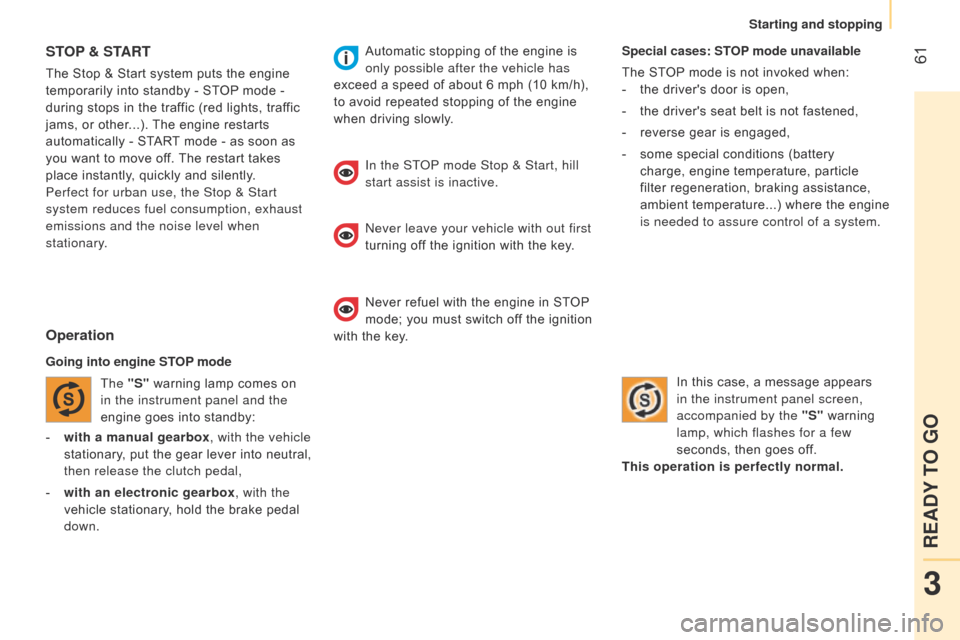
In this case, a message appears
in the instrument panel screen,
accompanied by the "S" warning
lamp, which flashes for a few
seconds, then goes off.
This operation is perfectly normal.
STOP & S TART
The Stop & Start system puts the engine
temporarily into standby - ST OP mode -
during stops in the traffic (red lights, traffic
jams, or other...). The engine restarts
automatically - START mode - as soon as
you want to move off. The restart takes
place instantly, quickly and silently.
Perfect for urban use, the Stop & Start
system reduces fuel consumption, exhaust
emissions and the noise level when
stationary.
Operation
Going into engine STOP mode
The "S" warning lamp comes on
in the instrument panel and the
engine goes into standby: Automatic stopping of the engine is
only possible after the vehicle has
exceed a speed of about 6 mph (10 km/h),
to avoid repeated stopping of the engine
when driving slowly.
In the ST
o
P mode Stop & Start, hill
start assist is inactive.
n
ever leave your vehicle with out first
turning off the ignition with the key.
Never refuel with the engine in STOP
mode; you must switch off the ignition
with the key.
3
READY TO GO
Starting and stopping