Citroen NEMO 2015 1.G Repair Manual
Manufacturer: CITROEN, Model Year: 2015, Model line: NEMO, Model: Citroen NEMO 2015 1.GPages: 192, PDF Size: 7.84 MB
Page 61 of 192
59
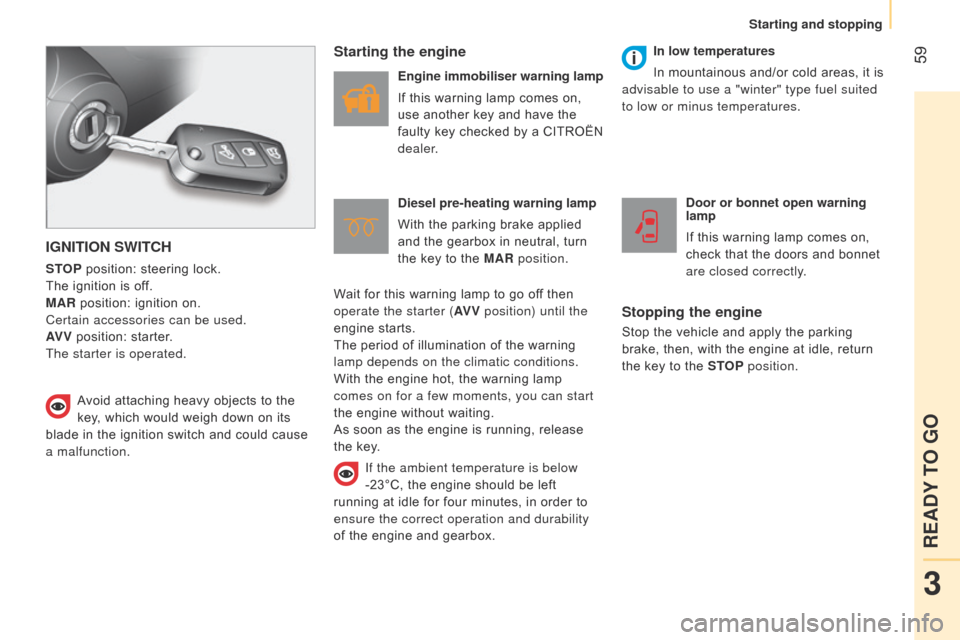
IGNITION SWITCH
STOP position: steering lock.
The ignition is off.
MAR position: ignition on.
Certain accessories can be used.
AV V position: starter.
The starter is operated.
Starting the engine
Engine immobiliser warning lamp
If this warning lamp comes on,
use another key and have the
faulty key checked by a CITROËN
dealer.
Diesel pre-heating warning lamp
With the parking brake applied
and the gearbox in neutral, turn
the key to the MAR position. Door or bonnet open warning
lamp
If this warning lamp comes on,
check that the doors and bonnet
are closed correctly.
Stopping the engine
Stop the vehicle and apply the parking
brake, then, with the engine at idle, return
the key to the STOP position.
Avoid attaching heavy objects to the
key, which would weigh down on its
blade in the ignition switch and could cause
a malfunction. In low temperatures
In mountainous and/or cold areas, it is
advisable to use a "winter" type fuel suited
to low or minus temperatures.
Wait for this warning lamp to go off then
operate the starter (AV V position) until the
engine starts.
The period of illumination of the warning
lamp depends on the climatic conditions.
With the engine hot, the warning lamp
comes on for a few moments, you can start
the engine without waiting.
As soon as the engine is running, release
the key.
If the ambient temperature is below
-23°C, the engine should be left
running at idle for four minutes, in order to
ensure the correct operation and durability
of the engine and gearbox.
3
READY TO GO
Starting and stopping
Page 62 of 192
60HILL START ASSIST
An integral part of the DSC system, it
facilitates starting on a gradient by keeping
your vehicle immobilised temporarily
(approximately 2 seconds), the time it takes
to move your foot from the brake pedal to
the accelerator pedal.
This function is only active when:
-
the vehicle is completely stationary
, with
your foot on the brake pedal,
-
the engine is running,
-
the gradient is steeper than 5 %. Operation
On a slope, with engine running and the
vehicle stationary, the vehicle is held
for a brief moment when you release the
brake pedal:
-
provided you are in first gear or neutral
with a manual gearbox,
-
provided you are in position
A or M with
an electronic gearbox,
On a descending slope, with the vehicle
stationary, the engine running and
reverse gear engaged, the vehicle is held
for a brief moment when you release the
brake pedal.
a
fter 2 seconds, if the vehicle has not
moved off, the system is deactivated
automatically by gradually reducing the
brake pressure. During this phase, the
characteristic sound of brakes being
released will be heard, indicating the
imminent movement of the vehicle.
d
o not leave the vehicle while it is
being held in the hill start assist phase.
If you need to leave the vehicle while the
engine is running, apply the parking brake
manually. Then ensure that the parking
brake warning lamp is on (not flashing) in
the instrument panel.
Operating fault
If a fault occurs with the system,
these warning lamps come on in
the instrument panel. Contact a
CITR
o Ë n dealer or a qualified
workshop to have the system
checked.
In ST
o
P mode of Stop & Start, hill start
assist is inactive.
Starting and stopping
Page 63 of 192
61
- with a manual gearbox, with the vehicle
stationary, put the gear lever into neutral,
then release the clutch pedal,
-
with an electronic gearbox
, with the
vehicle stationary, hold the brake pedal
down. Special cases: STOP mode unavailable
The STOP mode is not invoked when:
-
the driver's door is open,
-
the driver's seat belt is not fastened,
-
reverse gear is engaged,
-
some special conditions (battery
charge, engine temperature, particle
filter regeneration, braking assistance,
ambient temperature...) where the engine
is needed to assure control of a system.
In this case, a message appears
in the instrument panel screen,
accompanied by the "S" warning
lamp, which flashes for a few
seconds, then goes off.
This operation is perfectly normal.
STOP & S TART
The Stop & Start system puts the engine
temporarily into standby - ST OP mode -
during stops in the traffic (red lights, traffic
jams, or other...). The engine restarts
automatically - START mode - as soon as
you want to move off. The restart takes
place instantly, quickly and silently.
Perfect for urban use, the Stop & Start
system reduces fuel consumption, exhaust
emissions and the noise level when
stationary.
Operation
Going into engine STOP mode
The "S" warning lamp comes on
in the instrument panel and the
engine goes into standby: Automatic stopping of the engine is
only possible after the vehicle has
exceed a speed of about 6 mph (10 km/h),
to avoid repeated stopping of the engine
when driving slowly.
In the ST
o
P mode Stop & Start, hill
start assist is inactive.
n
ever leave your vehicle with out first
turning off the ignition with the key.
Never refuel with the engine in STOP
mode; you must switch off the ignition
with the key.
3
READY TO GO
Starting and stopping
Page 64 of 192
62Special cases: START invoked
automatically
The START mode is invoked automatically
when:
-
the vehicle's is free wheeling on a slope,
-
the engine has been stopped for around
3 minutes with Stop & Start,
-
some special conditions (battery charge,
engine temperature, braking assistance,
ambient temperature...) where the engine
is needed to assure control of a system. Good practice
With a manual gearbox in STOP mode, if a
gear is engaged without fully depressing the
clutch pedal, restarting may not take place.
A warning lamp or message is displayed
in the instrument panel asking you to fully
depress the clutch pedal to allow restarting.
With the engine stopped in STOP mode,
if the driver unfasten's their seat belt and
opens a front door, the engine can only
be restarted using the ignition key. This is
indicated by an audible signal, accompanied
by flashing of the service warning lamp and
a message in the instrument panel screen.
If following an automatic restart in START
mode, the driver takes no action on the
the vehicle during the next
3 minutes, the
system stops the engine definitively. The
engine can then only be restarted using the
key.
Going into engine START mode
The "S" warning lamp goes off and
the engine starts:
-
with a manual gearbox
, depress the
clutch pedal,
-
with an electronic gearbox
:
●
gear lever in position
A or M, release the
brake pedal,
●
or engage rever
se gear. In this case, a message appears
in the instrument panel screen,
accompanied by the "S" warning
lamp, which flashes for a few
seconds, then goes off.
This operation is perfectly normal.
In STOP mode, moving the gear lever
on an electronic gearbox starts the
engine, in anticipation of moving off.
If the engine stops automatically when
the vehicle is on a slope, as hill start
is only active with the engine running, it is
necessary to restart the engine by engaging
a forward gear and releasing the brake
pedal.
Starting and stopping
Page 65 of 192
63Deactivation
To give precedence to the control
of the temperature in the passenger
compartment, the Stop & Start
system should be deactivated to
allow continuous operation of the air
conditioning.The system retains the same state
(active or inactive) after switching of
and restarting the engine with the key.
a
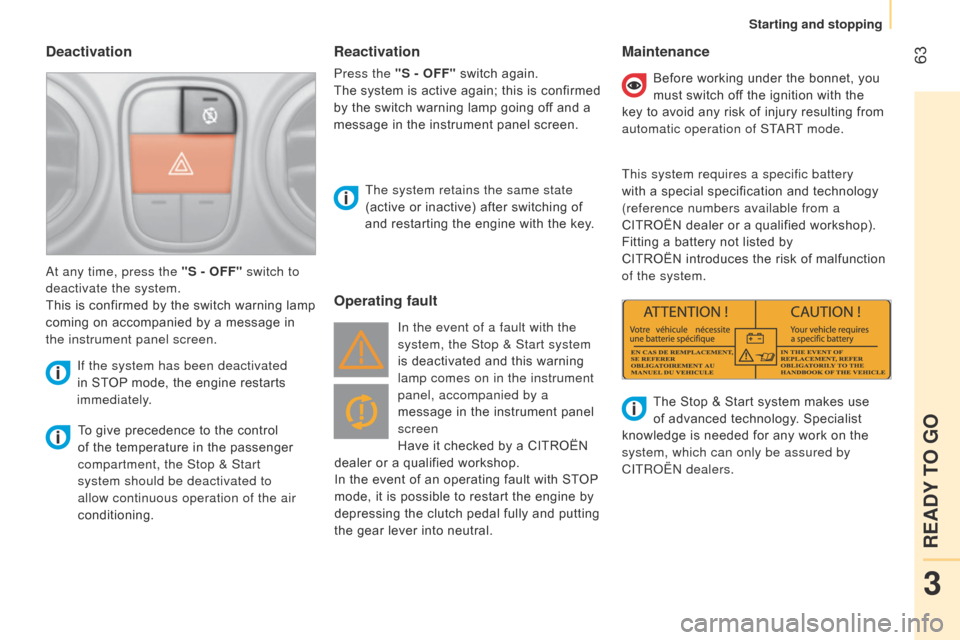
t any time, press the "S - OFF" switch to
deactivate the system.
This is confirmed by the switch warning lamp
coming on accompanied by a message in
the instrument panel screen.
If the system has been deactivated
in STOP mode, the engine restarts
immediately.
Operating fault Maintenance
In the event of a fault with the
system, the Stop & Start system
is deactivated and this warning
lamp comes on in the instrument
panel, accompanied by a
message in the instrument panel
screen
Have it checked by a CITROËN
dealer or a qualified workshop.
In the event of an operating fault with STOP
mode, it is possible to restart the engine by
depressing the clutch pedal fully and putting
the gear lever into neutral. Before working under the bonnet, you
must switch off the ignition with the
key to avoid any risk of injury resulting from
automatic operation of ST
a
RT mode.
This system requires a specific battery
with a special specification and technology
(reference numbers available from a
CITROËN dealer or a qualified workshop).
Fitting a battery not listed by
CITROËN introduces the risk of malfunction
of the system.
The Stop & Start system makes use
of advanced technology. Specialist
knowledge is needed for any work on the
system, which can only be assured by
CITR
o Ë n dealers.
Reactivation
Press the "S - OFF" switch again.
The system is active again; this is confirmed
by the switch warning lamp going off and a
message in the instrument panel screen.
3
READY TO GO
Starting and stopping
Page 66 of 192
64FRONT SEATS
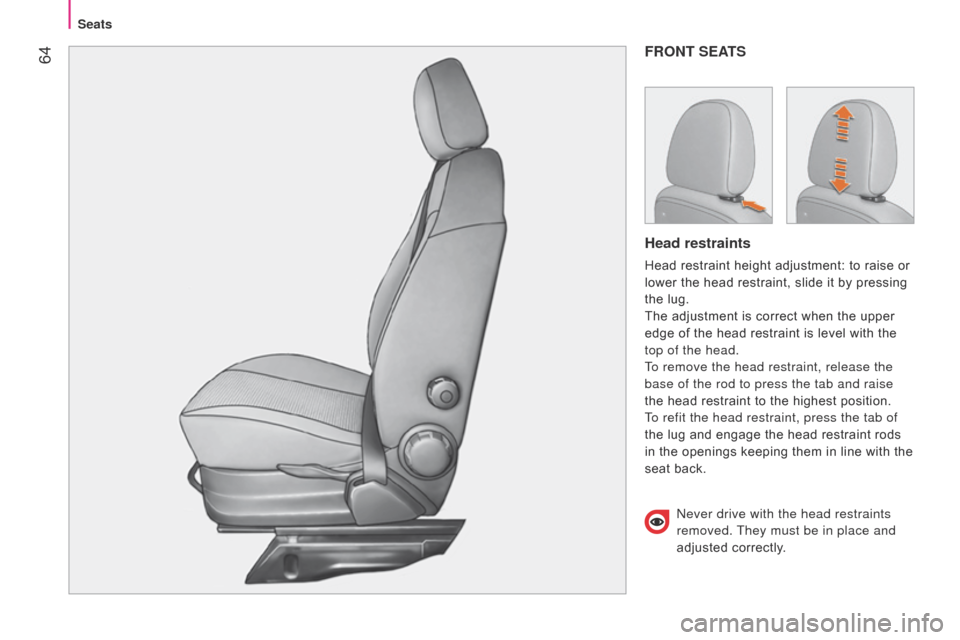
Head restraints
Head restraint height adjustment: to raise or
lower the head restraint, slide it by pressing
the lug.
The adjustment is correct when the upper
edge of the head restraint is level with the
top of the head.
To remove the head restraint, release the
base of the rod to press the tab and raise
the head restraint to the highest position.
To refit the head restraint, press the tab of
the lug and engage the head restraint rods
in the openings keeping them in line with the
seat back.
n
ever drive with the head restraints
removed. They must be in place and
adjusted correctly.
Seats
Page 67 of 192
65
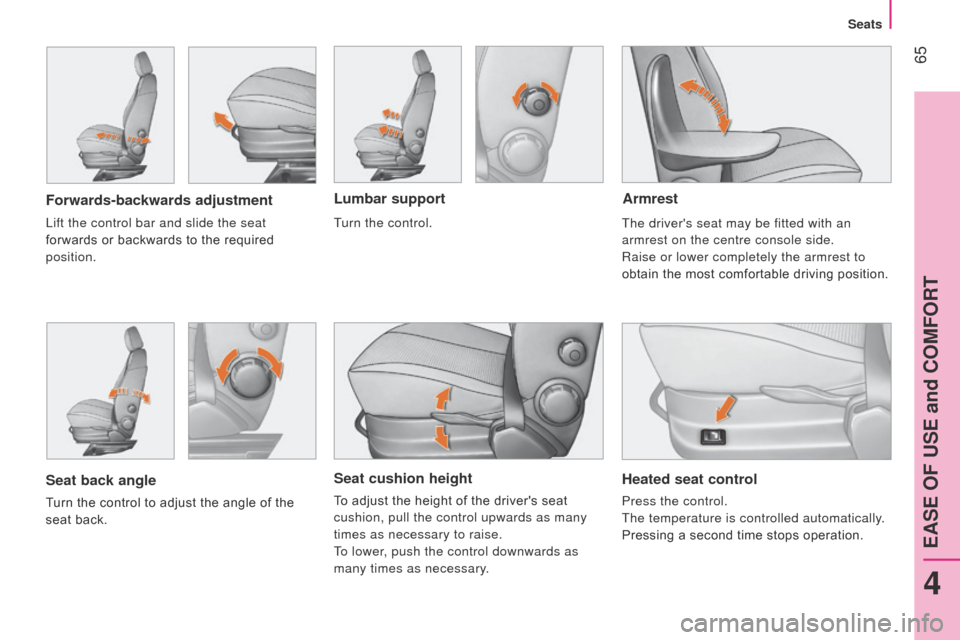
Seat cushion height
To adjust the height of the driver's seat
cushion, pull the control upwards as many
times as necessary to raise.
To lower, push the control downwards as
many times as necessary.
Forwards-backwards adjustmentHeated seat control
Press the control.
The temperature is controlled automatically.
Pressing a second time stops operation.
Lift the control bar and slide the seat
forwards or backwards to the required
position.
Lumbar support
Seat back angle
Turn the control to adjust the angle of the
seat back. Turn the control.
Armrest
The driver's seat may be fitted with an
armrest on the centre console side.
Raise or lower completely the armrest to
obtain the most comfortable driving position.
4
EASE OF USE and COMFORT
Seats
Page 68 of 192

66
FOLDING FRONT PASSENGER SEATTable position
Press the head restraint to place it in the
lowest position.
Push one of the controls rearwards, located
on each side of the seat back.
Lower the seat back onto the seat cushion
to the table position.
Folded position
After placing the seat back in the table
position, pull the seat's rear strap while
guiding the folded seat back forwards and
towards the floor.
Returning the seat to the sitting position
Pull the seat's rear strap to unlock the seat.
Lift the seat from the front and the rear
then guide it forwards to bring it to the table
position.
Push one of the controls, located on each
side of the seat back, rearwards while
pressing on the seat back, then place the
seat back in the upright position.
Press on the seat back firmly to trigger the
locking of the seat on the floor.
Adjust the head restraint using the button on
the side.
o
nly move the seat when the rear
seats are not occupied.
Before moving the seat backwards,
ensure that there is nothing that might
prevent the full travel of the seat, so as to
avoid the risk of of jamming the seat caused
by the presence of objects on the floor
behind the seat or rear passengers. If the
seat jams, stop the movement immediately.
Seats
Page 69 of 192

67
ONE-PIECE REAR BENCH SEAT
Table position
Press the head restraint and its lug
simultaneously to place the head restraint in
the low position.
Unlock the seat back by pushing the two
side controls. The red indicator becomes
visible.
Fold the seat back onto the seat cushion.
Fully folded position
After placing the seat back in the table
position, pull the central strap to unlock the
rear feet of the seat.
Lift the seat fully to secure it in the fully
folded position.
Removing the bench seat
After placing the bench seat in the fully
folded position, lower the transverse bar to
unlock the front feet of the seat.
Lift the bench seat to detach it from its front
anchorages.
When driving, to secure the bench,
detach the red retaining strap, located
on the back of the bench seat cushion, and
fix one end to a front head restraint spindle
and the other to the side of the seat cushion.
4
EASE OF USE and COMFORT
Seats
Page 70 of 192
68
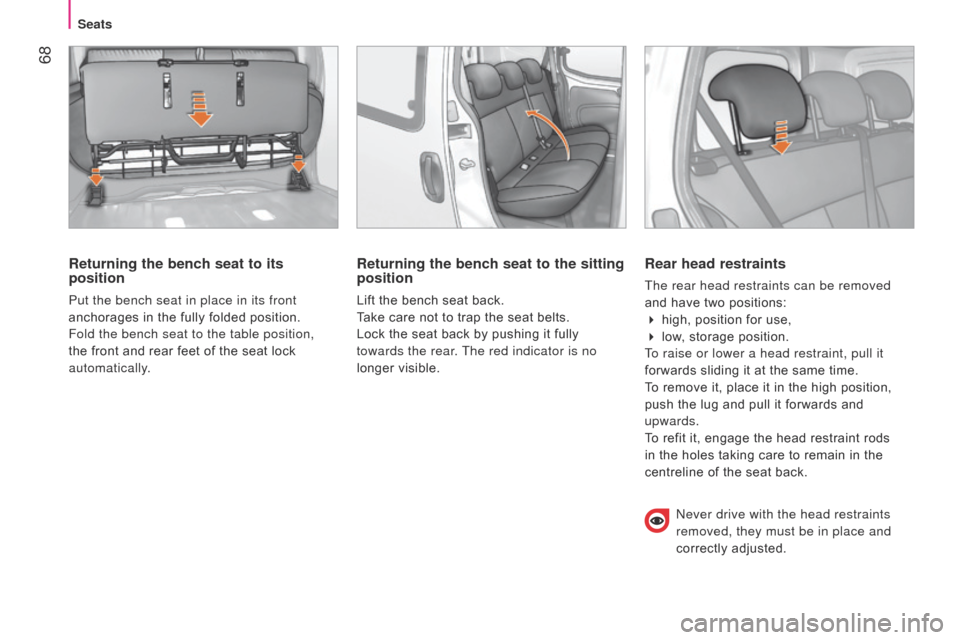
Returning the bench seat to its
position
Put the bench seat in place in its front
anchorages in the fully folded position.
Fold the bench seat to the table position,
the front and rear feet of the seat lock
automatically.
Returning the bench seat to the sitting
position
Lift the bench seat back.
Take care not to trap the seat belts.
Lock the seat back by pushing it fully
towards the rear. The red indicator is no
longer visible.
Rear head restraints
The rear head restraints can be removed
and have two positions:
4 high, position for use,
4 low, storage position.
To raise or lower a head restraint, pull it
forwards sliding it at the same time.
To remove it, place it in the high position,
push the lug and pull it forwards and
upwards.
To refit it, engage the head restraint rods
in the holes taking care to remain in the
centreline of the seat back.
n ever drive with the head restraints
removed, they must be in place and
correctly adjusted.
Seats