stop start CITROEN RELAY 2017 Handbook (in English)
[x] Cancel search | Manufacturer: CITROEN, Model Year: 2017, Model line: RELAY, Model: CITROEN RELAY 2017Pages: 292, PDF Size: 9.04 MB
Page 48 of 292
46drIVInG rEcOMMEndAtIO n S
Observe the driving regulations and remain
vigilant whatever the traffic conditions.
Pay close attention to the traffic and keep
your hands on the wheel so that you are
ready to react at any time to any eventuality.
On a long journey, a break every two hours
is strongly recommended.
In difficult weather, drive smoothly, anticipate
the need to brake and increase the distance
from other vehicles.
driving on flooded roads
We strongly advise against driving on
flooded roads, as this could cause serious
damage to the engine or gearbox, as well as
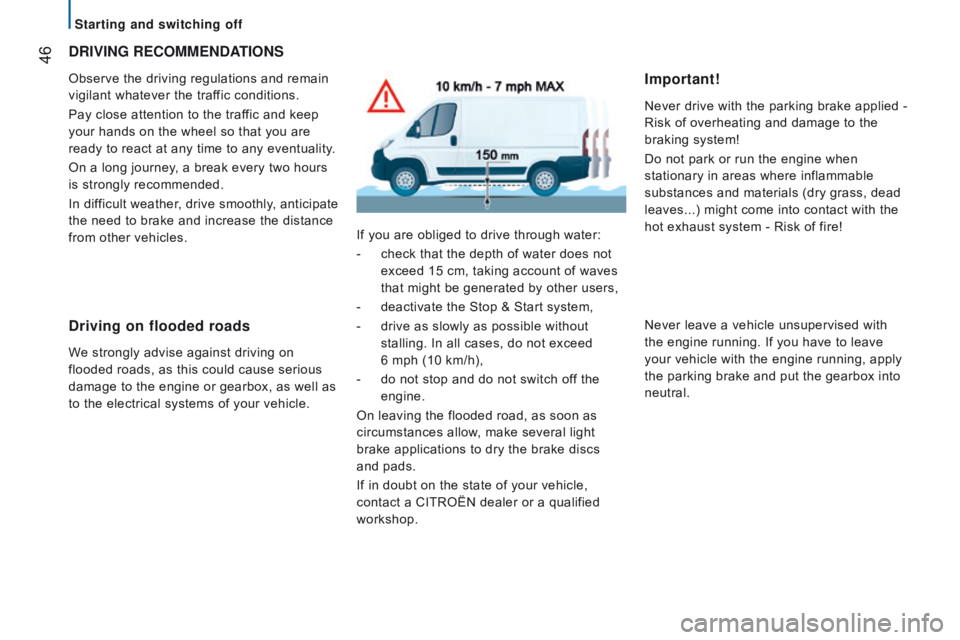
to the electrical systems of your vehicle. If you are obliged to drive through water:
-
check that the depth of water does not
exceed 15 cm, taking account of waves
that might be generated by other users,
-
deactivate the Stop & Start system,
-
drive as slowly as possible without
stalling. In all cases, do not exceed
6 mph (10 km/h),
-
do not stop and do not switch of
f the
engine.
On leaving the flooded road, as soon as
circumstances allow, make several light
brake applications to dry the brake discs
and
pads.
If in doubt on the state of your vehicle,
contact a CITROËN dealer or a qualified
workshop.
Important!
Never drive with the parking brake applied -
Risk of overheating and damage to the
braking system!
Do not park or run the engine when
stationary in areas where inflammable
substances and materials (dry grass, dead
leaves...) might come into contact with the
hot exhaust system - Risk of fire!
Never leave a vehicle unsupervised with
the engine running. If you have to leave
your vehicle with the engine running, apply
the parking brake and put the gearbox into
neutral.
Starting and switching off
Page 51 of 292

49AutOMAtI c ILL u MI n At IO n
Activation
Turn the ring to this position.
Do not cover the sunshine sensor at
the top centre of the windscreen.
GuIdE-ME-HOME LIGHtInG
Ignition off or key in the StOP
position.
Within 2 minutes after switching off the
engine, position the ignition key in the STOP
position or remove it.
Pull the lighting stalk towards the steering
wheel.
t
he indicator lamp comes on in
the instrument panel.
Each action on the lighting stalk,
pulled towards the steering
wheel, prolongs the guide me home
lighting by 30 seconds up to approximately
3
minutes. When this time has elapsed, the
lamps are switched off automatically.
Deactivate this control by keeping the stalk
pulled towards the steering wheel for more
than 2 seconds. If your vehicle is fitted with this function:
when you leave your vehicle, the dipped
beam headlamps remain on for the selected
duration (when leaving a car park for
example).
You can adjust the sensitivity of the
sunshine sensor.
Refer to the "Technology on board -
Vehicle configuration" section.
If your vehicle is fitted with this function, the
dipped beam headlamps are switched on
automatically if the light is poor.
In fog or snow, the sunshine sensor may
detect sufficient light. Therefore, the lamps
will not be switched on automatically. If
necessary, you must switch on the dipped
beam headlamps manually.
They are switched off when the light returns
to a sufficient level.
LEd dAYtIME runnInG LAMPS
On starting the vehicle, in daylight the LED
daytime running lamps come on automatically.
If the sidelamps and headlamps are switched
on manually or automatically, the daytime
running lamps go off.
Programming
For countries where exterior lighting by
day is not a legal requirement, you can
activate or deactivate the function via the
configuration menu.
The lamps are switched off automatically
when the ignition is switched off.
3
EASE OF uSE and cOMFOrt
Steering mounted controls
Page 55 of 292
53
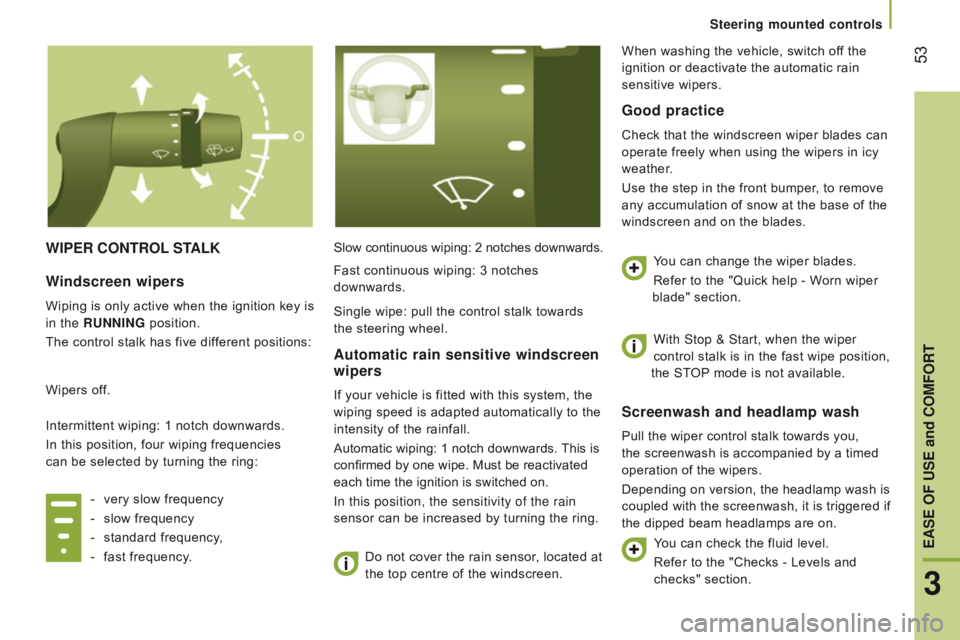
WIPEr cOntrOL S tALKSlow continuous wiping: 2 notches downwards.
Do not cover the rain sensor, located at
the top centre of the windscreen.
Screenwash and headlamp wash
Pull the wiper control stalk towards you,
the screenwash is accompanied by a timed
operation of the wipers.
Depending on version, the headlamp wash is
coupled with the screenwash, it is triggered if
the dipped beam headlamps are on.
Windscreen wipers
Wiping is only active when the ignition key is
in the runn I n G position.
The control stalk has five different positions:
Wipers off.
Intermittent wiping: 1 notch downwards.
In this position, four wiping frequencies
can be selected by turning the ring:
-
very slow frequency
-
slow frequency
-
standard frequency
,
-
fast frequency
.
Automatic rain sensitive windscreen
wipers
If your vehicle is fitted with this system, the
wiping speed is adapted automatically to the
intensity of the rainfall.
Automatic wiping: 1 notch downwards. This is
confirmed by one wipe. Must be reactivated
each time the ignition is switched on.
In this position, the sensitivity of the rain
sensor can be increased by turning the ring.
Good practice
Check that the windscreen wiper blades can
operate freely when using the wipers in icy
weather.
Use the step in the front bumper, to remove
any accumulation of snow at the base of the
windscreen and on the blades.You can change the wiper blades.
Refer to the "Quick help - Worn wiper
blade" section.
You can check the fluid level.
Refer to the "Checks - Levels and
checks" section.
Fast continuous wiping: 3 notches
downwards.
Single wipe: pull the control stalk towards
the steering wheel.
With Stop & Start, when the wiper
control stalk is in the fast wipe position,
the STOP mode is not available.
When washing the vehicle, switch off the
ignition or deactivate the automatic rain
sensitive wipers.
3
EASE OF uSE and cOMFOrt
Steering mounted controls
Page 66 of 292

64
dEMIStInG And dEF r OS t I n G
Manual mode
Direct the control to this air
distribution setting.
For faster and more effective
demisting and defrosting of
the windscreen:d efrosting the rear screen
and mirrors
Only operates when the engine
is running. Pressing this button
activates the rapid demisting-
defrosting of the rear screen and
door mirrors.
This function switches off automatically to
prevent excessive energy consumption. It
stops when the engine is switched off but
resumes when the engine is started again.
Pressing this button switches the function off.
-
increase the air flow setting, Returning to the exterior air
intake position permits renewal
of the air in the passenger
compartment.
Windscreen and side windows
The ventilation outlets located at the base
of the windscreen and the side vents for the
side windows increase the effectiveness
of the demisting and defrosting. Do not
obstruct these air outlets.
The pollen filter continuously and effectively
filters dust.
Air recirculation (which can be activated by
the driver or the passenger) isolates the
passenger compartment from the exterior
atmosphere. However, this position should
only be used temporarily, normal use is to
drive with the control positioned with the
exterior air intake open.
-
move the exterior air intake
control temporarily to air
recirculation.
With Stop & Start, when the heated
rear screen is switched on, the STOP
mode is not available.
Ventilation
Page 76 of 292
74
Have the additional heating checked at
least once a year at the beginning of
winter. Maintenance and repairs should only
be carried out by a CITROËN dealer or a
qualified workshop.
Use only genuine replacement parts.
Switching off the heating
In the case of deferred operation, the
heating stops at the end of the programmed
period.
Good practice
To avoid any risk of poisoning or
asphyxiation, the additional heating must
not be used, even for short periods, in
an enclosed space such as a garage or
workshop which is not fitted with an exhaust
gas extraction system.
The additional heating switches off when the
battery voltage is low, so as to allow engine
starting.
The additional heating is supplied by the
vehicle's fuel tank. Ensure that the low fuel
warning lamp is not on.
Always switch off the additional heating
when filling with fuel to avoid any risk of fire
or explosion. The temperature near the heater must not
exceed 120
°C. A temperature higher than
this (for example in the case of painting in
an oven) could damage the components of
the electronic circuits.
The additional heating is fitted with
a temperature limiter which cuts off
the combustion in the event of engine
overheating due to a lack of coolant. Check
the level and if necessary top-up following
the advice given in the "Checks - Levels"
section. Then press the programme
selection button before switching the heating
on again.
Setting the operating period
The period of operation can be set to
between 10 and 60 minutes.
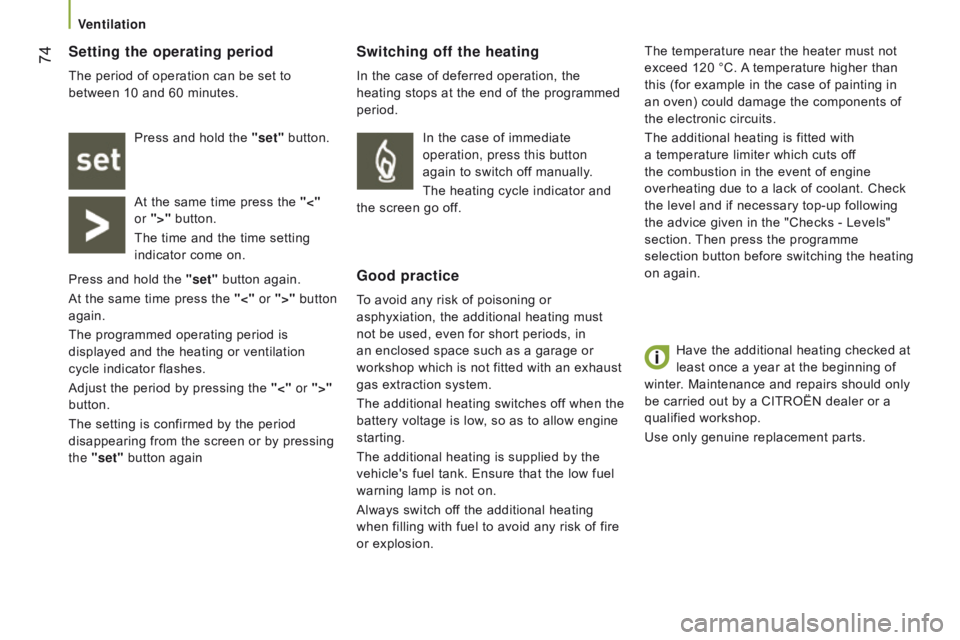
Press and hold the "set" button.
At the same time press the "<"
or ">" button.
The time and the time setting
indicator come on.
Press and hold the "set" button again.
At the same time press the "<" or ">" button
again.
The programmed operating period is
displayed and the heating or ventilation
cycle indicator flashes.
Adjust the period by pressing the "<" or ">"
button.
The setting is confirmed by the period
disappearing from the screen or by pressing
the "set" button again In the case of immediate
operation, press this button
again
to switch off manually.
The heating cycle indicator and
the screen go off.
Ventilation
Page 114 of 292

112
detection
If a change of direction is detected, you are
alerted by a warning lamp in the instrument
panel and an audible signal:
Operating fault
If a fault occurs with the system,
this warning lamp comes on,
accompanied by an audible
message and confirmed by a
message in the screen.
Have the system checked by a CITROËN
dealer or a qualified workshop.
-
flashing of the left hand warning
lamp, if drifting to the left,
No warning is given while the direction indicator
is active and for approximately 20 seconds after
the direction indicator is switched off.
A warning may be given if a direction
marking (arrow) or non-standard marking
(graffiti) is crossed.
The detection may suffer interference:
-
if the markings on the ground are worn,
-
if there is little contrast between the
markings on the ground and the road
surface. -
flashing
of the right hand warning
lamp, if drifting to the right.
Switching on
-
Press this button to switch the system
on, the indicator lamp in the button
goes
off.
The two indicators in the instrument panel
remain on up to 37 mph (60 km/h). Switching off
-
Press this button to switch of
f the
system, the indicator lamp in the button
comes on.
The status of the system remains in the
memory when the ignition is switched off. The system may suffer interference or
not work correctly:
-
When the vehicle is carrying a very
heavy load (even more so if the load is
not evenly spread).
-
When the conditions of visibility are poor
(rain, fog, snow, ...).
-
When the lighting conditions are poor
(dazzling sun, shade, ...).
-
If the windscreen is dirty or damaged
close to the camera.
-
If the
ABS, DSC, ASR or Intelligent
Traction Control systems are out of
service.
The system is automatically deactivated
if the Stop & Start system is active. The
system will restart and check the operating
conditions again when the vehicle moves off.
driving safely
Page 120 of 292

118
cAB SEAt BELt S
If you install a front bench seat as
an accessory, it it must be fitted with
approved seat belts.
Fastening
Pull the strap in front of you with an even
movement, ensuring that it does not twist.
Engage the tongue in its buckle.
Check that the seat belt is fastened securely
and that the automatic locking system is
operating correctly by pulling the strap
rapidly.
unfastening
Press the red button on the buckle, the
seat belt reels in automatically but you are
advised to guide it.
As a safety measure, these operations
should not be carried out while the
vehicle is moving.
Seat belts not fastened
warning lamp
If the driver's seat belt is unfastened,
START mode of Stop & Start will not be
invoked. Engine restarting is only possible
with the ignition key. When the vehicle is started, this warning
lamp comes on, accompanied by an
increasing audible signal, if the driver and/
or the front passenger has not fastened their
seat belt.
The alert operates both for versions with
an individual passenger front seat and for
versions with a 2-seat front bench seat.
The driver's seat is fitted with a pyrotechnic
pretensioner and a force limiter.
On versions with a passenger's front airbag,
the passenger's seat is also fitted with a
pyrotechnic pretensioner and a force limiter.
The front bench seat is fitted with two seat
belts.
Height adjustment
For the driver or outer passenger seat,
squeeze the control at the adjustable top
mounting, slide the assembly, then release
at the desired position to lock it.
The height of the seat belt for the centre
seat cannot be adjusted.
Seat belts
Page 141 of 292

139
On the inside
This operation must only be carried out with the
vehicle stationary and the driver's door open.
Pull the release lever on the side of the
dashboard towards you.
On the outside
Raise the safety catch lever located above
the grille to the right and raise the bonnet.Before closing the bonnet, put the stay back
in its housing.
Lower the bonnet and release it at the end
of its travel. Check that the bonnet has
latched.
OPEnInG tHE BOnnEt
Do not open the bonnet in strong
winds.
When the engine is hot, handle the safety
catch and stay with care (risk of burns).
Before doing anything under the
bonnet, switch off the ignition with the
key to avoid any risk of injury resulting from
an automatic change to START mode of the
Stop & Start system.
cLOSInG tHE BOnnEt
Bonnet stay
Unclip the stay and tilt it to insert it in the
first notch, then the second.
Because of the presence of electrical
equipment under the bonnet, it is
recommended that exposure to water (rain,
washing, ...) be limited.
7
under the bonnet
cHEcKS
Page 146 of 292
144
Brake pads
Brake pad wear depends on the style of
driving, in particular for vehicles which are
used in town, over short distances. It may
be necessary to check the thickness of the
pads, even between services.
Brake disc wear
For any information on checking the brake
disc wear, contact a CITROËN dealer or a
qualified workshop.If this warning lamp comes on,
have the brake pad wear checked
by a CITROËN dealer or a
qualified workshop.
Parking brake
Where the parking brake travel is too great
or there is a reduction in the performance
of the system, the parking brake should be
adjusted, even between services.
Have the system checked by a CITROËN
dealer or a qualified workshop.
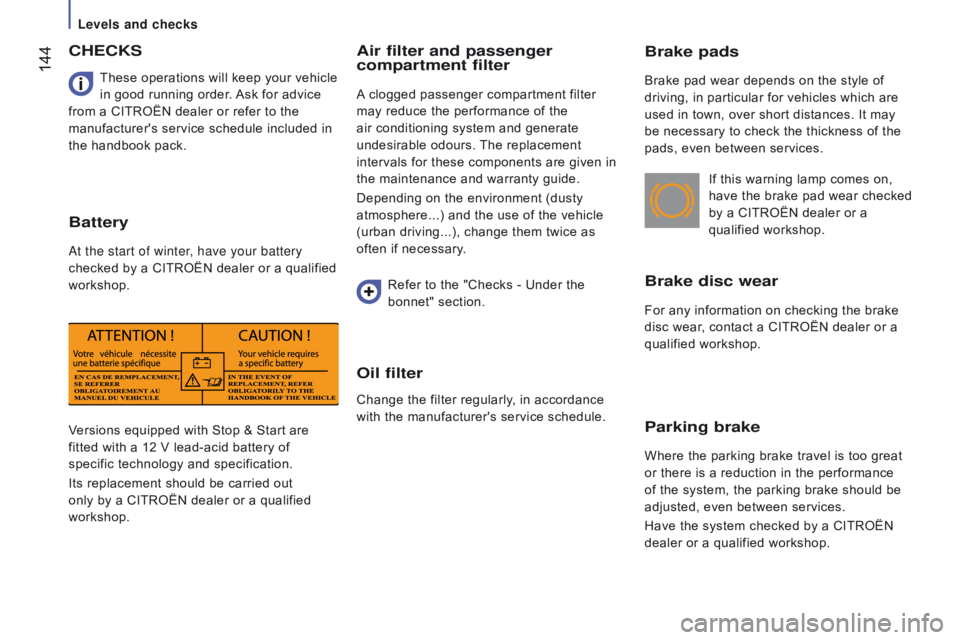
Versions equipped with Stop & Start are
fitted with a 12 V lead-acid battery of
specific technology and specification.
Its replacement should be carried out
only by a CITROËN dealer or a qualified
workshop. These operations will keep your vehicle
in good running order. Ask for advice
from a CITROËN dealer or refer to the
manufacturer's service schedule included in
the handbook pack.
cHEcKS
Battery
At the start of winter, have your battery
checked by a CITROËN dealer or a qualified
workshop.
Air filter and passenger
compartment filter
A clogged passenger compartment filter
may reduce the performance of the
air conditioning system and generate
undesirable odours. The replacement
intervals for these components are given in
the maintenance and warranty guide.
Depending on the environment (dusty
atmosphere...) and the use of the vehicle
(urban driving...), change them twice as
often if necessary.
Refer to the "Checks - Under the
bonnet" section.
Oil filter
Change the filter regularly, in accordance
with the manufacturer's service schedule.
Levels and checks
Page 147 of 292
145
Manual gearbox
Have the level checked in accordance with
the manufacturer's servicing schedule.
Good practice
In order to avoid damaging the
electrical units, we strongly advise you
not to use high pressure washing to clean
the engine compartment.
After washing the vehicle dampness, or in
winter, ice may form on the brake discs and
pads: braking efficiency may be reduced.
Make some light brake applications to dry
and de-ice the brakes. Only use products recommended by
CITROËN or products of equivalent quality
and specification.
In order to optimise the operation of units as
important as the braking system, CITROËN
selects and offers specific products.
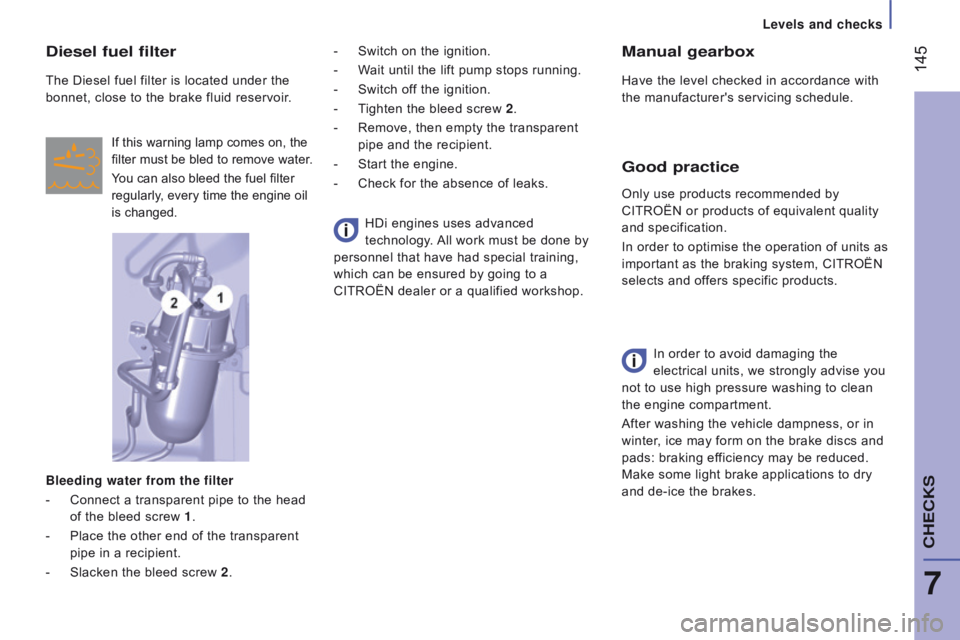
diesel fuel filter
The Diesel fuel filter is located under the
bonnet, close to the brake fluid reservoir.
If this warning lamp comes on, the
filter must be bled to remove water.
Y
ou can also bleed the fuel filter
regularly, every time the engine oil
is changed.
Bleeding water from the filter
-
Connect a transparent pipe to the head
of the bleed screw 1 .
-
Place the other end of the transparent
pipe in a recipient.
-
Slacken the bleed screw
2. HDi engines uses advanced
technology. All work must be done by
personnel that have had special training,
which can be ensured by going to a
CITROËN dealer or a qualified workshop. -
Switch on the ignition.
-
W
ait until the lift pump stops running.
-
Switch of
f the ignition.
-
T
ighten the bleed screw 2
.
-
Remove, then empty the transparent
pipe and the recipient.
-
Start the engine.
-
Check for the absence of leaks.
7
cHEcKS
Levels and checks