set clock CITROEN RELAY 2019 Handbook (in English)
[x] Cancel search | Manufacturer: CITROEN, Model Year: 2019, Model line: RELAY, Model: CITROEN RELAY 2019Pages: 232, PDF Size: 8.21 MB
Page 26 of 232
24
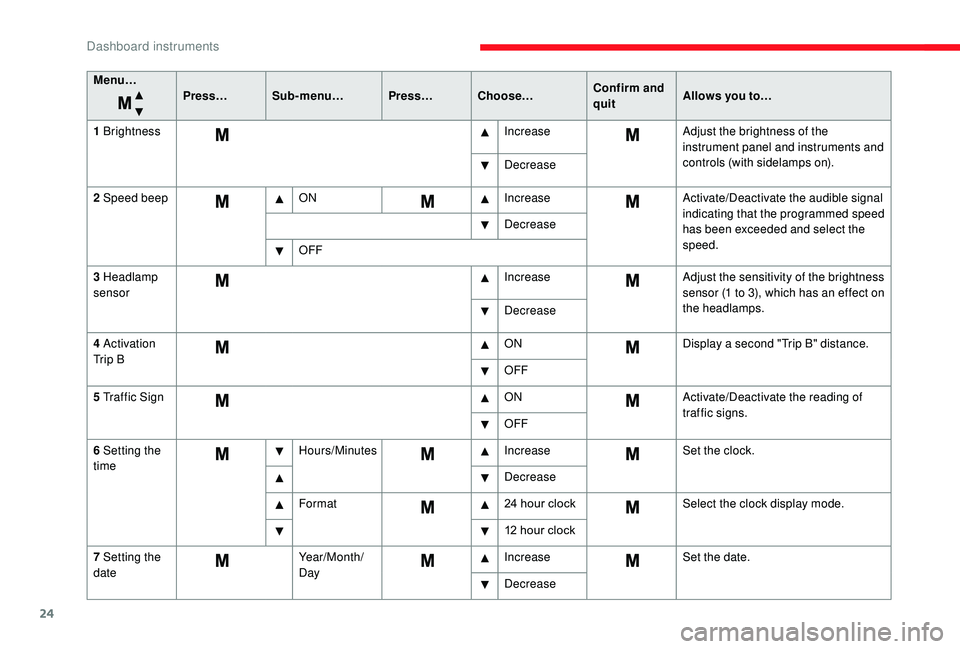
Menu…Press…Sub-menu… Press…Choose… Confirm and
quitAllows you to…
1
Brightness IncreaseAdjust the brightness of the
instrument panel and instruments and
controls (with sidelamps on).
Decrease
2
Speed beep ON IncreaseActivate/Deactivate the audible signal
indicating that the programmed speed
has been exceeded and select the
speed.
Decrease
OFF
3
Headlamp
sensor Increase
Adjust the sensitivity of the brightness
sensor (1
to 3), which has an effect on
the headlamps.
Decrease
4
Activation
Tr i p B ON
Display a
second "Trip B" distance.
OFF
5
Traffic Sign ONActivate/Deactivate the reading of
traffic signs.
OFF
6
Setting the
time Hours/Minutes
IncreaseSet the clock.
Decrease
Format 24
hour clockSelect the clock display mode.
12
hour clock
7
Setting the
date Year/Month/
DayIncrease
Set the date.
Decrease
Dashboard instruments
Page 29 of 232
27
Using the touch screen
audio system
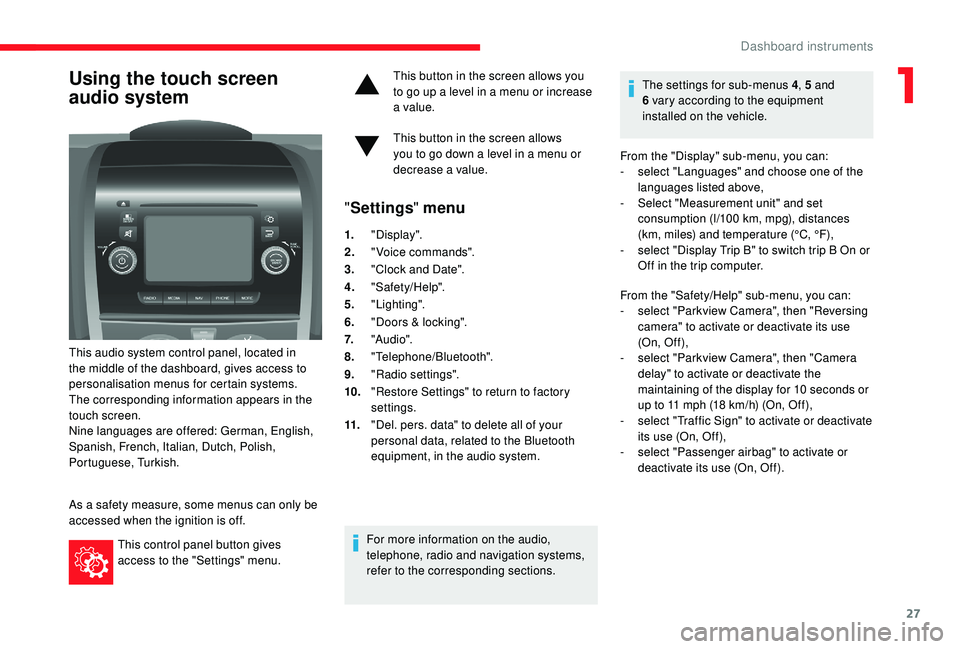
This audio system control panel, located in
the middle of the dashboard, gives access to
personalisation menus for certain systems.
The corresponding information appears in the
touch screen.
Nine languages are offered: German, English,
Spanish, French, Italian, Dutch, Polish,
Portuguese, Turkish.
As a
safety measure, some menus can only be
accessed when the ignition is off.
This control panel button gives
access to the "Settings" menu. This button in the screen allows you
to go up a
level in a menu or increase
a value.
This button in the screen allows
you to go down a level in a menu or
decrease a
value.
"
Settings " menu
1."Display".
2. "Voice commands".
3. "Clock and Date".
4. "Safety/Help".
5. "Lighting".
6. "Doors & locking".
7. "Audi o".
8. "Telephone/Bluetooth".
9. "Radio settings".
10. "Restore Settings" to return to factory
settings.
11. "Del. pers. data" to delete all of your
personal data, related to the Bluetooth
equipment, in the audio system.
For more information on the audio,
telephone, radio and navigation systems,
refer to the corresponding sections. The settings for sub-menus 4
, 5 and
6 vary according to the equipment
installed on the vehicle.
From the "Display" sub-menu, you can:
-
s
elect "Languages" and choose one of the
languages listed above,
-
S
elect "Measurement unit" and set
consumption (l/100 km, mpg), distances
(km, miles) and temperature (°C, °F),
- s elect "Display Trip B" to switch trip B On or
Off in the trip computer.
From the "Safety/Help" sub-menu, you can:
-
s
elect "Parkview Camera", then "Reversing
camera" to activate or deactivate its use
(On, Of f ),
-
s
elect "Parkview Camera", then "Camera
delay" to activate or deactivate the
maintaining of the display for 10
seconds or
up to 11
mph (18 km/h) (On, Off),
-
s
elect "Traffic Sign" to activate or deactivate
its use (On, Off),
-
s
elect "Passenger airbag" to activate or
deactivate its use (On, Off).
1
Dashboard instruments
Page 30 of 232
28
Setting the date and time
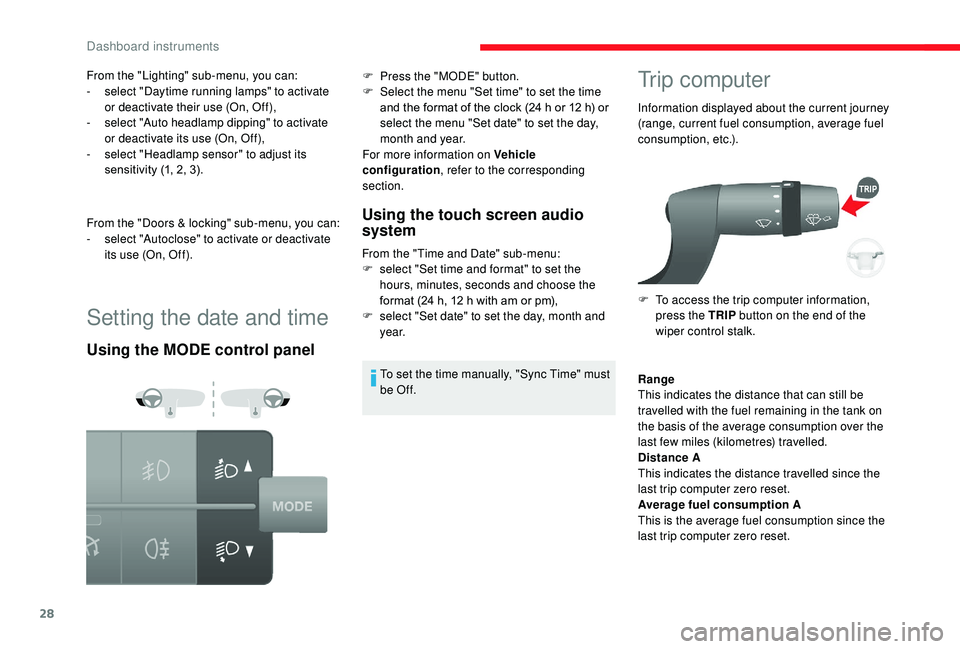
Using the MODE control panelUsing the touch screen audio
system
From the "Time and Date" sub-menu:
F
s elect "Set time and format" to set the
hours, minutes, seconds and choose the
format (24
h, 12 h with am or pm),
F
s
elect "Set date" to set the day, month and
ye a r.
To set the time manually, "Sync Time" must
be Of f.
Trip computer
Information displayed about the current journey
(range, current fuel consumption, average fuel
consumption, etc.).
F
T
o access the trip computer information,
press the TRIP button on the end of the
wiper control stalk.
From the "Lighting" sub-menu, you can:
-
s
elect "Daytime running lamps" to activate
or deactivate their use (On, Off),
-
s
elect "Auto headlamp dipping" to activate
or deactivate its use (On, Off),
-
s
elect "Headlamp sensor" to adjust its
sensitivity (1, 2, 3).
From the "Doors & locking" sub-menu, you can:
-
s
elect "Autoclose" to activate or deactivate
its use (On, Off). F
P
ress the "MODE" button.
F
S
elect the menu "Set time" to set the time
and the format of the clock (24
h or 12
h) or
select the menu "Set date" to set the day,
month and year.
For more information on Vehicle
configuration , refer to the corresponding
section.
Range
This indicates the distance that can still be
travelled with the fuel remaining in the tank on
the basis of the average consumption over the
last few miles (kilometres) travelled.
Distance A
This indicates the distance travelled since the
last trip computer zero reset.
Average fuel consumption A
This is the average fuel consumption since the
last trip computer zero reset.
Dashboard instruments
Page 34 of 232
32
Main functions of the key
Type of keyUnlocking the cab Locking the doorsUnlocking the rear
doors
Mechanical key Turn anti-clockwise
(driver's side). Turn clockwise
(driver's side). -
Key with remote control -
Signalling
Direction indicators 2
flashes.1
flash.2
flashes.
Indicator lamp in
the central locking
control button on the dashboard Of f.
On fixed for about
3
seconds, then flashing. Flashing.
Using the mechanical key in the drivers' door lock barrel does not activate (set) or deactivate
the alarm.
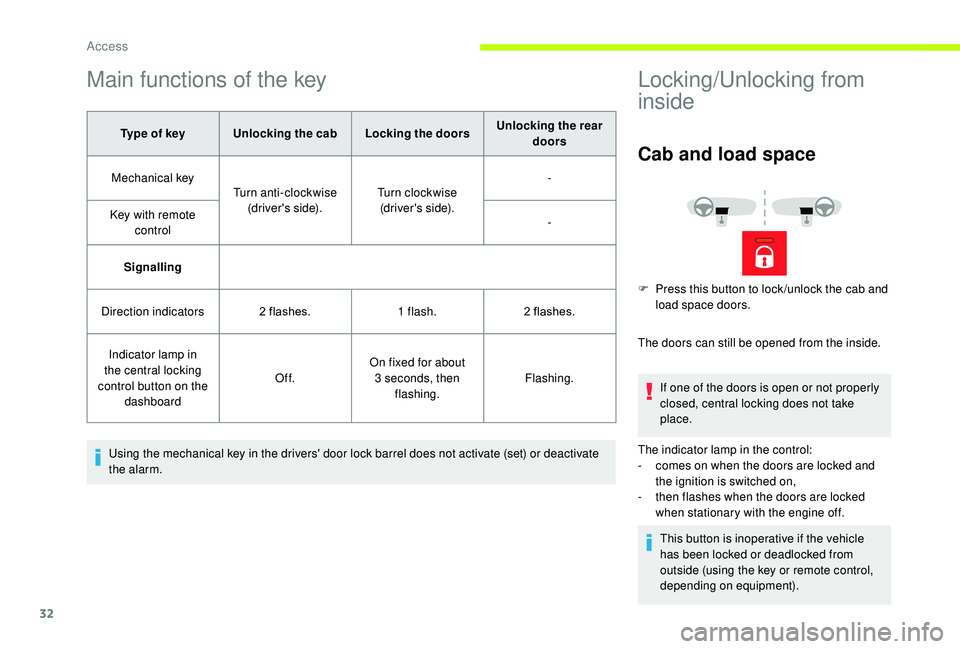
Locking/Unlocking from
inside
Cab and load space
The doors can still be opened from the inside. If one of the doors is open or not properly
closed, central locking does not take
place.
The indicator lamp in the control:
-
c
omes on when the doors are locked and
the ignition is switched on,
-
t
hen flashes when the doors are locked
when stationary with the engine off.
This button is inoperative if the vehicle
has been locked or deadlocked from
outside (using the key or remote control,
depending on equipment).
F
P
ress this button to lock /unlock the cab and
load space doors.
Access
Page 49 of 232
47
The warm air diffused at floor level from the
front air conditioning unit is distributed at the
feet of the rear passengers of rows 2 and 3.
A warm air diffusion vent, located on the rear
left wheel arch, can supplement the unit for the
feet of the rear passengers in row 3.
Activation/Deactivation
F From the driver's seat, press this button on the MODE control
panel to activate the operation
of the rear controls. The
indicator lamp comes on.
Air flow
F Turn the control to your chosen position to obtain sufficient air
flow for your comfort.
Comfort temperature
adjustment
F Turn the control to select a position between blue
(cold) and red (hot) so as to
adjust the temperature to your
requirements.
The OFF control on the "Single zone"
central control panel switches off the
function.
However, a safety device will ventilate the
rear circuit automatically, even if the control
is in position 0, to prevent condensation
forming.
Pressing this button again deactivates the rear
controls. The indicator lamp goes out.
Programmable additional
heating
This also facilitates passenger
compartment heating, demisting and
defrosting.
Digital programming
control
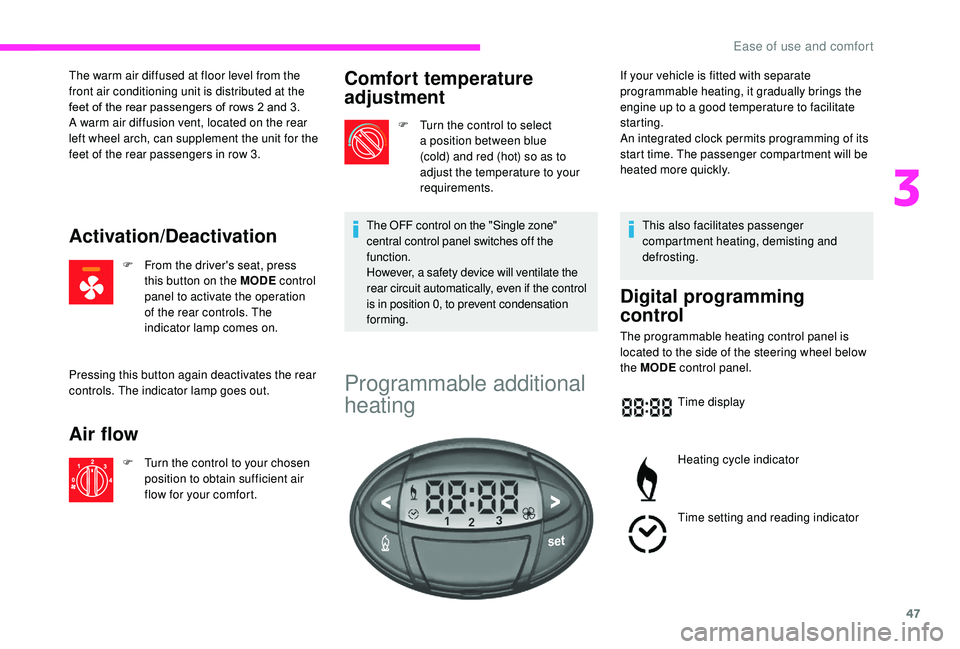
The programmable heating control panel is
located to the side of the steering wheel below
the MODE control panel.
Time display
Heating cycle indicator
Time setting and reading indicator
If your vehicle is fitted with separate
programmable heating, it gradually brings the
engine up to a
good temperature to facilitate
starting.
An integrated clock permits programming of its
start time. The passenger compartment will be
heated more quickly.
3
Ease of use and comfort
Page 50 of 232
48
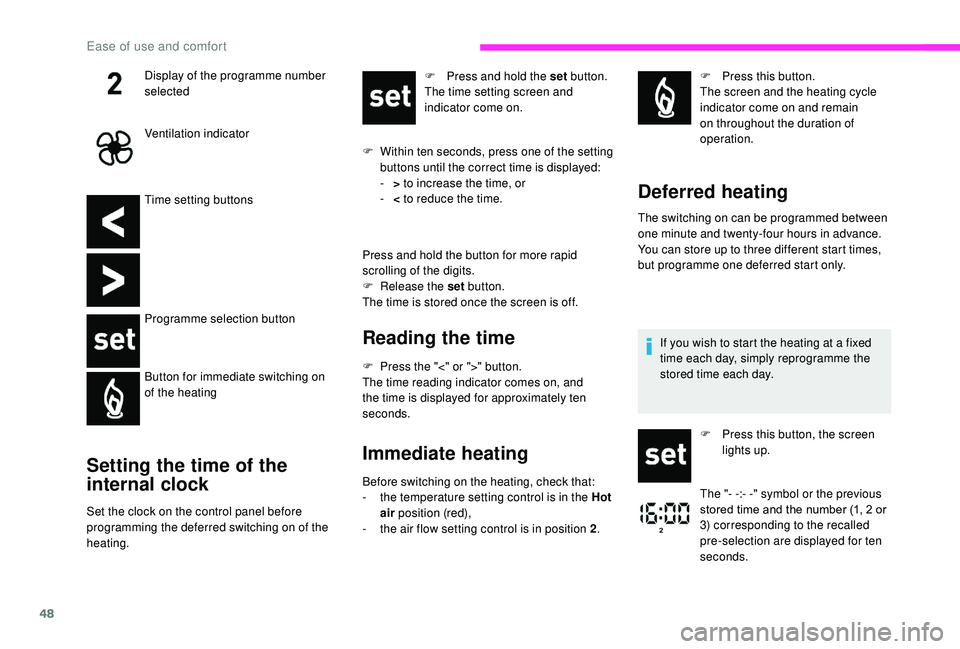
Time setting buttons
Programme selection button
Button for immediate switching on
of the heating
Setting the time of the
internal clock
Set the clock on the control panel before
programming the deferred switching on of the
heating.F
P
ress and hold the set button.
The time setting screen and
indicator come on.
F
W
ithin ten seconds, press one of the setting
buttons until the correct time is displayed:
-
>
to increase the time, or
-
<
to reduce the time.
Press and hold the button for more rapid
scrolling of the digits.
F
R
elease the set
button.
The time is stored once the screen is off.
Reading the time
F Press the "<" or ">" button.
The time reading indicator comes on, and
the time is displayed for approximately ten
seconds.
Immediate heating
Before switching on the heating, check that:
- t he temperature setting control is in the Hot
air position (red),
-
t
he air flow setting control is in position 2 .F
P
ress this button.
The screen and the heating cycle
indicator come on and remain
on throughout the duration of
operation.
Deferred heating
The switching on can be programmed between
one minute and twenty-four hours in advance.
You can store up to three different start times,
but programme one deferred start only.
Display of the programme number
selected
Ventilation indicator
If you wish to start the heating at a fixed
time each day, simply reprogramme the
stored time each day.
F
P
ress this button, the screen
lights up.
The "- -:- -" symbol or the previous
stored time and the number (1, 2
or
3) corresponding to the recalled
pre-selection are displayed for ten
seconds.
Ease of use and comfort
Page 138 of 232

136
F If a pressure of at least 3 bar is not
reached within 5 minutes, disconnect the
compressor from the valve and the power
socket, then move the vehicle for ward by
approximately 10
metres to distribute the
sealant fluid inside the tyre.
F
T
hen repeat the inflation operation:
•
i
f a pressure of at least 3 bar is not
reached within 10
minutes, switch off your
vehicle: the tyre has suffered too much
damage and it could not be repaired.
Contact a
CITROËN dealer or a qualified
workshop.
•
i
f the tyre has been inflated to a pressure
of 5
bar, set off again immediately.
F
A
fter driving for approximately 10 minutes,
stop and check the pressure of the tyre
again.
F
A
djust the pressure to the value given on
the label on the driver's door pillar, and
contact a
CITROËN dealer or a qualified
workshop as soon as possible.
This puncture repair kit and replacement
cartridges are available from CITROËN
dealers.Checking and adjusting the
pressure
The compressor can only be used to check and
adjust the pressure.
F
D
isconnect the hose I and connect it to the
tyre valve directly; the cartridge will then be
connected to the compressor and the filling
fluid will not be injected.
If it is necessary to deflate the tyre, connect the
hose I to the tyre valve and press the yellow
button, placed in the centre of the switch on the
compressor.
Replacing the cartridge
To replace the sealant cartridge, proceed as
follows:
F
D
isconnect the hose I .
F
T
urn the cartridge to be replaced
anticlockwise and lift it,
F
I
nsert the new cartridge and turn it
clockwise,
F
R
econnect the hose I and attach hose B in
its location.
The cartridge contains ethylene glycol, a
product which is harmful if swallowed and
which causes irritation to the eyes.
It must be kept out of the reach of children. After use, do not discard the cartridge
into the environment, take it to an
authorised waste disposal site or
a
CITROËN dealer.
In the event of a breakdown
Page 190 of 232

4
Vehicle information
Access to the exterior temperature,
the clock, the compass and the trip
computer.
Navigation
Enter navigation settings and
choose a destination.
Settings
Activate, deactivate, and configure
certain functions of the system and
the vehicle.
Media
Select from the different music
sources.
Activate, deactivate, and adjust
certain functions.
Radio
Press "RADIO " to display the radio
menus:
Press the 9
or: buttons briefly for an
automatic search.
Press and hold the buttons for a
quick search.
Pressing Pre-set
Press and hold the button to pre-set the current
radio station.
The current station is highlighted.
Press the "All" button to display all the pre-set
radio stations in the frequency band selected.
Navigate
-
L
ist of stations .
Select a
station by pressing once.
-
U
pdate the list according to reception.
-
P
ress the 5 or 6 buttons to scroll through
the radio stations received.
-
G
o directly to the desired letter in the list.
AM/DAB
-
C
hoose the band .
Choose the waveband.
Touch screen Audio-Telematic system
Page 200 of 232

14
Select "Connected " or "Disconnected ",
" Delete device " or "Add device", " Save
Favourites ", "Text messages on ",
" Download " in the list of options offered.
Receiving a call
An incoming call is announced by a ring and
a superimposed display in the screen.
Press this steering wheel mounted
button briefly to accept an incoming
call.
or
Press the " Answer" button displayed in the
screen.
If there are two calls in progress (one in
progress and one on hold), it is possible to
change from one to the other by pressing the
" Switch calls " button or to combine both calls
in a
conference call by pressing the " Co nf e r."
button.
Ending a call
To reject a call, press this button
a t the steering wheel mounted
controls.
or
Press the " Ignore" button displayed in the
screen.
Making a call
Calling a new number
Using the telephone while driving is not
advised. We recommend that you park
safely or make use of the steering wheel
mounted controls.
Press " PHONE ".
Press the keypad button.
Enter the phone number using the keypad then
press the " Call" button to start the call.
Calling a contact
Press "PHONE ".
Press the " Contacts" button or the
" Recent calls " button.
Select the desired contact from the list offered
to start the call.
Vehicle information
Press " MORE" to display vehicle
information menus:
Exterior temp.
Displays the exterior temperature.
Clock
Displays the clock.
Compass
Displays the direction taken.
Tr i p
-
I
nstant info., Trip A, Trip B .
Displays the trip computer.
Press and hold the "Trip A" or "Trip B"
buttons to reset the trip in question.
Settings
Press this button to display the
Settings menus:
Display
-
B
rightness .
Set the brightness of the screen.
-
Di
splay mode .
Set the display mode.
-
L
anguage .
Choose the desired language.
Touch screen Audio-Telematic system
Page 201 of 232

15
- Unit of measurement.
Set the units used for the display of fuel
consumption, distance and temperature.
-
T
ouch screen beep .
Activate or deactivate the audible signal
when touching a
screen button.
-
D
isplay Trip B .
Display Trip B in the driver's screen.
Voice commands
-
V
oice response time .
Set the response time for the voice system.
-
D
isplay command list .
Display suggestions with the different
options during a
voice session.
Clock and Date
-
S
et time and format .
Set the time.
-
Di
splay time mode .
Activate or deactivate display of the digital
clock in the status bar.
-
S
ync time .
Activate or deactivate the automatic display
of time.
-
S
et date .
Set the date. Safety/Help
-
R eversing camera.
Display the reversing camera.
-
C
amera delay.
Maintain the display in the screen of the
image from the reversing camera for
a
maximum of ten seconds or up to 11 mph
(18
km/h).
Lamps
-
D
aytime running lamps.
Activate or deactivate the automatic
illumination of headlamps when starting.
Doors and locking
-
A
utoclose.
Activate or deactivate the automatic locking
of doors when the vehicle is moving. -
A utomatic radio
.
Adjust the radio on startup or restore the
active state the last time the ignition was
switched to STOP.
-
R
adio off delay.
Adjust the setting.
-
A
UX vol. adjustment.
Adjust the settings.
Telephone/Bluetooth
®
- Tel. connected .
Start the Bluetooth® connection of the
device selected.
Delete the selected device.
Save the selected device in favourites.
Adjust the settings.
-
A
dd device .
Add a
new peripheral device.
-
A
udio connect .
Connect a
device in audio only.
Audio
-
E
qualiser .
Adjust the bass, mid-range and treble.
-
B
alance/Fade .
Adjust the balance of the speakers, front
and rear, left and right.
Press the button in the middle of the arrows
to balance the adjustments.
-
V
olume/Speed .
Select the desired setting, the option is
highlighted.
-
L
oudness .
Optimise audio quality at low volume. Radio settings
-
D
AB announcements .
Activate or deactivate announcements.
Activate or deactivate the options: Alarm,
Event announc., Stock market flash, News
flash, Programme info, Special event,
Sports info, Public transp. info, Alarm
announcement, Weather flash.
.
Touch screen Audio-Telematic system