engine CITROEN RELAY 2020 Handbook (in English)
[x] Cancel search | Manufacturer: CITROEN, Model Year: 2020, Model line: RELAY, Model: CITROEN RELAY 2020Pages: 196, PDF Size: 34.07 MB
Page 126 of 196

124
Technical data
Engine technical data and
towed loads
Engines
The engine characteristics are given in the
vehicle's registration document, as well as in
sales brochures.
The maximum power corresponds to the value type-approved on a test bed, under
conditions defined in European legislation
(Directive 1999/99/EC).
For more information, contact a CITROËN dealer
or a qualified workshop.
Weights and towed loads
The weights and towed loads relating to
the vehicle are indicated on the registration
document, as well as in sales brochures.
These values are also indicated on the
manufacturer's plate or label.
For more information, contact a CITROËN dealer
or a qualified workshop.
The GTW (Gross Train Weight) values and the
towable loads listed are valid for a maximum
altitude of 1,000 metres. The towable load must
be reduced by steps of 10% for each additional
1,000 metres.
The maximum authorised nose weight
corresponds to the weight permitted on the
towball.
When exterior temperatures are high, the
vehicle performance may be limited in
order to protect the engine. When the exterior
temperature is higher than 37°C, reduce the
towed weight.
Towing even with a lightly loaded vehicle can adversely affect its road holding.
Braking distances are increased when towing
a trailer.
When using a vehicle to tow, never exceed
a speed of 62 mph (100 km/h) (observe the
local legislation in force).
Diesel engines
Euro 6.2 Diesel engines
Engines 2.2 BlueHDi 120 S&S2.2 BlueHDi 140 S&S2.2 BlueHDi 165 S&S
Gearbox Manual 6-speed (BVM6)
Cubic capacity (cc) 2,1972,1972,197
Max. power - EC standard (kW) 88103121
Fuel DieselDieselDiesel
Euro 6.1 Diesel engines
Engines 2.0 BlueHDi 110
2.0 BlueHDi 110 S&S 2.0 BlueHDi 130
2.0 BlueHDi 130 S&S 2.0 BlueHDi 160
2.0 BlueHDi 160 S&S
Gearbox Manual 6-speed (BVM6)
Cubic capacity (cc) 1,9971,9971,997
Engines 2.0 BlueHDi 110
2.0 BlueHDi 110 S&S 2.0 BlueHDi 130
2.0 BlueHDi 130 S&S 2.0 BlueHDi 160
2.0 BlueHDi 160 S&S
Max. power - EC standard (kW) 8196120
Fuel DieselDieselDiesel
Euro 4/Euro 5 Diesel engines
(Depending on country of sale)
Engines 2.2 HDi 1102.2 HDi 130
2.2 e-HDi 130 2.2 HDi 150
2.2 e-HDi 150 3 HDi 180
Gearbox Manual 6-speed (BVM6)
Cubic capacity (cc) 2,1982,1982,1982,999
Max. power - EC standard (kW) 819611 0130
Fuel DieselDieselDieselDiesel
Weights and towed loads
These tables present the approved weight values (in kg) according to the dimensions and designations of the vehicle.
Minibus
Dimensions DesignationsGVWUnbraked trailerMaximum authorised
nose weight
L3 H2 4404,005XX
L4 H2 4424,250XX
For Combi versions, the maximum weight of the Braked trailer (within the GTW limit), on a 10% or 12% gradient, is: 2,500 kg.
Page 127 of 196

125
Technical data
9Engines2.0 BlueHDi 110
2.0 BlueHDi 110 S&S 2.0 BlueHDi 130
2.0 BlueHDi 130 S&S 2.0 BlueHDi 160
2.0 BlueHDi 160 S&S
Max. power - EC standard (kW) 8196120
Fuel DieselDieselDiesel
Euro 4/Euro 5 Diesel engines
(Depending on country of sale)
Engines 2.2 HDi 1102.2 HDi 130
2.2 e-HDi 130 2.2 HDi 150
2.2 e-HDi 150 3 HDi 180
Gearbox Manual 6-speed (BVM6)
Cubic capacity (cc) 2,1982,1982,1982,999
Max. power - EC standard (kW) 819611 0130
Fuel DieselDieselDieselDiesel
Weights and towed loads
These tables present the approved weight values (in kg) according to the dimensions and designations of the vehicle.
Minibus
Dimensions DesignationsGVWUnbraked trailerMaximum authorised
nose weight
L3 H2 4404,005XX
L4 H2 4424,250XX
For Combi versions, the maximum weight of the Braked trailer (within the GTW limit), on a 10% or 12% gradient, is: 2,500 kg.
Page 136 of 196
134
Technical data
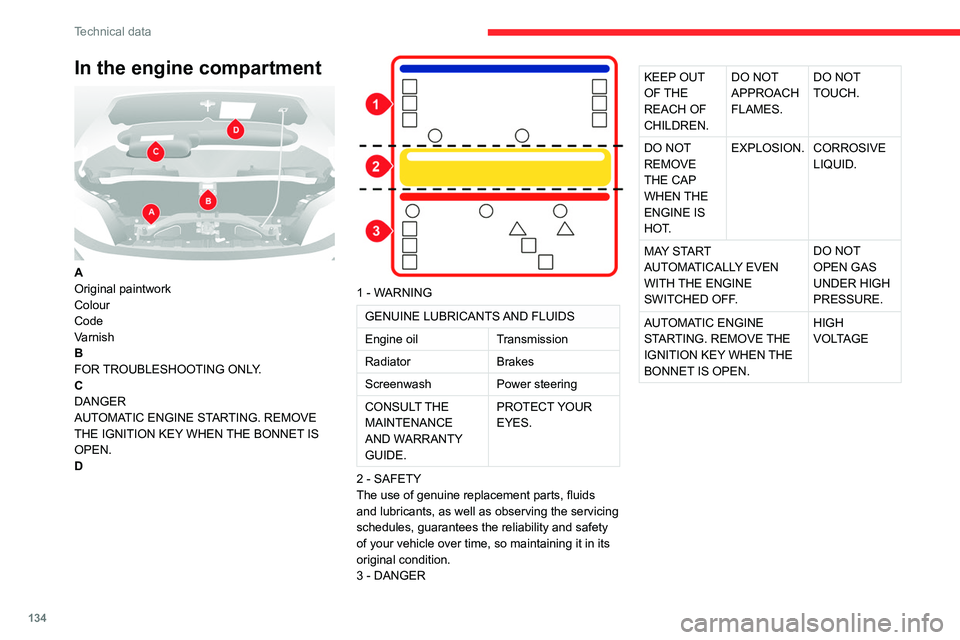
In the engine compartment
A
Original paintwork
Colour
Code
Varnish
B
FOR TROUBLESHOOTING ONLY.
C
DANGER
AUTOMATIC ENGINE STARTING. REMOVE
THE IGNITION KEY WHEN THE BONNET IS
OPEN.
D
1 - WARNING
GENUINE LUBRICANTS AND FLUIDS
Engine oil Transmission
Radiator Brakes
Screenwash Power steering
CONSULT THE
MAINTENANCE
AND WARRANTY
GUIDE. PROTECT YOUR
EYES.
2 - SAFETY
The use of genuine replacement parts, fluids
and lubricants, as well as observing the servicing
schedules, guarantees the reliability and safety
of your vehicle over time, so maintaining it in its
original condition.
3 - DANGER
KEEP OUT
OF THE
REACH OF
CHILDREN. DO NOT
APPROACH
FLAMES. DO NOT
TOUCH.
DO NOT
REMOVE
THE CAP
WHEN THE
ENGINE IS
HOT. EXPLOSION.
CORROSIVE
LIQUID.
MAY START
AUTOMATICALLY EVEN
WITH THE ENGINE
SWITCHED OFF. DO NOT
OPEN GAS
UNDER HIGH
PRESSURE.
AUTOMATIC ENGINE
STARTING. REMOVE THE
IGNITION KEY WHEN THE
BONNET IS OPEN. HIGH
VOLTAGEIn the fuel filler flap
DANGER REMOVE SLOWLY.
FUEL VAPOURS MAY CAUSE INJURY.
Page 150 of 196

148
Special features
– Never work under a tipper body that is not
supported,
– Switch off the power supply to the electro-
hydraulic unit using the circuit breaker,
– Vehicle stationary, engine off.
For safety reasons, we very strongly
advise against doing anything under the
tipper body while it is being operated or while
it is being serviced.
Maintenance
Reservoir
Regularly check and top up the engine oil level.
Change the oil once a year. If the oil contains
water, change it.
Regularly check the condition of the hose and
ensure the hydraulic system is properly sealed.
Pump and motor
No servicing required. The rolling elements are
permanently lubricated and the bearings are
lubricated by the pumped oil.
Lubrication
The pins of the tipper truck and the ram do not
contain lubricant. Regularly lubricate the hinges
and the grab handles of the side boards as well
as the retaining hooks of the rear board.
Sub-frame and tipper truck
For maximum service life, you are advised to
maintain your tipper truck by regularly washing it
using a power washer.
Carry out any required paint touch-ups quickly to
prevent the spread of rust.
After 8 months of use, check the tightening torque of the connection
between the chassis and the underbody (in
accordance with the manufacturer's
bodybuilding recommendations).
Cleaning the slide valve
► Loosen cap 244A, taking care with the ball
and retrieving it.
► Using a wide screwdriver, unscrew the banjo
bolt/piston assembly.
► Check that the piston slides freely and
remove any foreign bodies. Use a magnet to
remove any metal filings.
► Refit the assembly and make sure that the
piston slides freely. Retain the ball with a little
grease on the cap for refitting.
► Bleed the hydraulic unit.
Bleeding the hydraulic unit
► Unscrew hexagonal cap 257.
► Loosen internal screw 587 by half a turn,
using a 6 mm hex key.
► Operate the unit for a few seconds by
pressing the raise button.
The tipper truck does not rise or rises very
slowly. When the oil exits through this opening,
the unit is bled.
► Retighten screw 587 and replace cap 257.
Check that the tipper truck lowers correctly.
Detailed diagram of the UD2386 hydraulic
unit
Diagnostics
Symptoms ElectricHydraulic Verification/Check
The hydraulic unit does not work. XPower harness and unit relay.
X Control harness (control unit).
X Circuit-breaker.
Very noisy unit, rises slowly. XSuction strainer clogged or crushed at the bottom of the tank.
Very noisy new unit, rises quickly. XPump alignment, change the unit.
The ram lowers by itself. XLowering valve crushed or blocked.
The ram does not lower. XYes, check the slide valve and bleed.
Refer to the "Maintenance" section.
X No, check the coil and the electrical connections of the valve.
X No, replace the solenoid valve.
X No, check the alignment of the ram.
The unit works but its pressure does
not increase. X
Slide valve jammed if no solenoid valve on the unit.
Refer to the "Maintenance" section.
X Pressure relief device, setting, dirt.
X Pump seal out of service.
X Motor/pump coupling.
X Pump loose from its support.
The hydraulic unit does not work. XSolenoid valve blocked, replace it or retighten the nut behind the strainer .
The control unit does not work. XCheck connection and contacts.
Emulsion in the tank. XIncorrectly positioned return pipe.
X Insufficient oil level.
Page 153 of 196
151
Audio system
11Audio system
Multimedia audio system -
Bluetooth
® telephone
The system is protected in such a way
that it will only operate in your vehicle.
For safety reasons, the driver must only
carry out operations that require close
attention with the vehicle stationary.
When the engine is switched off and to
prevent discharging of the battery, the
system switches off after activation of energy
economy mode.
First steps
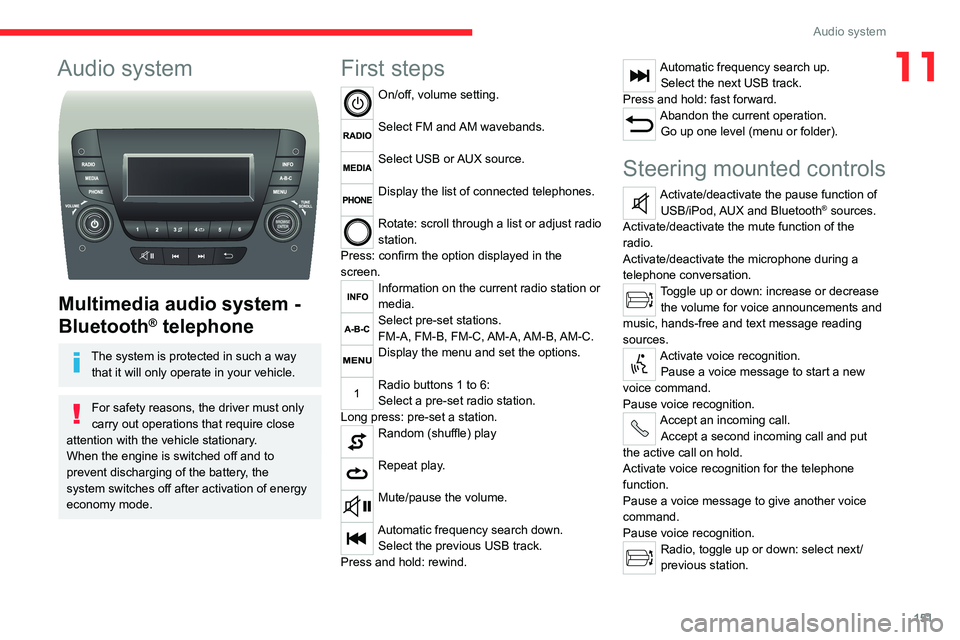
On/off, volume setting.
Select FM and AM wavebands.
Select USB or AUX source.
Display the list of connected telephones.
Rotate: scroll through a list or adjust radio
station.
Press: confirm the option displayed in the
screen.
Information on the current radio station or
media.
Select pre-set stations.
FM-A, FM-B, FM-C, AM-A, AM-B, AM-C.
Display the menu and set the options.
Radio buttons 1 to 6:
Select a pre-set radio station.
Long press: pre-set a station.
Random (shuffle) play
Repeat play.
Mute/pause the volume.
Automatic frequency search down. Select the previous USB track.
Press and hold: rewind.
Automatic frequency search up. Select the next USB track.
Press and hold: fast forward.
Abandon the current operation. Go up one level (menu or folder).
Steering mounted controls
Activate/deactivate the pause function of USB/iPod, AUX and Bluetooth® sources.
Activate/deactivate the mute function of the
radio.
Activate/deactivate the microphone during a
telephone conversation.
Toggle up or down: increase or decrease the volume for voice announcements and
music, hands-free and text message reading
sources.
Activate voice recognition. Pause a voice message to start a new
voice command.
Pause voice recognition.
Accept an incoming call. Accept a second incoming call and put
the active call on hold.
Activate voice recognition for the telephone
function.
Pause a voice message to give another voice
command.
Pause voice recognition.
Radio, toggle up or down: select next/
previous station.
Page 160 of 196
158
Touch screen audio and telematics system
Touch screen audio and telematics system
Multimedia audio system -
Bluetooth
® telephone - GPS
navigation
The system is protected in such a way
that it will only operate in your vehicle.
For safety reasons, the driver must only
carry out operations that require close
attention with the vehicle stationary.
When the engine is switched off and to
prevent discharging of the battery, the
system switches off after activation of energy
economy mode.
First steps
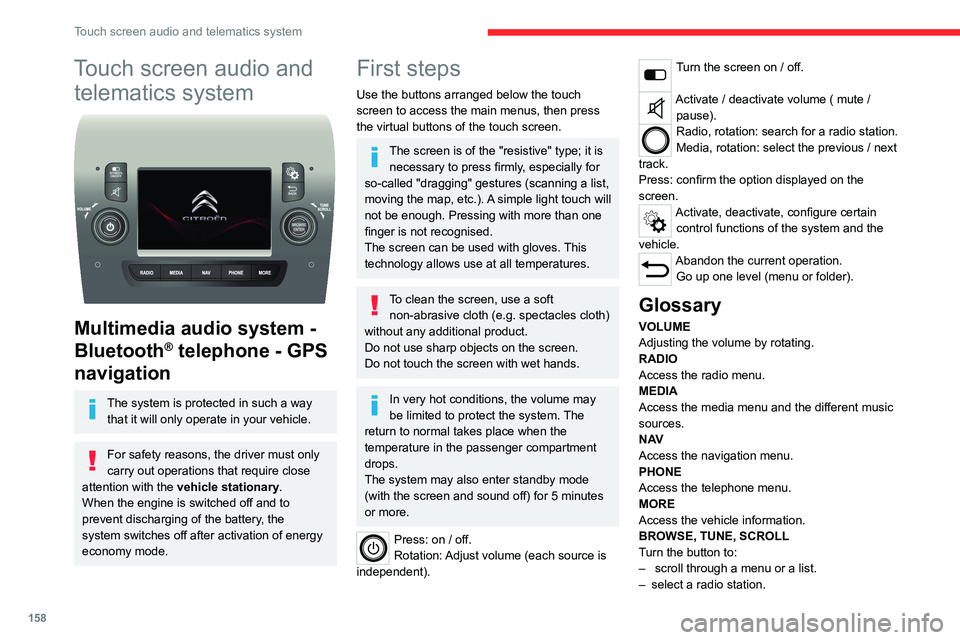
Use the buttons arranged below the touch
screen to access the main menus, then press
the virtual buttons of the touch screen.
The screen is of the "resistive" type; it is necessary to press firmly, especially for
so-called "dragging" gestures (scanning a list,
moving the map, etc.). A simple light touch will
not be enough. Pressing with more than one
finger is not recognised.
The screen can be used with gloves. This
technology allows use at all temperatures.
To clean the screen, use a soft non-abrasive cloth (e.g. spectacles cloth)
without any additional product.
Do not use sharp objects on the screen.
Do not touch the screen with wet hands.
In very hot conditions, the volume may
be limited to protect the system. The
return to normal takes place when the
temperature in the passenger compartment
drops.
The system may also enter standby mode
(with the screen and sound off) for 5 minutes
or more.
Press: on / off.
Rotation: Adjust volume (each source is
independent).
Turn the screen on / off.
Activate / deactivate volume ( mute / pause).
Radio, rotation: search for a radio station.
Media, rotation: select the previous / next
track.
Press: confirm the option displayed on the
screen.
Activate, deactivate, configure certain control functions of the system and the
vehicle.
Abandon the current operation. Go up one level (menu or folder).
Glossary
VOLUME
Adjusting the volume by rotating.
RADIO
Access the radio menu.
MEDIA
Access the media menu and the different music
sources.
N AV
Access the navigation menu.
PHONE
Access the telephone menu.
MORE
Access the vehicle information.
BROWSE, TUNE, SCROLL
Turn the button to:
– scroll through a menu or a list.
– select a radio station.
ENTER
Confirm an option displayed on the screen by
pressing.
Steering mounted controls
Activate / deactivate the pause function of USB/iPod and Bluetooth® sources.
Activate / deactivate the mute function of the
radio.
Activate / deactivate the microphone during a
telephone conversation.
Toggle up or down: increase or decrease volume for voice announcements, and
music sources, hands-free, and text message
reader.
Activate voice recognition. Pause a voice message to start a new
voice command.
Pause voice recognition.
Accept an incoming call. Accept a second incoming call and put
the active call on hold.
Activate voice recognition for the telephone
function.
Pause a voice message to give another voice
command.
Pause voice recognition.
Radio, toggle up or down: select next /
previous station.
Radio, toggle up or down continuously: scan up /
down frequencies until you release the button.
Page 166 of 196
164
Touch screen audio and telematics system
Change the appearance and behaviour of the
navigation system.
Most system settings can be accessed by
touching "Settings" in the main menu.
Help
Access information about assistance services
and other specialised services.
Finish
Validate the settings.
Limitation
Speed limitation (if known).
To see the difference between the desired arrival
time and the estimated arrival time.
Switch between a 3D map and a 2D map.
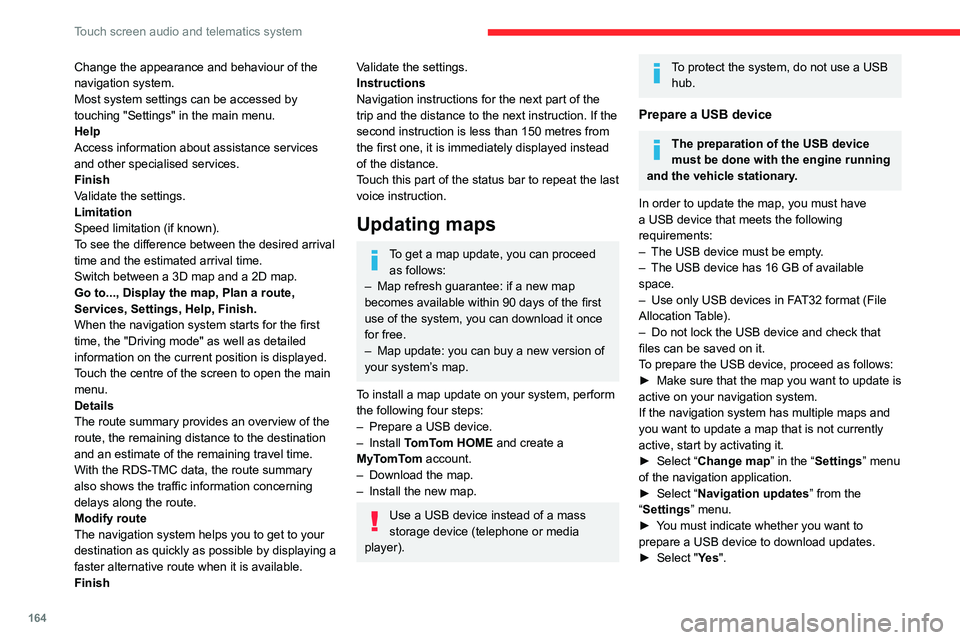
Go to..., Display the map, Plan a route,
Services, Settings, Help, Finish.
When the navigation system starts for the first
time, the "Driving mode" as well as detailed
information on the current position is displayed.
Touch the centre of the screen to open the main
menu.
Details
The route summary provides an overview of the
route, the remaining distance to the destination
and an estimate of the remaining travel time.
With the RDS-TMC data, the route summary
also shows the traffic information concerning
delays along the route.
Modify route
The navigation system helps you to get to your
destination as quickly as possible by displaying a
faster alternative route when it is available.
FinishValidate the settings.
Instructions
Navigation instructions for the next part of the
trip and the distance to the next instruction. If the
second instruction is less than 150 metres from
the first one, it is immediately displayed instead
of the distance.
Touch this part of the status bar to repeat the last
voice instruction.
Updating maps
To get a map update, you can proceed as follows:
– Map refresh guarantee: if a new map
becomes available within 90 days of the first
use of the system, you can download it once
for free.
– Map update: you can buy a new version of
your system’s map.
To install a map update on your system, perform
the following four steps:
– Prepare a USB device.
– Install TomTom HOME and create a
MyTomTom account.
– Download the map.
– Install the new map.
Use a USB device instead of a mass
storage device (telephone or media
player).
To protect the system, do not use a USB hub.
Prepare a USB device
The preparation of the USB device
must be done with the engine running
and the vehicle stationary.
In order to update the map, you must have
a USB device that meets the following
requirements:
– The USB device must be empty.
– The USB device has 16 GB of available
space.
– Use only USB devices in FAT32 format (File
Allocation Table).
– Do not lock the USB device and check that
files can be saved on it.
To prepare the USB device, proceed as follows:
► Make sure that the map you want to update is
active on your navigation system.
If the navigation system has multiple maps and
you want to update a map that is not currently
active, start by activating it.
► Select “Change map” in the “Settings” menu
of the navigation application.
► Select “Navigation updates” from the
“Settings” menu.
► You must indicate whether you want to
prepare a USB device to download updates.
► Select "Ye s ".
Page 167 of 196
165
Touch screen audio and telematics system
12► Insert the USB device into the USB socket
located in the central storage space dedicated
to data transfer.
The system starts preparing the USB device.
– If the system continues to ask you to
insert a USB device, make sure that your
USB device meets the above conditions, and
then try again.
– If you connect multiple USB devices, the
system prompts you to remove devices
so that only the device to be prepared is
connected.
– If there is not enough space on the USB
device, you are prompted to use another USB
device.
– If you connect a USB device that contains
files, the system warns you that files on the
USB device may be deleted.
When the USB device is ready, the message
below appears:
"Navigation updates"
The preparation of the USB device is
finished.
You can now safely remove the USB device.
► Remove the USB device; you can now
download the new map to your USB device.
Install TomTom HOME
To install "TomTom HOME" and create a
"MyTomTom" account, perform the following
steps:
► Download and install the TomTom HOME
app on your computer through this link:
tomtom.com/getstarted
► Select and download TomTom HOME, then
follow the on-screen instructions.
Use a secure Wi-Fi network rather than
3G/4G to download the application on
your computer.
► Connect the USB device to your computer;
"TomTom HOME" starts automatically.
► Select "Log in " in the upper right corner of
"TomTom HOME".
► Select "Register" and enter your information
to create a "MyTomTom" account.
To receive map updates, you must have a "MyTomTom" account.
Once the account is created, you must indicate
whether you want to link your system to your
account. The prepared USB device represents
your system.
► Select “Link device”, then “Close”.
You are now ready to download a map to your
USB device.
Download a map
Connect your USB device to your computer.
Select a map to download
– To check if you can download a map for free
with the map refresh guarantee, select " Tools"
and then "Map refresh guarantee " in "TomTom
HOME".
– To purchase a map update, select " Buy
maps" in "TomTom HOME".
– If you have already purchased an update,
select "Update my device" in "TomTom HOME".
Download a map
If a map update is available for your system, it is
listed as an available update.
If your system already has the most
recent map, no updates are available.
► Select the map to download, then select
"Update and install "; the map will be
downloaded and installed on your USB device.
► Select “Done” once the process is finished.
Install the map
The new map must be downloaded
with the engine running and the
vehicle stationary.
Once you have downloaded a map to your USB
device, you can install it on your system.
► Insert the USB device containing the new
map into the USB socket located in the central
storage space dedicated to data transfer to the
system.
The system detects the presence of a new
map on the USB device. It may also contain
an update of the navigation software if it is
necessary for the new map.
► You must indicate whether you want to
update the system.
► Select "Start".
Page 175 of 196
173
ALPINE® X902D system
13ALPINE® X902D system
Multimedia audio system -
Bluetooth
® telephone- GPS
navigation
For safety reasons, the driver must only
carry out operations that require close
attention with the vehicle stationary.
When the engine is switched off and to
prevent discharging of the battery, the
system switches off after activation of energy
economy mode.
For further information, refer to the
ALPINE user guide at:
https://www.alpine-europe.com
First steps
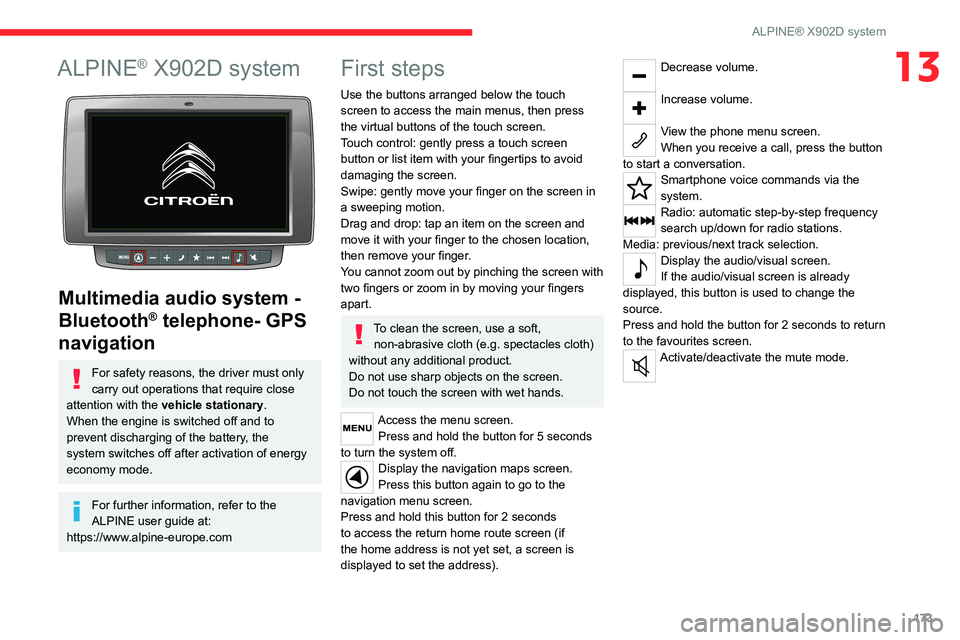
Use the buttons arranged below the touch
screen to access the main menus, then press
the virtual buttons of the touch screen.
Touch control: gently press a touch screen
button or list item with your fingertips to avoid
damaging the screen.
Swipe: gently move your finger on the screen in
a sweeping motion.
Drag and drop: tap an item on the screen and
move it with your finger to the chosen location,
then remove your finger.
You cannot zoom out by pinching the screen with
two fingers or zoom in by moving your fingers
apart.
To clean the screen, use a soft, non-abrasive cloth (e.g. spectacles cloth)
without any additional product.
Do not use sharp objects on the screen.
Do not touch the screen with wet hands.
Access the menu screen. Press and hold the button for 5 seconds
to turn the system off.
Display the navigation maps screen.
Press this button again to go to the
navigation menu screen.
Press and hold this button for 2 seconds
to access the return home route screen (if
the home address is not yet set, a screen is
displayed to set the address).
Decrease volume.
Increase volume.
View the phone menu screen.
When you receive a call, press the button
to start a conversation.
Smartphone voice commands via the
system.
Radio: automatic step-by-step frequency
search up/down for radio stations.
Media: previous/next track selection.
Display the audio/visual screen.
If the audio/visual screen is already
displayed, this button is used to change the
source.
Press and hold the button for 2 seconds to return
to the favourites screen.
Activate/deactivate the mute mode.
Page 179 of 196
177
Alphabetical index
E
EBA 52
EBFD 52
Eco-driving (advice) 5
Electric windows 25
Electronic brake force distribution (EBFD) 52
Emergency warning lamps 51
Emissions control system, SCR 101
Engine compartment 95
Engine, Diesel 91, 95, 124
Engines 124
Environment 5
ESP/ASR 53
F
Filling the AdBlue® tank 98, 101–102
Filling the fuel tank 90
Filter, air 98
Filter, Diesel fuel 96, 100
Filter, oil 99
Filter, particle 99
Filter, passenger compartment 31, 98
Fittings, front 38–42
Fittings, interior 38–42
Flap, fuel filler 90
Flashing indicators 46
Fluid, brake 97–98
Fluid, engine coolant 97–98
Fluid, power steering 97–98
Foglamps, front 46
Foglamps, rear 46
Front doors 23
Fuel 5, 91
Fuel consumption 5
Fuel tank 90
G
Gauge, fuel 90
Gearbox, manual 69–70, 99
Glove box 38–41
H
Hazard warning lamps 51
Headlamp flash 46
Headlamps, dipped beam 46
Headlamps, main beam 46
Head restraints, front 27
Heating 31–33
Heating, additional 35–36
Hill Descent Control 54–55
Hill start assist 70
Horn 51
I
Immobiliser, electronic 66
Indicator, coolant temperature 11
Indicator, engine oil level 10–11
Indicators, direction 46
Inflating tyres 100
Information, vehicle 168
Infrared camera 74
Instrument panel 74
Instruments and controls 4
Intelligent Traction Control 53–54
J
Jack 153, 162
K
Kit, hands-free 154, 166–167
L
Lane Departure Warning System (LDWS) 81
Level, AdBlue® 98
Level, brake fluid 97
Level, engine coolant 11, 97
Level, engine oil 96
Level, power steering fluid 97
Levels 97–98
Levels and checks 96–97
Lighting dimmer 6