Bonnet open CITROEN RELAY 2020 Handbook (in English)
[x] Cancel search | Manufacturer: CITROEN, Model Year: 2020, Model line: RELAY, Model: CITROEN RELAY 2020Pages: 196, PDF Size: 34.07 MB
Page 9 of 196
7
Instruments
1For more information on a system or a function,
refer to the corresponding section.
Warning lamp continuously
lit
The illumination of a red or orange warning lamp
indicates the occurrence of a fault that needs
further investigation.
If a warning lamp remains lit
The references (1), (2) and (3) in the warning
and indicator lamp description indicate whether
you should contact a qualified professional in
addition to the immediate recommended actions.
(1): You must stop the vehicle .
Stop as soon as it is safe to do so and switch off
the ignition.
(2): Contact a CITROËN dealer or a qualified
workshop.
(3): Visit a CITROËN dealer or a qualified
workshop.
List of warning and
indicator lamps
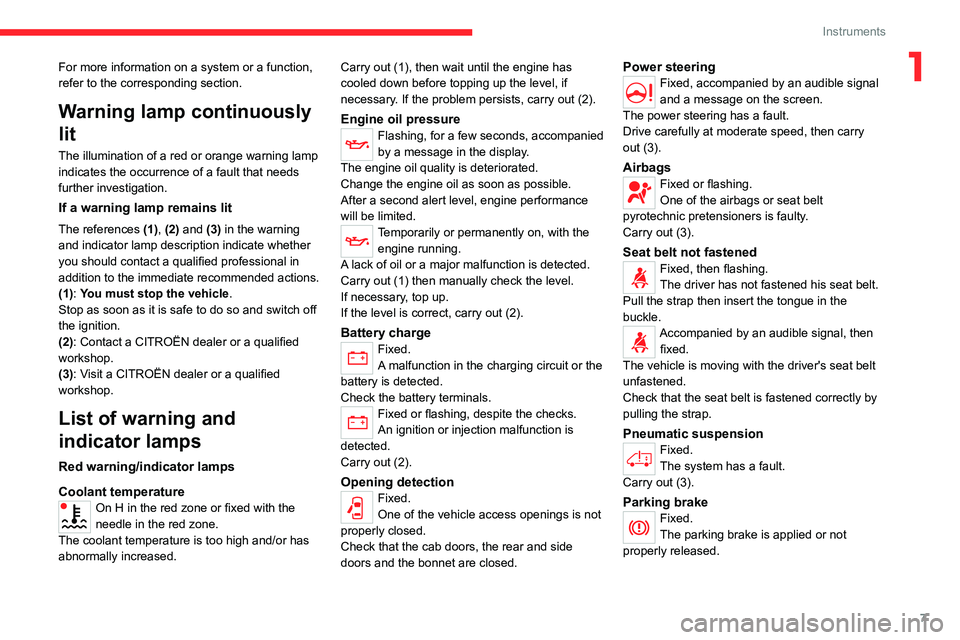
Red warning/indicator lamps
Coolant temperature
On H in the red zone or fixed with the
needle in the red zone.
The coolant temperature is too high and/or has
abnormally increased. Carry out (1), then wait until the engine has
cooled down before topping up the level, if
necessary. If the problem persists, carry out (2).
Engine oil pressureFlashing, for a few seconds, accompanied
by a message in the display.
The engine oil quality is deteriorated.
Change the engine oil as soon as possible.
After a second alert level, engine performance
will be limited.
Temporarily or permanently on, with the engine running.
A lack of oil or a major malfunction is detected.
Carry out (1) then manually check the level.
If necessary, top up.
If the level is correct, carry out (2).
Battery chargeFixed.
A malfunction in the charging circuit or the
battery is detected.
Check the battery terminals.
Fixed or flashing, despite the checks.
An ignition or injection malfunction is
detected.
Carry out (2).
Opening detectionFixed.
One of the vehicle access openings is not
properly closed.
Check that the cab doors, the rear and side
doors and the bonnet are closed.
Power steeringFixed, accompanied by an audible signal
and a message on the screen.
The power steering has a fault.
Drive carefully at moderate speed, then carry
out (3).
AirbagsFixed or flashing.
One of the airbags or seat belt
pyrotechnic pretensioners is faulty.
Carry out (3).
Seat belt not fastenedFixed, then flashing.
The driver has not fastened his seat belt.
Pull the strap then insert the tongue in the
buckle.
Accompanied by an audible signal, then fixed.
The vehicle is moving with the driver's seat belt
unfastened.
Check that the seat belt is fastened correctly by
pulling the strap.
Pneumatic suspensionFixed.
The system has a fault.
Carry out (3).
Parking brakeFixed.
The parking brake is applied or not
properly released.
Page 26 of 196
24
Access
Opening
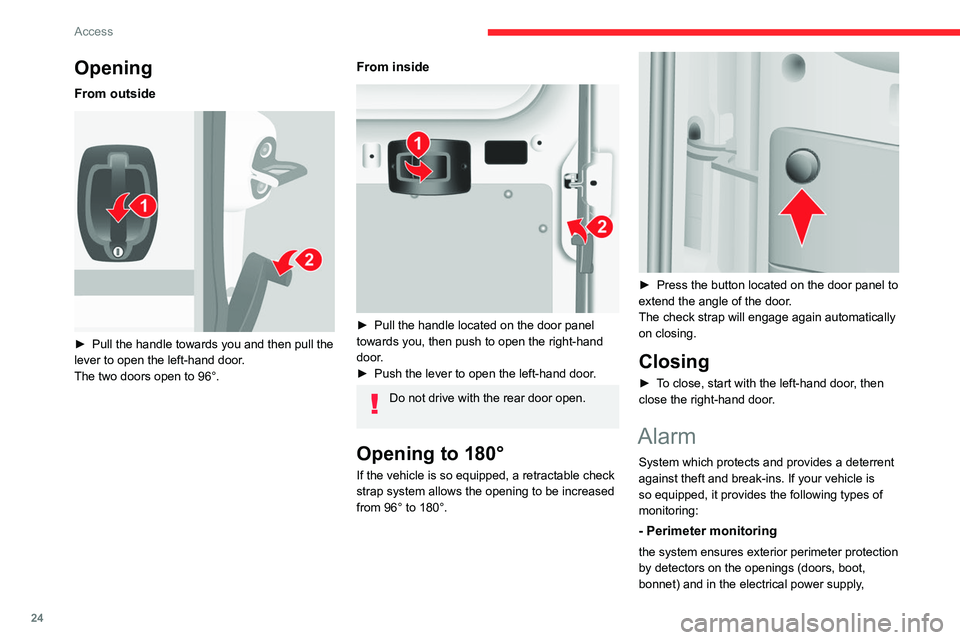
From outside
► Pull the handle towards you and then pull the
lever to open the left-hand door.
The two doors open to 96°.
From inside
► Pull the handle located on the door panel
towards you, then push to open the right-hand
door.
► Push the lever to open the left-hand door.
Do not drive with the rear door open.
Opening to 180°
If the vehicle is so equipped, a retractable check
strap system allows the opening to be increased
from 96° to 180°.
► Press the button located on the door panel to
extend the angle of the door.
The check strap will engage again automatically
on closing.
Closing
► To close, start with the left-hand door, then
close the right-hand door.
Alarm
System which protects and provides a deterrent
against theft and break-ins. If your vehicle is
so equipped, it provides the following types of
monitoring:
- Perimeter monitoring
the system ensures exterior perimeter protection
by detectors on the openings (doors, boot,
bonnet) and in the electrical power supply,
- Anti-tilt monitoring
The system checks for any change in the attitude
of the vehicle.
Activation
► Switch off the ignition and exit the vehicle.► Press this button of the remote
control.
The protections are active after a few seconds.
Triggering of the alarm
This is signalled by the siren sounding and
flashing of the direction indicators for thirty
seconds.
The alarm then returns to monitoring mode but the triggering event is stored
and is indicated by illumination of the electronic
immobiliser warning lamp for about 10 seconds
when the ignition is switched on.
The alarm is also triggered after interruption of
the electrical supply and when it is reconnected.
Deactivation using the
remote control
► Press this button.
The standby mode is deactivated when the
vehicle is unlocked.
Page 71 of 196
69
Driving
6Gear shift indicator
Depending on version or engine, this system
reduces fuel consumption by recommending a
higher gear change.
Gear shift recommendations should not be
considered compulsory. In fact, the road layout,
the traffic density and safety remain the deciding
factors when choosing the best gear. The driver
therefore remains responsible for deciding
whether or not to follow the indications issued by
the system.
The system cannot be deactivated.
Operation
The information appears in the instrument panel screen in the form of the SHIFT
indicator, accompanied by an upward arrow to
signal to the driver that they can change up.
The system adapts its gear shift recommendation according to the driving
conditions (slope, load, etc.) and the driver’s
requirements (power, acceleration, braking,
etc.).
The system never recommends engaging first
gear or reverse, or changing down.
Stop & Start
The Stop & Start function puts the engine temporarily into standby - STOP mode - during
phases when the vehicle is stopped (red lights,
queues, etc.). The engine restarts automatically
- START mode - as soon as the driver wishes to
move off again.
Primarily designed for urban use, the function
is intended to reduce fuel consumption and
exhaust emissions as well as the noise level
when stationary.
The function does not affect the functionalities of
the vehicle, in particular the braking.
Deactivation/Reactivation
The function is activated by default when the
ignition is switched on.
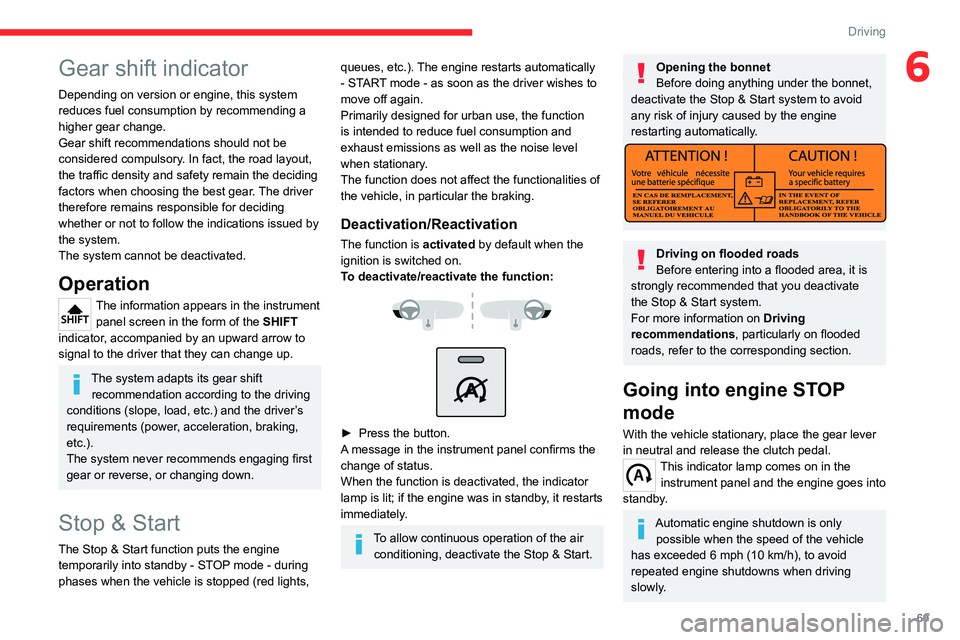
To deactivate/reactivate the function:
► Press the button.
A message in the instrument panel confirms the
change of status.
When the function is deactivated, the indicator
lamp is lit; if the engine was in standby, it restarts
immediately.
To allow continuous operation of the air conditioning, deactivate the Stop & Start.
Opening the bonnet
Before doing anything under the bonnet,
deactivate the Stop & Start system to avoid
any risk of injury caused by the engine
restarting automatically.
Driving on flooded roads
Before entering into a flooded area, it is
strongly recommended that you deactivate
the Stop & Start system.
For more information on Driving
recommendations, particularly on flooded
roads, refer to the corresponding section.
Going into engine STOP
mode
With the vehicle stationary, place the gear lever
in neutral and release the clutch pedal.
This indicator lamp comes on in the instrument panel and the engine goes into
standby.
Automatic engine shutdown is only possible when the speed of the vehicle
has exceeded 6 mph (10 km/h), to avoid
repeated engine shutdowns when driving
slowly.
Page 96 of 196
94
Practical information
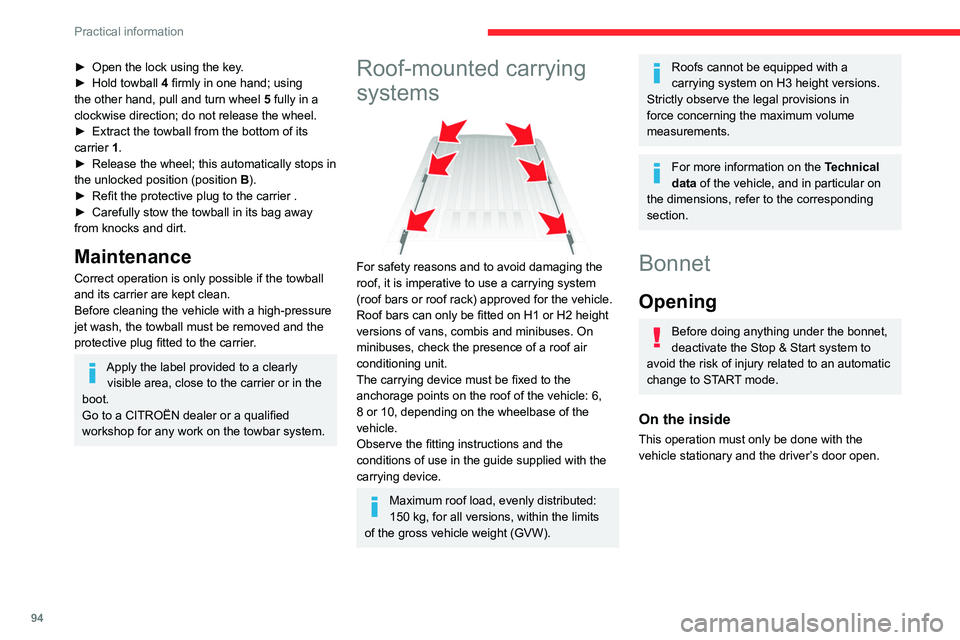
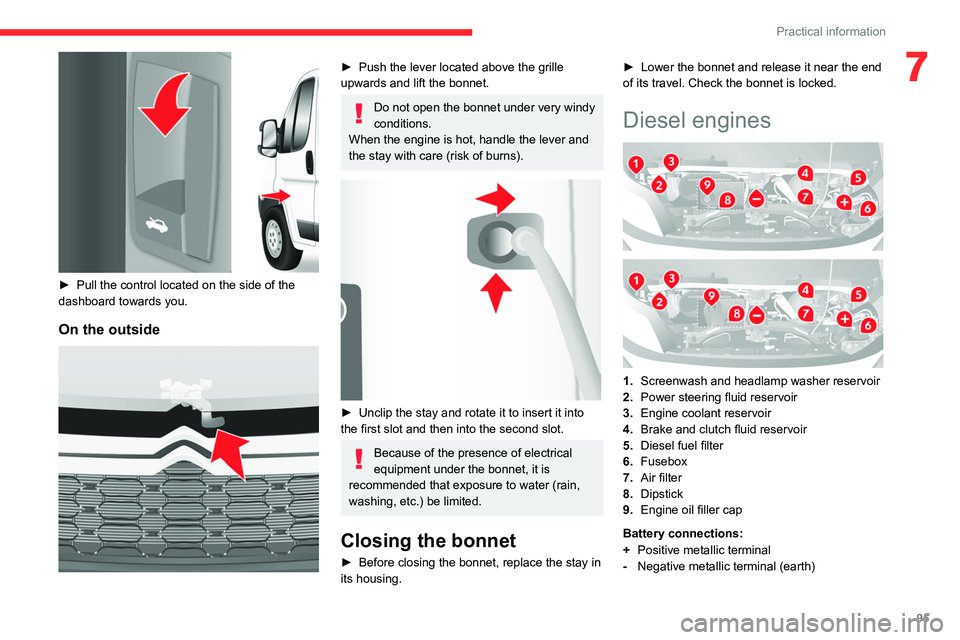
► Pull the control located on the side of the
dashboard towards you.
On the outside
► Open the lock using the key.
► Hold towball 4 firmly in one hand; using
the other hand, pull and turn wheel 5 fully in a
clockwise direction; do not release the wheel.
► Extract the towball from the bottom of its
carrier 1.
► Release the wheel; this automatically stops in
the unlocked position (position B).
► Refit the protective plug to the carrier .
► Carefully stow the towball in its bag away
from knocks and dirt.
Maintenance
Correct operation is only possible if the towball
and its carrier are kept clean.
Before cleaning the vehicle with a high-pressure
jet wash, the towball must be removed and the
protective plug fitted to the carrier.
Apply the label provided to a clearly visible area, close to the carrier or in the
boot.
Go to a CITROËN dealer or a qualified
workshop for any work on the towbar system.
Roof-mounted carrying
systems
For safety reasons and to avoid damaging the
roof, it is imperative to use a carrying system
(roof bars or roof rack) approved for the vehicle.
Roof bars can only be fitted on H1 or H2 height
versions of vans, combis and minibuses. On
minibuses, check the presence of a roof air
conditioning unit.
The carrying device must be fixed to the
anchorage points on the roof of the vehicle: 6,
8 or 10, depending on the wheelbase of the
vehicle.
Observe the fitting instructions and the
conditions of use in the guide supplied with the
carrying device.
Maximum roof load, evenly distributed:
150 kg, for all versions, within the limits
of the gross vehicle weight (GVW).
Roofs cannot be equipped with a
carrying system on H3 height versions.
Strictly observe the legal provisions in
force concerning the maximum volume
measurements.
For more information on the Technical
data of the vehicle, and in particular on
the dimensions, refer to the corresponding
section.
Bonnet
Opening
Before doing anything under the bonnet,
deactivate the Stop & Start system to
avoid the risk of injury related to an automatic
change to START mode.
On the inside
This operation must only be done with the
vehicle stationary and the driver’s door open.
Page 97 of 196
95
Practical information
7
► Pull the control located on the side of the
dashboard towards you.
On the outside
► Push the lever located above the grille
upwards and lift the bonnet.
Do not open the bonnet under very windy
conditions.
When the engine is hot, handle the lever and
the stay with care (risk of burns).
► Unclip the stay and rotate it to insert it into
the first slot and then into the second slot.
Because of the presence of electrical
equipment under the bonnet, it is
recommended that exposure to water (rain,
washing, etc.) be limited.
Closing the bonnet
► Before closing the bonnet, replace the stay in
its housing. ►
Lower the bonnet and release it near the end
of its travel. Check the bonnet is locked.
Diesel engines
1. Screenwash and headlamp washer reservoir
2. Power steering fluid reservoir
3. Engine coolant reservoir
4. Brake and clutch fluid reservoir
5. Diesel fuel filter
6. Fusebox
7. Air filter
8. Dipstick
9. Engine oil filler cap
Battery connections:
+ Positive metallic terminal
- Negative metallic terminal (earth)
Page 113 of 196
111
In the event of a breakdown
8Changing a bulb
The headlamps have polycarbonate lenses with a protective coating:
► do not clean them using a dry or
abrasive cloth, nor with a detergent or
solvent product,
► use a sponge and soapy water or a pH
neutral product,
► when using a high pressure washer on
persistent marks, do not keep the lance
directed towards the lamps or their edges for
too long, so as not to damage their protective
coating and seals.
Changing a bulb must only be done with
the ignition off and after the lamp has
been switched off for several minutes - Risk
of serious burns!
► Do not touch the bulb directly with your
fingers, use a lint-free cloth.
It is essential only to use anti-ultraviolet
(UV) type bulbs, so as not to damage the
headlamp.
Always replace a failed bulb with a new bulb
with the same type and specification.
In some weather conditions (e.g. low
temperature or humidity), the presence
of misting on the internal surface of the glass
of the headlamps and rear lamps is normal; it
disappears after the lamps have been on for a
few minutes.
Types of bulb
Various types of bulb are fitted on the vehicle. To
remove them:
Type A All-glass bulb: pull gently as it is fitted by
pressure.
Type B Bayonet bulb: press on the bulb then
turn it anti-clockwise.
Type C Cylindrical bulb: ease the contacts apart.
Type D Halogen bulb: release the retaining
spring from its housing.
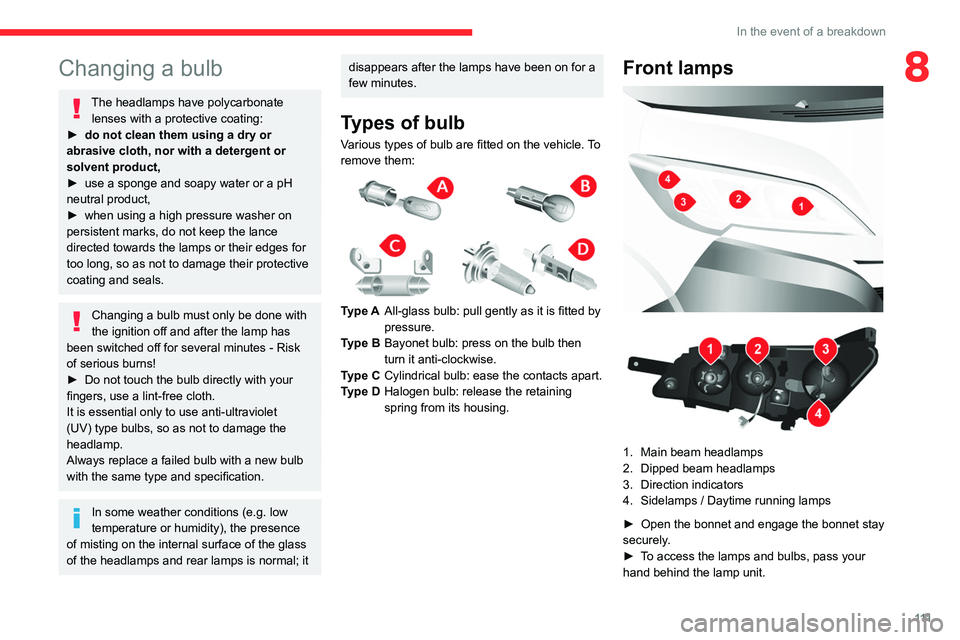
Front lamps
1. Main beam headlamps
2. Dipped beam headlamps
3. Direction indicators
4. Sidelamps / Daytime running lamps
► Open the bonnet and engage the bonnet stay
securely.
► To access the lamps and bulbs, pass your
hand behind the lamp unit.
Page 136 of 196
134
Technical data
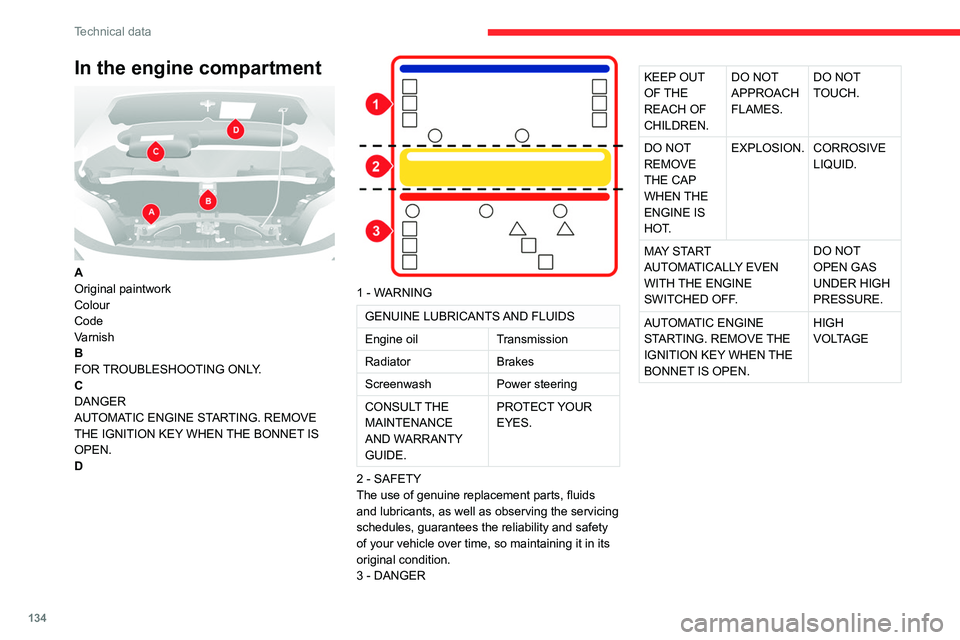
In the engine compartment
A
Original paintwork
Colour
Code
Varnish
B
FOR TROUBLESHOOTING ONLY.
C
DANGER
AUTOMATIC ENGINE STARTING. REMOVE
THE IGNITION KEY WHEN THE BONNET IS
OPEN.
D
1 - WARNING
GENUINE LUBRICANTS AND FLUIDS
Engine oil Transmission
Radiator Brakes
Screenwash Power steering
CONSULT THE
MAINTENANCE
AND WARRANTY
GUIDE. PROTECT YOUR
EYES.
2 - SAFETY
The use of genuine replacement parts, fluids
and lubricants, as well as observing the servicing
schedules, guarantees the reliability and safety
of your vehicle over time, so maintaining it in its
original condition.
3 - DANGER
KEEP OUT
OF THE
REACH OF
CHILDREN. DO NOT
APPROACH
FLAMES. DO NOT
TOUCH.
DO NOT
REMOVE
THE CAP
WHEN THE
ENGINE IS
HOT. EXPLOSION.
CORROSIVE
LIQUID.
MAY START
AUTOMATICALLY EVEN
WITH THE ENGINE
SWITCHED OFF. DO NOT
OPEN GAS
UNDER HIGH
PRESSURE.
AUTOMATIC ENGINE
STARTING. REMOVE THE
IGNITION KEY WHEN THE
BONNET IS OPEN. HIGH
VOLTAGEIn the fuel filler flap
DANGER REMOVE SLOWLY.
FUEL VAPOURS MAY CAUSE INJURY.
Page 180 of 196
178
Alphabetical index
Low fuel level 90
Lumbar 27
M
Maintenance, routine 74, 98
Manoeuvring aids (recommendations) 73
Mat 74
Menu 13, 160–161, 163, 166, 168
Menus (audio) 160–161
Mirrors, door 31, 83
O
Oil change 96
Oil consumption 96
OIl, engine 96–98
On-board tools 105–110
Opening the bonnet 94
Overhead storage 38–41
P
Pads, brake 99
Parking brake 68, 100
Player, USB 152–153, 161–162
Port, USB 152–153, 161–162
Pressures, tyres 100
Pre-tensioning seat belts 56
Protecting children 57–59
R
Radar (warnings) 74
Radio 152, 160, 162
Radio, digital (Digital Audio
Broadcasting - DAB) 161
Range, AdBlue® 12, 98
Recovery 122
Regeneration of the particle filter 99
Remote control 20, 66
Replacing bulbs 111
Replacing the air filter 98
Replacing the oil filter 99
Replacing the passenger compartment
filter 98
Resetting the service indicator 10–11
Reversing camera 74
S
Safety, children 57–59
Screen, colour 160
Screen menu map 160–161, 163, 166, 168
Screenwash fluid 97–98
SCR (Selective Catalytic Reduction) 101
Seat belts 55–56
Seat belts, rear 56
Seats, heated 28
Seats, rear 59
Sensors (warnings) 74
Service indicator 10–11
Servicing 10–11, 98
Settings, equipment 13, 18
Sidelamps 46
Snow chains 91
Socket, auxiliary 153, 162
Socket, Jack 153, 162
Sockets, auxiliary 38–41
Speed limiter 76–77
Speed limit recognition 75–76
Speedometer 74
Stability control (ESC) 52
Stability control (ESP) 53
Starting a Diesel engine 91
Station, radio 152, 160
Steering mounted controls, audio 151, 159
Steering wheel adjustment 30
Stop & Start 32, 38, 49, 56, 69–70, 94, 98, 122
Storage 38–41
Sunshine sensor 31
T
Tables of engines 124
Table, writing 38–40
Tank, fuel 90
Technical data 124
Telephone 154, 166–168
Temperature, coolant 11