wipers CITROEN RELAY 2020 Handbook (in English)
[x] Cancel search | Manufacturer: CITROEN, Model Year: 2020, Model line: RELAY, Model: CITROEN RELAY 2020Pages: 196, PDF Size: 34.07 MB
Page 50 of 196

48
Lighting and visibility
Once the function is activated, the system
operates as follows:
If the brightness is sufficient and/or if the traffic
conditions do not allow illumination of the main
beam headlamps:
– The dipped beam headlamps will
remain on: this indicator lamp lights up on
the instrument panel.
If the brightness is very low and the traffic
conditions allow:
– The main beam headlamps
come on automatically: these
indicator lamps light up on the instrument panel.
If the situation requires a change of headlamp
beam, the driver can take over at any time.
Flashing the headlamps again pauses the
function and the lighting system changes to
"automatic illumination of headlamps" mode.
At a speed lower than approximately 9 mph (15
km/h), the function deactivates automatically.
If the main beam headlamps are still needed,
flash the headlamps again; the main beam
headlamps then remain on fixed until the vehicle
reaches a speed of approximately 25 mph (40
km/h).
Above 25 mph (40 km/h), the function is
reactivated automatically (provided that you have
not flashed the headlamps again to turn off the
main beam headlamps during this interval).
Deactivation
► Turn the lighting control stalk ring to
the "Dipped beam" position.
The system may suffer interference or not work correctly:
– under conditions of poor visibility (falling
snow, heavy rain or thick fog, etc.),
– if the windscreen in front of the camera is
dirty, misted or obscured (by a sticker, etc.),
– if the vehicle is facing highly reflective
signs.
The system is not able to detect: – road users that do not have their own
lighting, such as pedestrians,
– vehicles whose lighting is obscured, such
as when running behind a safety barrier on a
motorway, for example,
– vehicles at the top or bottom of a steep
slope, on twisty roads, on crossroads.
Parking lamps
This system allows you to leave the lamps on
when parked; with the ignition off, and the key in
the STOP position or removed.
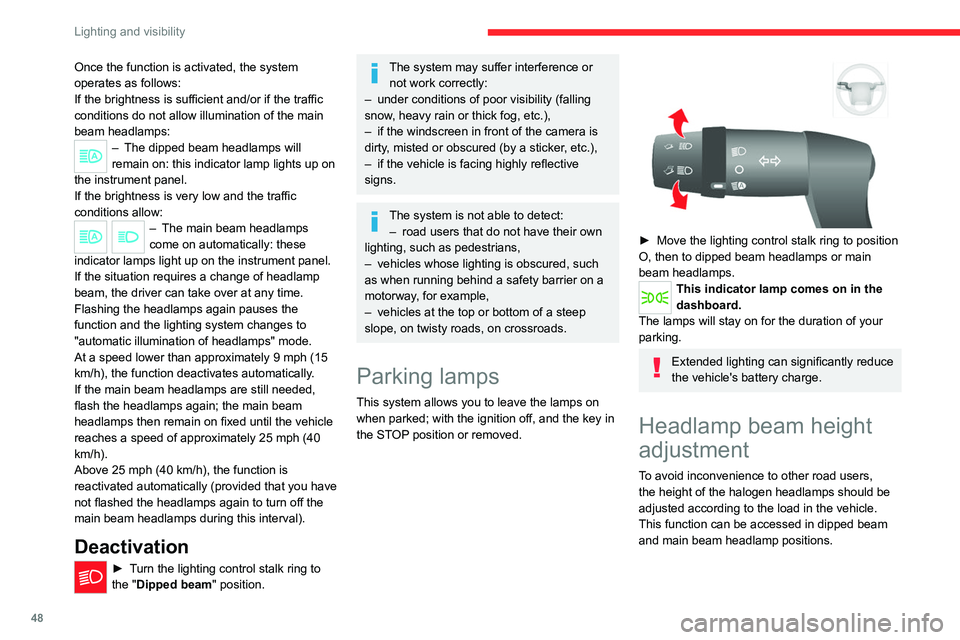
► Move the lighting control stalk ring to position
O, then to dipped beam headlamps or main
beam headlamps.
This indicator lamp comes on in the
dashboard.
The lamps will stay on for the duration of your
parking.
Extended lighting can significantly reduce
the vehicle's battery charge.
Headlamp beam height
adjustment
To avoid inconvenience to other road users,
the height of the halogen headlamps should be
adjusted according to the load in the vehicle.
This function can be accessed in dipped beam
and main beam headlamp positions.
Successive presses on these
controls adjust the headlamps.
An indicator lamp on the display indicates the
selected setting position (0, 1, 2, 3).
Wiper control stalk
Windscreen wipers
The wiping is active only when the ignition key is
in the ON position.
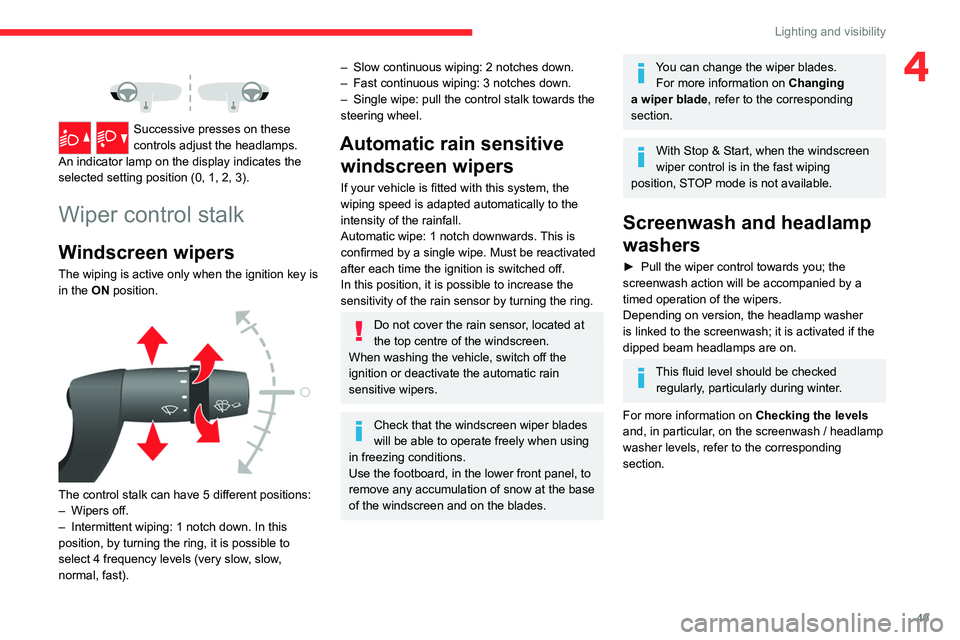
The control stalk can have 5 different positions:
– Wipers off.
– Intermittent wiping: 1 notch down. In this
position, by turning the ring, it is possible to
select 4 frequency levels (very slow, slow,
normal, fast).
Page 51 of 196

49
Lighting and visibility
4
Successive presses on these
controls adjust the headlamps.
An indicator lamp on the display indicates the
selected setting position (0, 1, 2, 3).
Wiper control stalk
Windscreen wipers
The wiping is active only when the ignition key is
in the ON position.
The control stalk can have 5 different positions:
– Wipers off.
– Intermittent wiping: 1 notch down. In this
position, by turning the ring, it is possible to
select 4 frequency levels (very slow, slow,
normal, fast).
– Slow continuous wiping: 2 notches down.
– Fast continuous wiping: 3 notches down.
– Single wipe: pull the control stalk towards the
steering wheel.
Automatic rain sensitive windscreen wipers
If your vehicle is fitted with this system, the
wiping speed is adapted automatically to the
intensity of the rainfall.
Automatic wipe: 1 notch downwards. This is
confirmed by a single wipe. Must be reactivated
after each time the ignition is switched off.
In this position, it is possible to increase the
sensitivity of the rain sensor by turning the ring.
Do not cover the rain sensor, located at
the top centre of the windscreen.
When washing the vehicle, switch off the
ignition or deactivate the automatic rain
sensitive wipers.
Check that the windscreen wiper blades
will be able to operate freely when using
in freezing conditions.
Use the footboard, in the lower front panel, to
remove any accumulation of snow at the base
of the windscreen and on the blades.
You can change the wiper blades. For more information on Changing
a wiper blade , refer to the corresponding
section.
With Stop & Start, when the windscreen
wiper control is in the fast wiping
position, STOP mode is not available.
Screenwash and headlamp
washers
► Pull the wiper control towards you; the
screenwash action will be accompanied by a
timed operation of the wipers.
Depending on version, the headlamp washer
is linked to the screenwash; it is activated if the
dipped beam headlamps are on.
This fluid level should be checked regularly, particularly during winter.
For more information on Checking the levels
and, in particular, on the screenwash / headlamp
washer levels, refer to the corresponding
section.
Page 72 of 196

70
Driving
Never leave the vehicle without first
switching the ignition off with the key.
Never refuel with the engine in STOP
mode; you must switch off the ignition
using the key.
Special cases: STOP mode
not available
STOP mode is not activated when:
– the system is initialising,
– the driver's door is open,
– the driver's seat belt is not fastened,
– the air conditioning is on,
– the rear screen demisting is on,
– the windscreen wipers are on fast wipe,
– the reverse gear is engaged for the parking
manoeuvre,
– some special conditions (battery charge,
engine temperature, particle filter regeneration,
braking assistance, exterior temperature, etc.)
where the engine is needed to assure control of
a system.
– during intensive use of Stop & Start, it may
be deactivated to conserve starting ability;
go to a CITROËN dealer to have the function
reactivated.
This indicator lamp in the instrument panel flashes for a few seconds, then
goes off.
This operation is perfectly normal.
Going into engine START
mode
With a gear engaged, the automatic restarting of
the engine is only possible by fully depressing
the clutch pedal.
This indicator lamp goes off and the engine restarts.
If, after an automatic restart in START mode, the
driver does not perform any action on the vehicle
within 3 minutes, the system stops the engine
permanently. The engine can only be restarted
with the ignition key.
Special cases: START mode
activated automatically
The START mode may be invoked automatically
in the following circumstances:
– the vehicle is free-wheeling on a gradient,
– the windscreen wipers are on fast wipe,
– the air conditioning is on,
– the engine has been stopped for around 3
minutes with Stop & Start,
– some special conditions (battery charge,
engine temperature, braking assistance, air
conditioning setting, etc.) where the engine is
needed for control of the system or vehicle.
In this case, a message appears in the
instrument panel screen, accompanied by
this indicator lamp, which flashes for a few
seconds, then goes off.
This operation is perfectly normal.
While in STOP mode with a manual
gearbox, if a gear is engaged without
fully depressing the clutch pedal, restarting
may not take place.
An indicator lamp and/or message is
displayed in the instrument panel asking
you to fully depress the clutch pedal to allow
restarting.
With the engine stopped in STOP mode,
if the driver unfastens their seat belt and
opens a front door, the engine can only be
restarted using the ignition key. There is an
audible signal, accompanied by flashing of this
indicator lamp, and the display of a message.
Malfunction
In the event of a malfunction, the Stop &
Start is deactivated and this warning lamp
comes on, accompanied by a message on the
instrument panel display.
Have the system checked by a CITROËN dealer
or a qualified workshop.
In the event of a malfunction in STOP mode, the
engine can be restarted by fully depressing the
clutch pedal or putting the gear lever in neutral.
Hill start assist
This system keeps your vehicle briefly stationary
(for approximately 2 seconds) when making a hill
start, while you transfer your foot from the brake
pedal to the accelerator pedal.
This system (also called HHC - Hill Hold
Control), integrated with the dynamic stability
control system, is activated in the following
conditions:
– the vehicle must be stationary, engine running,
foot on the brake,
– the gradient of the road must be steeper than
5%,
– uphill, the gearbox must be in neutral or in a
gear other than reverse,
– downhill, reverse gear must be engaged.
The hill start assist system is a driving
aid. It is not an automatic vehicle parking
function or an automatic parking brake.
Operation
With the brake pedal and clutch pedal pressed,
from the time you release the brake pedal,
Page 78 of 196

76
Driving
simultaneously in the two dedicated areas of the
instrument panel.
If an additional road sign is detected, such
as a reduced speed limit for wet road sign, it
is displayed in an empty window below the
corresponding sign.
Additional signs are filtered as follows:
– Signs for snow or ice only appear if the
outside temperature is below 3°C.
– Signs for snow, rain or fog are only displayed
if the wipers are activated while the outside
temperature is below 3°C.
– Signs concerning heavy goods vehicles are
not displayed if they concern a vehicle weighing
less than 4 tonnes.
– Signs concerning farm equipment are not
displayed.
Signs such as no overtaking go out after about
40 seconds on the instrument panel.
Activation/Deactivation
This function can be set using the MODE button: in the “Traffic Sign” menu, select
“ON” or “OFF”.
For more information on Vehicle
configuration (MODE) , refer to the
corresponding section.
Operating limits
The system does not take account of reduced
speed limits, especially those imposed in the
following cases:
– Poor weather (rain, snow).
– Atmospheric pollution.
– Towing.
– Driving with a space-saver type spare wheel
or snow chains fitted.
– Driving with a non-standard suspension kit.
– Tyre repaired using the temporary puncture
repair kit.
– Young drivers.
The system may not display the speed limit if it
does not detect a speed limit sign within a preset
period and in the following situations:
– Road signs that are obstructed, non-standard,
damaged or bent.
– Obsolete or incorrect maps.
– Road incline causing the sign to be out of the
camera field of vision (on a slope, for example).
– Change in the vehicle load that causes the
camera to tilt significantly (system operation may
temporarily be suspended to enable camera
self-calibration).
Speed limiter
Refer to the General recommendations on the
use of driving and manoeuvring aids .
System which prevents the vehicle
from exceeding the speed
programmed by the driver. The speed is selected when the vehicle is
stationary with the engine running or while
driving with at least 2
nd gear engaged.
The minimum speed to be programmed is 19
mph (30 km/h).
The vehicle responds to the driver's foot
pressure on the accelerator until resistance is felt
in the pedal, which signifies that the vehicle has
reached the programmed speed.
However, depressing the pedal beyond this point
of resistance to the floor allows you to exceed
the programmed speed. To resume use of the
speed limiter, gradually release the pressure
on the accelerator pedal and return below the
programmed speed.
1. Selection of the speed limiter function
2. Activation / deactivation of the function
3. Programming a speed
The selection status of the function and the
programmed speed are visible in the instrument
panel display screen.
Selecting the function
► Turn ring 1 all the way down. The speed
limiter is selected, but is not yet active.
The display indicates OFF and the last
programmed speed.
Programming a speed
A speed can be programmed without activating
the speed limiter but with the engine running.
To memorise a speed higher than the previous
one:
► Move the control upwards (+).
A short press increases the setting by 1 mph
(km/h).
Pressing and holding increases the setting in
steps of 5 mph (km/h).
To memorise a speed lower than the previous
one:
► Move the control downwards (-).
A short press decreases the setting by 1 mph
(km/h).
Pressing and holding decreases the setting in
steps of 5 mph (km/h).
Activation/Deactivation
► Press button 2 to activate the speed limiter.
Page 123 of 196

121
In the event of a breakdown
8
► Tilt lever 1 downwards to release the
terminals.
► Remove terminals 2 from the negative (-)
terminal.
Wait approximately 6 minutes after
switching off the ignition before
disconnecting the battery.
Do not disconnect the terminals while the
engine is running.
Do not charge a battery without disconnecting
the terminals first.
Close the windows and the doors before
disconnecting the battery.
After reconnecting the battery, turn on the
ignition and wait 1 minute before starting the
engine, to enable the electronic systems to
initialise. If minor problems nevertheless persist
following this operation, contact a CITROËN
dealer or a qualified workshop.
It is recommended to disconnect the (-)
terminal of the battery if the vehicle is to
be left unused for more than one month.
The description of the battery charging
procedure is only indicative.
After prolonged battery disconnection, it may be
necessary to reinitialise the following functions:
– the display parameters (date, time, language,
distance and temperature units),
– the stations of the audio system,
– the central locking.
Some settings are cancelled and must be
entered once again; contact a CITROËN dealer.
If the vehicle is equipped with a tachograph or
an alarm, it is recommended that the (-) terminal
of the battery (located under the floor on the
left-hand side, in the cab) be disconnected if the
vehicle is not going to be used for more than 5
days.
Starting using another
battery
Never start the engine by connecting a
battery charger.
Never use a 24 V or higher battery booster.
Check beforehand that the backup battery
has a nominal voltage of 12 V and a capacity
at least equal to that of the discharged
battery.
The two vehicles must not be in contact with
each other.
Switch off all the electrical consumers on both
vehicles (audio system, wipers, lighting, etc.).
Make sure that the jump leads are not close
to the moving parts of the engine (fan, belt,
etc.).
Do not disconnect the (+) terminal while the
engine is running.
A. Positive metallic terminal of your vehicle
B. Backup battery
C. Earth of your vehicle
The positive metallic terminal A is accessible
through a flap located on the side of the fuse
box.
Connect only to the terminals indicated
and illustrated above. In case of
non-compliance, risk of short circuit!
Page 178 of 196

176
Alphabetical index
A
ABS 52
Accessories 51
Active Safety Brake 84, 86
AdBlue® 101
AdBlue® tank 102
Adjusting the date 18
Adjusting the seat angle 27
Adjusting the seat belt height 55
Adjusting the time 18
Advice on driving 5, 64–65
Airbags 57–59
Airbags, curtain 58
Airbags, front 57–58
Airbags, lateral 58
Air conditioning 31, 35–36
Air conditioning, additional 35–36
Air conditioning, automatic 33
Air conditioning, manual 32–33
Air vents 31
Alarm 24–25
Anti-lock braking system (ABS) 52
Armrest, front 28
ASR 52
Assistance, emergency braking 52, 86
Audible warning 51
Audio streaming (Bluetooth) 162–163
Audio system 151
B
Battery 67, 120
Battery, 12 V 98, 120
Blind spot sensors 83
BlueHDi 12, 98
Bluetooth (hands-free) 154, 166–167
Bluetooth (telephone) 154, 166–167
Bonnet 94
Brake discs 99–100
Brakes 99–100
Braking, automatic emergency 84, 86
Brightness 6
Bulbs (changing) 111
Bulbs (changing, type) 111
C
Cable, audio 153, 162
Cable, Jack 153, 162
Capacity, fuel tank 90
CD 162
CD, MP3 162
Centre console 4
Changing a bulb 111
Checking the levels 96–98
Checks 98–100
Checks, routine 98–100
Children 56
Child seats 56, 58–59
Cigar lighter 43
Collision Risk Alert 84–85
Configuration, vehicle 13, 18
Container, AdBlue® 101–102
Control, heated seats 28
Control stalk, lighting 46
Control stalk, wipers 49
Courtesy lamp, front 38–40, 42
Courtesy lamp, rear 43
Courtesy lamps 43
Cruise control 78–80
D
DAB (Digital Audio Broadcasting) -
Digital radio 161
Dashboard 4
Daytime running lamps 46
Daytime running lamps, LED 46
Deactivating the passenger airbag 57, 59
Dimensions 129
Dipstick 96
Direction indicators 46
Display screen, instrument panel 6, 69
Driving 64–65
Driving abroad 46
Driving aids camera (warnings) 74
Driving aids (recommendations) 73
Driving economically 5
DSC 52
Dynamic stability control (DSC) 52–53
Page 181 of 196

179
Alphabetical index
Tools 105–110
Topping-up AdBlue® 102
Touch screen 158, 173
Touch screen audio-telematic system 158, 173
Towball, quickly detachable 92–94
Towbar with quickly detachable towball 92–94
Towed loads 124
Towing another vehicle 122
Traction control (ASR) 52–53
Traffic information (TA) 152
Trip computer 19
Type of bulbs 111
Tyres 100
Tyre under-inflation detection 71–72
U
Under-inflation (detection) 71–72
USB 152–153, 161–162
V
Ventilation 31–33
Voice commands 155–157, 169–171
W
Warning and indicator lamps 6–7
Warning lamps 7
Warning lamp, seat belts 55
Warnings and indicators 6–7
Washing 74
Weights 124
Wheel, spare 100, 105–110
Window controls 25
Wipers 49
Wipers, automatic rain sensitive 49